You can make a bird table pigeon-proof by removing stable landing perches, adding angled baffles or hoods at 45 degrees or steeper, fitting mesh guards with openings no larger than 2 inches, and switching to feeding stations designed specifically for small birds. Most of these changes take an afternoon with basic tools, and you can retrofit an existing table or build a fresh one with pigeon deterrence baked right in from the start.
How to Make a Bird Table Pigeon Proof: DIY Fixes

Marcus Thornton
14 Apr 2026

Why pigeons target bird tables (and how they get in)
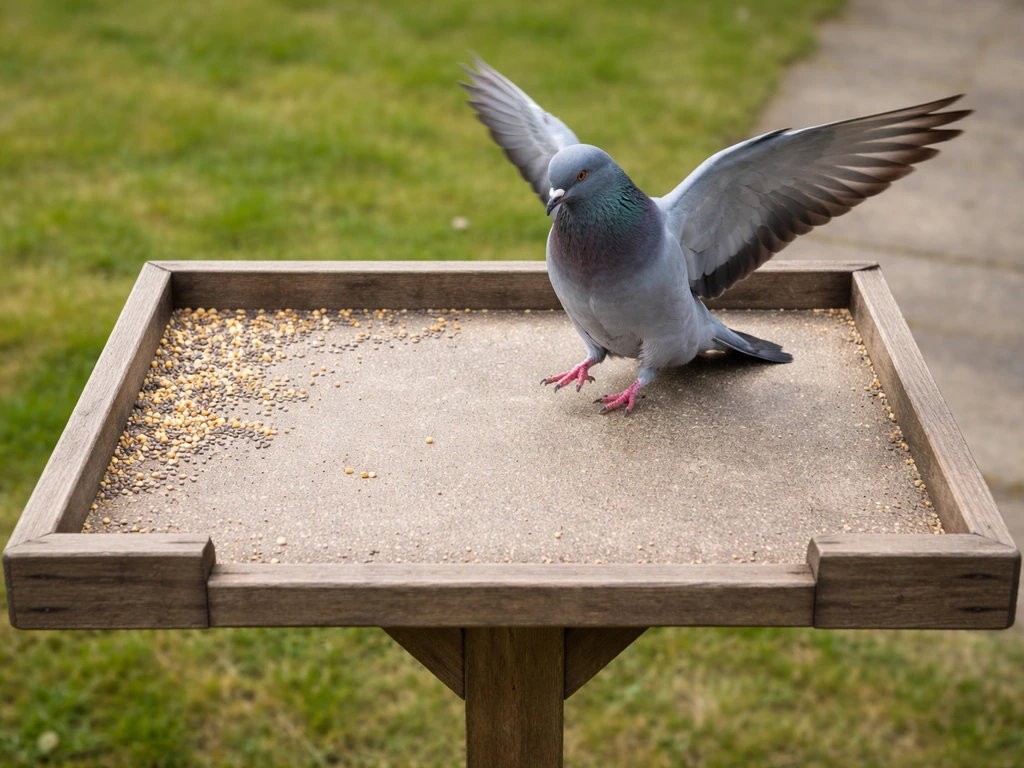
Pigeons are what wildlife managers call "land-and-perch" feeders. They scout from above, spot a flat stable surface, drop onto it, and start eating. They are not subtle about it. A standard bird table is basically a perfect pigeon platform: it has a wide flat tray, often a roof overhead for shelter, a post or bracket to perch on while approaching, and open edges on all sides. Every one of those features is an invitation.
The key failure points on most tables are the open tray edges (easy landing zones), any horizontal ledge wider than a pigeon's foot, the post or pole below the table (a launch pad), and the underside of a roof if it creates a sheltered overhang they can cling to. Remove those stable footholds and pigeons will lose interest far faster than you'd expect. They are persistent, but they are also lazy. If a surface keeps shifting them off, they will move on to easier pickings.
Quick wins you can do today
Before you build anything, there are a few things you can do right now with materials you probably already have. These won't eliminate the problem entirely, but they cut pigeon access significantly while you plan a more permanent solution.
- Remove or shorten any perch dowels on your table. Pigeons use these as a staging point before stepping onto the tray. Small birds like blue tits and sparrows will cling directly to mesh or edges anyway.
- Run a single length of thin garden wire (about 2mm gauge) across any flat ledge on the table rim, held about 1 to 1.5 inches above the surface with small staples or screw eyes. Pigeons can't balance on it; smaller birds ignore it.
- Reduce the amount of food on the tray to smaller portions. A large pile of loose seed is irresistible to pigeons. Switching to a tube feeder hung below the table cuts pigeon access almost immediately.
- Move spilled food off the ground daily. Pigeons that find scattered grain beneath your table will keep returning and eventually figure out the source. A quick sweep with a stiff brush takes 30 seconds.
- Check that your table post has no horizontal crossbrace at pigeon perching height (roughly 18 to 36 inches from the ground). If it does, wrapping it in smooth sheet metal or adding an anti-climb baffle will help.
Retrofit barrier designs for existing tables
If you've already got a table you love and don't want to start from scratch, retrofitting is entirely doable. The three most effective retrofit approaches are angled baffles, cage-style mesh guards, and overhead hoods. You can combine all three for a really robust setup.
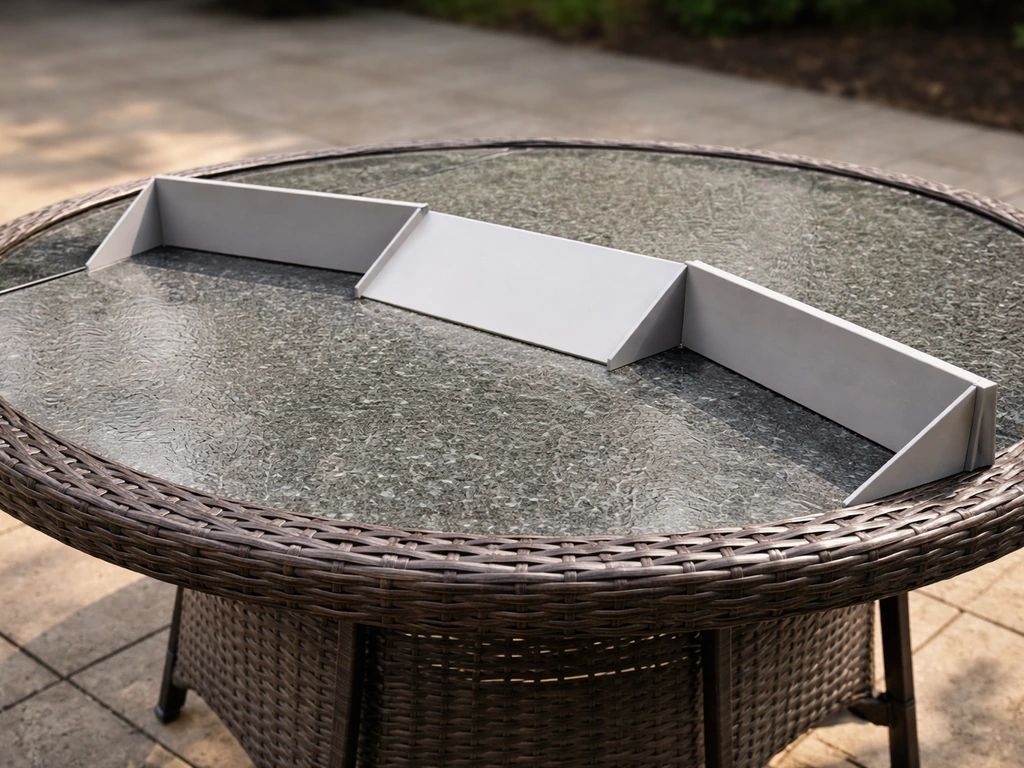
Angled baffles and sloped surfaces
A baffle is just an angled panel that prevents pigeons from landing on a flat surface. The magic angle is 45 degrees minimum. Research on ledge modification for pigeon control consistently shows that surfaces angled at 45 degrees or steeper become difficult for pigeons to roost on. You can add a baffle to the rim of an existing tray by cutting strips of exterior-grade plywood or sheet metal and screwing them along the tray edges at an outward-facing 45-degree angle. Make each strip about 6 to 8 inches wide. The pigeon lands, its feet find no grip, it slides off. Smaller birds, which land and immediately hop inward to feed, are barely affected.
You can do the same thing on the post below the table. Cut a circular disc of plywood about 12 to 14 inches in diameter, bevel the top edge outward at 45 degrees, and mount it on the post about 6 inches below the underside of the tray. This stops pigeons from walking up the post and also blocks squirrels, which is a bonus. If you want to go further with post protection, the same principle I used when thinking through how to make a cat proof bird table applies here: a smooth-surfaced cone or disc baffle on the pole is one of the most reliable deterrents you can build.
Mesh cage guards
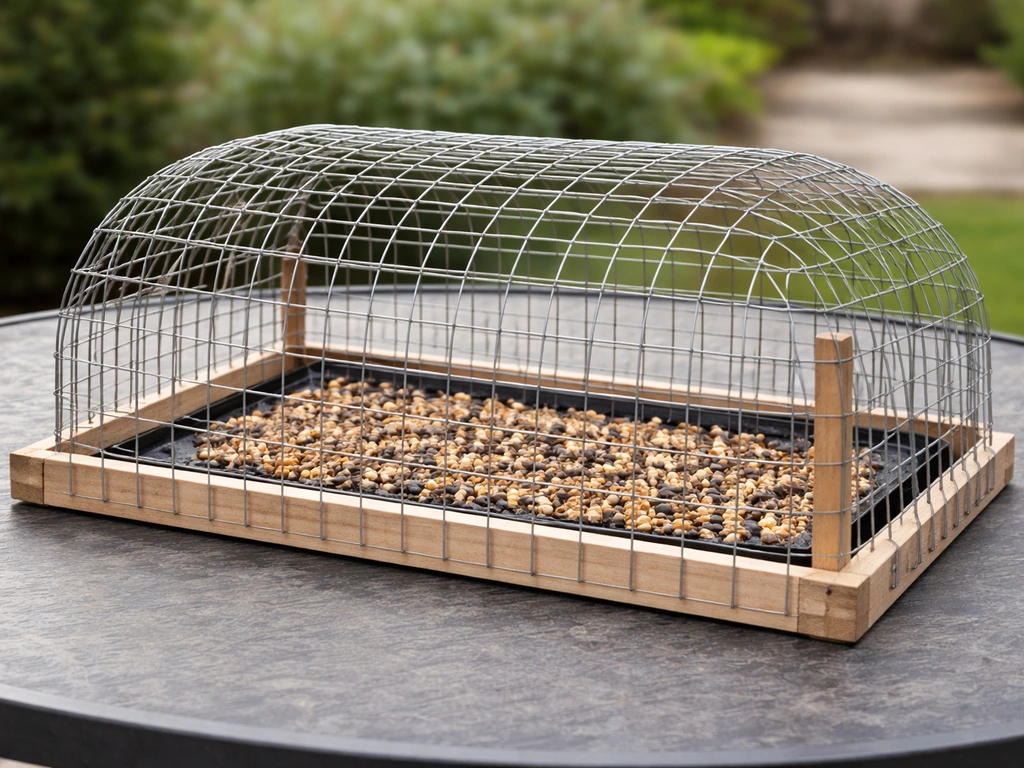
A cage-style guard is a wire mesh frame that surrounds the feeding tray, leaving gaps large enough for small birds but too small for pigeons. The critical dimension here is 2 inches (approximately 50mm). University extension guidance on bird exclusion is consistent: a 2-inch mesh opening excludes pigeons reliably. Some pigeon management sources use 2.36 x 2.36 inches (60mm square) as a minimum, but I'd stick with 2 inches to be safe because individual pigeons vary in size.
To retrofit a cage guard, build a simple rectangular frame from 12mm or 16mm timber batten, sized to sit just over or around your existing tray. Staple galvanized welded wire mesh (2-inch openings) to the frame, leaving the bottom open so the mesh sits around the tray without blocking drainage. The frame should clear the tray surface by at least 6 inches of headroom so small birds can move around inside comfortably. Use corner brackets and exterior screws so it can be lifted off for cleaning. It looks a bit like a cage, but honestly, the birds don't care once they realise it's safe inside.
Overhead hoods and extended roofs
If your bird table has a roof, extending it out by an extra 4 to 6 inches on all sides creates a physical block for pigeons trying to drop in from above. Pigeons need a clear vertical approach; a wide overhanging hood forces them to land on the hood itself (which you can make steep and slippery) rather than the food tray. If you're adding a roof for the first time, the guidance in how to build a bird table with roof covers the structural side well. Just remember to make the roof pitch at least 45 degrees and surface it with smooth metal flashing or exterior paint rather than rough timber, which gives pigeons grip.
Designing a pigeon-proof bird table from scratch
If you're starting from zero, you have a real advantage: you can build pigeon deterrence into the design from day one rather than bolting it on later. I've found that the most effective tables combine a narrow tray (which limits how many pigeons can land at once and reduces stable footing), a steep-pitched roof with wide overhangs, a cage-style mesh enclosure, and a post-mounted baffle below. Here are the key dimensions and layout decisions to make.
| Design element | Recommended spec | Why it matters |
|---|---|---|
| Tray width | 12 to 16 inches (30 to 40cm) | Narrow enough that pigeons can't land and turn comfortably; small birds use the full area |
| Tray edge lip height | 0.5 inch (12mm) at most | A tall lip gives pigeons a stable foothold; a shallow drainage lip still keeps seeds on the tray |
| Mesh opening size | Max 2 inches (50mm) square | Excludes pigeons while letting through sparrows, tits, and finches |
| Mesh cage headroom | Min 6 inches (15cm) above tray | Small birds need room to hop; too tight and they avoid it too |
| Roof pitch | 45 degrees minimum | Prevents pigeons landing on the roof and dropping down |
| Roof overhang beyond tray | 4 to 6 inches (10 to 15cm) all sides | Blocks vertical pigeon approach and provides weather cover |
| Post baffle diameter | 12 to 14 inches (30 to 36cm) | Stops post-climbing; should be smooth-surfaced |
| Post baffle position | 6 inches below tray underside | Close enough that a pigeon can't squeeze between baffle and tray floor |
| Table post height | 4 to 5 feet (120 to 150cm) from ground | High enough to discourage ground-to-tray jumping by pigeons |
For the frame itself, 18mm exterior-grade plywood works well for the tray and roof panels. CLS timber (38 x 63mm) is ideal for corner posts and the mesh cage frame because it's cheap, straight, and holds screws reliably. If you're comfortable working with scrap timber, there's a lot you can do with offcuts; I've got a separate walkthrough specifically for how to make a bird table out of scrap wood that will save you money on materials without cutting corners on the build.
One design choice worth making early is whether you want a freestanding post-mounted table or a hanging version. A hanging table actually has a natural pigeon deterrent built in: the swinging motion destabilises larger, heavier birds more than small ones. If that appeals to you, the approach described in how to make a hanging bird table is a good starting point, and you can add a mesh cage to a hanging design just as easily as a post-mounted one.
Keeping it bird-friendly for smaller species
The whole point of pigeon-proofing is that you still want other birds to feed. The good news is that the measures above are almost entirely pigeon-specific, because of how pigeons access food compared to small passerines. Sparrows, tits, finches, robins, and dunnocks all move in a completely different way: they land, then hop or cling, often approaching from below or from the side rather than dropping straight down. A 2-inch mesh opening is no barrier to them at all.
A dedicated small-bird feeding station is worth considering alongside your pigeon-proofed table. The design principles in how to make a bird table for small birds go into more detail on entrance sizing and tray layout specifically for sparrow-sized visitors. The key things to preserve for small birds when you add pigeon deterrents are: clear horizontal entry through the mesh sides, enough perch space inside the mesh cage (a 6-inch headroom is the minimum, but 8 inches is better), and avoiding surfaces treated with anything oily or waxy that could coat feathers near entry points.
Food choice also matters here. Mixed seed scattered on an open tray is basically a pigeon buffet. Switching to nyjer seed, sunflower hearts in a tube feeder, or fat balls hung on a wire inside your mesh cage selects strongly for smaller birds. Pigeons can physically eat sunflower hearts but they'll rarely bother pushing through a mesh cage to get them when easier food is available elsewhere.
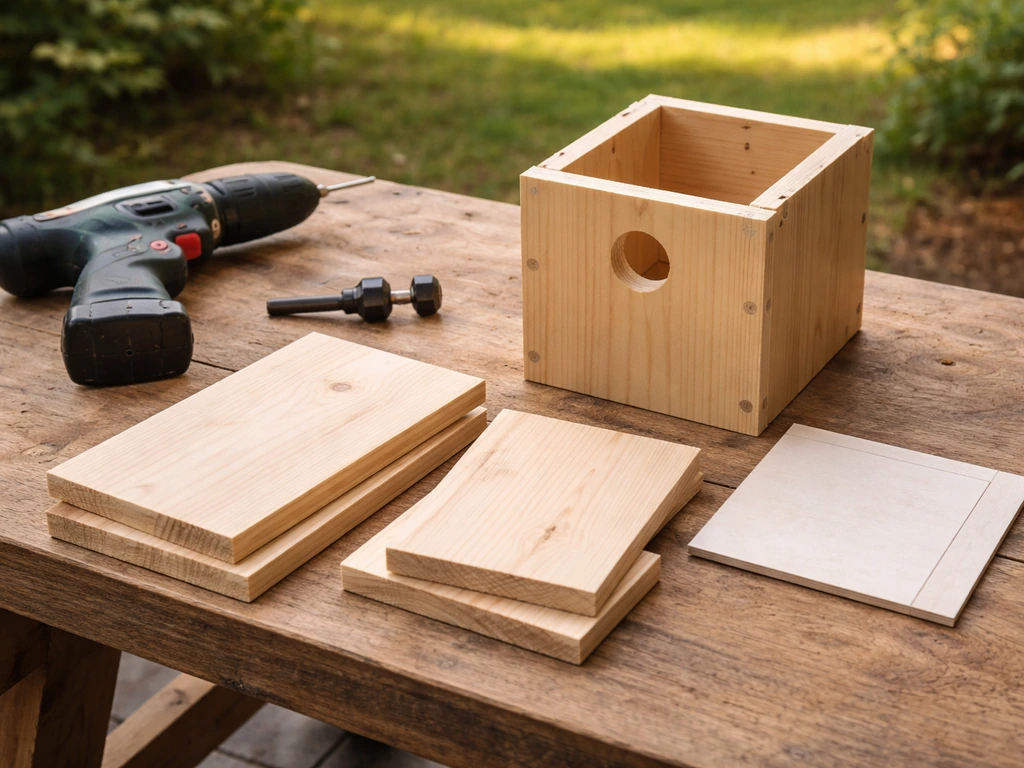
Materials, tools, and outdoor safety
For anyone building or retrofitting a table, here's what I'd actually reach for. This isn't an exhaustive shopping list, just the stuff that makes a difference for durability and bird safety outdoors.
- Timber: use exterior-grade plywood (18mm) for flat panels and CLS or PAR softwood (at least 38 x 38mm) for framing. Avoid MDF outdoors; it swells and rots within one season.
- Wire mesh: galvanized welded wire mesh with 2-inch (50mm) square openings is the right spec. Avoid chicken wire for this job; the hexagonal openings are inconsistent in size and the wire corrodes faster.
- Fixings: stainless steel or galvanized screws and staples only. Bright zinc screws rust within a year in the UK climate and the rust stains leach onto timber and can harm birds.
- Wood finish: linseed oil-based exterior paint or a water-based exterior preservative are both safe once fully dry. Never use creosote, lead paint, or solvent-based preservatives near a feeding area.
- Anti-slip strips for baffles: offcuts of smooth sheet aluminum or galvanized sheet metal (0.5 to 1mm gauge) attached to baffle surfaces prevent grip better than painted wood alone.
- Tools needed: a jigsaw or handsaw, a cordless drill with a countersink bit, a staple gun (heavy-duty with 12mm or 14mm staples for mesh fixing), a tape measure, and a square. That's genuinely all you need for most of these builds.
One safety note that's easy to overlook: whenever you cut or shape wire mesh, file or fold the cut edges before installing. Sharp wire ends at bird height can injure wings and feet. I check for any protruding wire points every time I clean the table, which takes about 30 seconds and has saved more than one bird from a scratch. This kind of regular check is standard advice from wildlife feeding organisations, and it's good practice to make it part of your cleaning routine.
If you're newer to DIY builds and want a solid foundation before tackling a pigeon-proof design, starting with beginner simple bird house plans is a great way to get comfortable with measuring, cutting, and fixing before you add the extra complexity of mesh cages and baffles.
Troubleshooting and ongoing maintenance
Even a well-built pigeon-proofed table will need a few tweaks after installation. Pigeons are persistent and will test every angle before giving up. Here's what to watch for and what to adjust.
- Pigeons are still landing on the roof: increase the roof pitch or surface it with smooth metal flashing. If the roof is already at 45 degrees and they're still managing it, add a thin wire line (garden wire, about 2mm) strung 1 inch above the roof surface on small screw eyes. This makes footing impossible.
- Pigeons are squeezing through the mesh: measure your openings again. If any gap is wider than 2 inches, use a small patch of finer mesh stapled over it. Gaps appear at corners where mesh was folded rather than cut cleanly.
- Small birds have stopped using the table: check that the mesh cage headroom is at least 6 inches and that there are no sharp wire edges near the entry point. Also check that the cage isn't blocking light too much; a fully shaded interior puts some species off.
- Pigeons are feeding on spilled seed below the table: add a tray or sheet below the table to catch spillage and sweep it up daily. Removing the ground-level food source is sometimes more effective than any barrier modification.
- The baffle on the post is wobbling: re-seat it and add a second fixing point. A baffle that wobbles will eventually spin off and also makes the whole structure less stable for small birds landing above.
Cleaning is non-negotiable. Droppings and old seed hulls build up quickly on a busy table, and birds can pick up illnesses from contaminated trays. Clean the tray every two weeks as a baseline, or more often during wet weather when seed goes mouldy faster. Scrub with hot water and a stiff brush, rinse well, and let it dry before refilling. Don't use disinfectants unless the table is showing visible mould or has hosted a sick bird, and if you do use one, rinse extremely thoroughly and let it air dry completely before putting food back. Keeping the area under and around the table clean matters too; a broom and a dustpan sweep of fallen seed and droppings removes the secondary pigeon attractant at ground level.
One more practical note: even the best pigeon deterrents sometimes need adjustment after the first few weeks, because pigeons will find the one angle you didn't account for. Walk around your table a week after installation and look at it from a pigeon's perspective. Is there a fence top, branch, or garden wall within 3 feet that gives a pigeon a stable launch point onto the table despite your baffles? If so, moving the table position is often easier than adding more hardware. Getting the placement right is part of the long-term fix, and it's something I always think about when working through how to secure a bird table in a garden with multiple access points.
Your next steps checklist
Use this as a practical action list. Tick off the quick wins today, then work through the retrofit or build steps over the next weekend or two. You don't need to do everything at once; even one or two changes will make a noticeable difference.
- Today: remove perch dowels, run garden wire over flat rim edges, reduce food portions, sweep spilled seed from below the table.
- This week: assess your table for all flat surfaces pigeons can land on (rim edges, roof, post crossbraces) and mark which need baffles or wire deterrents.
- Weekend project (retrofit): build and install a 2-inch galvanized mesh cage around your existing tray with minimum 6 inches headroom. Add a post baffle disc (12 to 14 inches diameter, angled at 45 degrees) below the tray.
- Weekend project (new build): use the dimension table above to design a tray no wider than 16 inches, fit a 45-degree-pitched roof with 4 to 6 inch overhangs, and build the mesh cage as an integral part of the structure from the start.
- After install (week one): monitor which angles pigeons are still attempting. Patch any mesh gaps wider than 2 inches. Add wire lines to any surface they're still landing on.
- Ongoing: clean the tray every two weeks, check for sharp wire edges, sweep the ground below, and reassess placement if a nearby fence or branch is acting as a launch point.
If you're building your first bird table and want a clean, straightforward starting point before adding the pigeon-proofing layer, the step-by-step process in how to make a simple bird table gives you a solid base structure to work from. Once that's in place, layering on the mesh cage, baffles, and angled roof is much more satisfying than trying to modify something that was never quite right to begin with.
FAQ
Will baffles and mesh work if my bird table is next to a fence or tree branch?
Yes, but “pigeon proof” depends on how pigeons can reach the food. If your table is near a fence top, trellis, or branch, pigeons may land from that perch onto the hood or the mesh entrance. After installing baffles and guards, do a 10 minute “approach check” from above (stand where pigeons would sit) and look for any solid launch point within about 3 feet. If you find one, relocate the table or extend the hood and baffles in that direction instead of adding more mesh only to the tray.
What mesh size mistakes still let pigeons through?
For pigeons, the most common failure is choosing mesh that is too open. Stick to about 2 inches (50mm) openings or smaller, and avoid “decorative” mesh with larger diamonds. Also confirm the frame opening size after installation, because sagging or stretched mesh can open up the gaps. When in doubt, measure the opening with a ruler at several points after tensioning the mesh.
Can I seal or stain the wood, and what finishes should I avoid for bird safety?
Avoid lubricants and oily coatings anywhere near the feed zone and mesh entry points. Even small amounts of wax or household oil can coat feathers and cause grooming issues. Use exterior-grade, bird-safe materials (exterior plywood and metal flashing are fine), and if you need to seal wood, keep sealants on the underside and out of the direct entry areas where birds’ feet and feathers contact.
Can I pigeon-proof my existing table without completely caging it?
Yes, if you want to reduce pigeon visits without fully enclosing the whole table, you can use a smaller, more “enclosed” feeding approach: keep the tray narrow and add the mesh cage sides, then mount baffles at the remaining rim edges that pigeons would target. However, avoid blocking access so completely that small birds cannot hop inward. Leave at least 6 to 8 inches of headroom inside the cage and maintain clear horizontal access through the mesh sides for small birds.
I added a roof. Why are pigeons still landing on the tray?
Do not rely on “roof-only” protection if the underside is rough or if the overhang still leaves a flat landing surface near the tray. Pigeons will probe any place that gives them traction. If you add or extend a roof, make the landing surface under the hood smooth (metal flashing or smooth painted surfaces) and keep the hood pitch at 45 degrees or more so they cannot stand comfortably while approaching.
How can I tell whether it’s a design problem or a placement problem?
If you see pigeons ignoring the table after the first week, it can still be a placement issue, not a design issue. Walk the perimeter from a pigeon’s perspective and check for any nearby flat top that lines up with the tray opening, including planter edges and patio ledges. When placement is the problem, adding “one more baffle” often misses the true landing route. Relocating the table a short distance, or extending the hood and baffle toward the launch point, usually works faster.
What cleaning routine actually matters for pigeon control?
Clean the table on a regular schedule because food residue can attract pigeons even with deterrents. A practical baseline is cleaning every two weeks, and more often in wet weather when hulls and seed degrade. Rinse thoroughly after hot-water scrubbing, and skip disinfectants unless there is visible mould or a confirmed sick-bird situation, because leftover chemical smell or residue can deter small birds too.
Do I need to make the mesh guard removable, and why?
Yes. If your table has removable parts, build in service access so you can lift the mesh guard frame off for cleaning. If the mesh cage becomes stuck or too heavy to remove, you are less likely to keep it clean, which eventually draws pigeons back. Using corner brackets and exterior screws, and leaving the bottom of the mesh unobstructed for drainage, makes maintenance realistic.
What food changes reduce pigeons even if they can still access the table?
Typically, switching food makes a big difference when combined with physical barriers. Avoid leaving mixed seed scattered on an open tray, because it’s easy for pigeons to take without entering the cage. Move toward tube feeders for sunflower hearts, nyjer, or fat balls placed so smaller birds can access them with less effort, then keep the table as a supplemental area rather than the main open buffet.
What if my pigeon-proofing keeps small birds away too?
If you notice small birds struggling after pigeon-proofing, the issue is usually excessive blocking at the entry points or insufficient interior clearance. Confirm that the cage has enough headroom (aim for 6 inches minimum, 8 inches is better) and that small birds can approach through the mesh sides and move inward to feed. Also check for surfaces that are too slippery inside, because small birds rely on better grip near the entry route.
Next Articles
Beginner Simple Bird House Plans: Easy Build Guide
Beginner simple bird house plans with build-ready cuts, sizes, tools, and setup tips to attract backyard birds safely.

How to Build a Chimney Swift Bird House DIY Guide
Step-by-step DIY plans to build a chimney swift bird house, with correct dimensions, placement, and weatherproofing for

How to Build an Oriole Bird House: Step-by-Step DIY
Step-by-step DIY for building an oriole bird house with right dimensions, weatherproofing, predator-safe placement, and