You can make a bird table much harder for cats to reach by raising it to at least 5 feet (1.5 metres) off the ground, fitting a smooth cone or tube baffle around the post, clearing away any nearby fences, branches, or furniture a cat could launch from, and adding physical deterrents like prickle strips or a wire cage around the table top. No single fix is bulletproof, but layer two or three of these together and most cats will give up and find easier hunting elsewhere.
How to Make a Cat Proof Bird Table: DIY Steps

Marcus Thornton
1 Jun 2026
Why you can't just "cat-proof" a bird table with one trick
Cats are remarkably good problem solvers, and a determined one will work through your defences methodically. A domestic cat can jump roughly 5 to 6 feet vertically from a standing start, sprint along a fence at speed, and cling to surfaces that would stop most other animals. That means any single solution, whether it's a baffle or a relocation, can be bypassed once the cat figures out the geometry. The only truly reliable fix, as Audubon points out, is keeping cats indoors near active feeders. But most of us are dealing with neighbourhood cats we don't own, so that's not always on the table.
The way to think about this is layered barriers: make the approach harder, the climb blocked, the landing uncomfortable, and the surrounding area unappealing. Each layer you add raises the difficulty for the cat and lowers the probability of a successful hunt. Done right, the birds still have a calm, accessible feeding spot while the cat decides your garden isn't worth the effort. That's the goal, and it's genuinely achievable with basic DIY skills. If you also want beginner simple bird house plans for your garden, start with a small, easy-to-build design and get the placement right first.
Start here: assess your table and your cat problem
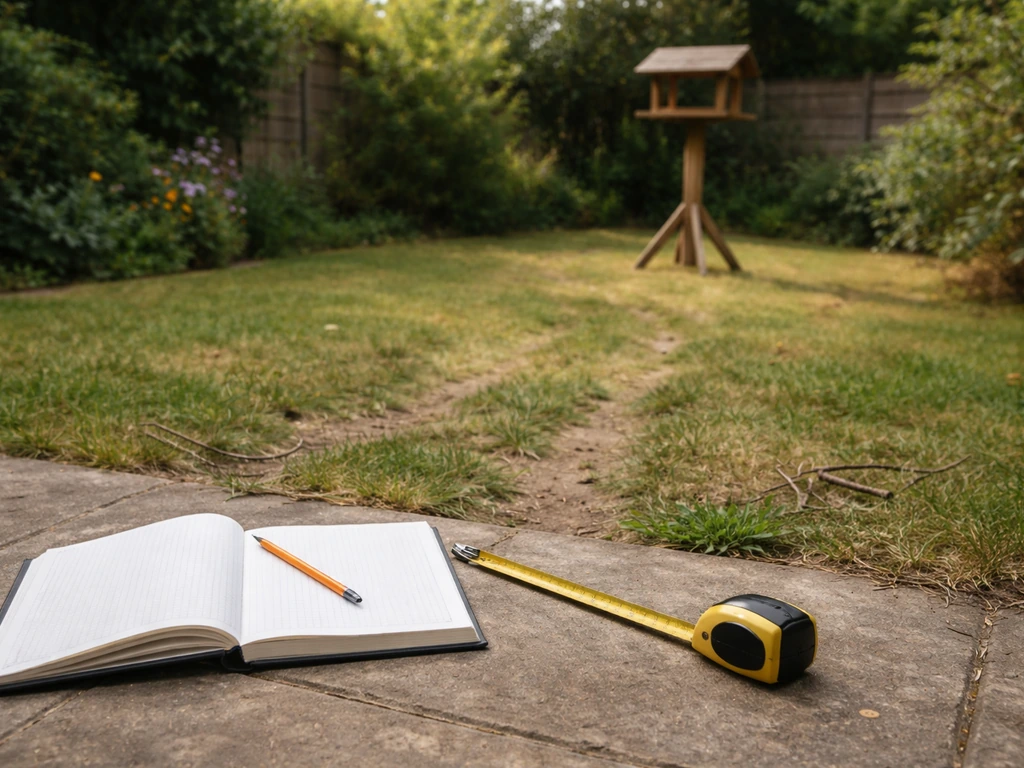
Before you buy materials or start cutting wood, spend a few minutes watching how the cat (or cats) actually approach the table. This diagnostic step saves a lot of wasted effort. I've seen people fit expensive baffles to a post while completely ignoring the garden bench sitting two feet away that the cat was using as a launching pad.
Walk around your bird table and ask yourself these questions: How high is the table top from the ground? Is the post climbable (rough wood, brick, or a nearby wall giving grip)? What's within 6 feet horizontally of the table, including fences, sheds, raised beds, patio furniture, or overhanging branches? Does the cat stalk from below, or does it sit on a fence and jump across? Is the feeder area messy, with seed casings and food scraps on the ground that attract birds at ground level where cats can pick them off easily?
Once you know the cat's route, you can target your fixes precisely. A cat that climbs the post needs a baffle. A cat that jumps from a fence needs more horizontal clearance or a deterrent on the fence itself. A cat that hunts the fallen seed on the ground needs a cleaner feeding area, which Audubon specifically flags as a way to reduce bird risk. Write down what you find because you'll refer back to it when troubleshooting later.
Redesigning the bird table to block climbing and jumping
If you're building a new table from scratch, or if your current one needs a significant rethink, the design itself is your first line of defence. A well-designed cat-resistant bird table shares a few key characteristics: a smooth post that offers no grip, good height, a wide overhang on the table top, and minimal flat surfaces for a cat to land and stabilise on.
Post material and diameter
A smooth metal pole (like a 2-inch galvanised steel fence post or electrical conduit pipe) is much harder to climb than rough timber. If you're using a wooden post, wrap the bottom 3 feet in a smooth material like aluminium flashing tape or a section of PVC pipe slid over the post. Cats need grip to climb, and a smooth cylinder 3 to 4 inches in diameter defeats them. I've used a length of 110mm PVC drain pipe slid over a 50mm square post on one of my own builds, and the cat literally tried twice and walked away.
Height and table top design
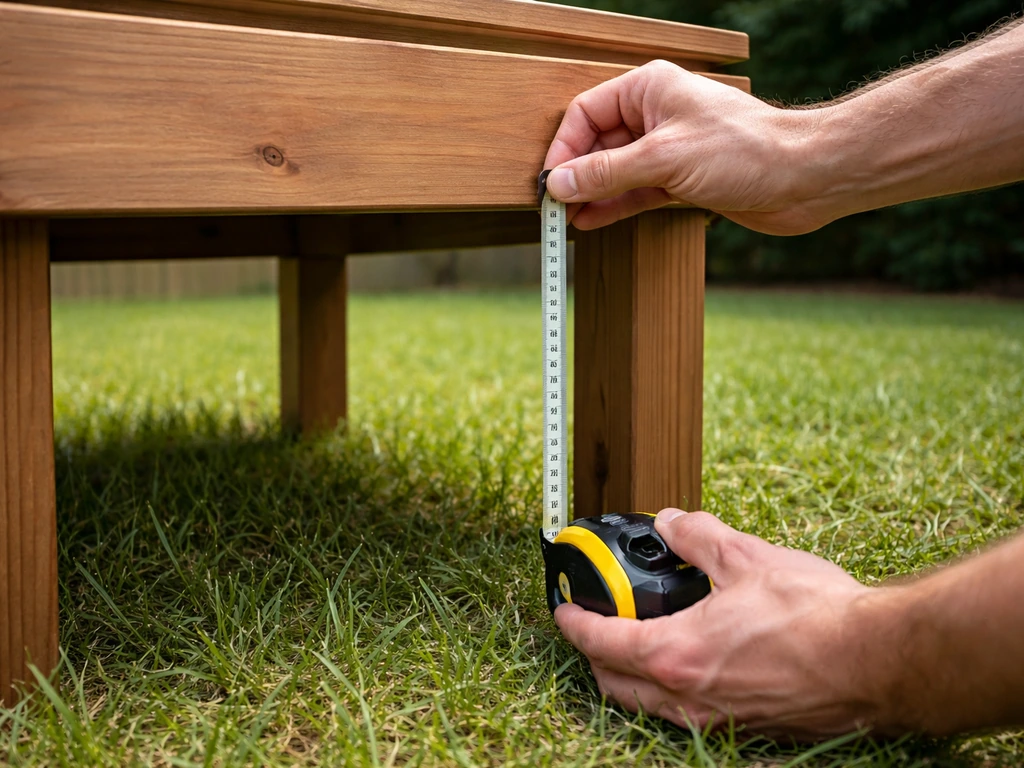
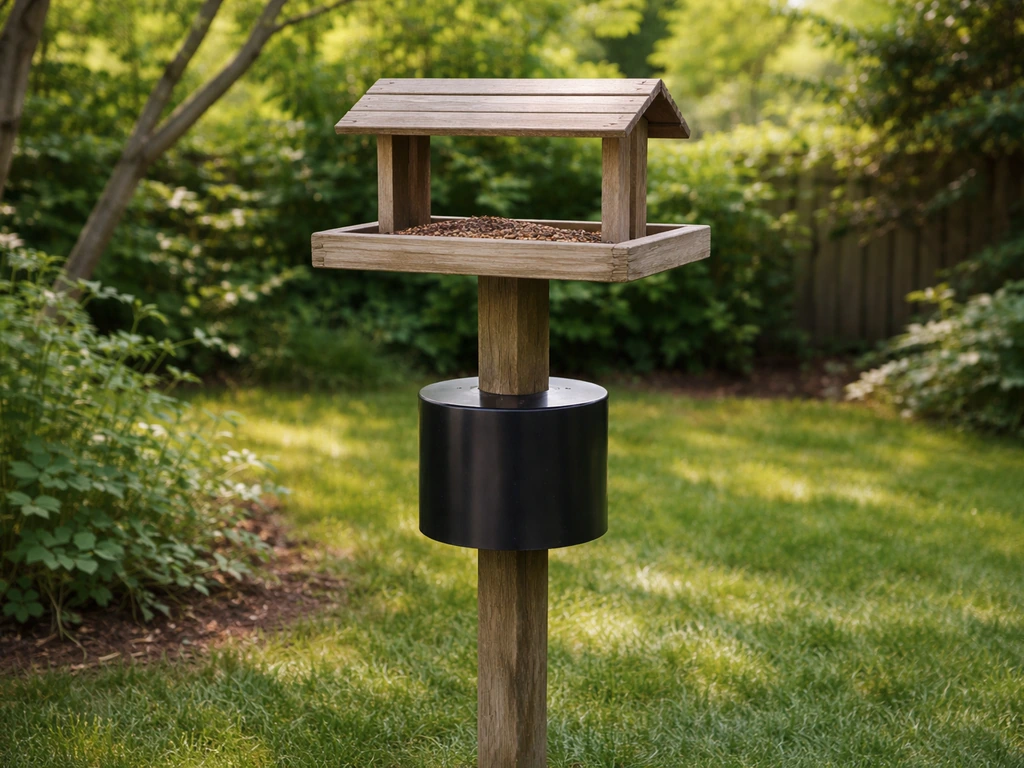
Aim for the feeding surface to sit at least 5 feet (150 cm) off the ground, and ideally 6 feet if you can manage it without making refilling a nuisance. The table top itself should have a wide, slight overhang on all sides (at least 3 to 4 inches beyond the post) so a cat can't get a purchase on the underside if it manages to jump and grab. Avoid designs with a solid enclosed base cabinet below the table top because these give cats a shelf to rest a paw on while they work out their next move.
Roof and perch management
If you're building a table with a roof (a great feature for keeping food dry), make sure the roof pitch is steep enough that a cat can't sit on top of it comfortably. If you want to include roof coverage in your build, plan the roof pitch and perch management early so cats cannot get comfortable on top. A 45-degree pitch works well. You can also add a simple prickle strip along the roof ridge using plastic spike strips (available from garden centres) screwed to the ridge board. This won't harm birds since they'll land on the table surface below, not the roof apex.
Getting the placement and feeder setup right

Where you position the bird table matters as much as what you build. The ideal spot is open ground, at least 6 feet away from any fence, wall, shed, or overhanging branch in every horizontal direction. That sounds like a lot of clearance, but remember a cat can cover considerable horizontal distance from a fence top in a single leap. A gap of 6 feet is genuinely hard for most cats to reliably bridge, especially if the landing zone is uncertain.
A baffle fitted to the post is your most powerful single tool here. A cone-shaped or torpedo-shaped baffle made from aluminium flashing or a purpose-made plastic guard should sit on the post about 3 to 4 feet off the ground. The baffle needs to be wide enough that a cat can't reach around it (at least 18 inches in diameter is the standard recommendation, and the same principle applies here as for squirrel baffles). When the cat tries to climb, the baffle tips or rotates, the cat loses grip and slides down, and it quickly learns the post is impassable.
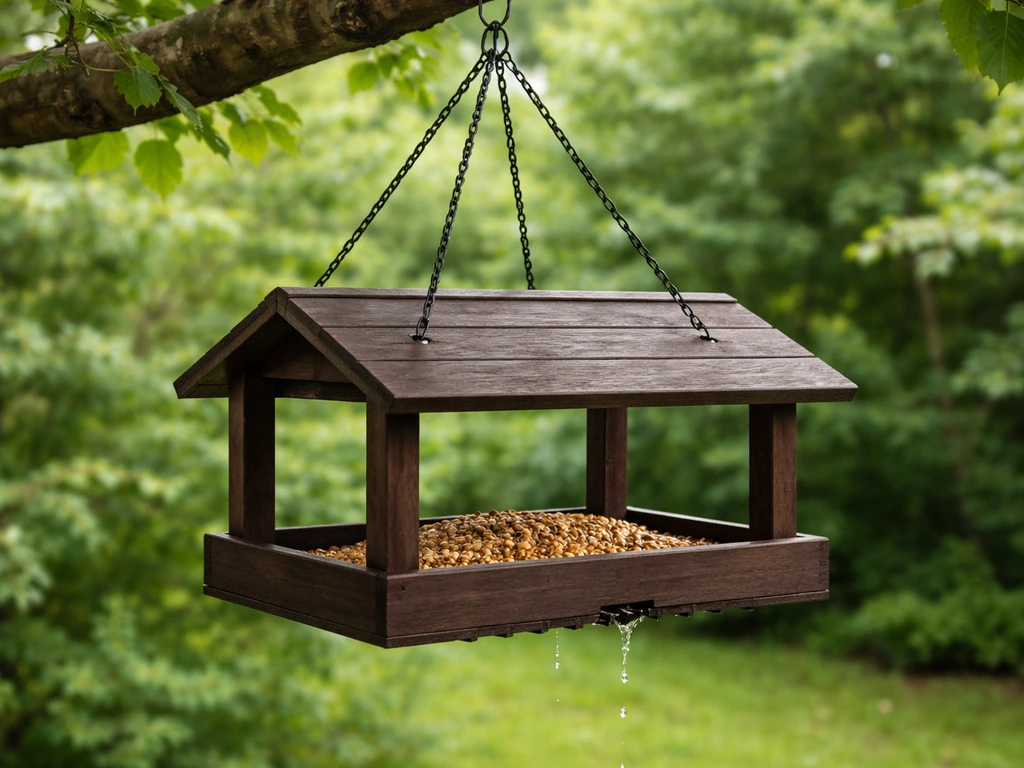
For the feeder arrangement on the table itself, avoid hanging feeders on long chains directly from the table top if there's any chance a cat could use the chain as a grip reference. Short, stiff arms are better. If you use a hanging bird table (a separate design covered in its own right), the cat-proofing logic changes because the main challenge shifts to the suspension point rather than a climbable post. If your setup is a hanging bird table, focus on the suspension point and keep the chain or bracket from giving cats extra grip.
Physical deterrents that protect birds without hurting cats
Beyond the post baffle, there are several physical deterrents you can add that will discourage cats while still leaving birds completely free to feed. The key principle is discomfort and unpredictability for the cat, not injury.
- Prickle strips on nearby fences and walls: Plastic spike strips (not metal spikes) screwed along fence tops create an uncomfortable landing surface. They're safe for cats and won't cause injury, just enough deterrent to make the fence top an unattractive perch. Focus on any fence or wall within 6 to 8 feet of the bird table.
- A wire cage around the table surface: A loose cage of 2-inch welded wire mesh around the table (mounted on simple corner posts, not the table itself) lets small birds fly in freely but blocks a cat from landing flat on the feeding surface. This works especially well for tables designed for small birds.
- Motion-activated water sprinklers: Infrared-triggered sprinklers positioned to cover the ground around the post are highly effective. Cats hate being sprayed and learn fast. They're completely harmless and also double as a garden irrigation tool.
- Deterrent collars: If the cat belongs to a neighbour who is cooperative, a Birdsbesafe collar cover (a brightly coloured ruff that fits over a standard cat collar) has good evidence behind it for reducing bird predation. It won't stop a cat reaching the table, but it does reduce hunting success by giving birds a split-second visual warning.
- Ground-level deterrents under the table: Lay a mat of plastic prickle strips or a circle of holly clippings in a 3-foot radius around the post base. Cats prefer to stalk from cover and they don't like approaching across rough, unpredictable terrain.
One thing I'd steer clear of: ultrasonic cat deterrents placed near a bird feeder. There's mixed evidence on whether they actually deter cats, and some models emit frequencies that can stress birds too. Stick with physical deterrents where you can see exactly what's happening.
DIY building plans: materials, tools, and step-by-step build
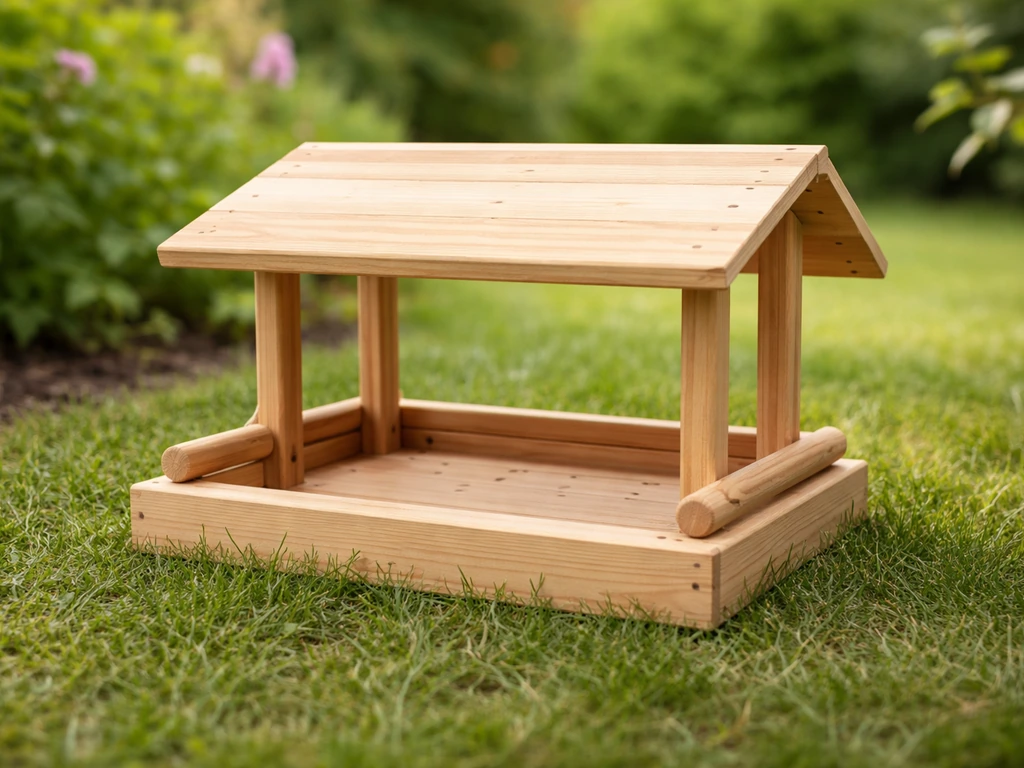
Here's a practical build you can put together in a weekend using basic tools and materials that are either cheap to buy or easy to repurpose. If you want full step-by-step guidance, follow a scrap-wood bird table plan and adapt the same cat-resistant features to your design. Here is a simple bird table you can build following the same step-by-step approach. This is a cat-resistant post-mounted bird table with a built-in baffle, suitable for most garden setups. If you're starting from a simpler base, this pairs naturally with a basic bird table build as your starting point.
Materials list
- 1x smooth metal fence post or 50mm galvanised steel pole, 8 feet long (you'll bury 2 feet, leaving 6 feet above ground)
- 1x piece of exterior-grade plywood, 18 x 18 inches, 12mm thick (for the table top)
- 4x lengths of 25 x 25mm treated softwood batten, cut to 6 inches (for the table top lip to retain food)
- 1x sheet of aluminium flashing, 24 x 36 inches (for forming the baffle cone)
- 1x length of 110mm PVC drain pipe, 24 inches long (optional smooth sleeve for timber post builds)
- Exterior wood screws (50mm and 30mm), waterproof wood glue
- 2x metal pipe clamps or hose clamps sized to fit your post (for securing the baffle)
- Waterproof exterior wood paint or wood preservative (bird-safe, water-based)
- Concrete mix (fast-set is fine) for post footing
- Optional: roll of 2-inch galvanised welded wire mesh, 2 feet wide, for the perimeter cage
Tools needed
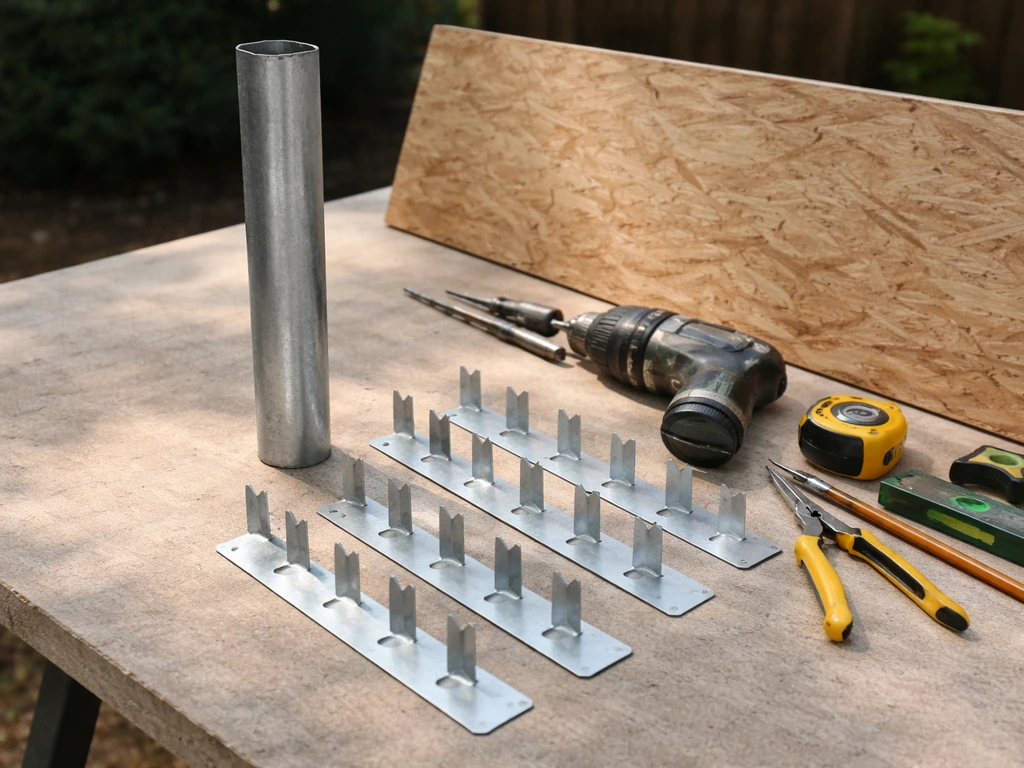
- Drill with wood and metal drill bits
- Jigsaw or hand saw
- Tin snips (for cutting aluminium flashing)
- Spade or post-hole digger
- Spirit level
- Tape measure and pencil
- Screwdriver or impact driver
- Work gloves (essential when handling cut aluminium sheet)
Step-by-step build
- Dig a post hole 2 feet deep and about 6 inches in diameter. Mix your fast-set concrete and pour it into the hole. Set the pole in the centre, check it's vertical with a spirit level, and prop it steady while the concrete sets (usually 20 to 30 minutes for fast-set). Leave it to fully cure for 24 hours before loading any weight on it.
- While the concrete cures, build the table top. Cut your plywood to 18 x 18 inches if not already cut. Screw and glue the 25mm batten strips around the perimeter of the top face to create a low lip that keeps food from blowing off. Sand any rough edges smooth, then apply two coats of exterior wood paint or preservative. Let it dry completely.
- Attach the table top to the post. Drill a hole through the centre of the plywood slightly larger than your pole diameter. Slide it down the pole to your desired height (the top should sit at 5 to 6 feet off the ground). Secure it with two hose clamps underneath the board gripping the pole tightly, one on each side of the board. For extra stability, add a small metal bracket from the post to the underside of the table.
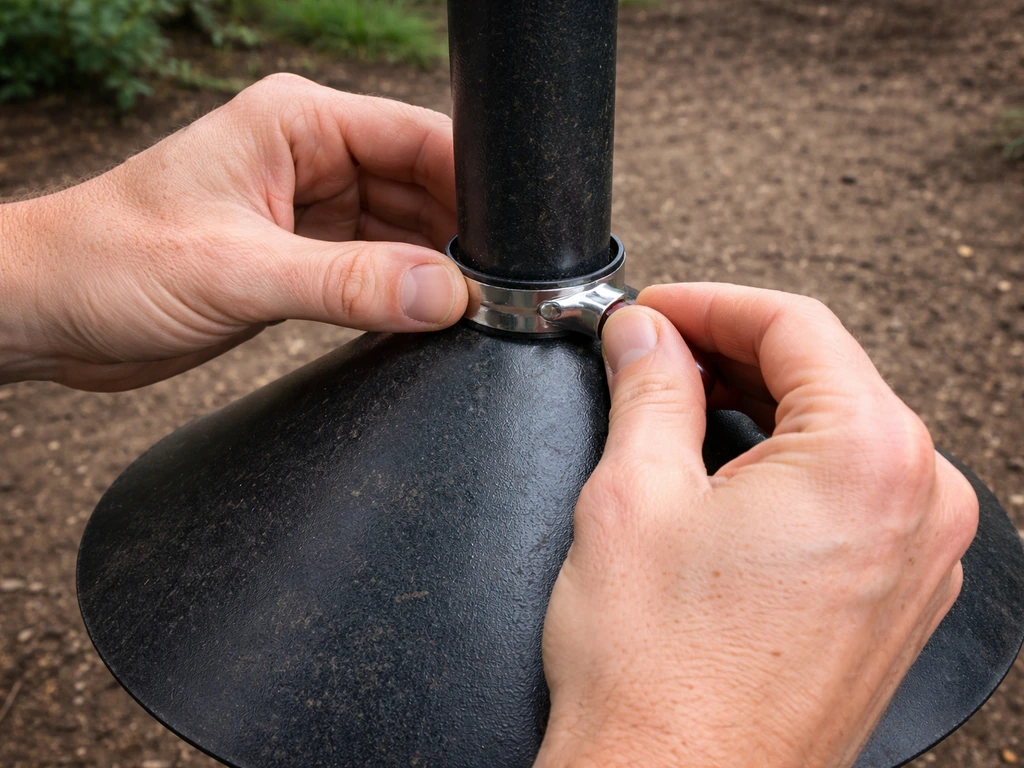
- Make the baffle cone. Lay your aluminium flashing flat and mark a circle roughly 22 to 24 inches in diameter. Cut it out with tin snips (wear gloves, cut edges are sharp). Cut a straight line from the outer edge to the centre, then overlap the cut edges to form a cone shape, aiming for a depth of about 5 to 6 inches at the centre. Use a few small pop rivets or sheet metal screws to hold the cone shape. Drill or punch a hole in the centre to fit over your post.
- Fit the baffle. Slide the cone up the post to about 3.5 feet off the ground (roughly halfway between the ground and the table top). Secure it with two hose clamps: one just below the cone and one just above, so it can't slide down but will tip slightly if a cat pushes on it. The tipping action is what deters climbing attempts.
- Optional perimeter cage: Cut a length of welded wire mesh and form it into a loose cylinder about 24 to 30 inches in diameter around the post at table height. Secure it to the table edge with wire ties. Leave a gap of around 6 to 8 inches between the wire and the food surface so birds can access food but a cat's paw can't reach in flat. This step adds significant protection and is worth the extra hour of work.
- Clean up and position: Rake the ground around the post base, lay your prickle mat or holly clippings, and do a final check that no garden furniture or structures sit within 6 feet of the post. Fill the table with food, step back, and watch.
Keeping it working: maintenance and troubleshooting over time
Cats are persistent and adaptable, and what works in June might need a tweak by September when garden layouts change, foliage grows, or new neighbourhood cats appear. If you want a pigeon-proof bird table, the same cat-proof layering and careful placement principles help reduce perching and take-off opportunities for pigeons too how to make a bird table pigeon proof. Build a quick monthly check into your routine and you'll catch problems before birds do.
When a cat finds a new route
If you see a cat making progress again after your initial setup, go back to your assessment checklist. Has a plant grown tall enough to provide a launching point? Has garden furniture been moved closer? Sometimes it's something genuinely new, like a neighbour building a raised bed near your fence. The fix is usually straightforward once you identify the new route, but you need to spot it early.
Seasonal adjustments
Summer brings overgrown vegetation that can create new approach routes, so trim plants near the table regularly. Winter can be trickier because bare branches that seem harmless in summer become easy cat highways once leaves drop. Check your 6-foot clearance zone again each autumn. Also check that the post concrete hasn't heaved slightly from frost, which can make the post lean and bring the table closer to a fence.
Keeping the feeding area clean
A messy feeder area is a bird risk all on its own, independent of cats. Seed hulls, fallen fruit, and spilled fat balls on the ground attract ground-feeding birds that are extremely vulnerable to cat predation. Sweep or rake beneath the table every week, and clean the table surface with a mild disinfectant solution (diluted white vinegar works fine) every few weeks to prevent mould and bacterial build-up. A clean feeding station is safer for birds and also less attractive as a hunting ground because birds move through quickly rather than lingering at ground level.
Checking the baffle and fixings
Inspect the baffle cone every month. Hose clamps can work loose, especially through a wet winter, and a baffle that has slipped down the post is almost useless. Tighten the clamps, check the cone for cracks or distortion (aluminium can fatigue over time), and replace it if it's lost its shape. Check the wire mesh cage for any bent sections where a determined cat might have tried to push through. Welded mesh is sturdy but pop the wire ties back in if any have pulled free.
A realistic "do this today" checklist
- Walk your garden and map the cat's current approach route to the table.
- Measure the height of your existing table top from the ground. If it's under 5 feet, plan to raise it.
- Check the 6-foot clearance radius and move or trim anything within that zone today.
- Order or make a baffle cone if you don't already have one, and fit it at the 3.5-foot mark on the post.
- Lay a ground deterrent (prickle mat, holly clippings, or motion sprinkler) around the post base.
- Clean the table surface and the ground beneath it, removing all fallen seed and debris.
- If you're building from scratch, follow the step-by-step plan above over the next weekend.
- Set a recurring monthly reminder to check fixings, clearance zones, and vegetation growth.
You don't need to do all of this at once. Even raising the table height and fitting a baffle will make a significant difference immediately. Add the other layers over the next few weeks and you'll have a genuinely robust system in place. The birds will notice the difference, and honestly, so will you.
FAQ
What height should the table top be for cat-proof bird feeding if I also want to reach it comfortably?
Aim for at least 5 feet off the ground, and try to push toward 6 feet if you can. If that makes refilling awkward, keep the clearance and height but use a wider tabletop overhang and make the feeder itself easier to refill from the side (for example, a removable tray rather than a hard-to-reach center mount).
Will a baffle alone stop every cat, or do I need multiple barriers?
A baffle is the strongest single layer, but a determined cat can still succeed if it has an alternate route, like a fence jump or a nearby bench. The practical test is to watch the cat for one approach cycle after adding the baffle and confirm it cannot reach a stable perch under the overhang.
How do I tell if the cat is climbing the post versus jumping from a nearby surface?
Look for where the cat is first positioned before it commits. If you see repeated pawing or foot placement on the post, it is climbing. If it approaches and then launches from a fence, shed roof edge, or furniture, it is using a leap route, meaning you should increase horizontal clearance and treat the landing zones, not just the post.
What is the minimum gap I should maintain from fences, walls, or branches?
Use 6 feet as the target in every horizontal direction from the feeder area. If your space is tighter, prioritize eliminating any “reliable launch point” within about 3 to 4 feet of the table, because a cat can cover a lot of ground from a short fence-run.
Can I use a wooden post and still make it cat-resistant?
Yes, but you need a smooth section that removes grip. Wrapping the bottom 3 feet with smooth material (like PVC or aluminium flashing tape) usually works better than sanding rough wood, because it seals gaps and prevents tiny handholds. Avoid leaving any rough knots or exposed transitions at the wrap edge.
Do I need a roof on the bird table to make it more cat-proof?
No, a roof is optional. In fact, a roof can help or hurt depending on perch management. If you add one, use a steep pitch (around 45 degrees) and add a ridge deterrent so the cat cannot sit comfortably on top while reaching down.
Are prickly strips safe to use with birds?
They can be safe when installed on surfaces the birds do not need to land on. The key is placement, ridge-only or around the edges where birds can still step onto the main tabletop. Avoid putting deterrents directly on the landing area birds use.
What should I do if the cat starts hunting fallen seed instead of the feeder?
Treat the ground area as part of the cat-proof plan. Sweep or rake beneath the table weekly, and reduce what remains on the ground daily if you can. Also consider using a feeder design that catches more spillage, so there is less food residue for ground-hunting cats.
Is it better to use prickle strips, wire cages, or both?
Both can work, but start with the layer that blocks the cat’s successful path, usually the post baffle. Then add a wire cage or deterrent only where needed to stop a paw or head reaching the feeding surface. This avoids overbuilding and makes it easier to clean and inspect.
How should I mount feeders so cats cannot use chains as grip?
Avoid long, flexible chain drops that a cat can grab for leverage. Prefer short, stiff arms or fixed brackets that keep the feeder close and reduce the chance of a cat getting a stable handhold. If you do use a hanging setup, focus on securing and smoothing the suspension point.
Do ultrasonic cat deterrents work near bird feeders?
They are unpredictable and some can stress birds if they generate problematic frequencies at close range. If you want a reliable approach, use physical barriers you can verify visually, like a properly sized baffle and a clean, well-positioned feeding station.
How often should I re-check the setup during the year?
Do a quick inspection monthly, and do a full “6-foot zone” check at least in early autumn and after any major garden changes. Also check after weather events like frost heave or heavy storms, because a slight lean can bring the table closer to a launch point and undo the spacing.
What maintenance do I need for the baffle over time?
Check it monthly for movement and integrity. Tighten any clamps or fasteners, look for cracks or warping in the baffle material, and inspect any mesh cage for bent sections. Replace parts that lose shape, because even a small gap can become a new route.
What is the fastest troubleshooting method if a cat resumes trying after improvements?
Re-run your approach checklist by watching the cat’s exact route for one session. Look for newly created launch points, like growth in tall plants, moved patio furniture, a new raised bed, or seasonal branches that become usable once leaves drop. Fix the newly discovered route rather than replacing everything at once.
Next Articles
How to Make a Hanging Bird Table: Step-by-Step DIY
Step-by-step DIY guide to build a weatherproof hanging bird table with safe mounting, drainage, finishing, and easy main
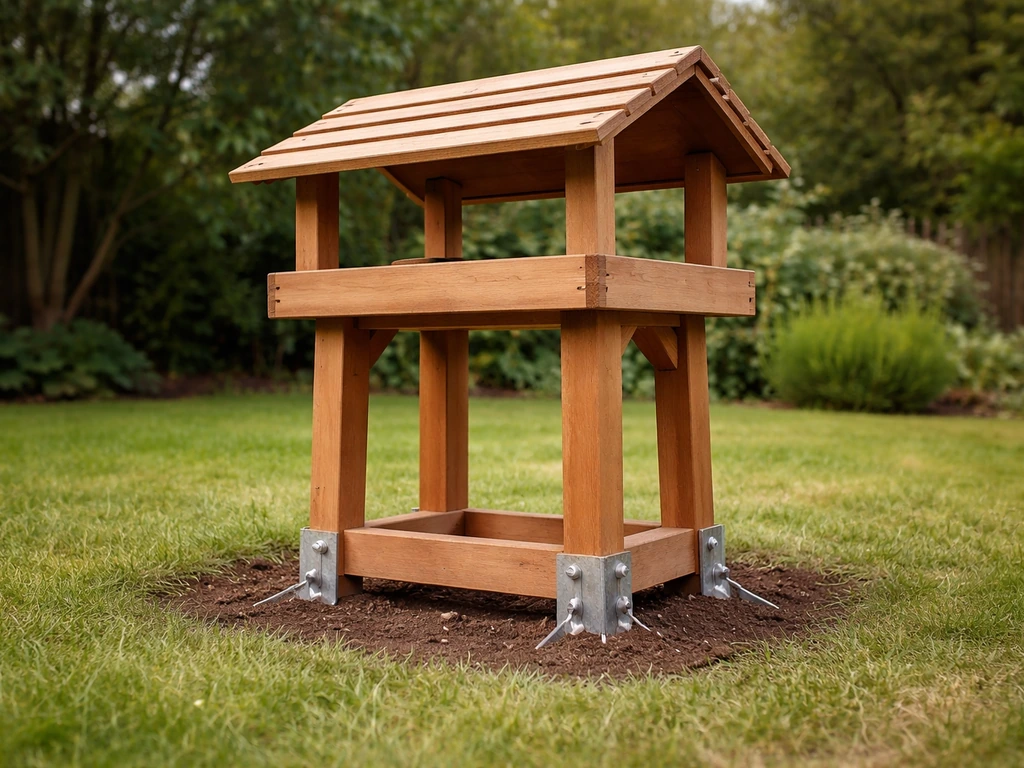
How to Secure a Bird Table to the Ground Step by Step
Step-by-step DIY guide to secure a bird table to the ground with the right anchors, tools, and stability checks.
How to Make a Bird Table for Small Birds DIY Guide
Step-by-step plan to build a small-bird bird table with safe materials, correct sizing, shelter, drainage, and easy clea