A bird play stand is a freestanding or tabletop structure designed to give your bird a dedicated space to climb, chew, forage, and hang out outside of their cage. You can absolutely build one yourself in an afternoon using basic tools and materials you might already have around the house. If you want more visual guidance alongside the steps here, you can also follow a related approach in our how to make bird stand walkthrough build one yourself. The result is something customized to your bird's size, your room's layout, and your budget, which is honestly better than most things you'd buy off a shelf.
How to Build a Bird Play Stand: DIY Step-by-Step

Marcus Thornton
21 Apr 2026
What is a bird play stand, and who is it for?
A bird play stand is essentially a jungle gym for birds. It gives them a safe, stimulating place to spend time outside their cage, whether that's a few hours of supervised free time or a permanent enrichment station in a dedicated bird room. Play stands can range from a simple single-perch T-bar to a multi-level climbing tree loaded with toys, foraging stations, and ropes. The concept sits on a spectrum that goes all the way up to full aviaries and bird rooms, but a stand is the most practical and buildable option for most people.
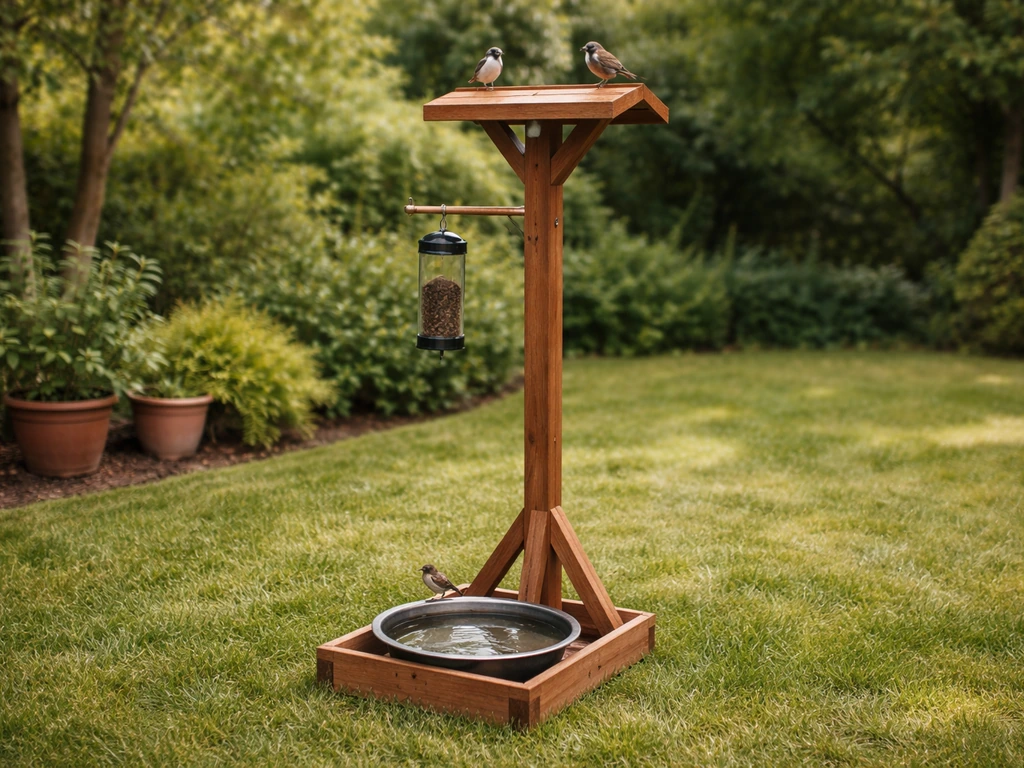
This guide is aimed at people with parrots, cockatiels, parakeets, conures, and similar companion birds. If you're building something specifically for backyard wild birds, you'll want a different structure (a garden bird stand or a birdhouse pole setup), but many of the materials and safety principles here still apply. If you want an outdoor setup, follow the same safety and materials basics, but tailor your plan for a garden bird stand.
If you're working on a backyard garden build, the same principles also help you when you learn how to make a bird house stand steady and secure garden bird stand. If you want it to remain steady in a garden setting, follow the same stability and safety checks used for bird play stands how to make a bird house stand. The DIY approach works especially well for companion bird owners who want to tailor the stand to their specific bird's size and personality.
Pick your location, size, and design before you cut anything
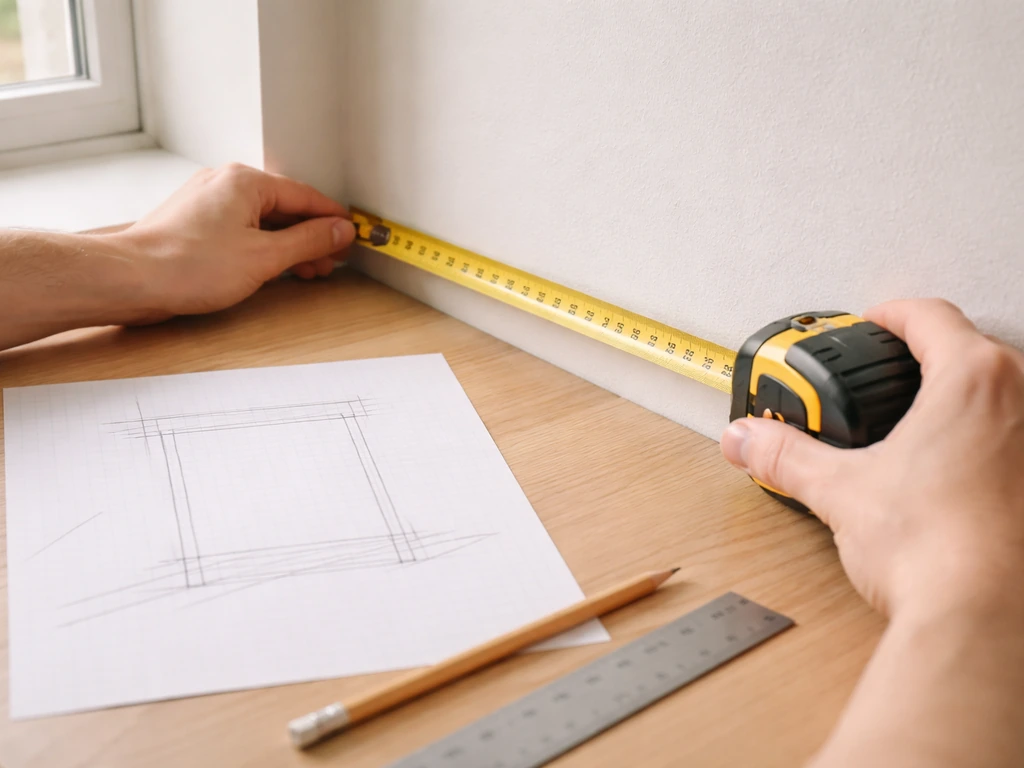
Before you grab a saw, think through where the stand is going and how big it needs to be. Placement matters more than people expect. Birds feel safer and more confident on a stand that's positioned at or slightly below your eye level, away from drafts, direct air vents, and windows with intense afternoon sun. Keep it away from the kitchen entirely since cooking fumes, including non-stick cookware, can be fatal to birds.
For sizing, use your bird's head-to-tail length as your baseline. A good rule of thumb is that the main platform or perch area should be at least 1.5 times your bird's body length in both height and width. So for a cockatiel that's roughly 12 inches long, your stand's usable area should be at least 18 inches in each direction. For a conure or small Amazon, scale up accordingly. You want enough room for the bird to spread wings, move between perches, and not feel cramped.
The other design requirement that people overlook is entrapment prevention. Any gap, opening, or spacing in the stand structure needs to be small enough that your bird can't get a head, wing, or foot caught in it. This applies to ladder rungs, perch spacing, rope loops, and toy attachment points. Think about it the same way you'd think about playground safety: if there's an opening, it either needs to be too small to enter or large enough to exit freely. For small birds like budgies and cockatiels, keep structural gaps under half an inch or over several inches so there's no dangerous middle ground.
Materials and tools you'll need (with budget-friendly swaps)
Here's the honest truth about materials: you don't need to spend much. Most of a good bird stand is untreated natural wood, which is cheap. The key word is untreated. Treated lumber, painted wood, and processed wood products can contain chemicals that are toxic or even fatal to birds. Stick to wood you can verify as untreated and from a bird-safe species. Avoid fresh pine because of sticky resin. Balsa is safe but won't survive a determined chewer. Good reliable choices include manzanita, birch, maple, willow, apple, and elm.
| Material | Use | Budget Swap |
|---|---|---|
| Untreated hardwood dowels (1/2" to 1" diameter) | Main perches | Natural branches from bird-safe trees (washed and dried) |
| Untreated plywood or solid wood board (3/4" thick) | Base platform and shelves | Repurposed shelving from old furniture (verify no finish/treatment) |
| PVC pipe (1" to 1.5" diameter) | Vertical uprights and frame | Thick wooden dowels or natural branches for a more organic look |
| Natural cotton rope (no synthetic fibers) | Rope perches and climbing links | Braided hemp cord (untreated) |
| Stainless steel screws and bolts | Assembly fasteners | Galvanized screws if stainless is out of budget |
| Stainless steel quick links or bird-safe clips | Toy attachment points | Stainless steel skewers for items that don't need to be removable |
For tools, you'll need a saw (a basic hand saw works fine, a circular or miter saw speeds things up), a drill with bits, sandpaper in 80 and 120 grit, a tape measure, and a level. That's genuinely it for a basic stand. If you don't own a drill, a hand screwdriver works for assembly, just pre-drill your holes to avoid splitting the wood.
- Saw (hand saw, circular saw, or jigsaw)
- Drill and bits (or hand screwdriver with pre-drilled holes)
- 80-grit and 120-grit sandpaper
- Tape measure and pencil
- Level (or a free level app on your phone)
- Clamps (optional but helpful when assembling)
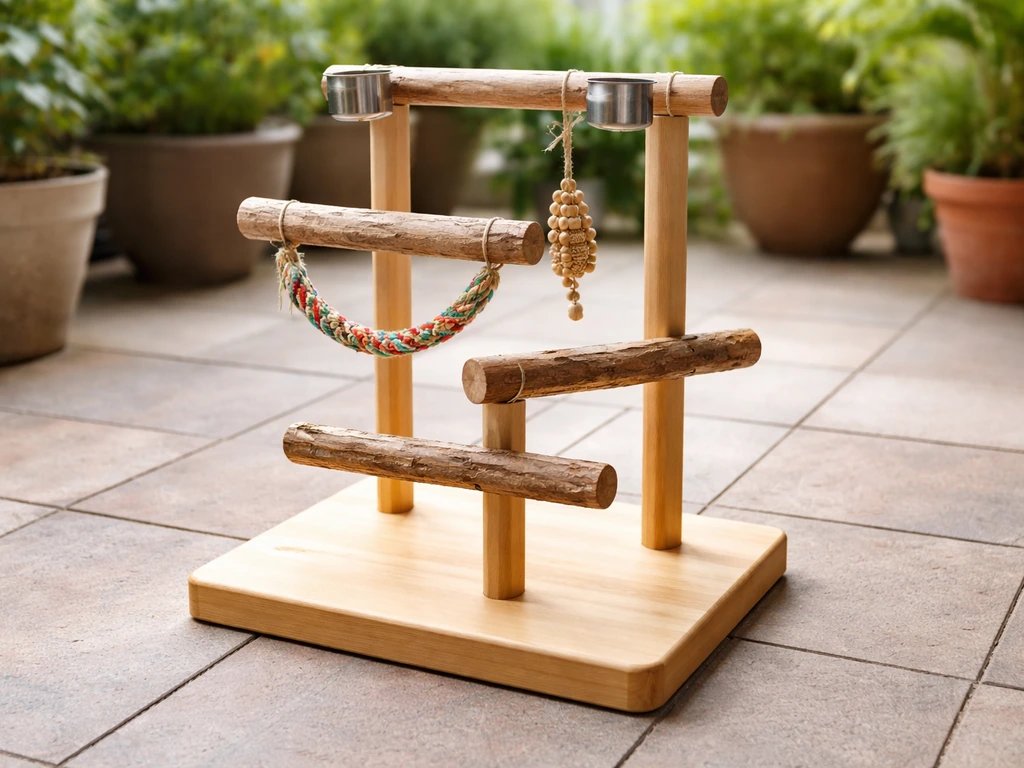
How to build it: base, perches, stabilizing, and finishing
This build is broken into four stages. Work through them in order and check stability at each stage before moving on. A wobbly stand that tips over is one of the most common ways birds get injured on DIY structures, so don't rush the stabilizing step.
Step 1: Build the base
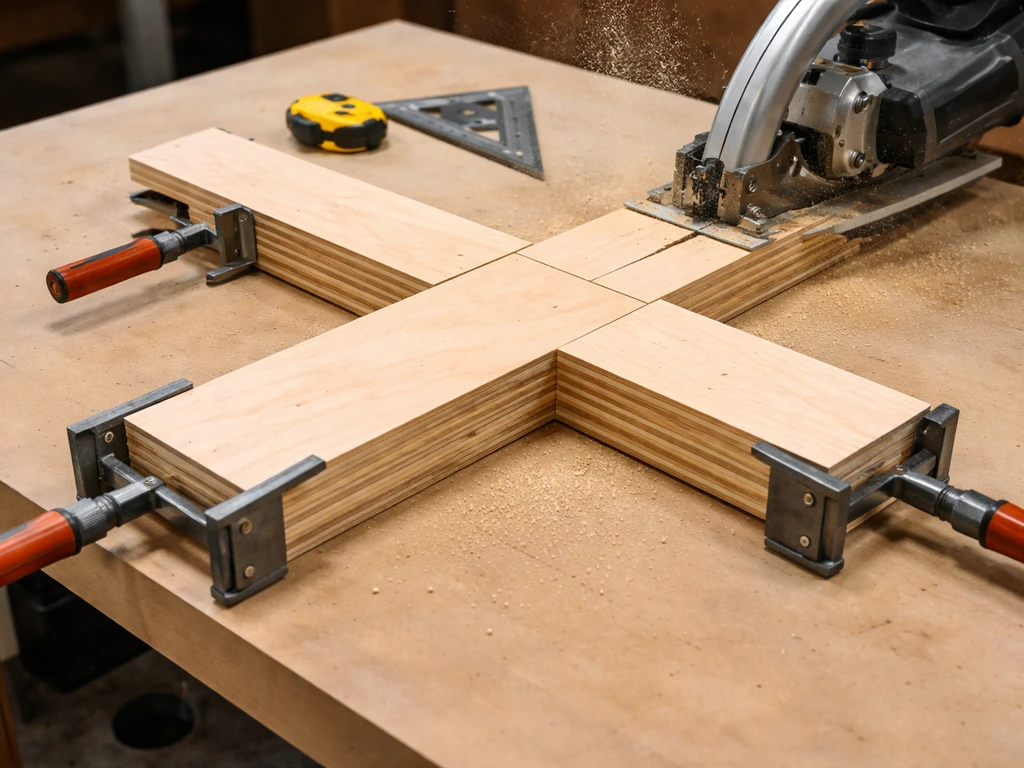
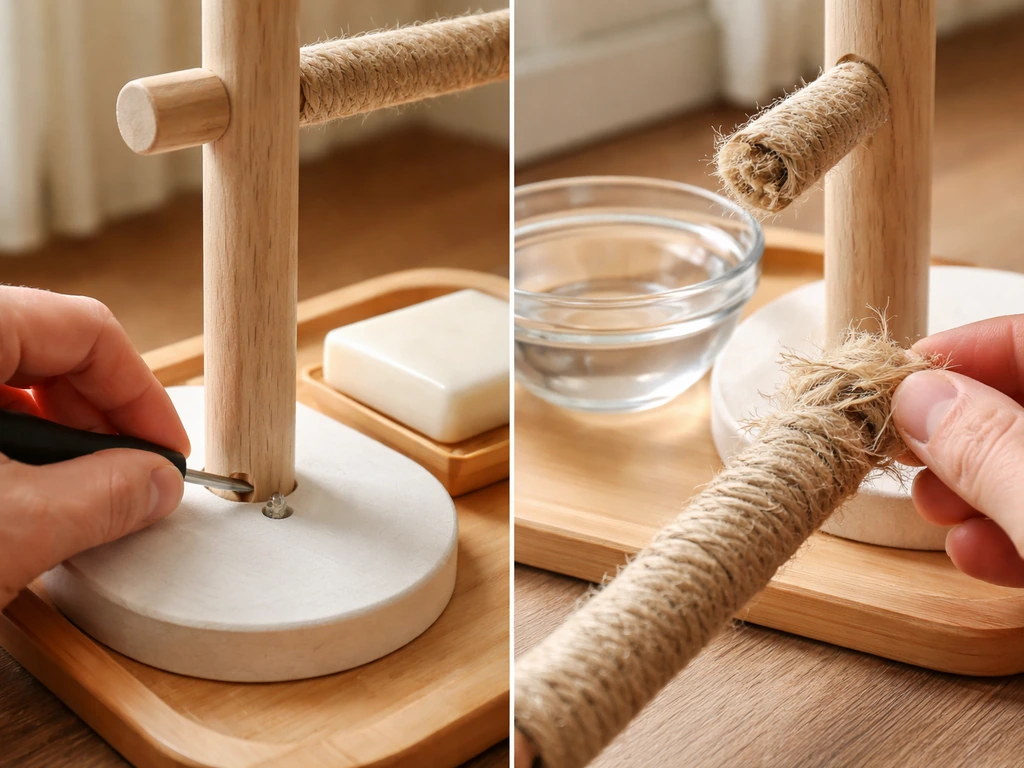
The base is the most important part of the whole stand. A wide, heavy base keeps everything stable. Cut two boards of 3/4 inch plywood or solid wood into a cross or T shape. For a mid-size stand (suited to cockatiels or conures), each arm of the base should be at least 16 to 18 inches long. Sand all edges smooth with 80-grit, then finish with 120-grit. Screw the two boards together at the center with three or four stainless steel screws, pre-drilling first to prevent splitting. If you want extra stability, add rubber feet or non-slip pads to the underside of the base. This makes a real difference on hard floors.
Step 2: Add the vertical upright and perch levels
The vertical upright is what everything hangs off of. You can use a thick wooden dowel (at least 1. 5 inches in diameter for a stand taller than 24 inches), a length of PVC pipe, or a sturdy natural branch. Drill a hole in the center of your base cross and set the upright into it, securing it with screws driven in from the underside or with a pipe flange if you're using PVC.
Then add your perch levels. Horizontal perches can be drilled directly through the upright, attached with screws, or notched in and secured. For cockatiels and similar birds, aim for perch diameters between 1/2 inch and 1 inch so the bird's foot wraps comfortably about halfway around the perch. For another common perch guidance, Birdsprees recommends that the foot wrap about 2/3 of the perch to help prevent pressure and foot issues [foot wraps comfortably about halfway around the perch](https://www.
birdsprees. com/collections/perches-swings-tents). A commonly used industry rule for safe perch sizing is that a bird’s toes should wrap [roughly two-thirds of the way around the perch circumference. ](https://sweetfeetandbeak.
com/pages/bird-perch-size-guide) Space multiple perches at different heights so the bird has to move to get between them.
If you're adding a top platform or play tray, attach it to the top of the upright with screws and reinforce with corner brackets. The platform gives the bird a place to land and play without having to grip a perch the whole time, which is easier on their feet during longer play sessions.
Step 3: Stabilize and test
Before you finish any surfaces, do a stability test. Put the stand on your intended floor surface and push it from different directions. It should not rock or tip. If it does, widen the base, add more weight to the base (a weighted tray works well), or lower the center of gravity by shortening the upright. I've made the mistake of skipping this step and finishing a stand before realizing it wobbled on hardwood floors. Save yourself the redo and check it now.
Step 4: Finish all surfaces
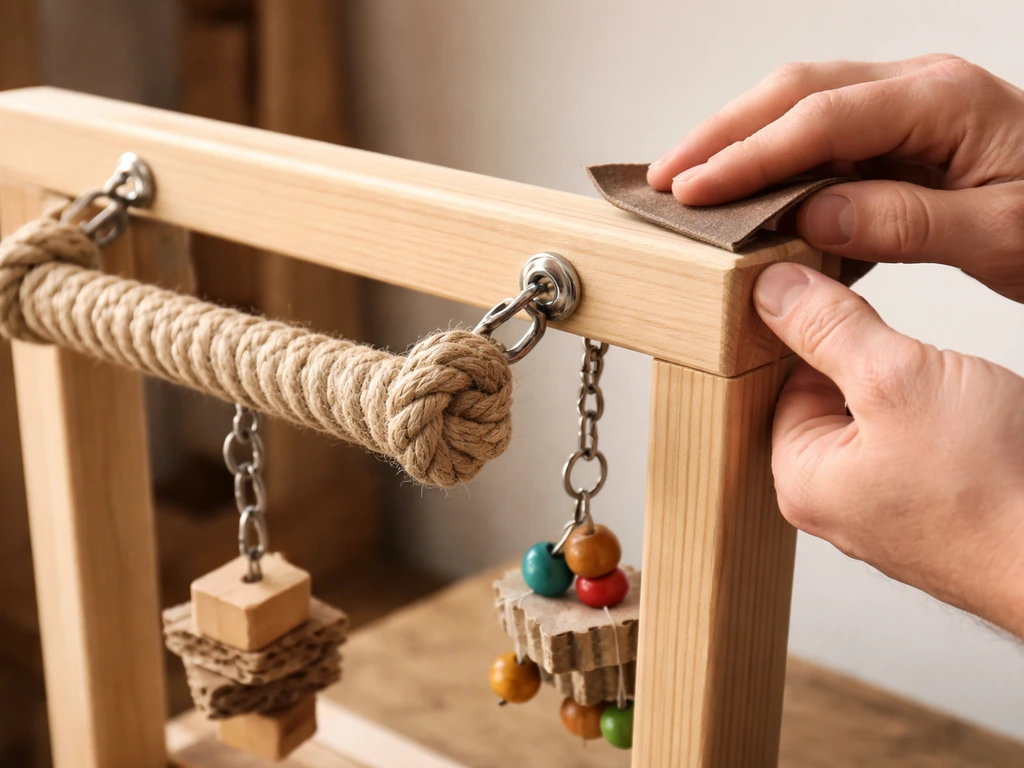
Any wood surface needs to be smooth enough that there are no splinters or rough edges. Work through your sandpaper grits and run your hand over every surface and edge. If you want a finish on the wood, it has to be bird-safe. The safest approach is no finish at all, especially on perches and any surface the bird will chew. If you want to seal a base platform for easier cleaning, look for water-based, bird-safe sealers and let them fully cure (at least 72 hours with good ventilation) before putting the bird anywhere near the stand. Never use oil-based paints, varnishes, or stains.
Adding enrichment: toys, foraging, and attachment points
A bare stand with just a perch gets boring fast. Enrichment is what turns a wooden structure into something a bird actually wants to spend time on. The goal is variety: different textures, challenges, and ways to interact with the stand. Include at least a few types of items from this list, and rotate them regularly to keep things interesting.
- Natural rope perches or swings (100% cotton or hemp, no synthetic fibers)
- Foot toys: small wooden blocks, cork pieces, or untreated wood beads the bird can hold and chew
- Foraging stations: small cups or trays hidden with treats under paper strips or woven into rope
- Bells: stainless steel only, with no small parts that can be pulled off and swallowed
- Climbing ladders made from bird-safe wood rungs and natural rope
- Bird-safe plant perches: fresh branches from safe species like willow or apple
Attachment is where a lot of DIY stands go wrong. Carabiners and open key rings look convenient but they can trap a beak or toe, which is a serious injury risk. Quick links (the small oval metal connectors) are a better option, but be aware that some determined birds can unscrew them. For items you don't need to remove frequently, a stainless steel skewer passed through a toy and bent over at the end is actually one of the safest and most reliable attachment methods. For items you do swap out often, use quick links and check them at every cleaning.
Keeping it safe, clean, and long-lasting
Safety checks should happen before you ever put the bird on the stand and then on a weekly basis after that. Look for loose screws, frayed rope ends, cracked perches, and any new sharp edges from chewing. A perch that was fine three weeks ago may have been chewed down to a point that's now a hazard. Replace worn perches regularly; it's cheap and easy if you've used standard dowel diameters.
For cleaning, keep it simple and bird-safe. Hot water and an unscented dish soap work well for routine wipe-downs. Rinse everything thoroughly with fresh water after applying any soap or disinfectant, and let the stand dry completely before the bird goes back on it. Do not use bleach mixed with any ammonia-based cleaner, and avoid anything with fragrance, essential oils, or aerosol propellants.
Reddit users who keep parrots also report emergency cases linked to fumes from nonstick cookware like Teflon, so it is best to avoid nonstick in bird homes Avoid anything with fragrance, essential oils, or aerosol propellants. .
For a deeper disinfect, a quaternary ammonium compound (QAC) cleaner is a solid option. The respiratory system of birds is extremely sensitive, so your cleaning products really do matter.
How often you clean depends on how much time the bird spends on the stand. A stand used for a few hours a day should get a wipe-down every two to three days and a full clean weekly. If you have a foraging station or food attachments on the stand, those need to be cleaned daily to prevent mold or bacterial growth.
Customizing for different birds and spaces
The build plan above gives you a solid foundation, but the best stands are tailored to the specific bird using them. Here's how to think about customization by bird size and space.
| Bird Type | Perch Diameter | Stand Height | Key Customizations |
|---|---|---|---|
| Budgerigar / Parakeet | 1/2" or slightly under | 18–24" tall | Smaller footprint, lighter rope toys, keep gaps under 1/2" |
| Cockatiel | 1/2" to 1" | 24–36" tall | Mid-size platform, bells, foraging cups, climbing ladders |
| Conure / Caique | 3/4" to 1" | 30–42" tall | Chew-heavy toys, reinforced attachment points, wider base |
| Senegal / Poicephalus | 3/4" to 1" | 30–42" tall | Dense hardwood perches, foot toys, multiple levels |
| Small Macaw / Amazon | 1" to 1.5" | 42–60" tall | Very wide base (24"+ arms), heavy-duty uprights, large top platform |
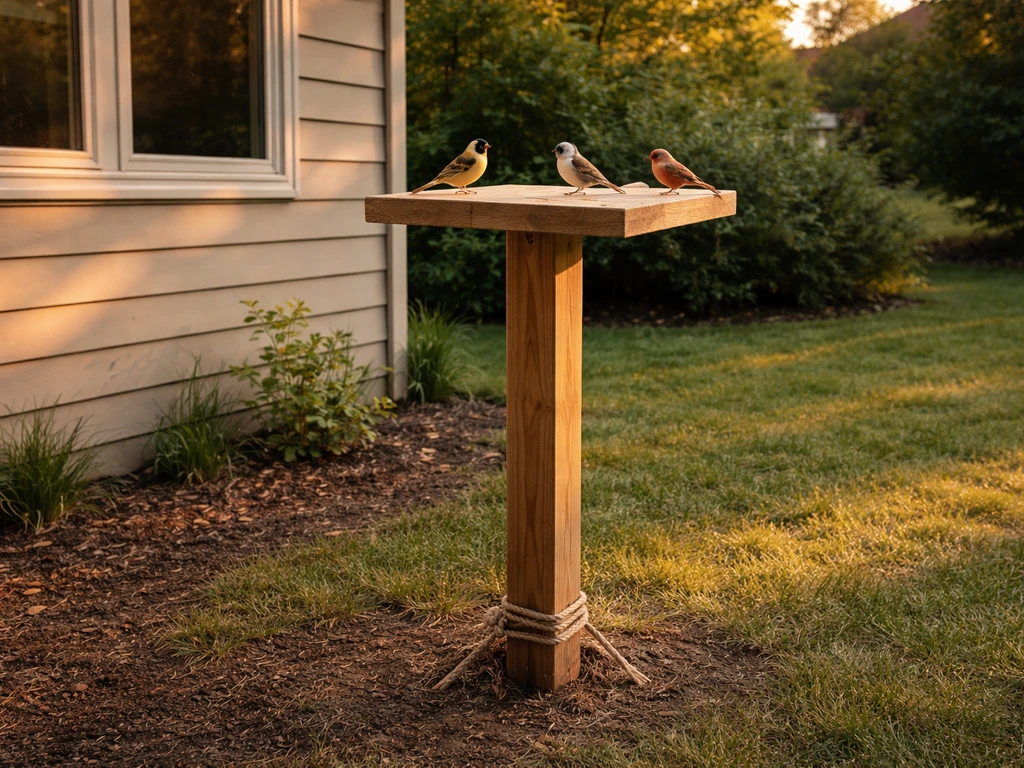
For small apartments or rooms with limited floor space, a tabletop stand (without the freestanding base) is a practical alternative. Mount the upright and perch structure to a wide, weighted board that sits stably on a table or counter. You get all the same enrichment features with a much smaller footprint. For outdoor or garden setups, the design considerations shift significantly since you'll need weather-resistant materials and secure anchoring, which is a different project entirely from what's covered here.
If you have multiple birds, build multiple stands or extend the platform width so each bird has its own territory. Shared stands with one perch can cause resource guarding and stress, especially between birds that don't have a strong bond. Give everyone their own landing zone and the stand becomes a place for positive experiences rather than competition.
Your next steps after the build
Once the stand is done, do a final walkthrough before your bird touches it: tug every perch, check every fastener, run your hand over every surface, and shake the whole stand to confirm it won't tip. Let any finished or sealed surfaces fully off-gas for at least 72 hours in a well-ventilated space before introducing your bird. Then introduce the stand slowly. Put it in the room for a day or two before letting the bird climb on it, so it becomes part of the environment rather than a sudden alarming new object. Most birds take to a well-built, enrichment-loaded stand pretty quickly once they realize it's their space.
The great thing about building your own stand is that you can always add to it. Start simple, watch how your bird uses it, and modify from there. Add a foraging station after a week. Swap out perches when you see what heights your bird prefers. This kind of iterative building is honestly more fun than trying to plan everything perfectly upfront, and it means the stand keeps evolving to match what your bird actually enjoys.
FAQ
Can I make a bird stand that sits on a table instead of being freestanding?
Yes, but for birds you should only use tabletop stands if the base board is wide and heavy enough that it cannot slide when pushed, and the upright must be secured with through-bolts or strong screws (pre-drill to prevent splitting). Also leave clearance around the board edge so a foot or toy cannot fall off and get caught on the underside.
Is it safe to use rope or swings on a homemade bird stand?
For most DIY stands, avoid using rope as a structural load-bearing element. If you add rope for climbing or play, keep attachment points tight, trim frayed ends, and position rope so the bird cannot wind a toe or foot into a loop. Replace rope immediately if you see stretched fibers, fraying, or knot loosening.
Do I need to seal or varnish the wood for my bird stand?
If you use untreated wood, sanding to smooth edges is usually enough for safe contact areas. When you need a finish for cleaning, use a bird-safe, water-based sealer only on surfaces that are not chewed, and allow full cure time plus additional dry time if the room is humid. Never rely on an “it feels dry” check, because some sealers off-gas longer.
Where should I place the stand in my home to keep it safe?
For indoor safety, choose a stand location where the bird is not directly in line with drafty windows, HVAC vents, or ceiling fans, and avoid areas where hot cooking occurs (even when the bird is not “in the kitchen”). If you can smell strong odors when cooking starts, relocate the stand, because air currents can carry fumes throughout the room.
How do I properly stability-test a bird stand before my bird uses it?
Stands should be stable under real use, not just when set on the floor. During testing, push on the highest perch you plan to build, not only the base center, and check that it does not rock when the bird climbs. If you notice wobble while applying force, widen the base or lower the upright before your bird ever tries it.
What’s the safest way to attach toys and accessories to a DIY stand?
Many people under-estimate the risk of small hardware. Avoid anything that can pinch or trap (open key rings, loose carabiners, or thin wire loops), and prefer attachments that are either fixed permanently (skewer-style) or secured with quick links you cannot easily unscrew. Also ensure all metal edges are smooth and not able to snag toenails.
What should I do if my bird starts chewing the stand’s main wood parts?
If your bird shows strong chewing on perches or the upright, change the design so the bird can chew safer elements (like replaceable chew blocks) while keeping primary structure out of reach. For built-in upgrades, add more chew-focused items and swap to harder, bird-friendly woods once you see early wear, since a small notch can become a splintering hazard quickly.
Can I add height or more levels to an existing bird stand?
Yes, but only for extension when you keep the center of gravity low and preserve the base stability. Add material to the upright or platforms carefully, then re-run the tug test from multiple directions. Avoid stacking heavy trays or adding tall elements without increasing base width, because most tipping incidents come from raised weight.
How do I make sure there are no entrapment gaps in the stand design?
For small gaps, your best check is tactile and visual: run your fingers along every opening and verify a bird’s body cannot fit into a “middle zone.” If you build ladders, spacing should allow safe stepping without allowing a head, foot, or wing to become wedged. When in doubt, keep openings either too small to enter or arranged so escape is immediate and not dependent on the bird pulling back.
How often should I clean a bird stand with foraging toys or food attachments?
Clean based on what the stand actually collects, not just how often it is used. If you have a foraging tray or food-catch surfaces, wipe and remove debris daily, and do a deeper clean weekly. After cleaning, ensure the stand is fully dry and odor-free before returning the bird, because lingering detergent scent can bother sensitive respiratory systems.
How should I introduce my bird to the stand without stressing them?
Introduce the stand gradually and keep an escape route in the room. Start by placing familiar items or treats near the stand for a day or two, then allow supervised climbing. If your bird avoids the stand for more than a few days, reduce the number of new attachments, keep lighting steady, and re-check perch placement so the bird does not have to jump too far to reach the first level.
Next Articles
How to Make a Bird Stand for the Garden DIY
Step-by-step DIY guide to build a stable, weatherproof freestanding bird stand for perching, feeding, and watering.
How to Make a Bird Stand at Home: DIY Steps
DIY guide to build a stable bird stand at home with safe materials, steps, dimensions, and placement tips for backyard b

How to Build a Chimney Swift Bird House DIY Guide
Step-by-step DIY plans to build a chimney swift bird house, with correct dimensions, placement, and weatherproofing for