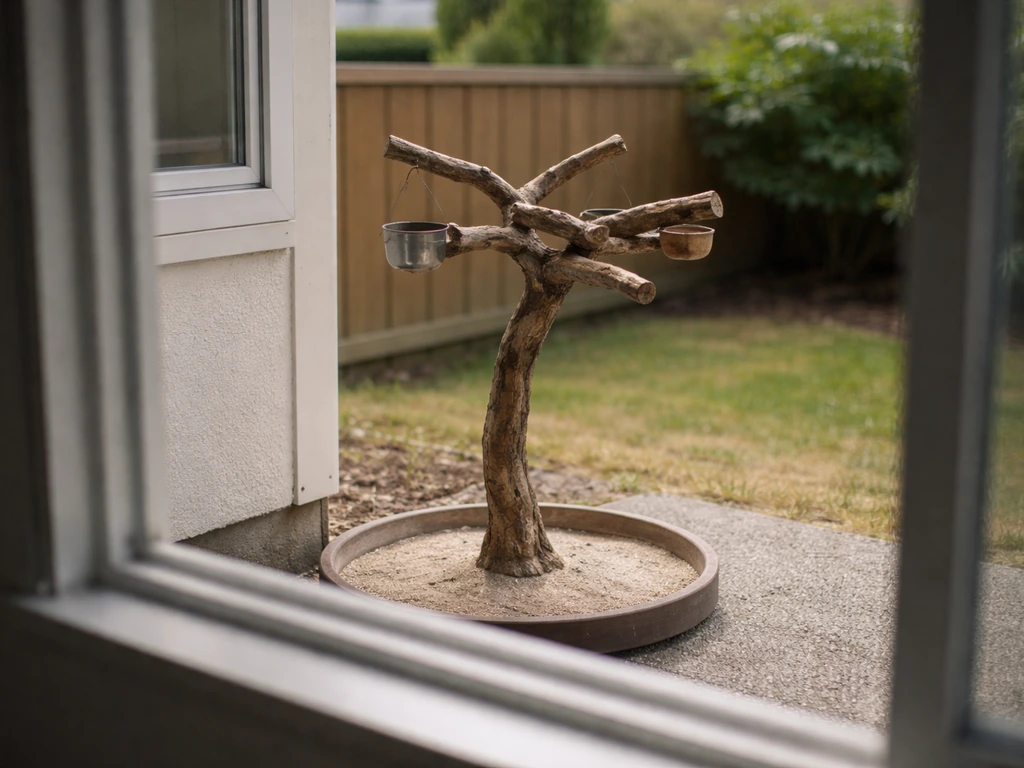
A bird tree stand is one of those terms that means something slightly different depending on who you ask, but the most common DIY version is a branch-style perch and feeding structure, basically a freestanding or tree-mounted "tree" made of natural or crafted branches that gives birds places to land, eat, and sometimes nest. You can build a solid one in an afternoon with basic tools, a few lengths of wood, some screws, and a stable base or mounting strap. The key decisions are what you want it to do (perch, feed, or support nesting), where you're putting it, and what materials you're using, because those three things drive every measurement and design choice that follows. If you want to go a step further and learn the exact measurements and safe materials, see the full step-by-step guide on how to make bird stand.
How to Make a Bird Tree Stand: DIY Step-by-Step Guide

First, figure out which kind of bird tree stand you're actually building
Before you cut a single piece of wood, get clear on your goal, because the build is pretty different depending on the answer. There are three main types, and they overlap just enough to cause confusion.
- Perch tree stand: A decorative, branch-style structure (freestanding or mounted) that gives birds places to land and rest. Think of the tabletop branch trees you see in pet and garden stores. Great for smaller yards, patios, or bird-watching close to a window.
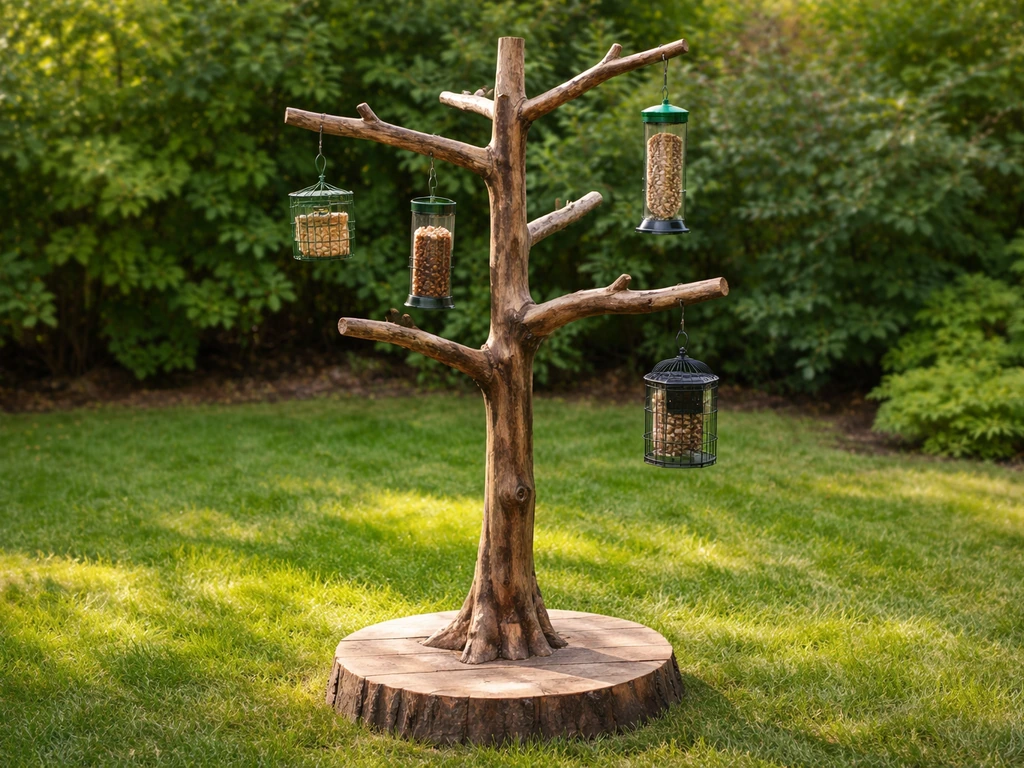
- Feeder tree stand: The same branch structure but with hooks, platforms, or cups attached for seed, suet, or water. This is the most popular backyard DIY version, and it's what this guide focuses on most heavily.
- Nesting or birdhouse stand: A post, tripod, or tree-mounted bracket designed to hold a nest box at the right height. This is a different build from a perch or feeder tree, and it comes with extra predator-safety considerations.
If you're building something to hold a birdhouse, the approach is closer to building a birdhouse pole or a birdhouse stand, which are their own topics worth exploring separately. For this guide, the main focus is the branch-style feeder and perch tree stand, since that's what most people are picturing when they search this term. That said, the planning and material advice applies to all three, and I'll flag where nesting stands need different treatment.
Plan the location before you build anything
Getting the placement right matters more than almost any build decision. A beautiful stand in the wrong spot will go unused, or worse, it'll put birds at risk.
Height and visibility
For a feeder tree stand, aim to position the main feeding level between 4 and 6 feet off the ground. That height keeps the feeder visible to birds flying overhead, puts it at a comfortable eye level for you when you're filling it, and makes it harder for ground-level predators to reach. If you're mounting to a tree, keep the lowest branch or perch arm at least 4 feet up from the ground. The top of the stand doesn't need to exceed 7 or 8 feet unless you're targeting larger birds like woodpeckers, which prefer feeding higher.
Distance from windows and launch points
Audubon's guidance on window collisions is worth following here: place your stand either right at a window (within 3 feet, so birds can't build up dangerous speed) or at least 30 feet away. The dangerous middle zone, between 3 and 30 feet, is where most window strikes happen. On the squirrel side of things, Audubon recommends keeping feeders at least 8 to 10 feet away from trees, fences, and buildings that squirrels can use as launch pads. That's a real tension in small yards, but even getting to 6 feet with a good baffle helps.
Stability and weather
Think about wind direction in your yard. A tall, top-heavy stand on a patio catches a lot of surface area in a gust. Position it where a fence, wall, or hedge breaks the prevailing wind without creating a hiding spot for cats. If you're in a climate with real winters, consider whether the base design allows you to bring the stand inside or anchor it more securely for the season.
Predator safety, especially for nesting stands
This one catches a lot of DIYers off guard. Mounting a nest box directly to a tree trunk, or building a stand that butts up against a tree, gives raccoons, snakes, and cats a very easy path to the nest. Sialis.org, one of the most trusted bluebird nesting resources around, is direct about this: attaching nestboxes to trees without predator protection in predator-rich areas can harm the very birds you're trying to help. For feeder and perch stands, predator risk is lower, but you still want to avoid designs that create a convenient climbing path. For any nesting stand, use a metal pole or a smooth wooden post with a predator baffle mounted 4 to 5 feet off the ground.
Materials and tools: wood, metal, or repurposed
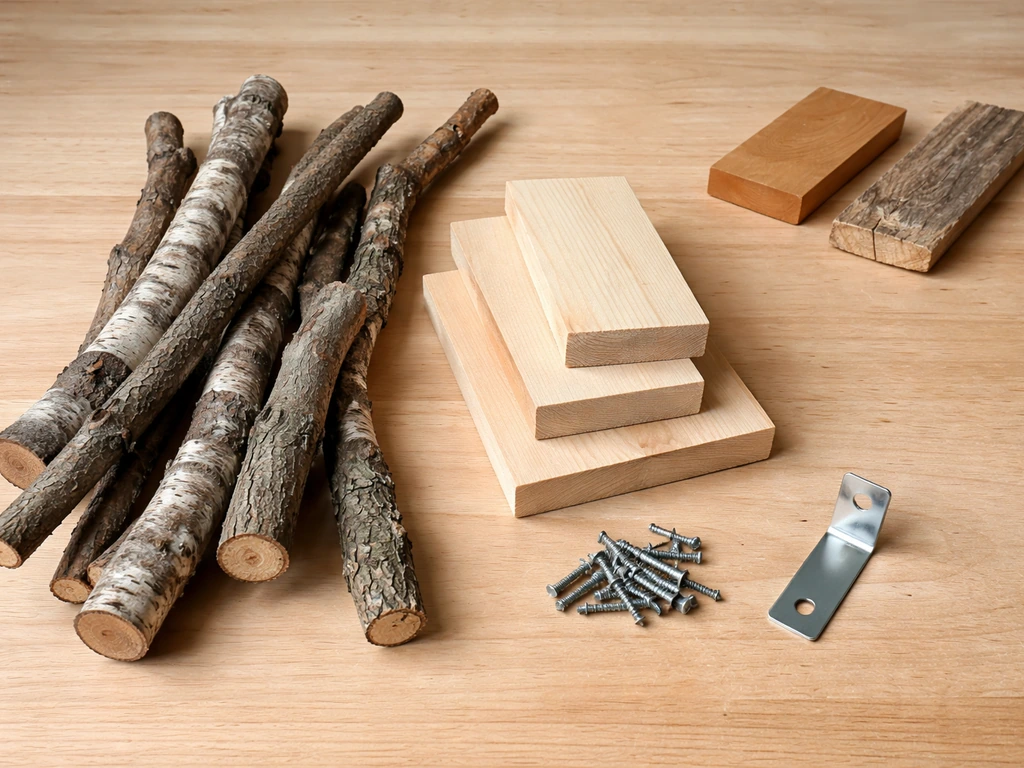
The good news is that you don't need to buy much. Most bird tree stands can be built almost entirely from repurposed wood, salvaged branches, or basic lumber with a handful of screws and hardware. Here's how the main material options compare:
| Material | Best For | Pros | Watch Out For |
|---|---|---|---|
| Natural branches (birch, cedar, oak) | Perch arms, decorative look, naturalistic design | Free or cheap, birds respond well, looks great | Can split if drilled without pre-drilling; dry out and crack over time |
| Cedar or redwood lumber | Main trunk/post, base frame, shelf platforms | Rot-resistant, safe for birds, weathers well | More expensive than pine; still needs a water-safe finish |
| Pine or spruce lumber | Budget build, interior parts, base support | Very affordable, easy to cut and screw | Not naturally rot-resistant; needs sealing or annual treatment |
| Metal pipe (galvanized or powder-coated) | Freestanding post, pole mount | Extremely stable, predator-resistant, long-lasting | Heavier to work with; needs flanges or flanged base for anchoring |
| Repurposed wood (pallets, salvaged decking) | Base, shelves, backing boards | Essentially free, sturdy, good for rustic builds | Check for chemical treatment (avoid CCA-treated wood); sand sharp edges |
Bird-safe finishes
Avoid any paint, stain, or sealer that contains lead, heavy metals, or strong biocides. Once fully cured, water-based exterior latex paint is generally safe, and many bird-focused builders skip paint entirely and use raw linseed oil or a simple beeswax finish on natural wood. The inside of any feeding platform or nesting surface should stay unfinished or be treated only with raw linseed oil. Never use creosote, CCA-treated lumber (the older green-tinted pressure-treated wood), or oil-based paints near feeding or nesting surfaces.
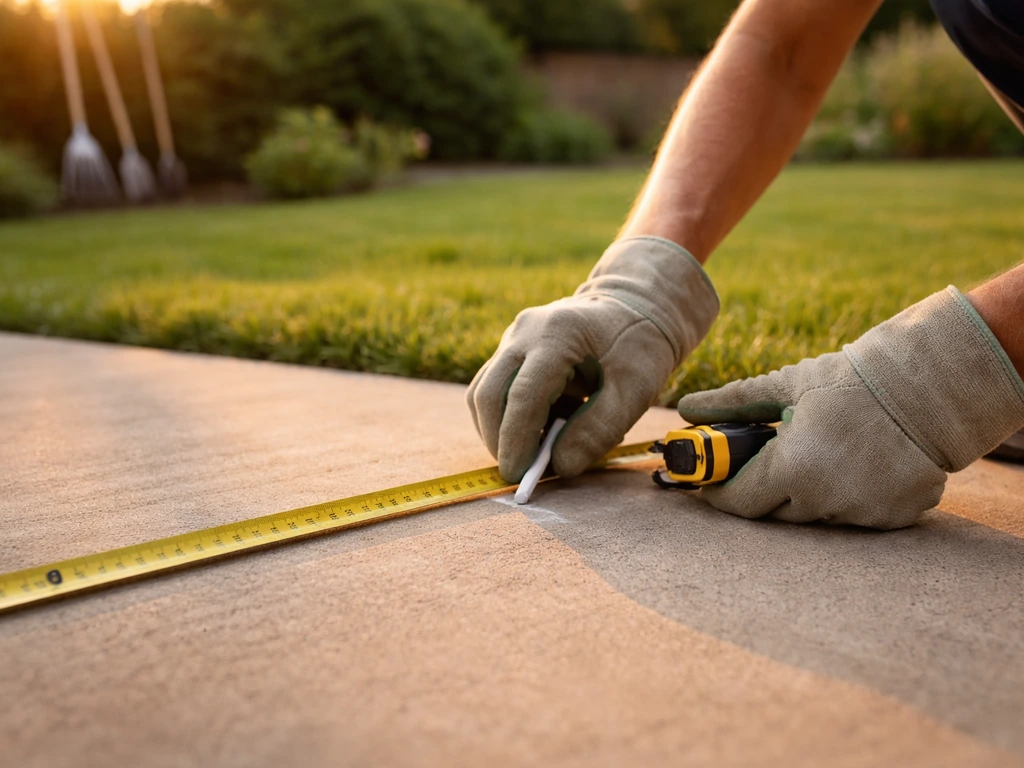
Tools you'll need (and budget substitutes)
- Drill with bits (1/8" for pre-drilling, 1/4" for bolt holes) — a basic cordless drill under $40 works fine
- Jigsaw or handsaw for cutting lumber and branches to length
- Sandpaper (80-grit for shaping, 120-grit for finishing) — smooth all surfaces and edges
- Tape measure and pencil
- Exterior wood screws (2" and 3" lengths) and carriage bolts (1/4" x 2") for main joints
- Adjustable wrench and screwdriver bits
- Hose clamps or wide nylon straps if mounting to a live tree (never use nails or screws driven into a live tree)
Step-by-step build: a freestanding feeder tree stand
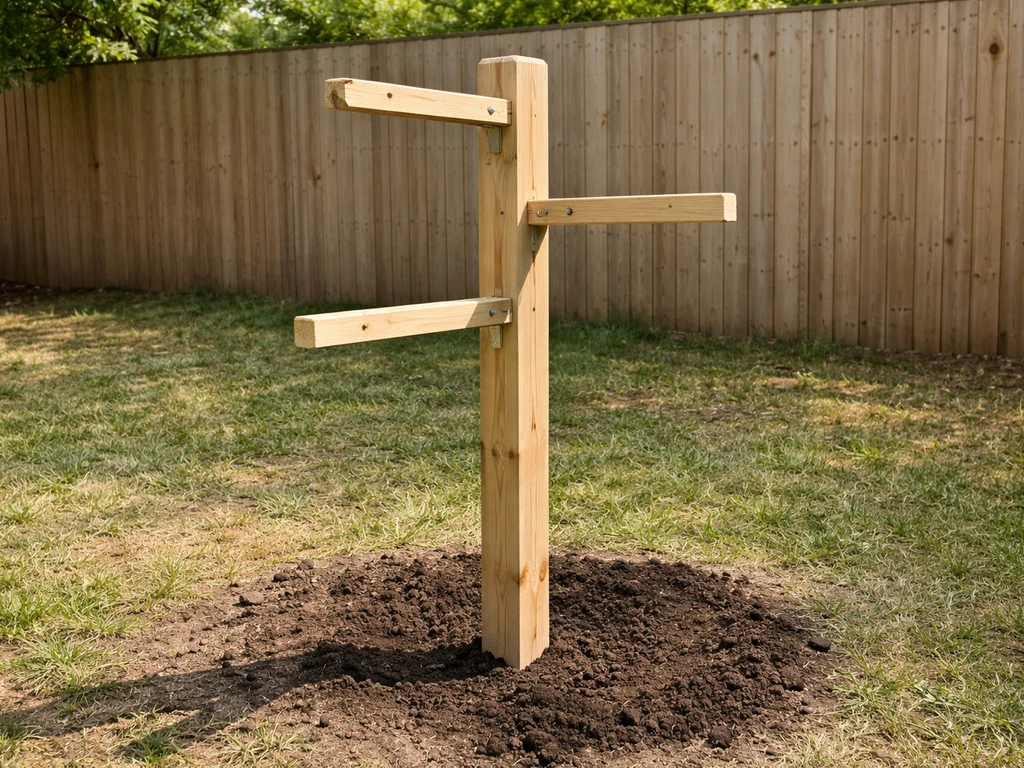
This design builds a freestanding branch-style feeder tree stand roughly 5 to 6 feet tall, with a central post and three or four perch arms at staggered heights. It works in a yard, on a patio, or mounted in a planter base. Adjust the measurements to fit your space. If you want the simplest overall approach for how to make a bird stand for the garden, use this freestanding branch-style layout as your baseline and adjust height and placement.
What you'll cut
- Central post: 4x4 cedar or pine, 6 feet long (or a natural branch at least 3" in diameter)
- Perch arms: 3 to 4 pieces of 1.5" diameter branch or 1x2 lumber, cut to 18"–24" each
- Base cross-feet: 2 pieces of 2x4, each 24" long (for an X-base) or one 24"x24" plywood square (3/4" exterior-grade)
- Optional top cap: a small 6"x6" platform cut from 3/4" cedar, for a seed tray or hanging hook
Assembly order
- Build the base first. Lap the two 2x4 cross-feet into an X shape by cutting a half-lap notch (1" deep, 1.5" wide) into the center of each board. Fit them together, apply a bead of exterior wood glue, and drive two 2" screws through the joint. The base should feel rock-solid before you add the post.
- Attach the post to the base. Center the 4x4 post on the X-base and clamp it while you drill two 1/4" holes through the base boards and into the bottom of the post. Drive 1/4"x3" carriage bolts through each hole, add washers and nuts, and tighten firmly. This double-bolt connection is what keeps your stand from rocking in the wind — a single screw here is the most common cause of a wobbly stand.
- Mark perch arm positions. Stagger your perch arms so they spiral up the post: first arm at 30" up (pointing roughly north), second at 42" (pointing southeast), third at 54" (pointing west), and an optional fourth at 64" (any direction). Staggering the heights and angles prevents arms from blocking each other and gives birds clear flight paths to each one.
- Drill and mount perch arms. For branch perches, drill a 1/4" pilot hole through the branch and into the post (about 2" deep). Drive a 3" exterior screw or a lag screw to secure. For 1x2 lumber arms, use two 2.5" screws at a slight downward angle so the arm tilts just slightly down at the tip — this helps water run off and gives birds a more natural grip. Pre-drill everything to avoid splitting.
- Add the top cap (optional). Center the 6"x6" platform on top of the post, drill two pilot holes, and attach with 2" screws from below. Add 1/4" drainage holes in each corner of the platform so water doesn't pool.
- Sand all surfaces and edges, paying special attention to any cut branch ends and the tops of perch arms where birds will land. Round off any sharp corners with 80-grit sandpaper. Finish with raw linseed oil or leave bare if using cedar — both age well outdoors.
Mounting to a live tree (instead of freestanding)
If you want to attach the stand or a bracket to a living tree, use wide nylon tree straps (the kind arborists use) or hose clamps over a rubber pad, never screws or nails driven into the bark. This protects the tree's cambium layer and avoids creating an entry point for disease. Loop the strap around the trunk, thread it through a pre-drilled hole in a backing board, and bolt the board to the strap hardware. The stand or arm then screws into the backing board, not into the tree itself. Check the strap tension every spring and loosen it as the tree grows.
Add bird-safe features: perches, feeders, nesting support, and drainage
Once the basic structure is up, the additions are what make it genuinely useful to birds. Keep a few principles in mind: every attachment should be smooth and snag-free, every feeding surface needs drainage, and anything that collects water or debris needs to be easy for you to remove and clean.
Perches
Natural branch perches are ideal because the irregular diameter gives birds the foot grip they'd get on a real tree. Aim for perch diameters between 1/2" and 1.5" to suit a wide range of small to medium birds (finches, chickadees, nuthatches, woodpeckers). Sand away any loose bark that could harbor mites, but leave the texture of the wood itself intact. Avoid smooth dowels as the only perch option, especially if you expect larger birds.
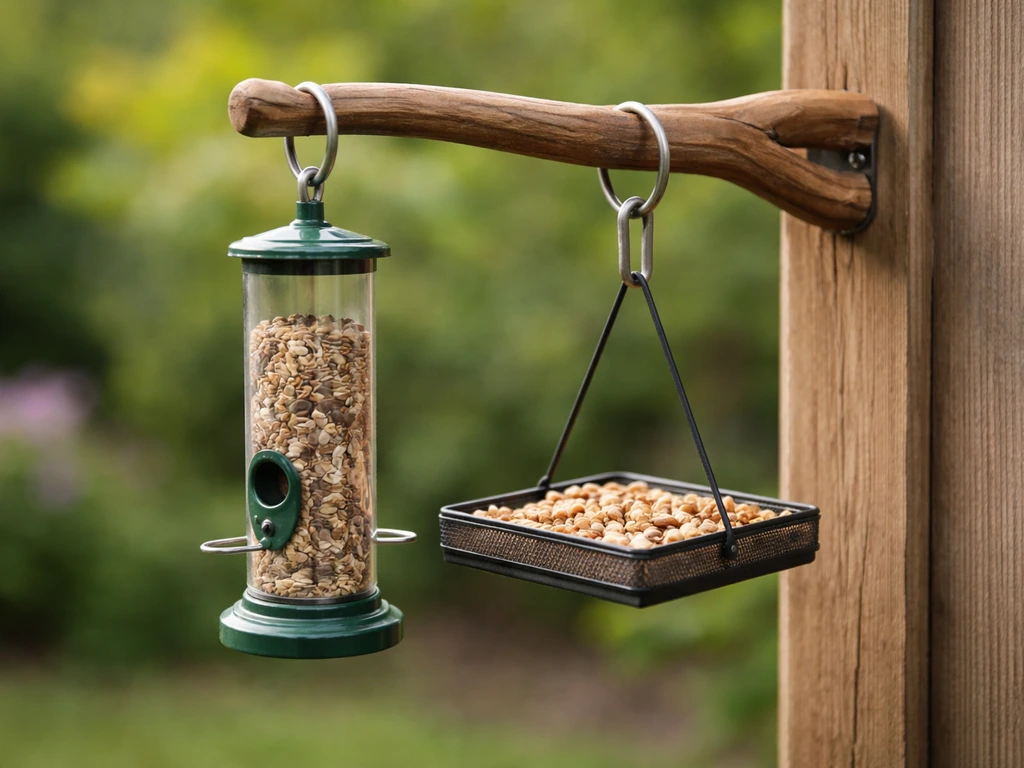
Feeding stations
S-hooks screwed into the underside of perch arms let you hang tube feeders, suet cages, or small platform feeders from the stand. A tray feeder mounted on the top cap gives ground-feeding species like juncos and sparrows a higher, safer option. Drill at least four 1/4" drainage holes in any tray or platform, and slope the surface very slightly (about 1/8" over 6") so water runs toward the holes rather than pooling.
Squirrel baffle
If your stand is freestanding on a post, add a torpedo or cone baffle to the post between 4 and 5 feet off the ground. This is the height range Audubon recommends for effective squirrel deterrence. Audubon recommends placing feeders at least 8, 10 feet from trees, fences, and buildings that squirrels can use as launch pads, and keeping a squirrel baffle between 4 and 5 feet off the ground. The baffle needs to be at least 15" in diameter to prevent squirrels from reaching around it. You can buy one for around $15 to $20, or cut a cone from a piece of sheet aluminum and clamp it to the post.
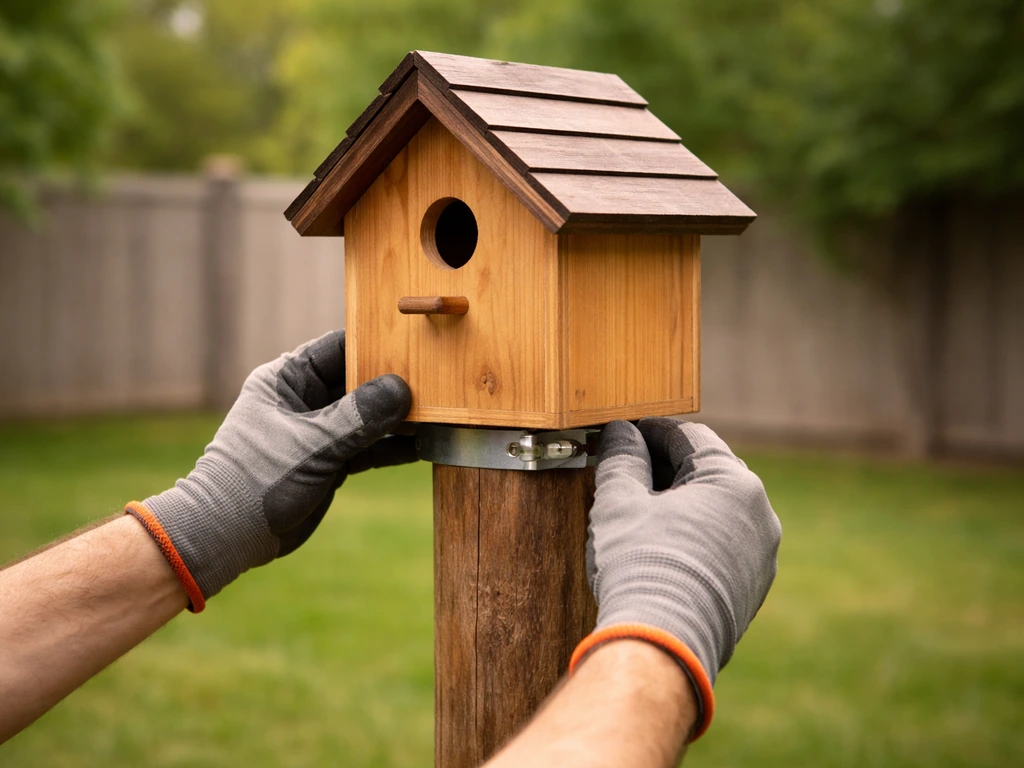
Nesting support (only if your design calls for it)
If you want to add a nest box to the stand rather than building a separate nesting stand, mount it at the top of the post on a pivot bracket so the box can be opened for monitoring and cleaning. The box should face east or north to avoid overheating, and the entrance hole diameter should match your target species: 1-1/8" for chickadees, 1-1/2" for bluebirds, 1-1/2" to 2" for tree swallows, and 2" for woodpeckers. As noted earlier, keep the stand away from trees and fence lines to limit predator access, and add a predator baffle below the box.
Maintenance, seasonal adjustments, and safety checks
A well-built stand needs maybe 30 minutes of attention per season, but skipping that maintenance is how good builds turn into hazards. Here's what to do and when.
Cleaning routine
Scrub feeding trays and platforms with a stiff brush and a solution of one part white vinegar to nine parts water, or a 10% bleach solution (1 tablespoon bleach per cup of water) if there's mold or fungus. Rinse thoroughly and let dry completely before refilling. Do this every two to four weeks during peak feeding season, more often in humid climates. Remove and clean hanging feeders at the same time.
Seasonal adjustments
- Spring: Inspect all screw and bolt joints before birds return. Tighten anything that has loosened over winter. If you used nylon tree straps, loosen them slightly to account for tree growth. Clean out any old nesting material from nest boxes.
- Summer: Check that drainage holes are clear and not blocked by debris or algae. In very hot climates, consider adding a small shade roof over the top platform to protect seeds from spoiling quickly.
- Fall: Reduce the number of feeders if you want to encourage birds to migrate naturally rather than overwinter. Leave one or two feeders stocked for resident species like chickadees, nuthatches, and woodpeckers.
- Winter: Check whether the base is stable in frozen ground or on an icy patio. Add extra weight to the base (a brick or heavy planter) if needed. Offer high-fat foods like suet and black-oil sunflower seeds. If you brought the stand inside, give it a quick sand and re-oil before putting it back out in spring.
Annual safety check
Once a year, go over the entire stand looking for splinters, cracked wood, loose hardware, and any sharp edges that have developed from weathering. Tap each perch arm to test that it's still solid in the post, not just held by a rusted screw. Check the base joint, which takes the most stress, and re-apply wood glue to any opening gaps before re-screwing. Replace any branches or arms that have cracked through, since a bird landing on a failing perch can fall or injure itself. This annual once-over adds years to the stand's life and keeps it safe for the birds using it all season.
Once your bird tree stand is up and running, you'll probably start thinking about what else you can build alongside it. A simple garden bird stand, a dedicated birdhouse stand, or a proper birdhouse pole can all work together to create a layered backyard habitat, each structure serving a slightly different group of birds at a different height and with different features. If you want the classic setup where the birdhouse is mounted on a tall pole, this guide covers how to make a bird house pole and keep it stable and predator-safe. The stand you just built is a great foundation, and every improvement from here makes your yard a better place for birds to visit, feed, and eventually call home.
FAQ
How do I know if my branch perches are the right size and texture for different birds?
Before weathering sets in, gently sand only the loose, peeling bark and any sharp edges, then leave the wood grain texture intact for grip. If a branch perch is too smooth, rough up the surface with fine sandpaper, rather than replacing it, and confirm birds can perch without wobbling or rotating.
What should I check at screw and joint points to prevent the stand from becoming unsafe over time?
Use only hardware-rated fasteners and keep all joints below where birds land. If you see rust at a screw head, replace the screw and inspect the wood around it for cracks or soft spots, because metal corrosion can hide a structural weakness.
My feeder tray pools water after rain, what’s the fix?
If the tray or platform holds water, increase drainage by adding more holes and slightly re-slope the surface so every point drains toward the holes. Also empty and clean promptly after rain, because standing water can attract insects and encourage mold.
Can I use the same baffle and placement approach for a nest box as I do for a feeder?
Don’t. Any baffle or barrier near nest boxes should be smooth, vertical, and mounted to block climbing routes, and nesting stands need predator-safe placement rather than “good enough” heights. If you’re adding a nest box to this stand, keep the box opening oriented correctly and add a predator baffle below it.
How can I reduce crowding or bullying among birds using the stand?
If you see aggressive bird behavior at the same perch location, add multiple perch arms at staggered heights and consider spreading food sources. Another quick improvement is to hang tube feeders slightly lower than the highest perch so different species can feed without crowding.
Is it safe to leave the freestanding stand outside during winter, and what changes should I make?
Yes, but plan for winter stability. Either anchor the freestanding post more securely before freezing weather or make the base winter-ready (for example, heavier ballast and check hardware). Also consider bringing perishable feeding items indoors so you are not refilling daily in freezing temperatures.
How do I adjust heights if I’m targeting specific species like chickadees versus woodpeckers?
Choose perch and feeder heights by target species and daily bird habits. If you mainly want small songbirds, stick with the 4 to 6 foot feeding band and tray design described, but if you notice larger birds consistently, increase perch height gradually rather than jumping the entire structure at once.
Squirrels are getting the food anyway, what’s the most likely reason and what should I fix first?
If squirrels are still reaching, the most common cause is a baffle that is too small, mounted too low, or not positioned between the squirrel launch point and the food. Confirm the baffle is at least in the 4 to 5 foot range and large enough to prevent reaching around it, then re-check for nearby “bridges” like nearby branches or fence edges.
How do I mount it to a living tree without damaging the tree or letting the stand shift later?
For tree mounting, check the strap every spring for looseness, and loosen or re-center it as the tree thickens. Also confirm the strap is over a rubber pad so it does not abrade bark, and ensure the stand loads are carried by the backing board, not by direct screws into the trunk.
What should I do if no birds are using my bird tree stand after I install it?
If birds aren’t using the stand after setup, verify placement first. Look for wind exposure, nearby predator routes, and window collision risk zones. Then ensure the first food offering is clean and visible, and keep the area quiet for a couple of days so birds can investigate without repeated disturbances.
How often should I check a nest box on the stand, and how do I avoid stressing nesting birds?
If you use a pivot bracket for a nest box, open it only during routine monitoring windows and keep the process quick. Avoid leaving the box open for extended periods, and after checking, close it promptly and ensure the predator baffle area remains unobstructed.
Can I expand the setup with extra feeders or a bird bath next to the stand?
Yes, but keep the stand’s feeding and cleaning surfaces accessible. Many people add a second feeder or shallow bath nearby, but maintain separation from areas squirrels can use as launch pads and keep everything in the same predator-safe spacing strategy.

DIY steps to build a sturdy outdoor birdhouse stand with proper height, drainage, ventilation, predator safety, and leve
Step-by-step guide to build a sturdy birdhouse mounting pole, choose materials, set height, prevent wobble, and weatherp
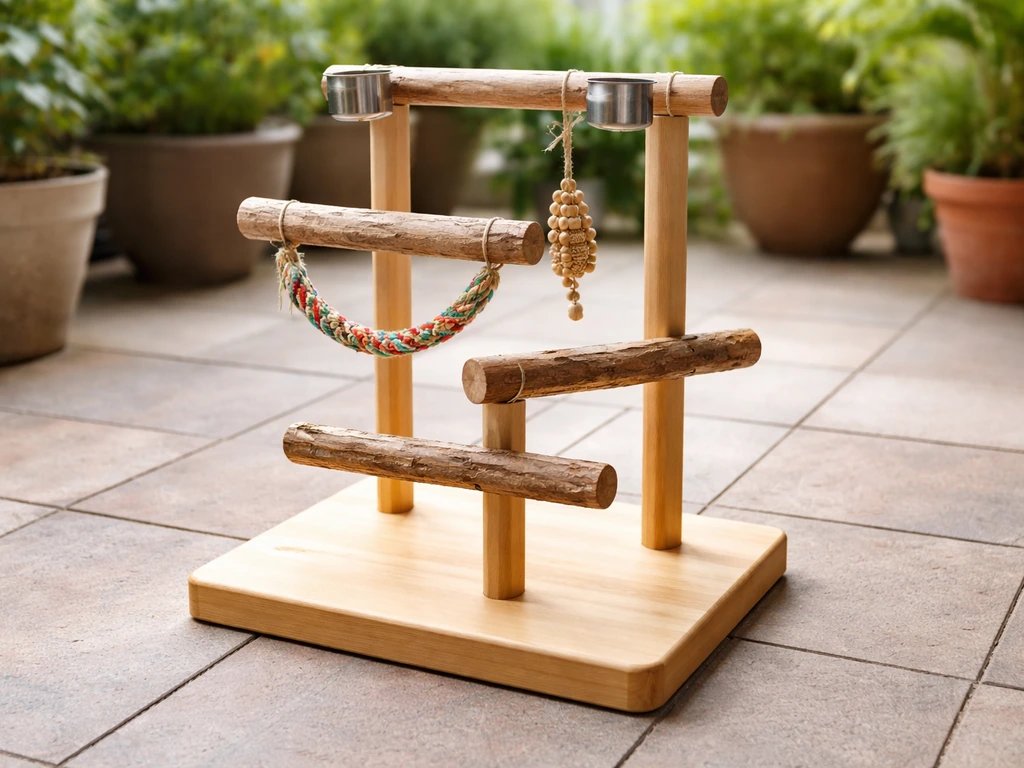
Step-by-step DIY guide to build a stable bird play stand with safe perches, levels, enrichment, and non-toxic finishes.