You can absolutely build a freestanding bird stand for your garden this weekend with basic tools, a few lengths of lumber, and under $30 in materials. The trickiest part isn't the construction, it's deciding what you actually want the stand to do. Once you nail that down, the build itself is very manageable, even if you've never made anything like this before.
How to Make a Bird Stand for the Garden DIY

Marcus Thornton
17 Apr 2026
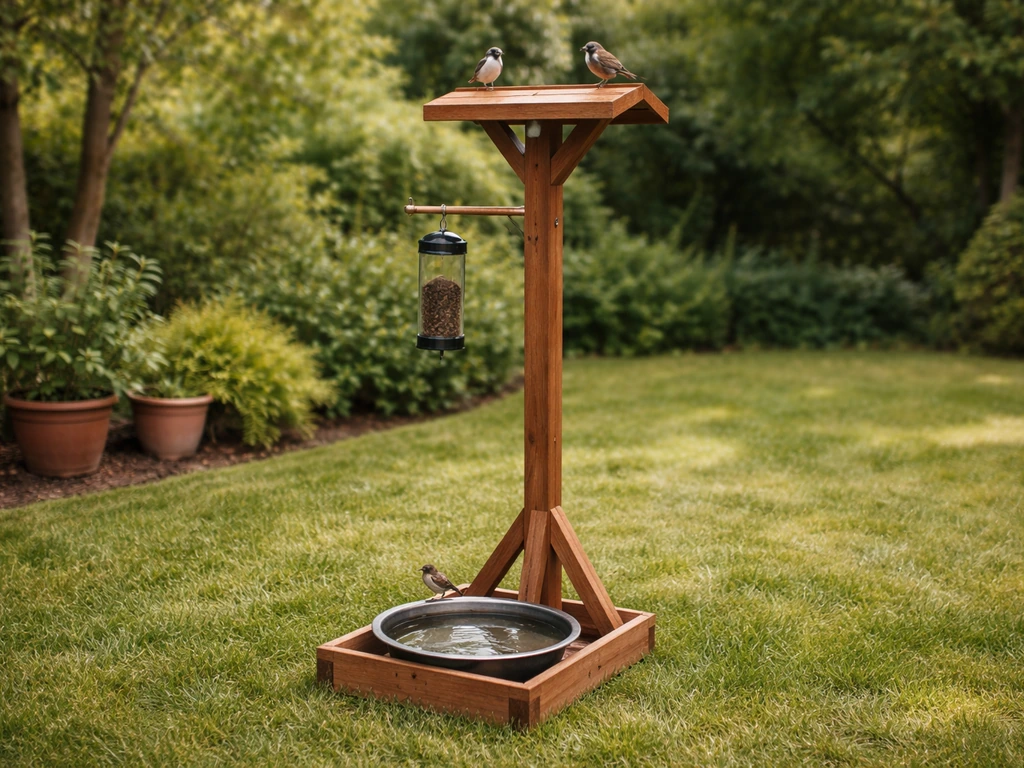
Figure out what your bird stand is actually for
"Bird stand" means different things to different people, and building the wrong one for your space is the most common mistake I see. Before you cut a single board, decide which of these four purposes fits your yard and your goals.
- Perch station: a simple T-bar or branch-style frame that gives birds a landing spot, lookout, or resting place near a feeder or open lawn area.
- Feeding station: a freestanding pole or post with a platform, tray, or hanging hook to hold seed feeders, suet cages, or peanut feeders.
- Bird bath stand: a freestanding pedestal or frame that holds a shallow basin of water for drinking and bathing.
- Combination station: a pole or post with multiple arms, hooks, or shelves that handle feeding, perching, and sometimes a small birdhouse all at once.
Location matters as much as purpose. For window safety, stick to [the '3-30 rule'](https://www. fws. gov/sites/default/files/documents/2025-01/01.
29. 2025-learn-more-about-bird-window-collisions-vyfwc. pdf): place your stand either within 3 feet of a window (so birds can't build up enough speed to hurt themselves if they do veer toward the glass) or more than 30 feet away. The mid-range of 5 to 25 feet is actually the danger zone most people accidentally choose.
If you're building a bird bath stand specifically, aim for at least 10 feet from your home windows. And skip full midday sun placement, morning sun with dappled afternoon shade keeps the water comfortable, slows evaporation, and reduces algae growth. building a bird house stand follows similar siting logic, so those placement principles transfer directly if you want to expand your setup later.
Think about what birds already visit your yard and what they're missing. If you have feeders but no water source, a bath stand is probably more valuable than another feeding post. If birds zip through but never linger, a simple perch station near shrubs gives them a reason to pause.
Design options that actually work
Here are the four main DIY approaches, each with a realistic sense of what's involved.
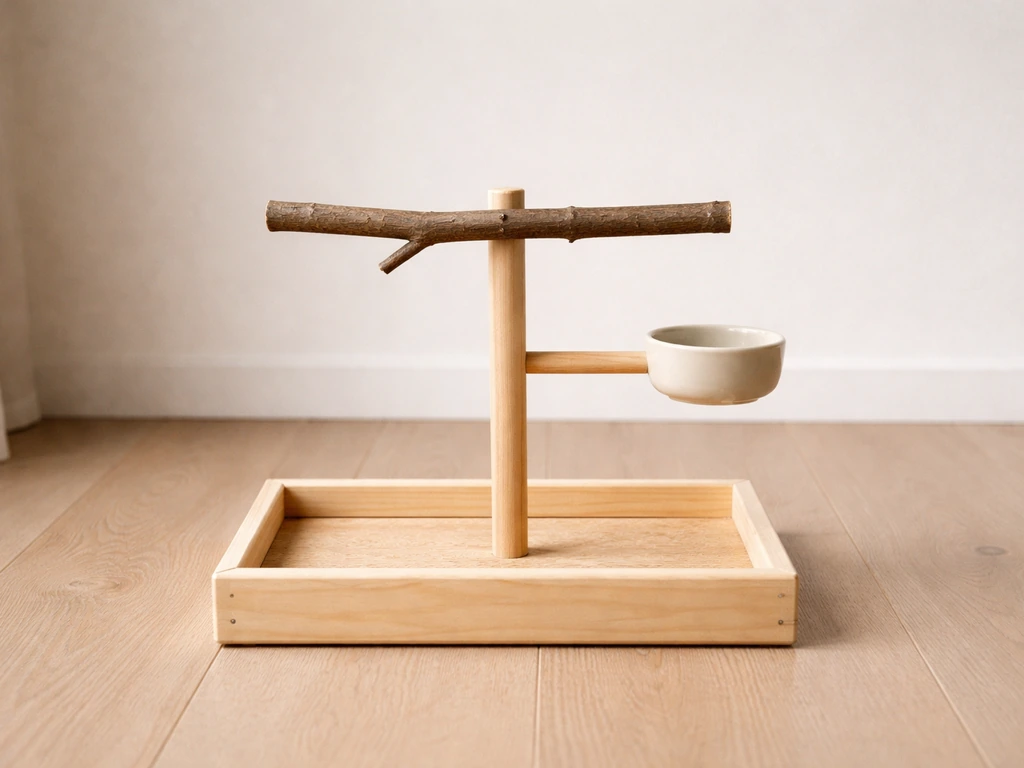
T-bar perch stand
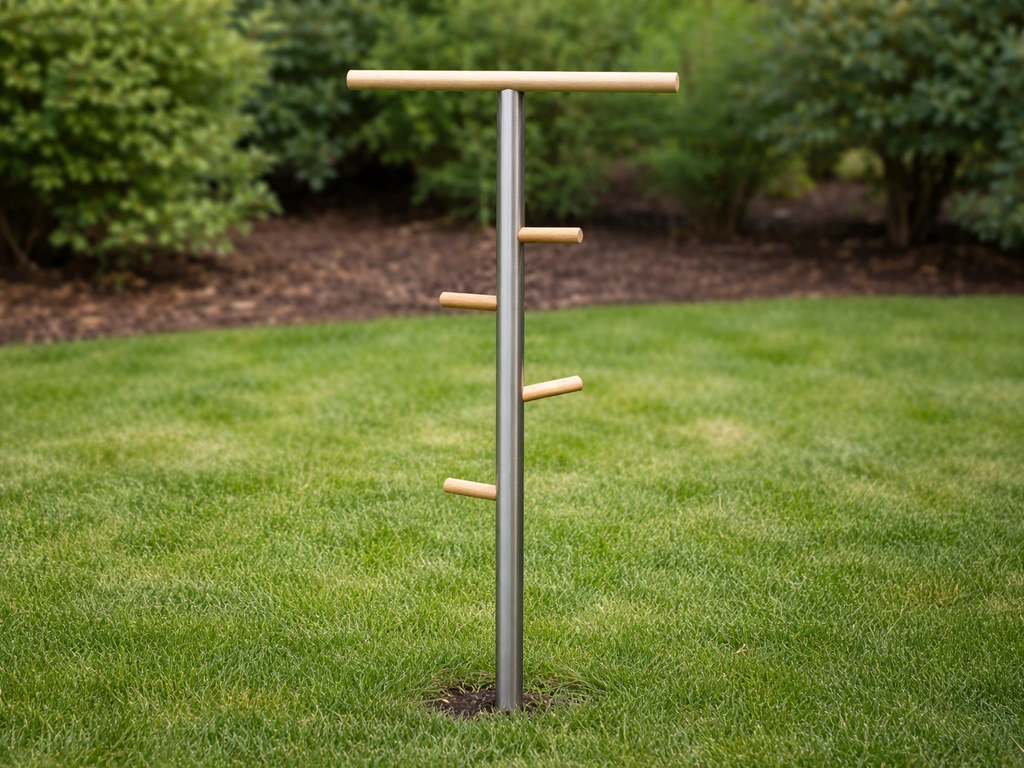
This is the simplest build: a vertical post with a horizontal crossbar at the top, like a capital T. You can add short dowel branches along the sides at different heights. Birds use it as a lookout, a staging area before hitting the feeder, or just a favorite hangout. It takes about an hour to build and costs almost nothing if you have scrap wood.
Freestanding feeding station
A 4x4 or 2-inch-diameter metal conduit post set into a ground anchor or concrete, with one or more arms extending from the top. You hang feeders from the arms at roughly 5 to 6 feet off the ground, which is the sweet spot for most backyard birds, high enough to be visible and feel safe, low enough for you to refill without a step stool. This is the build I'll walk through step by step below.
Bird bath stand
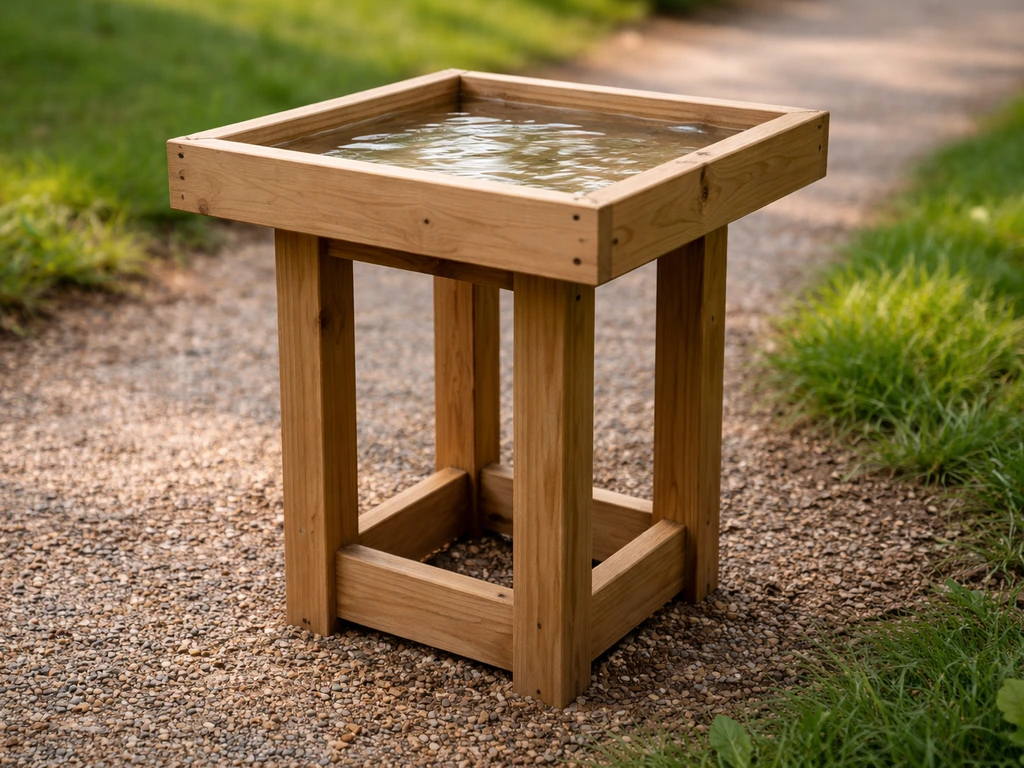
A pedestal frame built from cedar or pressure-treated lumber, topped with a shallow basin. The basin depth should be 1.5 to 2 inches, deep enough to be useful, shallow enough that small birds like sparrows and wrens feel safe standing in it. You can make the basin from a terracotta saucer, a repurposed shallow bowl, or a purpose-built plastic tray. The stand itself is usually a post-and-platform design, similar to a feeding station but with a wider flat shelf at the top.
Combination multi-arm station
If you want to do everything at once, you can build a central post with multiple arms at different heights, one for a hanging feeder, one for a suet cage, a small platform tray at mid-height, and even a side bracket for a small birdhouse or nest box. how to build a bird stand with multiple arms like this takes more planning but isn't structurally complicated. The key is keeping the load balanced so the post doesn't lean over time.
What you'll need: materials and tools
This list covers a solid freestanding feeding station (the most versatile beginner build). Adjust quantities for simpler or more complex versions.
Materials
- One 8-foot 4x4 cedar or pressure-treated post (cedar is my preference — naturally rot-resistant, lighter, and bird-safe without extra sealing)
- One 3-foot length of 2x4 for the top crossbar or arm(s)
- Two 18-inch lengths of 2x4 for a base platform, or one metal ground spike anchor (available at hardware stores for about $8–12)
- 1.5-inch and 3-inch exterior-grade screws (stainless or galvanized — don't use regular drywall screws outdoors, they rust fast)
- Wood glue rated for exterior use
- Screw-in eye hooks (galvanized, 3/8-inch) for hanging feeders
- Sandpaper, 80-grit and 120-grit
- Exterior-grade linseed oil or a non-toxic wood sealer for finishing (no stains with biocides, no glossy paint — birds can get confused by reflections)
Tools
- Drill/driver (a basic cordless drill works fine)
- Circular saw or hand saw
- Speed square for checking right angles
- Level (a small torpedo level is perfect for this)
- Tape measure
- Post-hole digger or a sturdy metal spike and hammer if you're anchoring into ground
- Clamps (2 are enough) for assembly
- Safety glasses and work gloves
No table saw, no joinery skills, no problem. Everything here can be done with a drill and a saw. If you don't own a post-hole digger, most hardware stores rent them for a few dollars, or you can skip the concrete entirely and use a metal ground spike anchor, I've used those for years with no issues in normal soil.
Step-by-step: building the freestanding feeding station
This gets you a single-post feeding station with a crossbar arm, standing about 6 feet tall with the feeders hanging at the right height. The whole build takes 2 to 3 hours including drying time.
- Cut your post to length. If you're using a ground spike anchor, cut your 4x4 to 7 feet — you'll lose about 12 inches into the anchor. If you're digging a hole and setting in concrete or packed gravel, cut to 8 feet and plan for 18 to 24 inches underground.
- Cut the crossbar arm. A single arm of 24 to 30 inches works well for two hanging feeders. If you want two arms (one on each side), cut two 18-inch pieces. Sand all cut ends smooth with 80-grit, then 120-grit.
- Mark and drill the arm attachment point. Measure down 3 to 4 inches from the top of your post and mark the center. This is where your crossbar attaches. Pre-drill to prevent splitting — cedar splits easily if you skip this step.
- Attach the arm(s) to the post. Use two 3-inch screws per arm, plus wood glue for extra strength. Check with your speed square that the arm sits perfectly horizontal before the glue sets. Clamp it while the glue dries.
- Add eye hooks to the arm. Space them evenly along the underside of the crossbar, at least 8 inches apart so hanging feeders don't knock together. Screw them in by hand — no drill needed, just grip the shaft with pliers for the last few turns.
- Sand the whole structure once more with 120-grit to remove any rough edges birds could catch on.
- Apply your exterior finish. Brush on linseed oil or non-toxic sealer on all exposed surfaces. Let it dry fully (usually 24 hours) before placing outside.
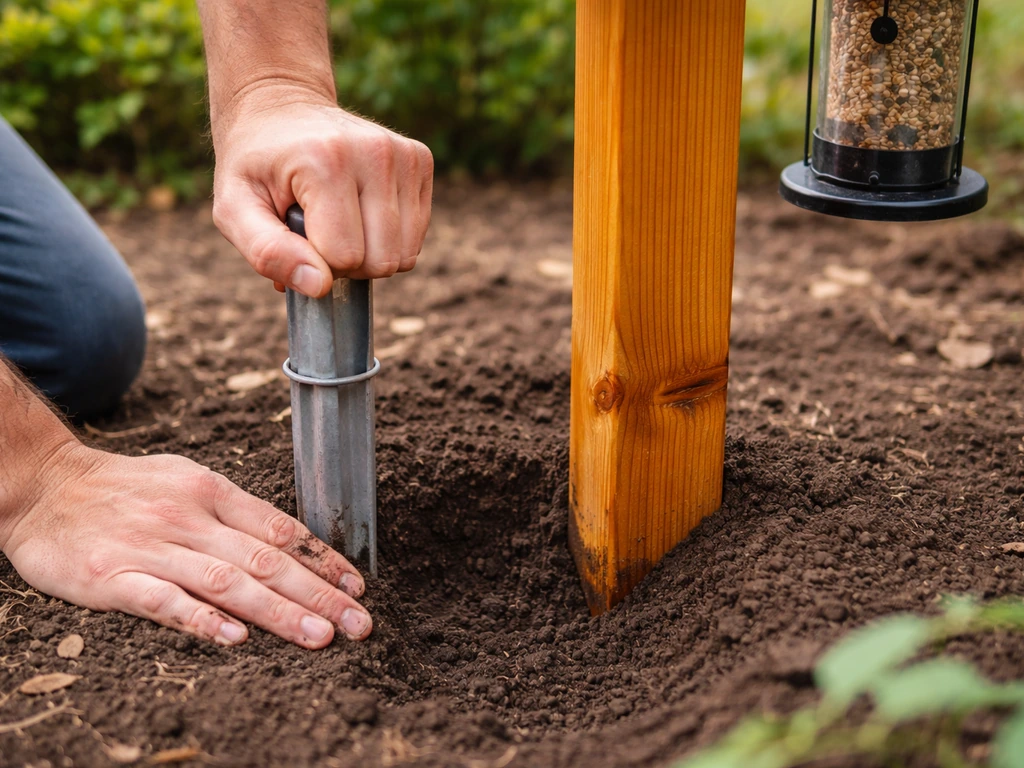
- Set the post. Drive in your ground spike anchor with a hammer and a scrap block of wood to protect the spike top, then slide the post into the anchor and tighten the bolts. Or dig your hole 18 to 24 inches deep, set the post, check it's plumb with your level, and pack with gravel or fast-setting concrete.
- Hang your feeders and check the height. The feeder bottoms should land around 5 to 6 feet off the ground. Adjust before the concrete sets if needed.
One thing I learned the hard way: don't skip pre-drilling. I split a gorgeous piece of cedar with an overconfident screw on my second build and had to start the arm over. Takes 30 seconds, saves you a board.
If you want a natural branch-style look instead of cut lumber, check out the approach in this guide on how to make a bird tree stand, it uses actual salvaged branches and gives a much more organic feel in a naturalistic garden.
Making it safe, stable, and weatherproof
Stability in wind
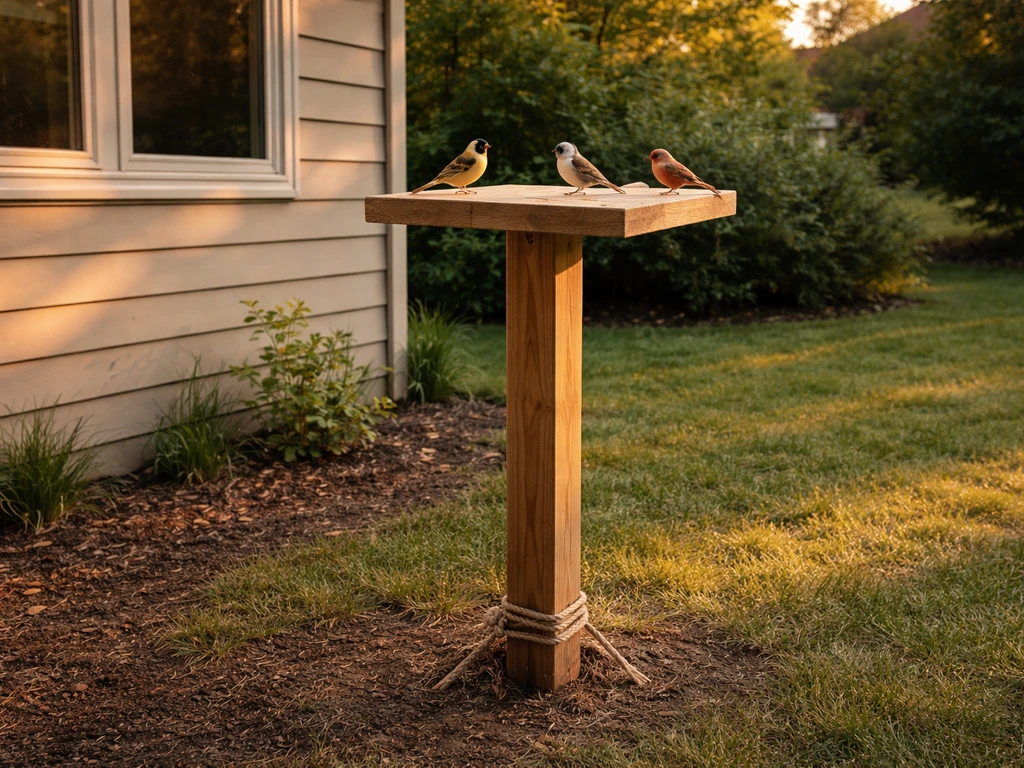
The number one failure mode for garden bird stands is tipping in wind, especially once loaded with filled feeders. If you're using a ground spike, go at least 12 inches deep in firm soil, 18 inches if you're in a windier area. If you're in sandy or loose soil, use concrete. I also add a cross-base (two 18-inch 2x4 boards screwed together in an X shape at the post base, sitting on the ground surface) as a secondary stabilizer for ground-spike builds. It looks intentional and adds a lot of tip resistance.
Weatherproofing
Cedar and pressure-treated lumber handle rain and sun well, but they still benefit from a yearly coat of linseed oil or non-toxic exterior wood sealer. Avoid polyurethane varnishes with shiny finishes, the reflection can disorient birds. Avoid any stain or preservative that contains copper naphthenate or arsenic-based compounds (older pressure-treated wood used these, modern ACQ-treated lumber is fine for stands that birds land on but won't nest inside). All metal hardware should be galvanized or stainless to prevent rust streaking and structural weakening over time.
Predator deterrence
A freestanding post in an open area is already safer than a feeder hung from a tree branch, because squirrels and cats have fewer jumping-off points. To go further, add a metal squirrel baffle, a cone-shaped sleeve that slides onto the post about 4 feet up. For cats, placing the stand at least 10 feet from shrubs, fences, or other launch points makes ambush much harder. Avoid placing the stand directly against a wall or fence, which functions as a climbing ladder for both squirrels and predators.
Finishing up, placing it right, and keeping it clean
Once your finish has dried and the post is anchored, do a final walk-around check: tug the post to confirm it doesn't rock, run your hand along all edges and joints to feel for splinters or sharp hardware ends, and confirm the arm screws are tight. Birds are light but feeders filled with seed are not, a large platform feeder can hold 3 to 4 pounds of wet seed after rain.
For placement: choose a spot with some open sightlines so birds can see approaching predators, but within 10 to 15 feet of shrubs or small trees so they have a quick escape route. Follow that 3-30 window rule for distance from your house. For squirrel-proof placement, Ideal Home summarizes the wildlife “5-7-9” rule, which focuses on spacing between bird feeders and nearby launch or jump structures 3-30 window rule. For bird baths specifically, morning sun and afternoon shade is the target, it keeps the water from getting too warm and reduces how often you need to top it up.
Maintenance is easy but it matters. Clean feeding trays and platform surfaces every 1 to 2 weeks with a 10% bleach solution (1 part bleach to 9 parts water), rinse thoroughly, and let dry before refilling. Change bird bath water every 2 to 3 days to prevent mosquito breeding and algae. Every spring, check all screws and joints for rust or loosening, re-apply wood sealer if the surface looks dry or weathered, and inspect the ground anchor or concrete footing for erosion or movement. A 20-minute seasonal check keeps the stand going for years.
If you decide later that you want to mount a birdhouse on your stand instead of (or alongside) feeders, the structural process is nearly identical, the post dimensions and anchoring method are the same. The guide on how to make a bird house pole covers the specific mounting heights and orientation details that matter when a nest box is involved.
Optional upgrades to attract specific birds
Once your basic stand is up and birds are using it, you can tune the setup to attract particular species. Here's what actually works, based on what each type of stand offers.
| Target species | What to add to the stand | Why it works |
|---|---|---|
| Hummingbirds | Add a small arm hook at 5–6 feet for a nectar feeder; plant red or orange flowers nearby | Hummingbirds prefer eye-level feeders in open but sheltered spots |
| Woodpeckers | Hang a suet cage from a lower arm, about 4–5 feet up | Suet mimics their natural food source; lower height feels safe for clinging |
| Finches (goldfinch, house finch) | Add a tube feeder filled with nyjer (thistle) seed | Nyjer is specific enough that it mostly attracts finches and reduces squirrel interest |
| Sparrows and wrens | Add a low tray platform (24–30 inches) with millet or cracked corn | Ground-feeding instinct means lower trays feel more natural |
| Orioles | Hang an oriole feeder with grape jelly and orange halves at 5–6 feet | Orioles arrive in spring; bright orange color on the feeder helps attract them |
| Bluebirds | Add a shallow water dish or birdbath basin; keep nearby open lawn area clear | Bluebirds hunt insects across open ground and use water sources frequently |
You can also get more creative with the stand structure itself to appeal to specific birds. A natural branch arm instead of a cut 2x4 gives woodpeckers and nuthatches a surface texture they prefer. Wrapping the base of an arm in rough bark gives smaller birds extra grip. These are small additions that cost nothing but make the stand feel more like a real piece of the garden ecosystem.
The beauty of a freestanding build is that you can keep modifying it. Swap out a feeder for a bath basin in summer when water is scarcer. Add a suet cage in winter when high-calorie food matters most. If you want to understand the full range of stand styles, from simple perch bars to elaborate multi-station rigs, the broader guide on how to make a bird stand is a good place to keep exploring designs as your confidence grows.
Start with one purpose, build it well, and watch how your local birds respond. You'll know within a week or two whether you need water, more seed variety, different heights, or a new spot. The birds will tell you, and that feedback loop is honestly one of the most satisfying parts of this whole project.
FAQ
How do I choose the right stand height for different birds?
Use about 5 to 6 feet for most hanging feeders, and then add lower perches or crossbars in the 2 to 4 foot range if you notice small birds hesitating. If birds keep landing briefly and retreating, raise the main feeding height a little, since they feel safer when they can watch predators from a higher perch. For a bath, keep the basin shallow (about 1.5 to 2 inches) so smaller birds can stand without struggling to get footing.
Can I put a bird stand closer than the 3-30 window rule to my windows?
It’s possible, but the safe approach is still to follow the 3-30 distance, or place the stand at the very low end of that guideline (within about 3 feet) so birds cannot pick up enough speed to harm themselves if they veer toward the glass. If you must break the rule due to limited space, add visual deterrents on the window (like curtains or window film) because the stand location alone may not prevent collisions.
What should I do if my stand wobbles after installing it?
Don’t rely on the first set of screws and anchors. Re-check the footing depth and soil firmness, then confirm the base is level, and tighten all arm bolts after the post settles. For ground spike builds in loose or sandy soil, the fix is usually switching to concrete or adding the cross-base stabilizer (the X-shaped 2x4 support) so the post resists rocking under feeder weight.
Is it safe to use pressure-treated lumber for parts birds land on?
Modern ACQ-treated lumber is generally acceptable for a stand surface birds can land on, but avoid using it for any area that birds might nest inside. If you’re building a setup that includes a nest box, use cleaner, non-treated materials for the interior of the box and keep treated lumber components outside that nesting space.
How deep should I set the post if I’m using a ground spike anchor?
Go at least 12 inches deep in firm soil, and about 18 inches deep in windier areas. If your ground is sandy or loose, plan on concrete instead, because spikes can loosen and the feeder weight can increase tipping risk over time.
Can I mount the stand near a fence or wall?
Avoid placing it directly against a wall or fence, since those surfaces create easy climbing paths for squirrels and cats. If you’re limited by space, keep it pulled away far enough that predators cannot use the barrier as a launch point, and prioritize open sightlines plus shrubs that are at least 10 to 15 feet from the stand so birds have cover without making an ambush route.
Do I need a baffle if I don’t have squirrels?
If you have no squirrels now, you may still want at least basic protection in regions where they can move in seasonally. A baffle on the post (around 4 feet up) prevents climbing regardless of whether you see squirrels immediately, and it also helps reduce general predator access to feeder height.
How often should I refill seed and water, and what’s the fastest cleanup routine?
For baths, change water every 2 to 3 days to help prevent mosquitoes and algae. For feeding surfaces, clean trays and platforms every 1 to 2 weeks with a diluted 10% bleach solution, then rinse thoroughly and let everything dry before refilling. If you see heavy buildup or wet seed, clean sooner, since moisture accelerates mold and bacteria growth.
What’s the best wood finish if I want protection from rain but minimal bird risk?
Use a linseed oil coat or a non-toxic exterior wood sealer, and apply it yearly or whenever the surface looks dry or weathered. Avoid shiny polyurethane finishes, since reflections can confuse birds. Also steer clear of older preservative formulations with arsenic-based compounds or copper naphthenate.
My feeder area has lots of rain-mold issues. How can I reduce it?
Start by avoiding full midday sun, since constant heat can dry the seed inconsistently while still encouraging algae in baths. Aim for morning sun with afternoon shade, so water stays comfortable and feeds less microbial growth. Also consider using a platform feeder that can drain after rain, and wipe off wet seed during your regular cleaning rather than letting it build up.
Can I adapt this stand later to hold a birdhouse as well?
Yes, the structural anchoring approach stays basically the same. The key is planning clearance so the nest box has a safe orientation and mounting height, since nest-box rules depend on species and on how exposed the entrance is. When adding a box later, re-check tip stability, because extra weight at a side position can change the balance.
How do I know within the first week if my stand choice is wrong?
Watch bird behavior, not just visits. If birds stop briefly and never linger, try changing the element you’re offering (add water if you only have seed, or add perches near cover if birds look for a place to pause). If you see repeated avoidance of the area, reassess siting using escape cover (near shrubs or small trees) and predator visibility, since open-but-not-exposed placement often matters as much as the build itself.
Next Articles
How to Make a Bird Stand at Home: DIY Steps
DIY guide to build a stable bird stand at home with safe materials, steps, dimensions, and placement tips for backyard b

How to Build a Chimney Swift Bird House DIY Guide
Step-by-step DIY plans to build a chimney swift bird house, with correct dimensions, placement, and weatherproofing for

How to Build an Oriole Bird House: Step-by-Step DIY
Step-by-step DIY for building an oriole bird house with right dimensions, weatherproofing, predator-safe placement, and