You can build a bird rope ladder in an afternoon using untreated sisal rope, natural wood dowels, and a handful of figure-eight knots. The key details that make it safe are rope type (sisal over cotton), rung spacing between 2 and 4 inches depending on your bird's size, knots that are dressed tight so rungs can't slide, and sealed or whipped rope ends so nothing frays into a foot-tangling hazard. Get those four things right and you'll have a sturdy, bird-safe enrichment ladder that holds up in a cage, aviary, or covered outdoor setup. If you are also training steady perching behaviors, pair this with a dedicated perch by using the same bird-safe materials and spacing principles in how to make a bird training perch bird-safe enrichment ladder.
How to Make a Bird Rope Ladder: Step-by-Step DIY Guide

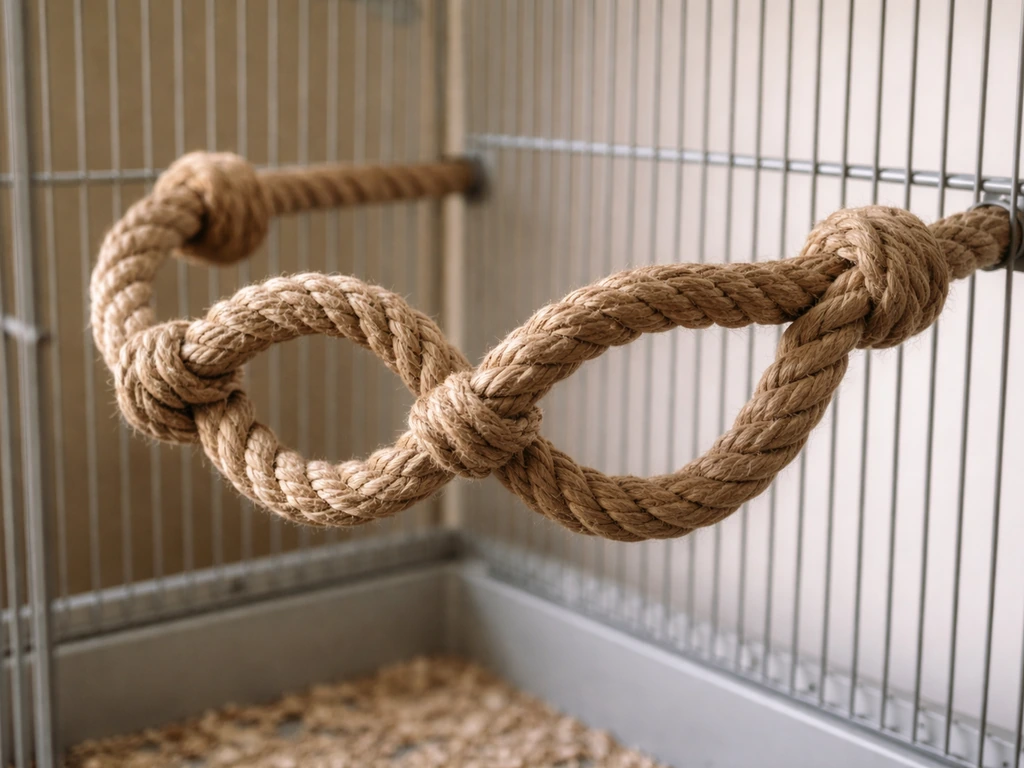
What a bird rope ladder actually is and where it works best
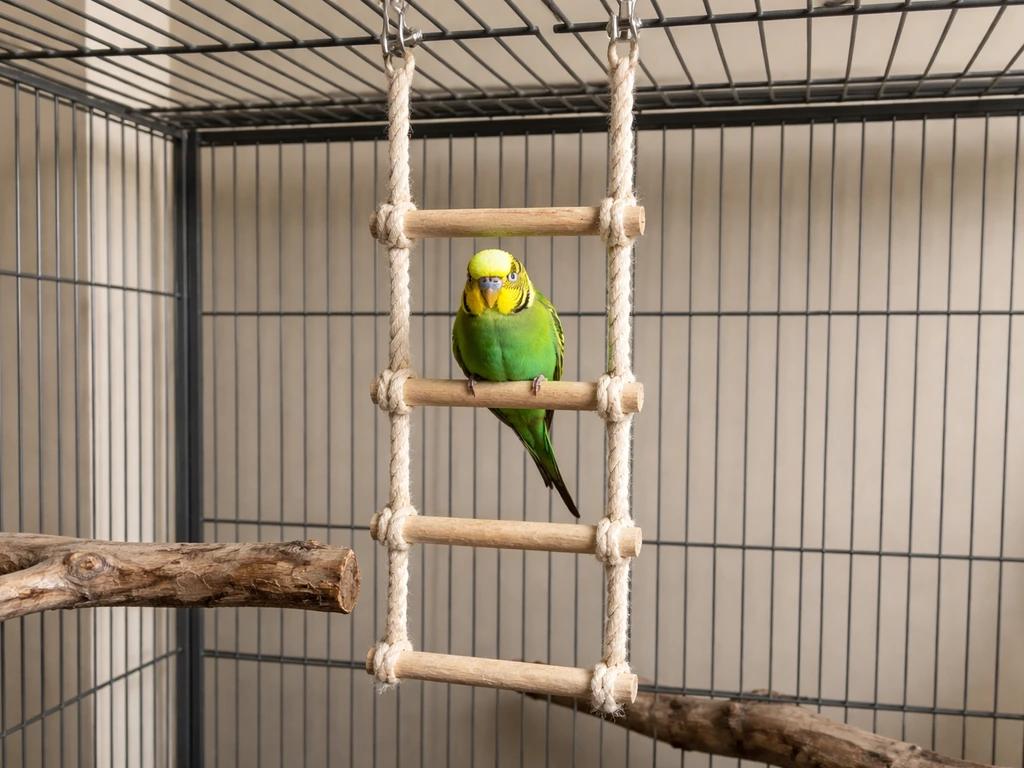
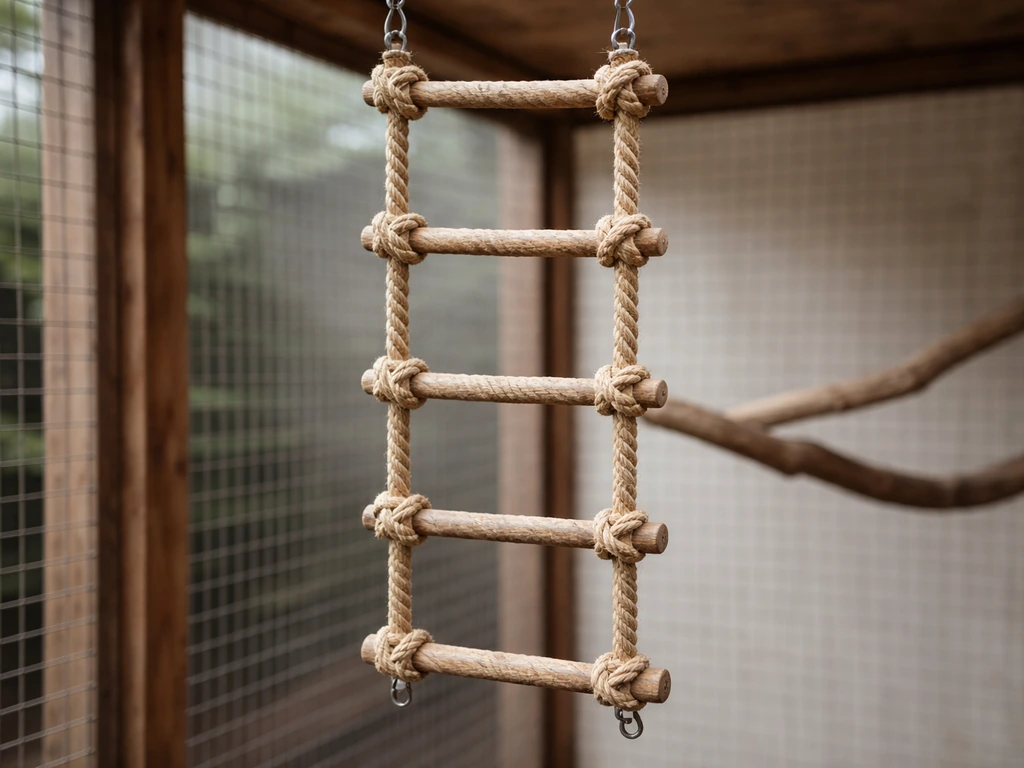
A bird rope ladder is exactly what it sounds like: two vertical side ropes connected by horizontal rungs, hung so a bird can grip and climb. It's an enrichment structure first and foremost. Birds that climb naturally, like parrots, parakeets, and finches, use the moving, flexible surface to practice balance, strengthen their feet and legs, and keep themselves mentally occupied. Unlike a fixed wooden perch, the gentle sway of a rope ladder engages a bird's stabilizer muscles and mimics the movement of a real branch or vine.
Where it works best depends on your setup. Inside a large cage or walk-in aviary, a rope ladder is ideal as a vertical climbing path between perch levels or as a route up to a nesting box. In a covered outdoor aviary, one can span a corner or hang diagonally from a high anchor point to a lower perch.
They're less practical in fully exposed outdoor spots where rain and UV will break down natural fibers quickly, though a quick weatherproofing coat extends their life considerably. If you're building a DIY bird housing structure and want to give birds a fun way to access elevated nesting areas, a rope ladder is one of the most rewarding things you can add.
If you’re also wondering how to make a bird house in Minecraft, you can apply the same idea of adding cozy nesting access to your in-game build. It pairs naturally with a rope perch setup, and if you've already built a custom perch for your bird, the techniques here will feel very familiar.
If you want to include a more stable resting option, follow the same rope safety principles to learn how to make a bird perch that fits your bird's grip rope perch setup.
Rope types and materials that are actually safe for beaks and claws
This is the most important decision in the whole build, and it's worth slowing down on. The wrong rope can injure or even kill a bird, so let me be direct about what works and what doesn't.
Untreated natural sisal is the gold standard. It's stiff enough to hold knot positions well, doesn't unravel into long loose threads at cut ends as readily as cotton, and most birds can grip it without their nails slipping. The texture also gives beaks something satisfying to work on without the rope disintegrating into swallowable fibers quickly. Look for sisal that's explicitly untreated or unbleached. Rope sold for agricultural use is often treated with pesticides or preservatives, which is exactly what you don't want near a bird.
Tightly braided cotton rope is an option, but it comes with a real caveat. Cotton unravels into long threads faster than sisal, and those loose loops are a genuine hazard. A bird's toe or nail can catch in a frayed loop, and if the bird panics and pulls, serious injury follows. If you use cotton, go for the tightest braid you can find and inspect it far more frequently than you would sisal.
Personally, I switched to sisal after a cotton prototype started looking ragged within two weeks. Synthetic ropes like nylon or polypropylene are generally not recommended because they can create sharp melted edges when cut, are slippery for gripping, and some have dyes or coatings that aren't safe for birds that chew everything they touch.
For the rungs themselves, untreated hardwood dowels are the right choice. Birch, maple, or oak dowels work well and are easy to find at any hardware store. Avoid pine or cedar: pine is too soft and splinters easily, and cedar contains aromatic oils that can irritate a bird's respiratory system. Dowel diameter should match your bird's foot size. A rough guide: 3/8 inch diameter for small birds like budgies and finches, 1/2 to 3/4 inch for medium birds like cockatiels and conures, and 1 inch or larger for bigger parrots. Sand every dowel smooth with 120-grit sandpaper before you start, and wipe off the dust.
| Material | Safety Rating | Best For | Watch Out For |
|---|---|---|---|
| Untreated sisal rope | Best choice | All bird sizes | Must be labeled untreated/unbleached |
| Tightly braided cotton rope | Acceptable with caution | Smaller birds, supervised use | Unravels into hazardous loose threads quickly |
| Nylon or synthetic rope | Not recommended | Not suitable | Slippery, sharp melted edges, possible coatings |
| Untreated hardwood dowels (birch, maple, oak) | Best choice | All rung sizes | Sand smooth before use |
| Pine or cedar dowels | Avoid | Not suitable | Pine splinters, cedar oils irritate respiratory system |
Tools you need and how to set up safely
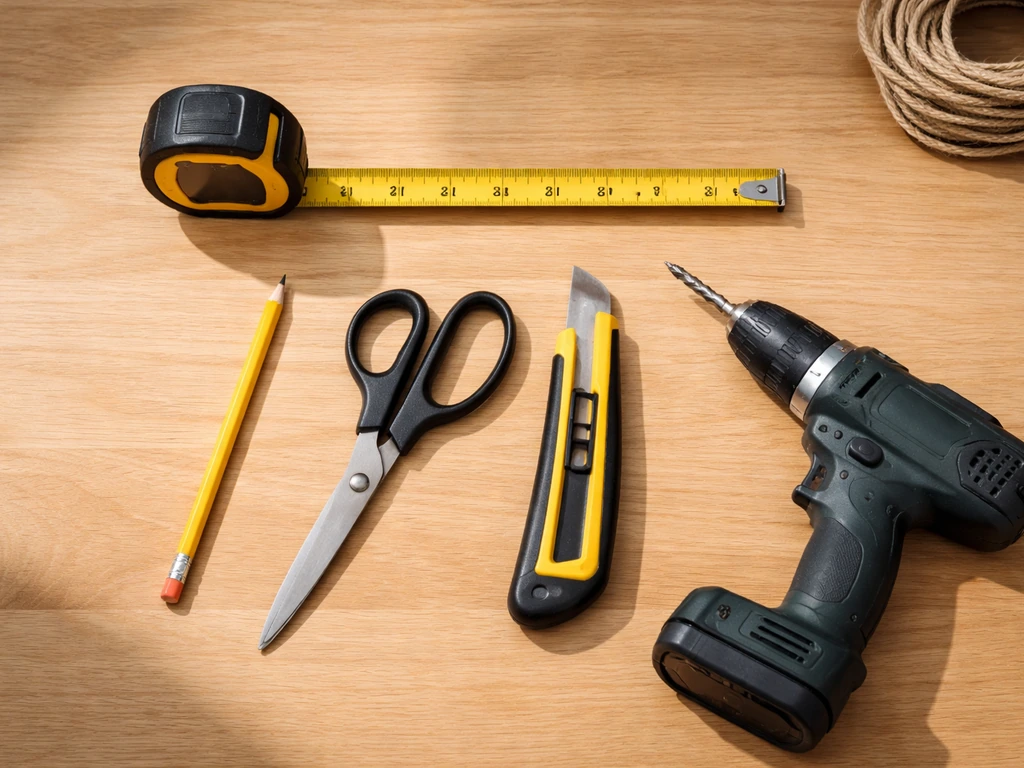
You don't need a workshop full of gear for this. Here's what I use for a standard build:
- Measuring tape and a pencil
- Sharp scissors or a utility knife for cutting rope cleanly
- A drill with a bit slightly larger than your rope diameter (for drilling holes through dowels)
- 120-grit sandpaper
- A lighter or candle (if using synthetic rope for sealing ends) or whipping twine (for natural fiber ends)
- Workbench clamps or a vice to hold dowels steady while drilling
- Work gloves for handling cut rope ends
Set up on a stable surface, ideally a workbench or a solid table. When drilling through dowels, clamp them securely so they can't spin or roll. This matters a lot because a rolling dowel and a drill bit in the same hand is how you end up drilling through your palm instead of the wood. Drill slowly and keep the bit centered.
I usually mark the center of each dowel with a pencil dot before drilling so the rope holes come out aligned on both sides. If you're sealing rope ends with heat, do that step away from any sawdust or wood shavings, and keep a small cup of water nearby. Always wear gloves when handling freshly sealed rope ends because the melted material stays hot longer than you'd expect.
How to build the ladder: measurements, cuts, knots, and spacing
Let's get into the actual build. If you're specifically looking for a bird perch out of PVC pipe, you can adapt the same idea of stable mounting and the right spacing for safe foot grip rope ladder. I'll walk through a standard aviary or large-cage ladder, roughly 18 inches wide and 24 inches long with 8 rungs, which is a practical size for most setups. Scale up or down as needed.
Step 1: Cut your rope and prep your rungs
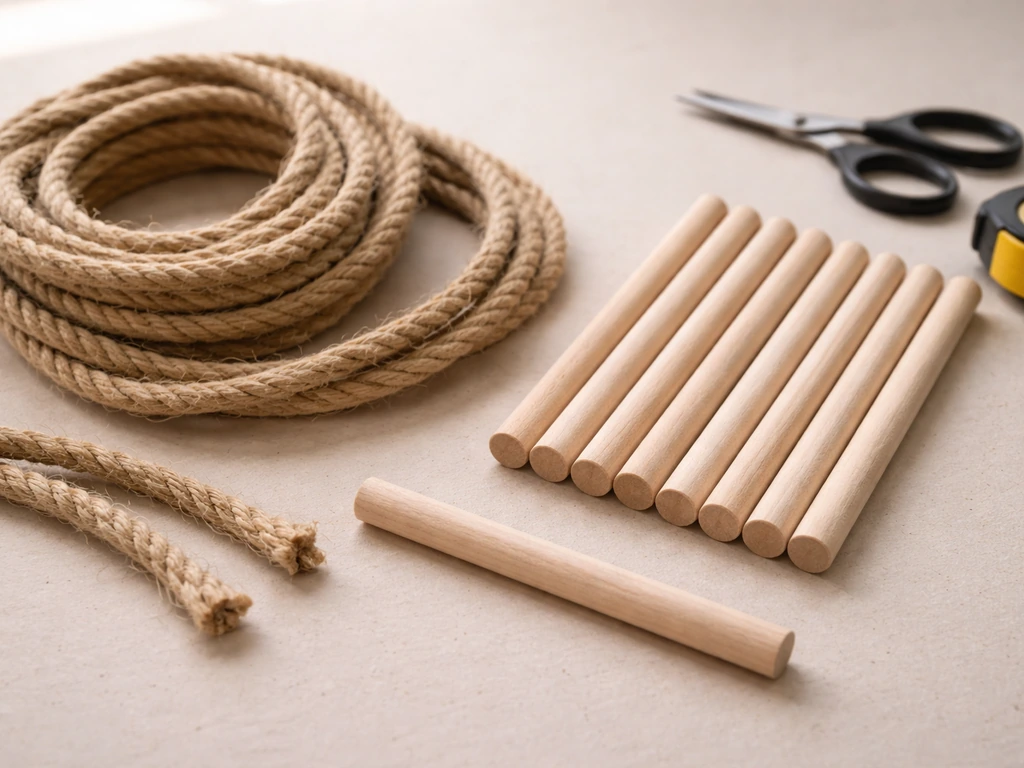
Cut two lengths of sisal rope, each about 36 inches long for a 24-inch finished ladder. The extra length accounts for knots, which eat up more rope than you'd think. Cut 8 dowels to 18 inches each. Drill a hole through each dowel about 1 inch from each end, centered on the dowel's flat face. The hole should be just slightly larger than your rope diameter so the rope threads through with a little resistance but doesn't require forcing. Sand every dowel thoroughly, paying extra attention to the drilled holes where rough edges could catch bird toenails.
Step 2: Seal your rope ends before you start knotting
If you're using sisal, whip the ends with a few tight wraps of waxed thread or thin twine to prevent unraveling. If you ever use synthetic rope (for a weatherproofed outdoor version), hold the cut end 1 to 2 inches from a lighter flame to melt it slightly, then use the flat side of a metal spoon or a gloved finger to smooth the melted tip into a neat seal. Don't hold the flame too close or you'll burn and blacken the end instead of melting it cleanly. Either way, sealed ends are non-negotiable because loose fraying rope is one of the main injury hazards for birds.
Step 3: Thread and knot the first rung
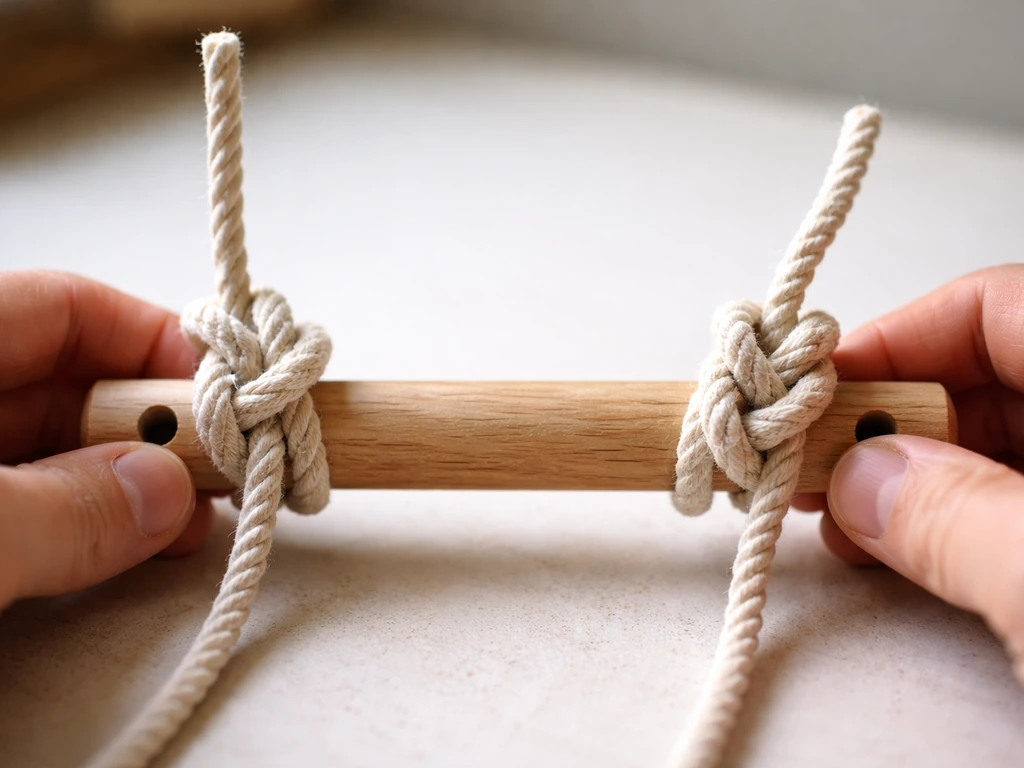
Thread one rope through the left hole of your first dowel. Pull it through until you have about 6 inches of tail on the top. Tie a figure-eight knot in the short tail, pulling it up tight against the underside of the dowel so the rung can't slide down. A figure-eight knot is the right choice here because it's bulky enough to not pull back through the drilled hole, it's easy to tie correctly, and it's simple to inspect later.
To tie it: make a loop, pass the working end over the standing part, then back through the loop from underneath. Pull both ends to tighten and dress the knot by smoothing it so it sits snug with no loose bights.
Repeat this on the right hole of the same dowel using your second rope. Now you have your bottom rung secured with both ropes hanging upward.
Step 4: Space and secure the remaining rungs
Rung spacing is one of the most common places people go wrong. Space rungs too far apart and smaller birds can't reach, or a bird's body could slip between rungs. Too close and the ladder becomes awkward to climb. For small birds, space rungs 2 inches apart measured from center to center. For medium birds, 3 inches works well. For large parrots, 4 inches is a comfortable climbing stride. Mark your rope at the correct intervals with a pencil before tying each knot so your spacing stays consistent.
Work your way up the ladder, threading each dowel through both ropes and tying a figure-eight knot below each rung to lock its position. After tying each knot, tug the rung firmly to make sure it doesn't shift. If a rung can slide, the knot isn't tight enough or wasn't dressed properly. Untie it and try again. This is worth the extra two minutes because a sliding rung under a bird's weight is how accidents happen.
Step 5: Create the top hanging loops
At the top of each rope, tie a secure loop for mounting. A figure-eight on a bight is ideal here: fold the rope back on itself to create a doubled length, then tie a figure-eight knot through both strands. The result is a strong, fixed loop that won't tighten under load or slip. Pull it firmly after tying and dress the knot so it sits flat. These loops are what take the bird's full weight, so don't rush this step.
Attaching the ladder safely: mounting, hardware, and placement
How you hang the ladder matters as much as how you build it. A poorly anchored ladder that swings wildly or comes loose under load defeats the whole purpose and can injure a bird.
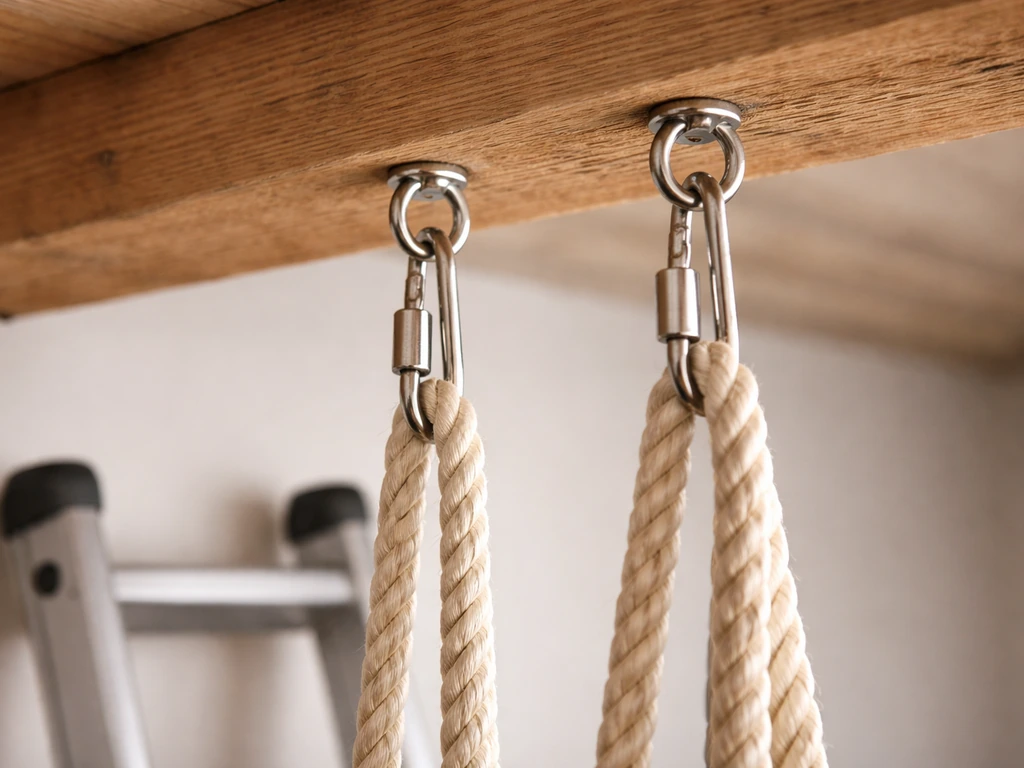
For hardware, use stainless steel eye bolts and quick-link connectors. Stainless steel won't rust or corrode in an aviary environment, and it's strong enough to handle repeated loading without fatigue. Avoid galvanized hardware because the zinc coating can be toxic if birds chew on it, and skip plain steel entirely in outdoor or humid environments. Size your hardware to match the rope diameter: a 1/4-inch eye bolt is more than adequate for sisal rope up to 3/8-inch diameter. If you want to be able to re-tension the ladder after the rope stretches over time, a small turnbuckle between the eye bolt and the hanging loop lets you take up slack without removing the whole ladder.
For placement, hang the ladder at an angle if possible rather than perfectly vertical. A slight lean, say 70 to 80 degrees from horizontal, gives birds a more natural climbing feel and reduces the swinging that can happen with a purely vertical hang.
Bottom anchor the ladder if you can: attaching the lower end to a stable point like a perch or aviary frame prevents the whole structure from swinging out from under the bird when it steps on the bottom rung.
If you also need a solid place for the bird to land and rest, you can learn how to make a bird perch in Minecraft with the same focus on stability and spacing attaching the lower end to a stable point like a perch. This is the single most overlooked detail in most rope ladder builds, and fixing it takes only a small S-hook or a short length of rope looped to a lower anchor.
Height placement depends on your bird. Hang the top of the ladder at a level birds are already comfortable using: near an existing perch or the entrance to a nesting box. Birds are more likely to explore a new ladder if it connects two spots they already use rather than floating in the middle of empty space.
Finishing, weatherproofing, and keeping it clean
For an indoor cage or covered aviary, the bare sisal and sanded wood finish is all you need. Don't apply any oil, varnish, or sealer to the wood rungs because birds will chew them and ingest whatever is on the surface. Leave the wood raw. The same rule applies to the rope: no coatings, dyes, or treatments.
For an outdoor setup that gets rain exposure, you have a couple of options. First, position the ladder under a roof overhang or a stretch of shade cloth so it's never fully soaked. Second, consider using a tightly woven polyester or polypropylene rope (rather than sisal) specifically for outdoor builds, since natural fibers rot and mold when repeatedly wet. If you go synthetic for outdoors, choose undyed, food-safe-grade rope and seal all ends with heat. You'll sacrifice some natural grip texture, but the ladder will last far longer in weather. Check the mounting hardware monthly in outdoor locations and tighten or replace any fasteners that show rust or loosening.
Cleaning is straightforward. Remove the ladder from its mounting points, scrub it with warm water and a stiff brush to remove droppings and debris, and let it dry completely in sunlight before re-hanging. Never put a damp rope ladder back in use because wet natural fiber loses strength and invites mold growth. If a rung gets cracked or a section of rope looks significantly soiled or discolored and won't clean up, replace that component rather than putting it back in service.
Enrichment tips and fixing common problems
When you first introduce the ladder, don't just hang it and expect the bird to immediately know what to do with it. Put a small treat (a piece of fruit or a favorite seed) on one of the lower rungs to draw the bird's attention. Let the bird explore at its own pace. Some birds investigate new things immediately, others need a few days of having the ladder in their space before they trust it enough to step on it. Supervise the first few sessions, especially if you have a bird that tends to chew through rope quickly, since those birds need extra-frequent inspections.
Rope stretching
Natural fiber rope stretches under load, especially when it gets wet and dries repeatedly. After the first week of use, check your rung spacing again and re-tie any knots that have shifted. If you added a turnbuckle at the top, use it to take up any overall length stretch. Stretching is normal and doesn't mean the build failed. It just means the ladder needs a quick once-over in its first few weeks.
Rung shifting
If a rung slides up or down the rope, the knot below it wasn't tight or dressed correctly. Take the ladder down, untie that rung's knots, and re-tie them with more care. Pull hard on the finished knot and tug the rung in both directions before re-hanging. A properly tied and dressed figure-eight knot with an appropriate tail (at least 2 inches of rope beyond the knot) won't slip under normal use.
Fraying and wear
This is the most important ongoing maintenance task. Inspect the entire ladder every week. Run your fingers along every section of rope and look at every knot. Any section showing significant fraying, loose loops, or broken strands should be repaired or replaced immediately.
Follow the same inspection and retirement approach used in rope safety programs: if a rope shows damage, fraying, or abrasion, remove it from service rather than relying on continued use significant fraying, loose loops, or broken strands should be repaired or replaced immediately. Don't wait until the damage is severe.
A single loose thread loop is enough to trap a bird's nail, and a frayed knot is a knot that's losing strength. This isn't being overcautious. Fraying and loose parts are the leading cause of rope toy and enrichment injuries in pet birds, and the fix is almost always as simple as trimming the loose fibers or replacing a short section of rope.
Stability issues
If the ladder swings too freely and the bird seems reluctant to use it, add a bottom anchor as described in the mounting section. A small length of sisal rope tied from the bottom rung to a fixed aviary frame point is all it takes. The ladder will still have some gentle sway, which is actually good for enrichment, but won't swing wildly when the bird steps on. If the whole structure feels loose at the top, check your eye bolt threads and tighten the quick-link connectors. Hardware can back off over time from vibration and repeated loading.
FAQ
What size bird ladder should I make if my bird is between categories (like a medium bird but not quite)?
Use the rung spacing that matches your bird’s comfortable stride, then test with the lowest rung first. If your bird is a borderline case, start with the middle option (about 3 inches center to center), but ensure the bird’s feet land squarely on each rung without stretching or slipping between rungs.
How much tail should I leave after tying the figure-eight knot so it cannot work loose?
Leave at least about 2 inches of rope beyond the knot, then dress it so no bights or slack loops hang outward. After tying, tug hard and also tug the rung up and down to confirm the knot cannot translate along the rope.
Can I replace dowels with natural branches or thicker wood slats?
You can, but keep the same safety rules: smooth all surfaces completely, choose wood that does not splinter easily, and drill or attach so the rung cannot pivot or crack under load. Avoid soft woods and any piece that has sharp bark edges or can flake while a bird grips it.
What if my rope holes in the dowels are too tight or too loose?
If they are too tight, widen the holes slightly with the appropriate drill bit so threading does not fray the sisal. If they are too loose, the rung can shift and stress knots, so remake the dowel with a properly sized hole or add a better-fitting knot placement rather than forcing the rope.
Do I need to oil or seal the wood dowels for hygiene or water resistance?
No, for bird safety you should not add oils, varnish, or sealers to wood rungs because birds chew and can ingest residues. For indoor builds keep them raw and sanded; for outdoor exposure use placement under cover and, if needed, switch to an outdoor-appropriate rope while leaving the wood unrsealed.
How do I prevent the ladder from tangling the ropes during hanging or transport?
Before hanging, untwist the side ropes and confirm both ropes run straight through the dowels. Keep the mounting loop aligned so the ropes travel in the same plane, then check that the bottom anchor does not twist as the ladder is attached.
Is it safe to use the ladder for breeding or nesting access?
It can be, but only if it is stable and inspected more often. Avoid setups where the ladder is the only access to a nest, and position the top so droppings and nesting material do not accumulate in a way that makes knots harder to inspect.
How often should I inspect and replace parts in a busy household?
At minimum, inspect weekly by feel (fraying and loose strands) and check knot security with a firm tug. If your bird chews rope frequently, inspect more often and consider replacing rope sections sooner rather than trimming frayed spots that keep spreading.
What’s the safest way to introduce the ladder if my bird is fearful of new items?
Place the ladder near favorite perching spots and start with a treat at the lowest rung so it is reachable without committing. Let the bird explore on its own for several days before expecting climbing, and supervise first sessions closely to catch quick refusals or frantic behavior.
Can I hang the ladder vertically instead of at an angle?
You can, but a slight angle usually helps it feel more like natural climbing and can reduce awkward bouncing. If you must go vertical, add a bottom anchor to limit swing and re-check rung spacing access for smaller birds, since they can struggle with a too-upright stride.
What should I do if the rope stretches after the first week?
Re-check overall tension and spacing, then re-tie any knots that shifted. If you installed a turnbuckle, use it to take up slack, but do not overtighten to the point that knots or dowels bind and restrict natural movement.
How do I clean a rope ladder without weakening the rope?
Remove it, scrub with warm water and a stiff brush to remove droppings, then dry completely in sunlight. Do not store or re-hang while damp, and if you see persistent discoloration or repeated-soiled sections that do not clean up, replace that rope section instead of reusing degraded fiber.
My bird’s nails catch on the rope sometimes, what’s the fix?
First check for fraying, loose loops, or unfinished rope ends near knots and top loops. If the rope looks intact, ensure rung spacing is appropriate for the bird’s feet so they are not stepping at an awkward angle that pulls nails across the rope.
Are there any hardware or connector choices that I should avoid indoors even if it’s not outdoor?
Avoid galvanized hardware and plain steel when possible, even indoors, because corrosion and chewability still matter. Use stainless hardware and check tightness periodically, especially at mounting points where vibration and load cycling can loosen connectors.
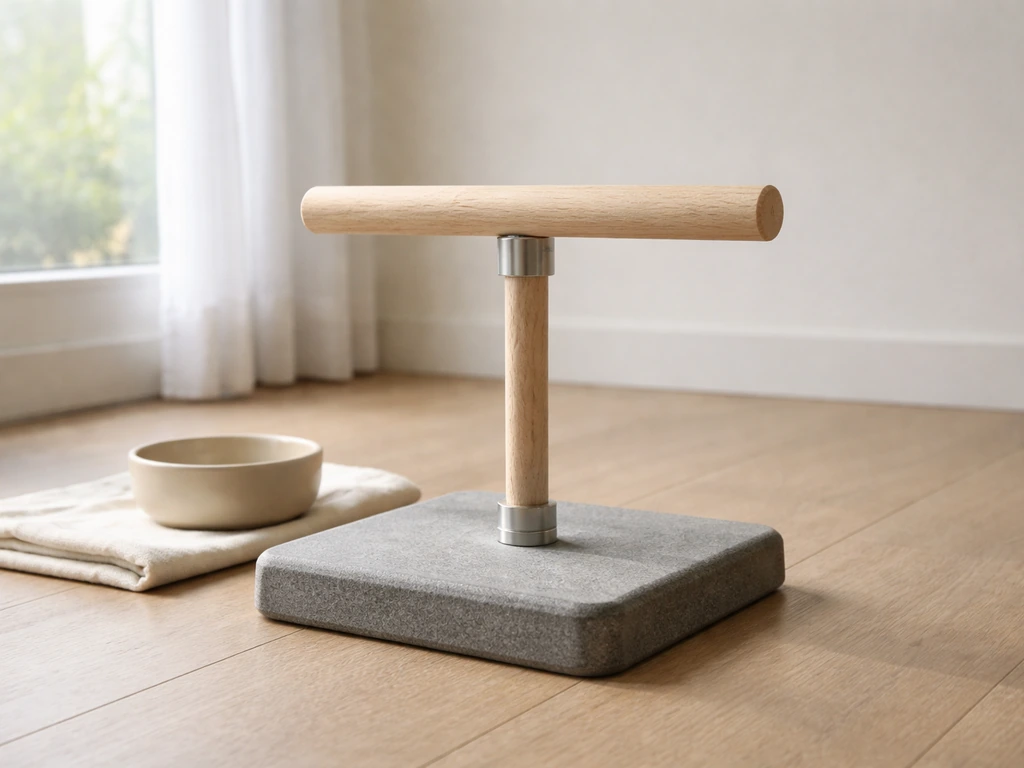
Build a safe DIY bird training perch with step-by-step plans, fitting tips, placement, training setup, and maintenance.
Step-by-step guide to build a safe rope bird perch, choosing the right rope, mounting, knotting, sizing, and maintenance

Step-by-step guide to build a stable, non-slip PVC bird perch with safe finishes, mounting options, and maintenance tips