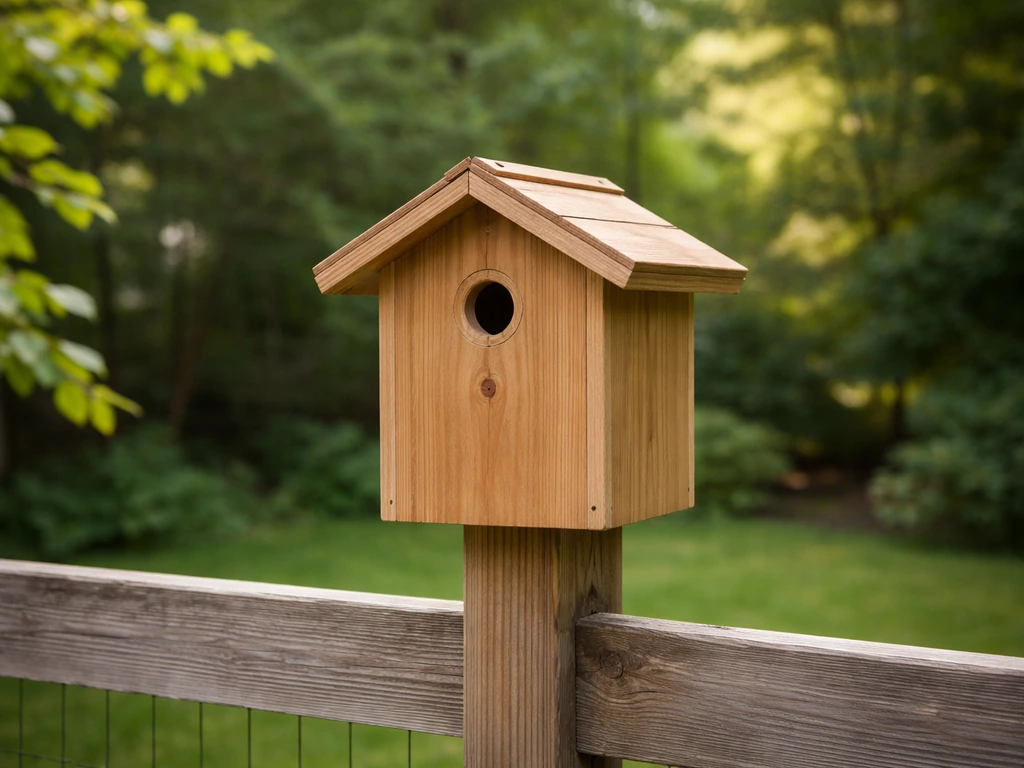
Hanging a Williamsburg bird bottle takes about 15 minutes and one screw, but getting the location, hardware, and angle right is what separates a bottle that birds actually move into from one that just sits there looking pretty. Most of these ceramic bottles are designed to mount flat against a wall on a single lag screw with a rubber washer, so the process is genuinely beginner-friendly once you know what you're working with.
How to Hang a Williamsburg Bird Bottle Safely

Marcus Thornton
24 May 2026
Know Your Bird Bottle Before You Pick Up a Drill
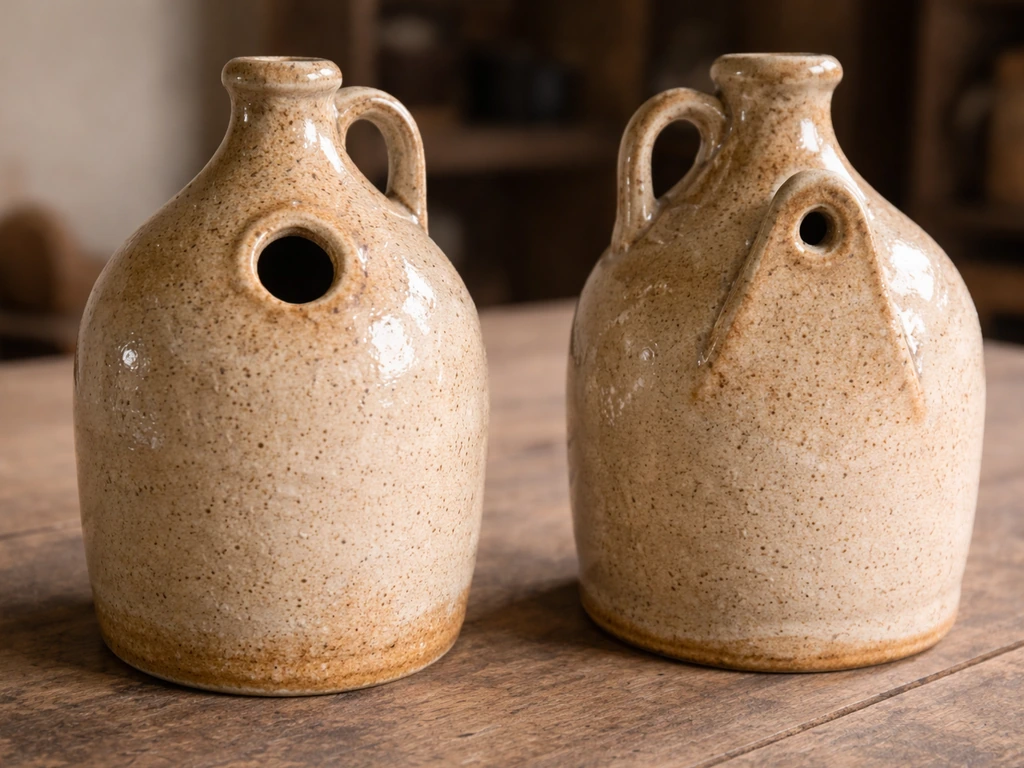
Williamsburg-style bird bottles are ceramic or stoneware structures shaped like a jug or bottle with a small entry hole near the top. They're designed for cavity-nesting birds like wrens and chickadees. Before you start drilling, take two minutes to figure out exactly what you have, because it changes your hardware choices.
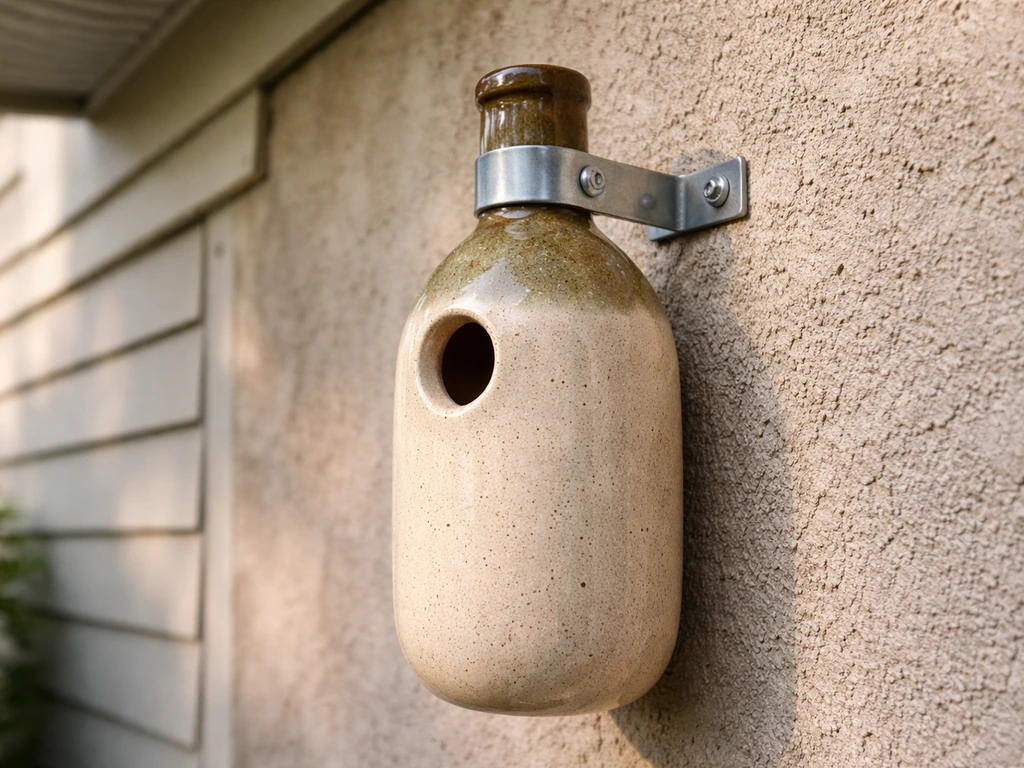
Check the back of the bottle first. Most Colonial Williamsburg-inspired designs, like the popular 'Peek a Boo' stoneware bottle and similar pieces from pottery studios, have a single mounting hole or keyhole slot on the back. Modern Artisans also notes that the “Peek a Boo” stoneware bird bottle is designed to hang securely on a single screw (included) single mounting hole or keyhole slot on the back. Some, like the W.A. Painter Pottery Works bottle, come with hardware included: a lag screw and a steel and rubber washer combination. Others just need a standard screw you supply yourself.
Also check for a cleanout hole. Many ceramic bottle birdhouses have a small opening on the back or bottom specifically for cleaning out old nesting material at the end of the season. If yours has one, you'll want to make sure it stays accessible after mounting, so don't press the bottle flush if it blocks that opening.
Finally, note the weight. The stoneware 'Peek a Boo' bottle, for example, weighs around 1.5 lbs. That's light enough for almost any mounting surface, but heavier handmade pottery pieces can weigh more. Knowing the weight helps you confirm your screw and wall anchor choices are adequate.
The Best Outdoor Spot: Location and Height
Where you hang this thing matters more than most people think. Small cavity-nesting birds are picky about their nesting sites, and a poorly placed bottle will be ignored all season while you wonder what went wrong.
Height and orientation
Aim for 6 to 12 feet off the ground on a vertical wall surface. Wrens and chickadees are comfortable with a fairly wide range of heights, but anything under 5 feet puts the bottle in easy reach of cats and curious kids, and anything over 15 feet makes it harder for you to clean and inspect. A north or east-facing wall is ideal.
This is not just preference: ceramic and stoneware retain heat, and a bottle on a south or west-facing wall that gets direct afternoon sun can become dangerously hot inside, which will either kill eggs and nestlings or drive birds away before they even start. This is a specific warning from multiple Williamsburg bottle makers, so take it seriously.
Shelter and cover
A wall under a porch eave or roof overhang is an excellent choice. The cover keeps rain from driving directly into the entry hole and reduces temperature swings. If you're mounting to a post or open fence, try to position the bottle so the entry hole faces away from prevailing wind and rain. Near shrubs or established foliage is also a good call: small birds like wrens want nearby cover to duck into if a predator shows up. Think of the foliage as their escape route, not just decoration.
Distance from windows and feeders
Keep the bottle either within 3 feet of a window or more than 30 feet away. That sounds counterintuitive, but it's based on solid bird-safety research: bottles placed at intermediate distances, say 10 to 25 feet from a window, send birds on a flight path that gives them enough speed to fatally collide with glass. Very close placement means any collision happens too slowly to cause injury. Very far placement avoids the trajectory entirely. The U.S. Fish and Wildlife Service and Audubon both support this guidance.
Also keep the bottle away from your busiest bird feeders. Feeder areas attract a constant stream of visitors including aggressive sparrows that can harass nesting birds and discourage them from settling in. A bottle placed 15 to 20 feet from your feeders, in a quieter corner of the yard, gives nesting birds the peace they need.
Choosing the Right Hardware for Your Surface
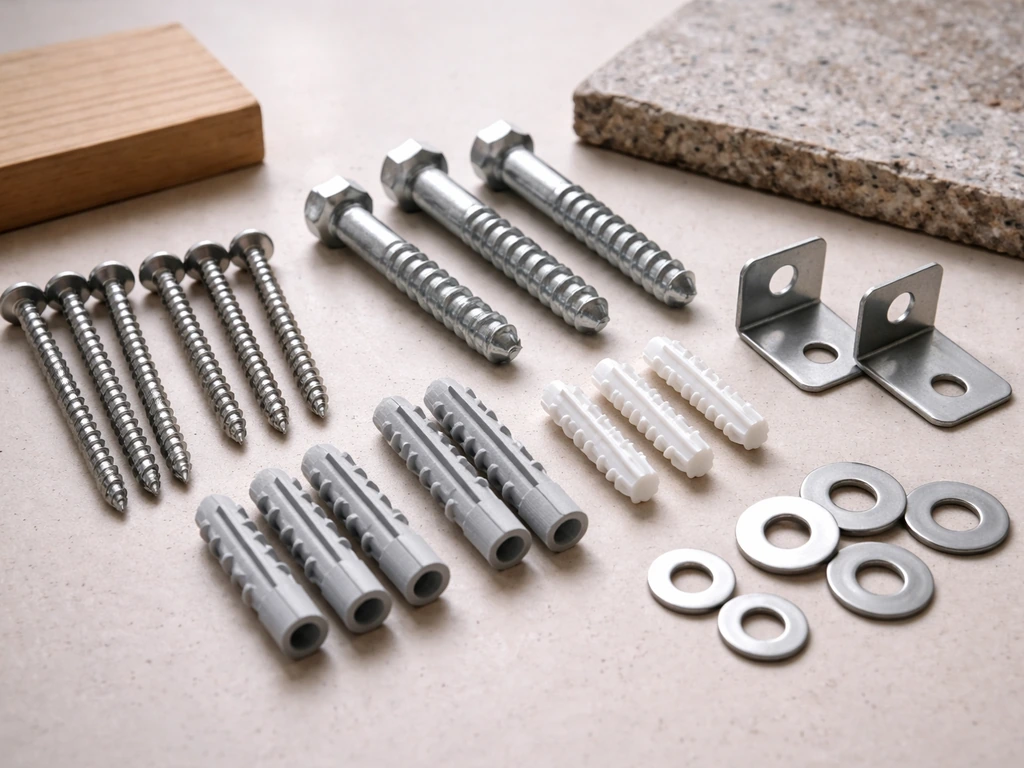
The mounting surface is the biggest variable here. A ceramic bottle weighing 1.5 lbs doesn't need heavy-duty anchoring, but it does need rust-resistant, weatherproof hardware that won't fail in the first rainy season.
| Surface Type | Best Hardware | Key Notes |
|---|---|---|
| Wood (fence, deck post, siding) | Stainless steel or coated lag screw, rubber washer | Pre-drill a pilot hole slightly smaller than the screw shank to prevent splitting |
| Brick or concrete block | Masonry anchor (e.g., Tapcon screw) or wall plug + stainless screw | Use a hammer drill with a masonry bit; standard drills will struggle |
| Vinyl or composite siding | Stainless screw into a wall stud, or hook into a deck rail bracket | Avoid hollow-wall anchors alone; locate a stud for anything over 1 lb |
| Wood post (freestanding) | Lag screw + rubber washer through a pre-drilled pilot hole | Can also use a post-mount bracket for easy repositioning |
| Porch beam or rafter (hanging) | Heavy-duty screw hook (stainless or galvanized), S-hook + chain or wire | Rated to at least 10 lbs to allow a safety margin |
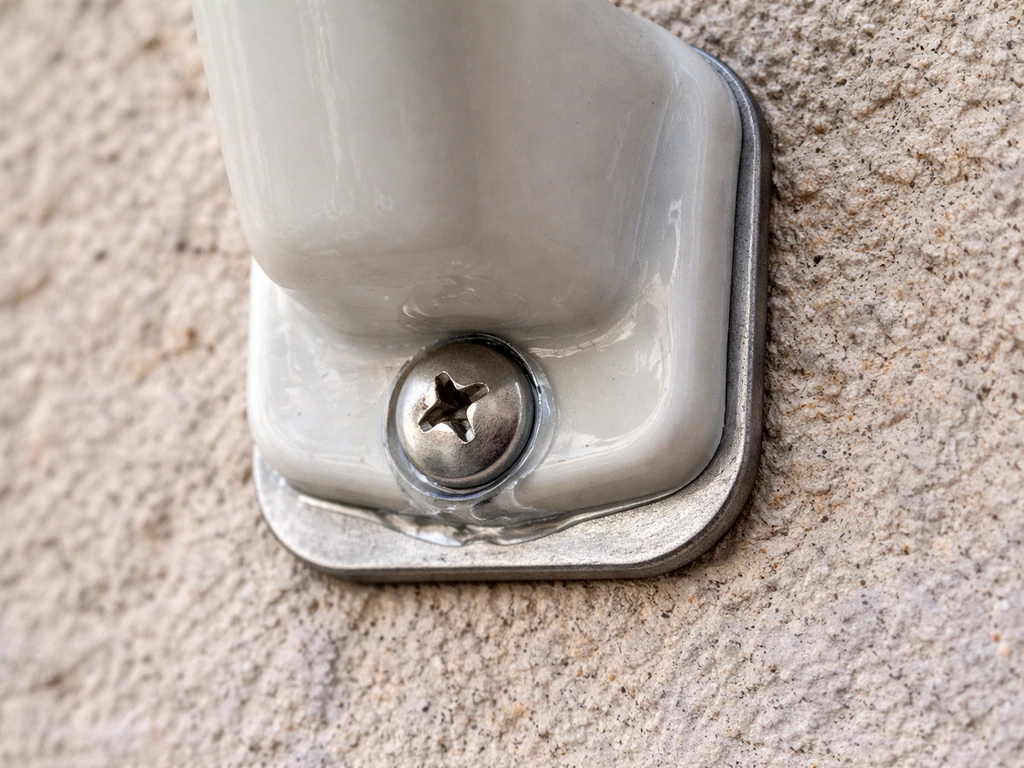
The rubber washer is worth calling out specifically. It sits between the screw head and the ceramic back of the bottle and does two important jobs: it prevents the hard screw head from cracking the ceramic when you tighten it, and it creates a slight cushion that reduces vibration and wobble. If your bottle didn't come with one, pick up a small rubber fender washer from any hardware store for under a dollar.
Tools and Materials Checklist
Get everything together before you start. It's a short list, and most of this is already in a basic toolbox.
- Drill with standard drill bits (and a masonry bit if mounting to brick or concrete)
- Screwdriver or driver bit matching your screw head (usually Phillips or hex)
- Lag screw: 2.5 to 3 inches long, stainless steel or hot-dip galvanized
- Rubber or neoprene washer (often included with the bottle)
- Level or level app on your phone
- Pencil for marking
- Tape measure
- Safety glasses
- For brick/concrete: masonry anchor or wall plugs
- Optional: hanging chain, S-hook, or wire if you prefer a suspended mount from a hook
A note on screw material: galvanized screws are cheaper and fine for most situations, but stainless steel holds up longer against rust in humid climates or areas that get a lot of rain. Since you're not going to want to redo this install every two years, stainless is worth the small extra cost.
Step-by-Step: How to Hang and Mount Your Williamsburg Bird Bottle
The steps below cover the most common scenario: mounting flat to a wood or wood-framed wall. I've added notes for brick and hanging mounts after the main steps.
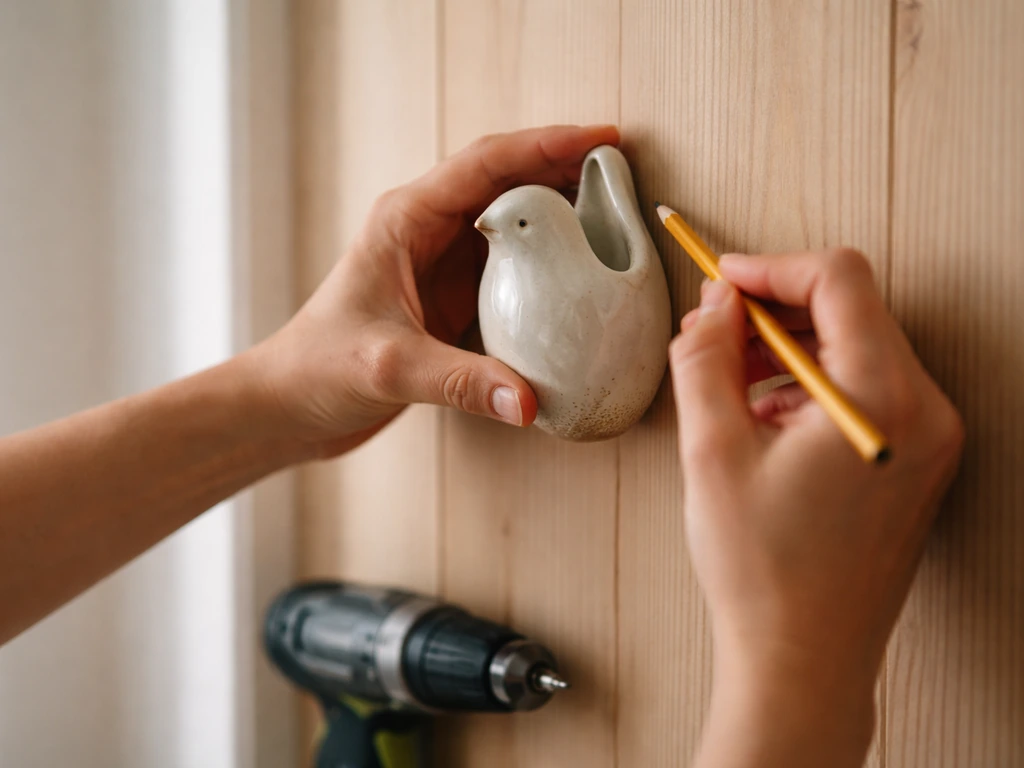
- Hold the bottle against the wall at your chosen height and mark the mounting point with a pencil. Use a helper or a small piece of tape to hold it in place while you step back and check the position visually.
- Confirm the bottle entry hole will face the direction you want (away from afternoon sun and prevailing wind). Adjust the mark if needed.
- Pre-drill a pilot hole at the pencil mark. For a standard lag screw, use a bit that is slightly smaller than the screw's threaded shank, typically 3/16 inch for a 1/4-inch screw. Pre-drilling prevents wood splitting and makes driving the screw much easier.
- Thread the rubber washer onto the lag screw before driving it into the wall. Drive the screw until the washer is snug against the wall surface, but leave about 3/8 to 1/2 inch of the screw protruding. The bottle's mounting hole or slot rests on this exposed shank.
- Hang the bottle on the screw. If it has a keyhole slot, slide the wide part over the screw head then slide down to lock it. If it has a simple hole, seat it over the screw head. The rubber washer on the wall side and the snug fit of the mounting point should hold it securely.
- Check that the bottle sits level using your level or app. Most bird bottles look best and drain best when they tilt very slightly forward (entry hole pointing just slightly downward, maybe 5 degrees). This keeps rain from pooling inside the entry hole.
- Gently tug and wiggle the bottle to confirm it's not going anywhere. It should feel solid with no rotation or slide.
Mounting to brick or concrete
Mark your spot and use a hammer drill with a masonry bit to drill into the mortar joint (easier to drill and less likely to crack the brick face). Insert a plastic wall plug, then drive your lag screw or masonry screw in, again leaving the right amount of shank exposed for the bottle to hang on. Tapcon-style concrete screws work well here and don't require a separate anchor, just the correct masonry bit size listed on the package.
Hanging from a hook
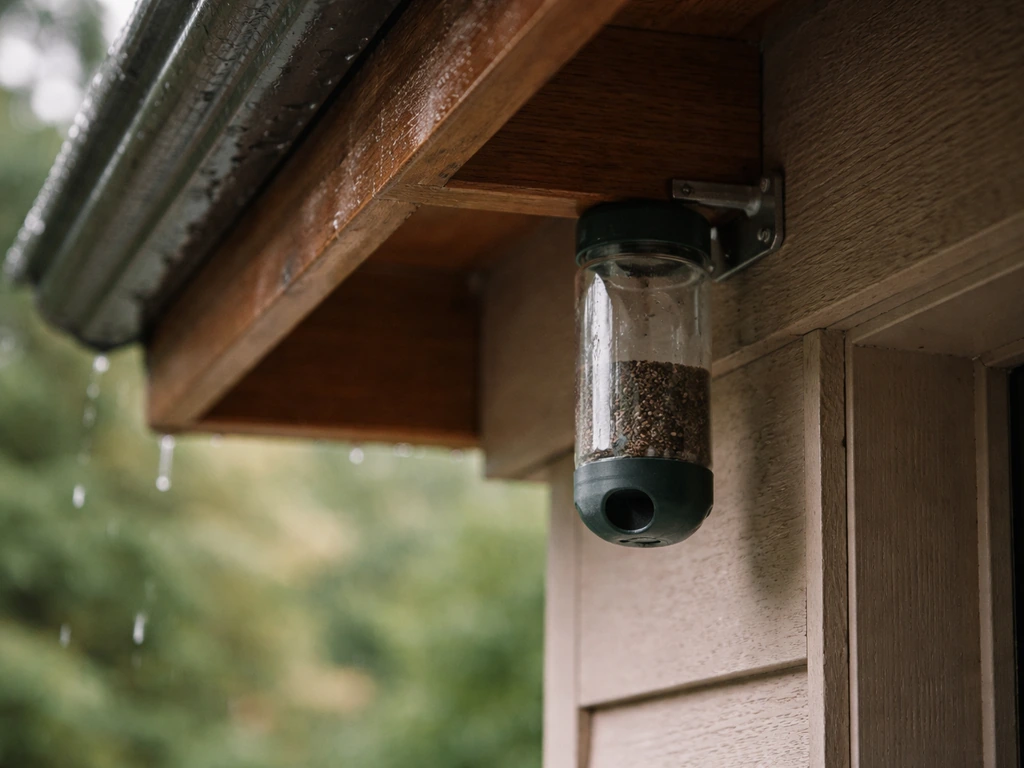
Some bottle designs include a hanging loop on top rather than a flat back mount. If yours does, screw a heavy-duty stainless or galvanized cup hook into a porch beam or bracket (again, pre-drill a pilot hole). Link the bottle's hanging loop to the hook using a short length of stainless chain or a galvanized S-hook. Avoid thin wire that can kink or cut through a ceramic loop over time. Keep the total hanging length short enough that wind doesn't swing the bottle into the wall repeatedly.
Weatherproofing, Safety, and Stopping the Wobble
Once it's up, take a few minutes to make it weather-ready. The biggest enemies of an outdoor ceramic mount are rust-driven staining, hardware failure, and the slow damage of constant movement.
- Check the screw for rust every spring. A small rust spot on a galvanized screw is fine; a screw that's deeply corroded or pitting should be replaced before the nesting season starts.
- If the bottle wobbles or rotates on the screw, the mounting hole may be slightly larger than the screw diameter. Fix this by adding a second rubber washer between the bottle back and the wall, or by using a wider-headed screw that bridges the gap.
- Avoid putting any sealant inside the bottle or over the entry hole. The inside of the bottle needs to breathe and drain naturally.
- If you mounted to wood siding, inspect the wood around the screw annually for water infiltration or rot. A small bead of exterior caulk around the base of the screw (not over the bottle) helps keep water from wicking into the wall.
- Make sure no sharp screw edges are exposed where birds perch near the entry hole. If the screw protrudes beyond the bottle face at all, that's a problem: back it out a turn or use a shorter screw.
- In very windy locations, a second mounting point (a small L-bracket touching the bottom of the bottle without penetrating it) can brace against rotation without adding another hole in the ceramic.
Getting Birds to Actually Use It (and Keeping It That Way)
You've done everything right with the install, but birds are slow to trust new structures. If you want to go beyond a bottle style, you can also follow a robin bird house plan to give larger cavity-nesters a suitable spot how to make a robin bird house. Give it at least one full nesting season before you decide it's not working. Wrens and chickadees often scout cavities in late winter and early spring, so having your bottle up by February or March is better than April.
Position matters more than anything at this stage. If birds aren't investigating after six weeks during active nesting season, try moving the bottle closer to established shrubs or vine cover. Small birds feel exposed approaching a bottle on a bare, open wall. They want a perch or branch within a few feet where they can stop and assess before committing to the entry hole.
Keep it clean between seasons. At the end of each nesting season (usually late summer), take the bottle down and remove old nesting material through the cleanout hole on the back. Clean the inside with a solution of 1 part bleach to 9 parts water, rinse thoroughly, and let it dry completely before re-hanging. This is the same cleaning protocol Audubon recommends for feeders and birdhouses, and it prevents bacteria and mites from building up in the cavity. Plan to do this once a year minimum.
During the nesting season, resist the urge to peek inside constantly. Checking once every two weeks is fine for a quick visual inspection of the hardware and a look at the entry hole for blockages. More frequent disturbance can cause birds to abandon active nests. If you need to inspect more closely, do it in the early morning when birds are less likely to be alarmed.
If you enjoy hands-on bird housing projects, a Williamsburg bottle pairs well with other cavity-nesting setups in the same yard. If you want to go beyond a bottle-style setup, you can also follow a window bird house guide for a similar safe, cavity-style home. If you're specifically looking for a Carolina wren bird house, use similar mounting and placement principles so the birds feel safe and protected Williamsburg bottle pairs well with other cavity-nesting setups. Wrens, which are a great target species for bottle birdhouses, are also well-served by purpose-built wren houses with specific entrance hole diameters. Adding variety to your yard means more species can find what they need without competing for the same cavity.
The whole install, from unpacking to done, should take you under half an hour. The payoff, watching a pair of wrens carry in nesting material and raise a clutch of eggs in something you put up yourself, is genuinely satisfying in a way that a store-bought feeder on a shepherd's hook never quite matches.
FAQ
How can I mount it so the cleanout hole stays accessible year after year?
If the bottle has a cleanout hole, keep the back or bottom opening fully unobstructed by the wall. That usually means mounting with enough clearance so the bottle sits flat on its intended rubber washer but not “cranked” sideways, and avoiding any bracket or spacer that blocks access. If your mount point forces the bottle to sit too tight against the wall, switch to the specific washer spacing or mounting hardware the manufacturer recommends for that model.
What’s the biggest hardware mistake people make when installing a Williamsburg bird bottle?
Most Williamsburg-style bottles are intended to mount flat to the wall on a single screw and rubber washer. If you use only an anchor when the bottle actually needs a wood-lag style mount, the washer can’t do its job and the ceramic may crack when tightened. Confirm the back mount type first (single hole or keyhole, or hanging loop), then match the screw length and wall plug to the wall material (masonry needs a masonry bit and appropriate plug or Tapcon-style concrete screw).
What should I do if my bottle gets too hot in summer sun?
For nests, the bottle needs to remain shaded enough to avoid overheating, but still dry. If you live somewhere with intense afternoon sun, choose an east or north wall when possible, or mount under an eave where the entry hole is protected from direct rain and sun. If you notice the inside gets too hot to touch on warm afternoons, relocate it or add a nearby protective shade overhang.
Can I hang the bottle from a loop instead of mounting it flat?
Yes, but only if the mount method doesn’t increase swing or rattle. A cup hook or loop-and-chain setup should be kept tight and the hanging length short so wind doesn’t repeatedly bump the ceramic against the wall. For a cavity that birds will use, constant movement is a problem, even when the hardware is “strong enough.”
What if I can’t place it within the 6 to 12 foot height range?
If you can’t mount it between 5 and 15 feet high, prioritize safety for birds over convenience for you. Below 5 feet increases exposure to cats and kids, above 15 feet can make inspections and cleaning difficult, which matters for preventing mites and bacteria. In tight spaces, use physical deterrents like cat-proofing the area and installing it with secure hardware to reduce wobble, then commit to annual cleanout.
How do I place the bottle if my feeders are already near my yard’s best wall spot?
Placement near feeders is about reducing harassment during nest settlement. If you already have feeders close by, pick a quieter micro-location and use plants, fence lines, or a secondary buffer so birds can approach the bottle without crossing the feeder “traffic lane.” Aim for roughly 15 to 20 feet when you can, but if that’s not possible, increase cover and reduce feeder dominance during nesting months.
Is it safe to mount a bottle that has a small crack or chip near the back mounting area?
Don’t use a bottle that is cracked or has compromised ceramic around the mounting hole or loop. Even small fractures can worsen when you tighten the screw, and they can create sharp edges inside the cavity. If you find a crack, stop and replace the bottle rather than “patching” it, because it’s an egg-and-chick safe housing item.
What’s the best next step if no birds are using the bottle after I install it?
If birds aren’t inspecting within about six weeks during the active season, don’t keep changing the setup every few days. Make one adjustment at a time, most often improving approach cover by moving the bottle closer to established shrubs, vine cover, or a nearby perch. Avoid frequent direct peeking during this window, since disturbance can reset trust building.
How tight should the screw be, and do I need the rubber washer even if the bottle feels stable?
Use the rubber washer as intended, between the screw head and the ceramic, and tighten only to the point where the bottle feels secure with no wobble. Over-tightening can still stress ceramic even with the washer, and under-tightening can allow vibration and eventual loosening. If hardware loosened after a storm, remove it, check alignment, and re-seat the washer rather than just tightening again.
Can I mount it on brick or concrete, and how is that different from wood?
Yes, but choose the correct approach for each surface. For brick, drill into the mortar joint rather than the brick face to reduce cracking risk. For concrete, you can often use a masonry screw type like Tapcon-style if you use the specified masonry bit size, which eliminates the need for a separate plastic anchor. For wood-framed surfaces, use the appropriate lag screw length and pre-drill a pilot hole to prevent splitting.
How often is too often to check the entry hole and mounting hardware?
During the nesting season, keep checks minimal. A quick look every couple of weeks for hardware and entry-hole blockages is reasonable, but more frequent inspection can cause abandonment. If you must inspect more closely, do it early in the morning when disturbance is less likely to alarm adults and startle them away from the cavity.
Is it okay to relocate the bottle if birds start showing interest?
If you have to move it, do it before active nesting is well underway and then give it time to regain trust. Since wrens and chickadees often start scouting late winter or early spring, mounting by February or March (in your region) helps. If relocating mid-season, do it carefully, and avoid repeatedly moving during a week once birds show consistent interest.
Next Articles
How to Make a Window Bird House Step by Step DIY
Step-by-step DIY window bird house guide with safe materials, cut list, mounting, drainage, ventilation, and placement t
How to Make a Robin Bird House: Step-by-Step DIY
Step-by-step DIY guide to build a robin bird house with right dimensions, entrance, roof drainage, mounting, and safe ma
How to Build a Wren Bird House Step by Step
Step-by-step DIY wren nest box with cut list, entry size, ventilation, placement, and seasonal maintenance tips.