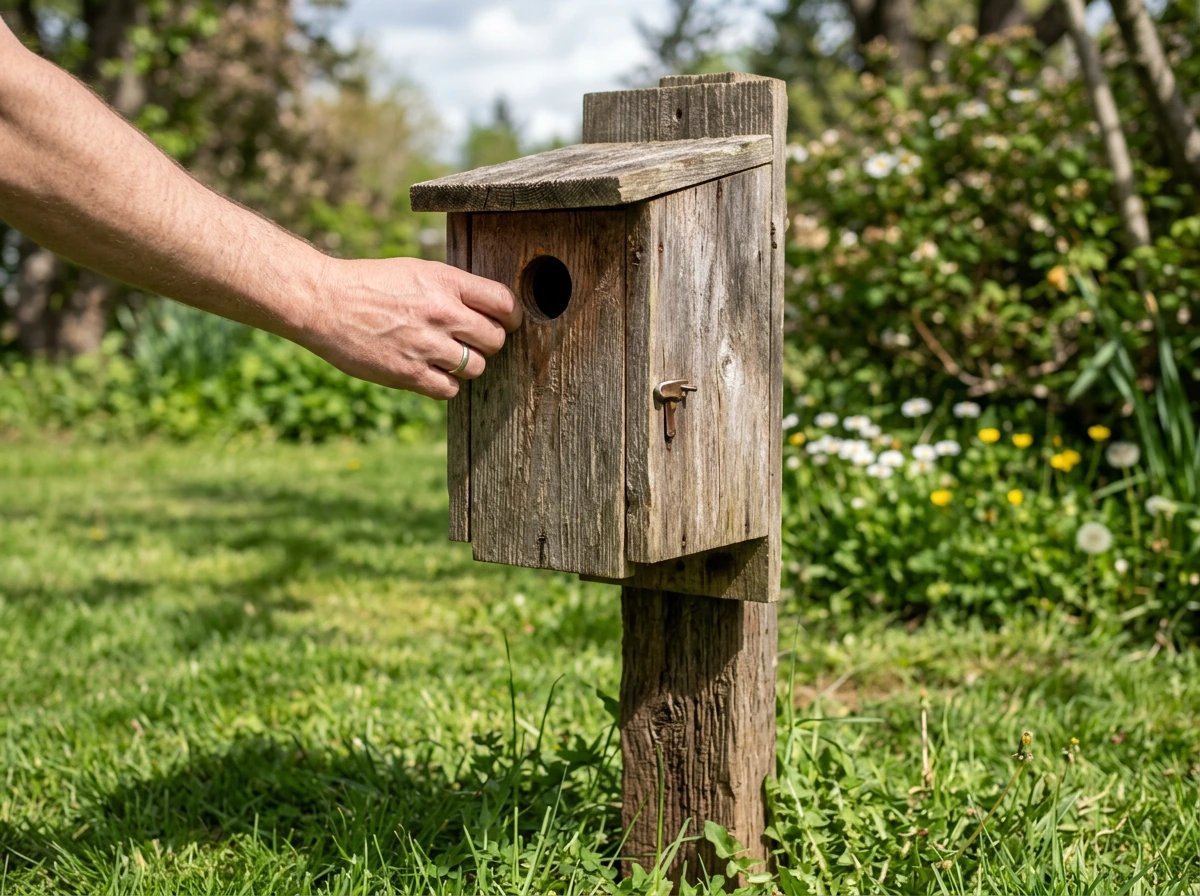
Building a bird nest at home comes down to two different things depending on what you're trying to do. If you want to attract cavity-nesting birds like bluebirds or chickadees, you're building a nest box: a small wooden structure with a precisely sized entrance hole. If you want to support open-cup nesters like robins or finches, you're setting up habitat: gathering and offering loose natural materials so the birds can weave their own nest nearby.
How to Build a Bird Nest: DIY Steps for Real Nests

Marcus Thornton
23 Mar 2026
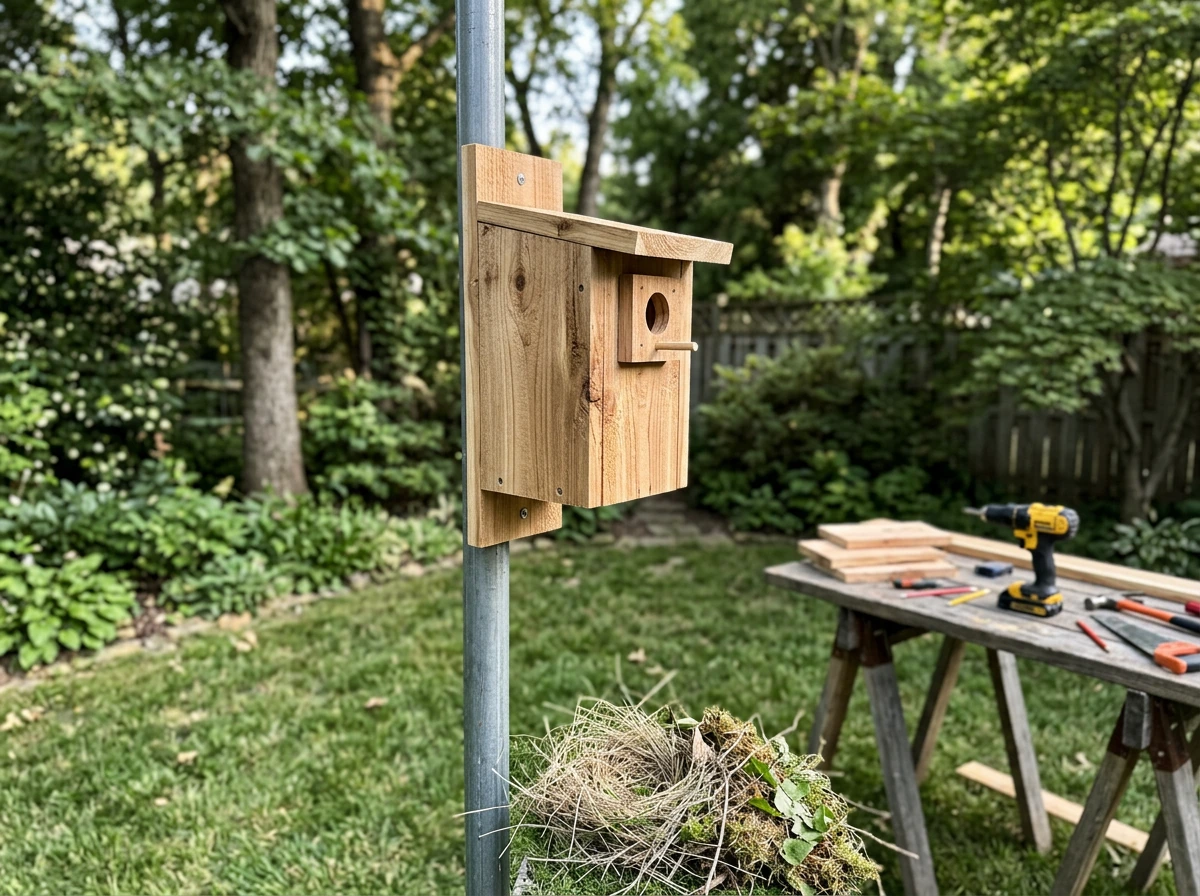
Both approaches work, both are genuinely satisfying to do, and neither requires special skills or expensive tools. This guide covers both, walks you through every step, and tells you exactly what not to do so you don't accidentally make things harder for the birds you're trying to help.
Choosing the right nest type for the bird species
Before you cut a single piece of wood or gather a single twig, figure out which birds actually live near you. This matters more than anything else because different species have wildly different nesting needs. A bluebird won't nest in a robin's cup nest, and a robin won't use a wooden box. Spending an hour with a local bird guide or a quick search on Cornell Lab's All About Birds will tell you which species are common in your area and what kind of nest they build.
Bird nests generally fall into three categories that matter for DIY builders. Cavity nesters use enclosed spaces, either natural tree holes or purpose-built boxes. This group includes bluebirds, chickadees, wrens, nuthatches, and tree swallows. Open-cup nesters like robins, finches, and orioles build exposed bowl-shaped nests in trees, shrubs, or on ledges. Platform nesters like mourning doves and some hawks prefer flat, slightly sheltered structures. For most backyard builders, cavity nesters are the sweet spot because a wooden box gives you a real, measurable impact you can verify.
One species worth calling out specifically: House Sparrows. NestWatch and most wildlife organizations actively discourage providing nest boxes for House Sparrows in the U.S. because they are an invasive species that aggressively displaces native cavity nesters. The way you limit their access is by using the correct entrance hole size for your target species. House Sparrows can squeeze through openings as small as 1 1/4 inches, so boxes intended for chickadees (1 1/8 inch hole) will naturally exclude them. USDA Wildlife Habitat Management Institute guidance on nesting structures discusses entrance hole diameters and notes using limiting openings to reduce certain invasive-nesting access blank" rel="noopener noreferrer">entrance hole size. Keep that in mind when you're sizing your entrance hole.
Natural materials and how to source them safely
Whether you're building a free-form nest support or just want to offer nesting materials alongside your box, sourcing the right stuff matters. The good news is that most of the best nesting materials are already in your yard or nearby, and the sourcing is mostly free.
Safe nesting materials birds actually use include dry grass, small twigs, fallen leaves, moss, feathers, pine needles, bark strips, and plant fluff or down (the fluffy seed material from plants like cattails or dandelions). Mud is critical for robins specifically; they use it to mortar their cup nests together. The single most useful thing you can do to support open-cup nesters is to stop raking your leaves.
Leaving leaf litter and fallen twigs on the ground gives birds a free materials buffet right where they already forage. To make a bird nest out of twigs, offer loose twig bundles and a natural nesting spot, then let the bird weave it. If you want a more complete, structured overview beyond loose nesting materials, follow the step-by-step walkthrough in how to make a bird nest step by step.
Sourcing safely means thinking about what those materials have been exposed to. Dry grass is only safe if it hasn't been treated with pesticides or herbicides. Same goes for pet fur: it seems like a great nesting material and birds will absolutely use it, but if your dog or cat was recently treated with a flea dip or topical insect repellent, that fur can harm nestlings. Wait at least two weeks after any treatment before putting pet fur out.
Never offer dryer lint (it mats when wet and loses insulating properties), human hair longer than a few inches (can tangle around legs and necks), or anything synthetic like tinsel, plastic strips, or cellophane. Those materials look fine but cause real harm.
- Dry grass (untreated, pesticide-free)
- Small twigs and thin bark strips
- Fallen leaves, dry and crumbled
- Feathers (found naturally, not synthetic)
- Moss collected from non-chemically treated areas
- Pine needles
- Plant down or fluff (cattail, milkweed, dandelion)
- Clean, untreated pet fur (no flea treatments in the past two weeks)
To offer these materials, you can stuff a small wire suet cage loosely with a mix of the above and hang it near where birds already spend time. Keep portions loose so birds can pull individual strands out easily. Refresh the materials every few days if they get wet or compacted.
Step-by-step: building a DIY bird nest box at home
This build is a standard cavity nest box sized for Eastern Bluebirds, which is one of the most well-documented and beginner-friendly projects you can do. The dimensions are based on widely accepted bluebird nesting specifications: a 5 x 5 inch floor, 8 inches of interior depth, an entrance hole 6 inches above the floor, and a 1 1/2 inch entrance hole diameter. You can adapt these dimensions for other species using the table in the next section.
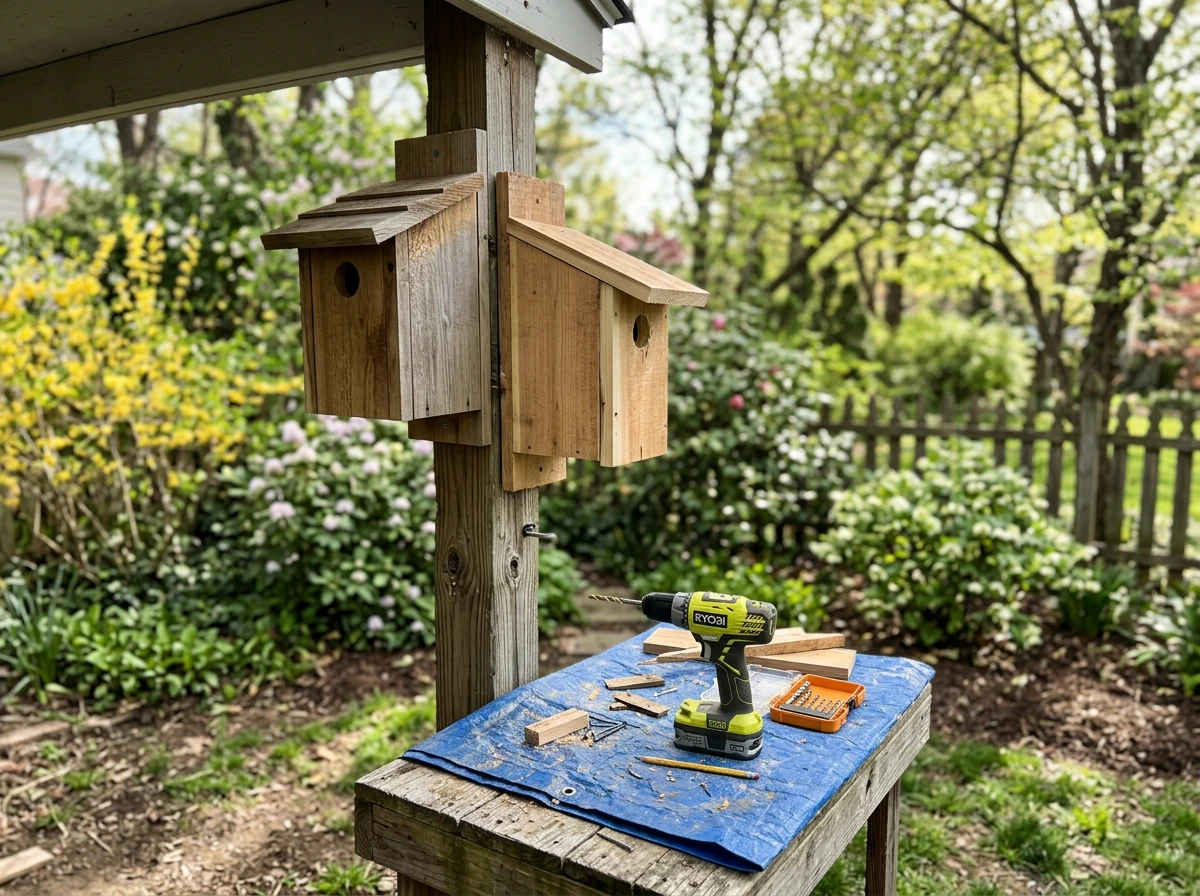
What you'll need
- One board of untreated pine, cedar, or exterior-grade plywood, 1 inch thick (cedar is ideal; avoid pressure-treated wood)
- A tape measure and pencil
- A handsaw or circular saw
- A drill with a 1 1/2 inch spade or Forstner bit (for the entrance hole)
- A 3/8 inch drill bit (for drainage and ventilation holes)
- 1 5/8 inch exterior wood screws (at least 20)
- Sandpaper (medium grit)
- A hinge or pivot mechanism if you want an opening side panel (recommended strongly)
Cut list for a bluebird box
| Panel | Dimensions | Notes |
|---|---|---|
| Floor | 5" x 5" | Trim corners or drill four 3/8" holes for drainage |
| Front panel | 5" wide x 10" tall | Entrance hole drilled 6" from bottom |
| Back panel | 5" wide x 14" tall | Extra length allows for mounting |
| Two side panels | 5" wide x 10" tall (angled top) | Taper top edge for roof slope |
| Roof | 7" x 8" (overhangs front) | Angled to shed rain; overhang protects entrance hole |
Assembly steps
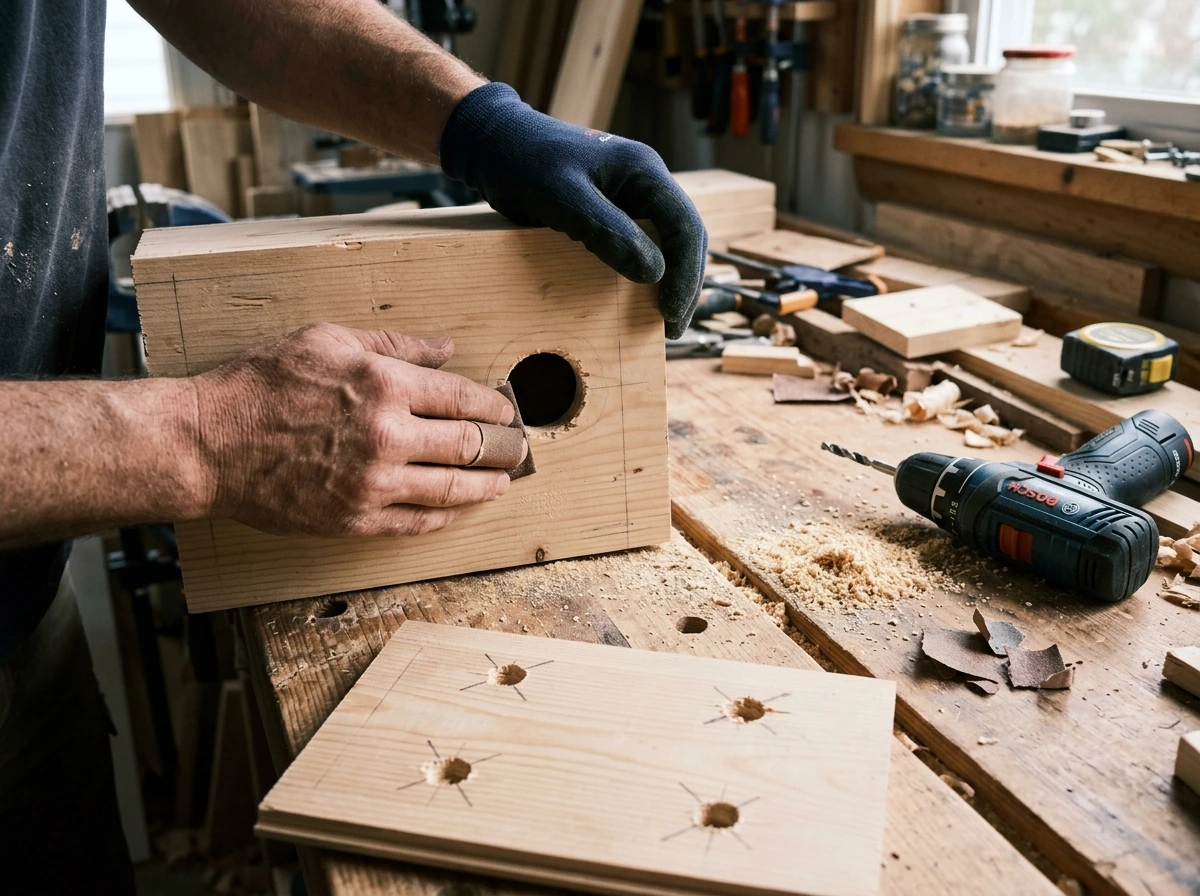
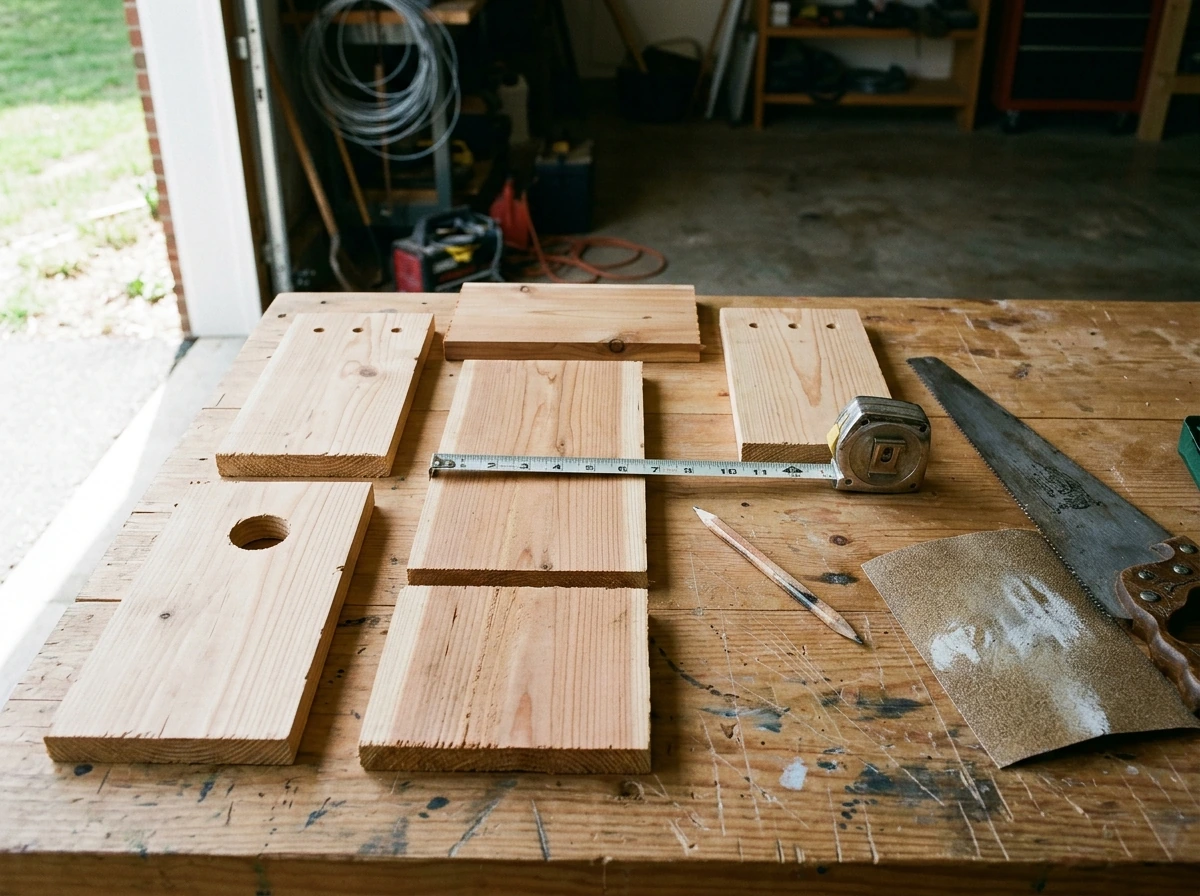
- Cut all panels according to the cut list. Sand any rough edges, especially around the entrance hole, so splintering doesn't injure birds entering and exiting.
- Drill the entrance hole centered on the front panel, 6 inches up from the bottom edge. Use a 1 1/2 inch spade bit for bluebirds. Go slowly and clamp the board so it doesn't split.
- Drill at least four drainage holes (3/8 inch diameter) through the floor panel. These are not optional; water sitting in the box kills eggs and nestlings. Trimming the four corners of the floor by about 3/8 inch accomplishes the same thing if you prefer.
- Drill two small ventilation holes (3/8 inch) near the top of each side panel just under the roofline. This cross-ventilation prevents overheating on hot days.
- Attach the floor to the two side panels using exterior screws. Pre-drill to avoid splitting.
- Attach the back panel. If you're mounting to a post, the extra length of the back panel is what you'll screw through into the post.
- Attach the front panel. If you want a side-opening design (highly recommended for monitoring and cleaning), attach only one side panel permanently and hinge or pivot the other side so it swings open. Make sure it latches securely so predators can't pull it open.
- Attach the roof last, angling it slightly forward so rain runs off the front rather than into the entrance hole. Let the roof overhang the front by at least 2 inches.
- Do not paint the interior. If you paint or stain the exterior, use a light, earth-tone, water-based paint and let it fully cure before mounting. Never paint or varnish the inside.
One mistake I made on my first box was skipping the drainage holes because the floor looked snug and I didn't want to weaken it. After one rainstorm the box had standing water inside. Four small holes fix this entirely. Don't skip them.
Nest-box and nesting-house designs vs free-form nests
People often ask whether they should build a fixed wooden nest box or set up a free-form nesting support, like a wire basket or a platform that birds can weave a nest onto. The honest answer is that it depends entirely on what birds you want to attract. Here's how the two approaches compare.
| Feature | Enclosed Nest Box | Free-Form / Platform Nest Support |
|---|---|---|
| Best for | Cavity nesters: bluebirds, chickadees, wrens, swallows | Open-cup and platform nesters: robins, phoebes, mourning doves |
| Materials | Untreated pine or cedar, 1" thick boards | Wire mesh, wood scraps, natural woven materials |
| Construction difficulty | Beginner to intermediate (requires saw, drill) | Easy (minimal tools, often no cutting required) |
| Predator protection | High when used with predator guard | Low to moderate; more exposed to predators |
| Weather protection for eggs | Excellent when built correctly | Moderate; depends on placement and shelter |
| Monitoring ease | Easy if designed with opening panel | Easy; nest is visible |
| Cleaning | Required at season end; straightforward | Remove old nest material at season end |
| Attractiveness to target birds | Very high for cavity nesters | Depends on species and location |
If you're building for specific species like bluebirds, chickadees, or wrens, a proper enclosed nest box wins every time. The protection it offers from weather and predators is genuinely significant; research from NestWatch data showed that boxes with predator guards had nest success rates about 6.7% higher than those without. That may sound small, but across multiple nesting attempts per season it adds up to real birds fledging successfully.
For open-cup nesters, a simple robin shelf is a good project, learn more in our guide on how to make love bird nest. If you are specifically planning for lovebirds, you can follow the tips in our guide on how to make love bird nest alongside the platform or shelf approach.
Learn more about the different ways birds build nests and how you can set up an appropriate nesting spot for them how to make a nest for a bird. It's essentially a three-sided platform with a roof, mounted under an eave or on a sheltered fence post. Robins will find it and build their mud-and-grass cup nest on the platform. These are faster to build than a full box and require no entrance hole sizing.
These are faster to build than a full box and require no entrance hole sizing. We cover hanging and open nest designs in more detail in companion guides on how to make a hanging bird nest and how to make a nest for a bird. If you want to make a parakeet bird nest, the process changes a lot because parakeets typically need a safe nesting cavity and the right bedding material.
Species-specific nest box dimensions at a glance
| Species | Floor Size | Interior Depth | Entrance Hole | Entrance Height from Floor | Mounting Height |
|---|---|---|---|---|---|
| Eastern Bluebird | 5" x 5" | 8" | 1 1/2" | 6" | 4–6 ft |
| Mountain Bluebird | 5" x 5" | 8" | 1 9/16" | 6" | 4–6 ft |
| Black-capped Chickadee | 4" x 4" | 8–10" | 1 1/8" | 6–8" | 5–15 ft |
| Mountain Chickadee | 4" x 4" | 8–10" | 1 1/8" | 6–8" | 5–15 ft |
| House Wren | 4" x 4" | 6–8" | 1 1/8" | 4–6" | 5–10 ft |
| Tree Swallow | 5" x 5" | 6–8" | 1 1/2" | 4–6" | 4–10 ft |
Placement, mounting, and environmental setup
A well-built box in the wrong location will sit empty for years. Placement is probably the single most overlooked part of this whole project, and it's also where most beginners go wrong. Let's fix that.
Mounting height and entrance direction
For most cavity-nesting species, mounting height falls between 4 and 15 feet depending on the species (see the table above). For bluebirds, 4 to 6 feet is the sweet spot and has the practical bonus of making monitoring and cleaning easy without a ladder. Face the entrance hole roughly toward the east or southeast if possible. This catches morning sun to warm the box early in the day without baking it in the hot afternoon sun, which can overheat eggs and nestlings.
Mounting on posts, not trees
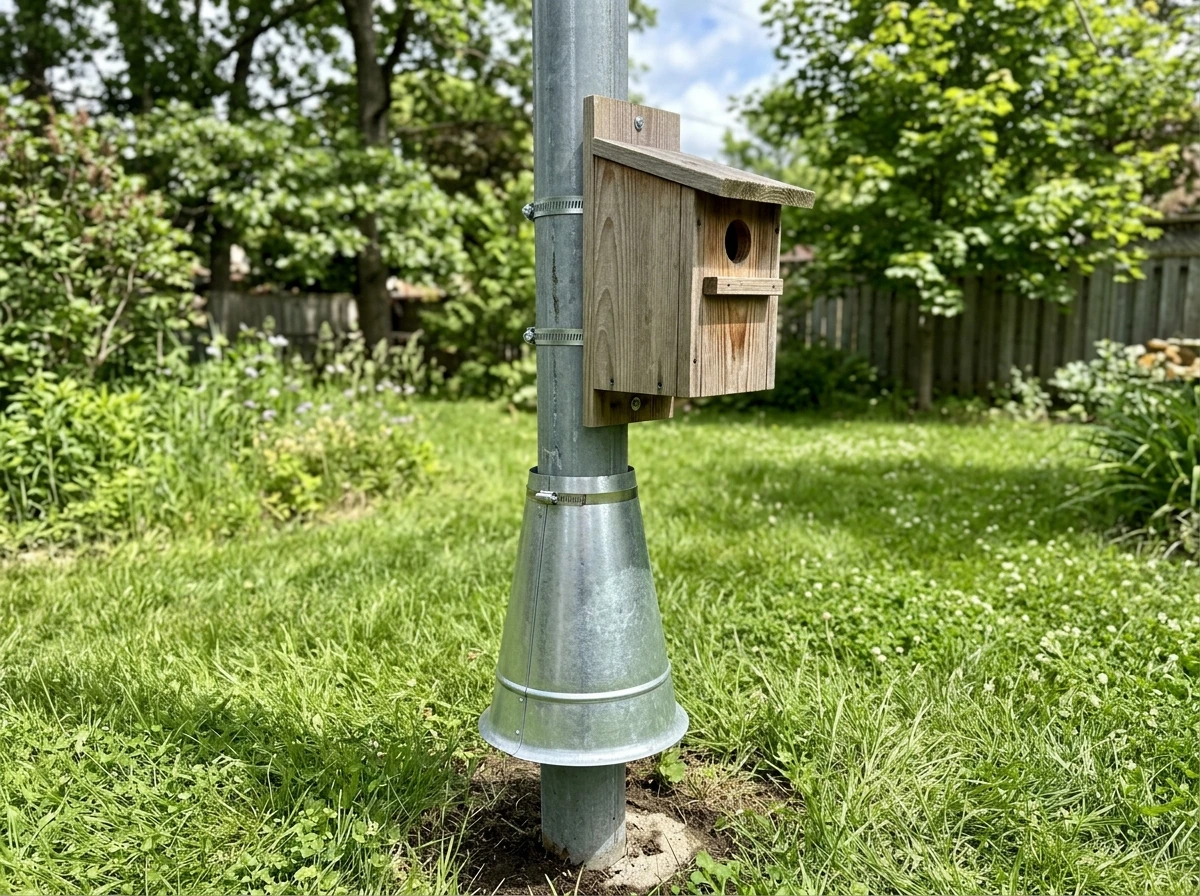
Mount your box on a smooth metal or PVC pipe post rather than on a tree, fence post, or building whenever possible. The reason is predator protection. Squirrels, raccoons, and snakes climb rough surfaces easily. A smooth metal pole is much harder to climb, especially when you add a predator guard. Attaching a predator guard to a box on a tree branch is essentially impossible to do effectively. This is one of those things that seems like a minor detail until you check your box one morning and find an empty nest after a successful hatch.
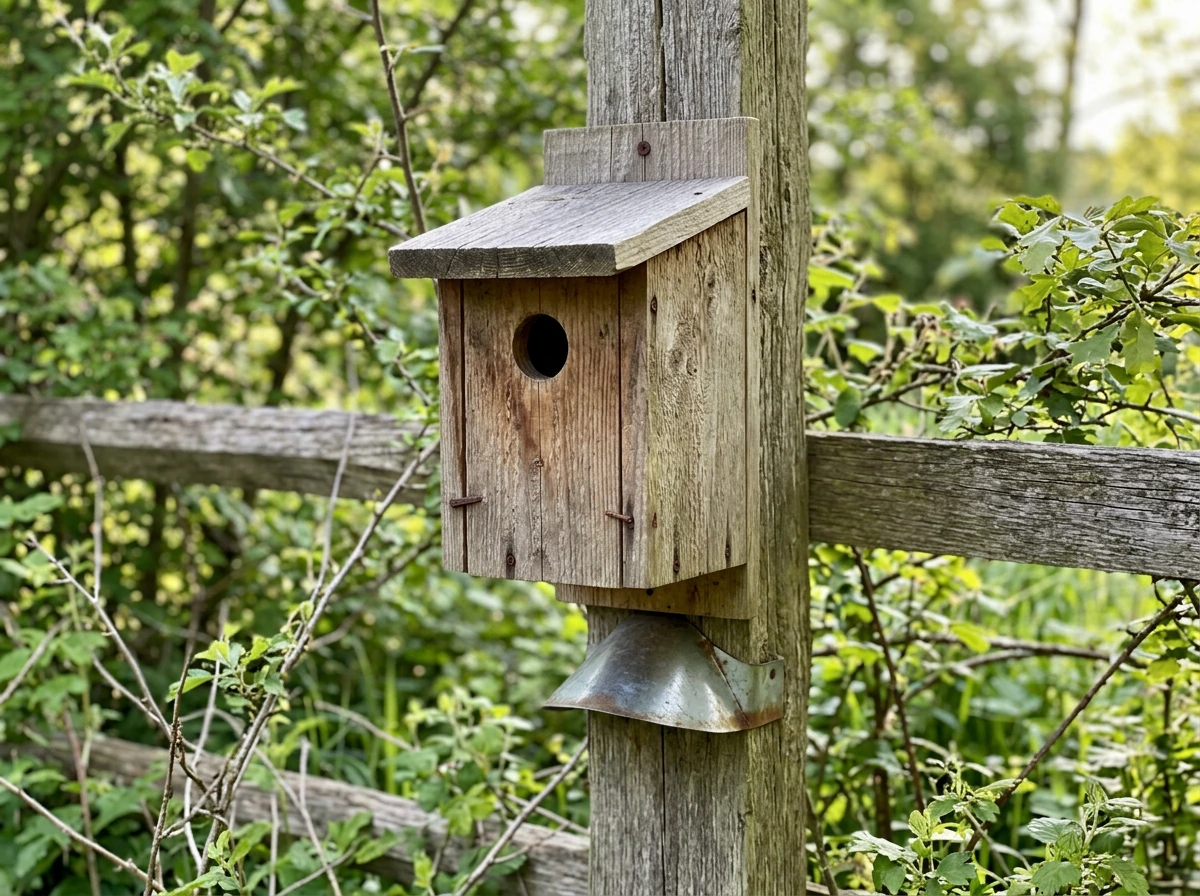
Predator guards: don't skip this
A stovepipe or cone baffle mounted on the pole below the box is the most effective predator deterrent available for a backyard nest box. Position it so the top of the baffle is at least 4 feet off the ground and the box is at least 18 inches above the baffle top. A standard 8-inch diameter stovepipe section about 18 inches long works well. One important note: a small perch mounted under the entrance hole does nothing to protect eggs or nestlings from cats or birds of prey. Skip the perch entirely; bluebirds and chickadees don't need it, and it actively gives predators a foothold.
Spacing between boxes
If you're setting up multiple boxes for bluebirds, space them at least 300 feet apart. Bluebirds are territorial and will actively fight over boxes placed too close together. For other species like wrens and chickadees, 50 to 100 feet is generally sufficient. Placing boxes too close together doesn't give you more birds; it causes conflict and reduces overall nesting success.
Habitat around the box
Bluebirds need open habitat with short grass nearby for foraging. Placing their box in a densely wooded area won't attract them no matter how perfect the box is. Chickadees and wrens prefer woodland edges with shrubby cover nearby. Think about what habitat surrounds your box and match it to the species you're targeting. For open-cup nesters using a platform or hanging basket style support, thick shrubs, dense vines on a fence, or the sheltered underside of an eave are all good options. If what you want is a hanging bird nest, you can use a platform or hanging basket support and focus on the materials and placement those open-cup nesters need.
Maintenance, cleaning, and season-by-season tips
Once your box is up and birds are using it, your job isn't done. Regular monitoring and end-of-season cleaning make a real difference in how many nesting attempts succeed over time.
Monitoring during nesting season
Check your box once a week during nesting season. Before opening the box, tap on it gently with your knuckle and wait a few seconds. This gives the incubating adult a chance to slip out before you open the panel rather than flushing them suddenly, which is more stressful for both the bird and the eggs. Keep monitoring visits short, under 30 seconds if possible. If you see an adult in the box and she doesn't leave after your tap, close it and come back another day. Never monitor during the last few days before expected fledging; young birds that are startled at this stage can jump out prematurely before they're ready to fly.
What to do between nesting attempts
Many cavity nesters have two or three broods per season. After a brood fledges successfully, you can clean out the old nest material to encourage the pair to start a new clutch in the same box. Dispose of the old nest material at least 15 feet away from the box. Don't leave a failed nest in the box mid-season hoping the birds will fix it; for some species, notably bluebirds, a failed nest may actually discourage reuse of the box. Check species-specific guidance on this, as the rules vary.
End-of-season deep clean
At the end of the nesting season (late summer to early fall in most of North America), do a full clean before winter. First, make absolutely sure no bird is actively using the box. If you're not certain, wait another week. Once it's clearly empty and nesting is done for the year, remove all nesting material.
Scrub the interior with mild dish soap and warm water. If there is significant fecal matter or heavy soiling, clean with a solution of 1 part bleach to 10 parts water, then rinse thoroughly and let the box air dry completely before closing it up. A clean box that dries out fully over the winter is far less likely to harbor parasites or mold when nesting season starts again in spring.
Season-by-season checklist
| Season | What to do |
|---|---|
| Late winter (Feb–Mar) | Inspect box for damage, check that the mounting post is secure, replace any warped or cracked panels before birds arrive |
| Early spring (Mar–Apr) | Begin weekly monitoring as soon as birds are scouting; note when nesting material first appears |
| Spring–Summer (May–Aug) | Monitor weekly; clean out old nest after each brood fledges; watch for parasite buildup (blow fly larvae in nest material) |
| Late summer (Aug–Sep) | Confirm nesting is finished; do end-of-season deep clean; let box dry out completely |
| Fall–Winter (Oct–Jan) | Leave box up if it won't be damaged by local conditions; some species use boxes for winter roosting; inspect and repair as needed |
Building a nest box and watching birds use it is one of those projects that pays back far more than you put in. The first time you open the panel and see a clutch of small blue eggs inside, or hear the cheeping of nestlings on a weekly check, you'll be glad you took the time to get the dimensions, drainage, and placement right. Start with one box, one species, and one good location. Get that right before you scale up to a trail of boxes across your yard. The birds will find it faster than you expect.
FAQ
Can I put nesting materials in a nest box, or should I leave the box empty?
Leave the box empty except for what the birds bring in. For cavity nesters, adding loose material inside the box can interfere with natural nest shaping, increase dampness, and make it harder for adults to manage the nest cup. If you want to offer help, provide nesting materials in a nearby wire suet cage and let the birds carry them to the box.
How often should I check the box once birds start incubating?
Once a week is a good baseline. If you need to open the box, tap gently first and keep the visit very short. If the adult does not leave after tapping, close the panel and try again later rather than forcing a prolonged check.
What should I do if I see a nestling already in the box after a monitoring visit?
Avoid further disturbance during that period. If you accidentally startle nestlings, leave the area immediately and do not reopen the box for at least a few days unless there is an urgent safety issue. Keep monitoring closer to fledging only up to the point where the nestlings are still securely unable to jump out on their own.
Is it safe to use pine needles and leaf litter, even if the area was treated?
Only if you are confident it has not been treated with pesticides or herbicides. Spot treatments and lawn chemicals can carry into dry leaves and needles, and birds may contact or feed nestlings with contaminated material.
What if I don’t know which bird species is using my box?
Assume the safest approach is to stop trying to “correct” the setup mid-season. Do not change the entrance hole, add perches, or swap to a different box style once activity begins. Instead, observe entrances and timing from a distance, then adjust for next season only after you confirm the species.
Should I add a perch under the entrance hole to help birds land?
No. A perch under the entrance often increases predator access by giving cats or birds of prey a foothold. If the box is sized and placed correctly, most cavity nesters can land and enter without a built-in perch.
How can I tell if my placement is wrong, and what should I change?
If the box sits empty after the right season window for your target species, reassess habitat and location rather than dimensions. Common fixes include changing sun exposure (east or southeast orientation), improving nearby habitat match (short grass for bluebirds, shrubby edge for wrens and chickadees), and correcting height or pole type (smooth metal or PVC tends to outperform rough surfaces). Make changes after nesting ends.
What are the signs of parasites or moisture problems in my box?
Look for heavy soiling, persistent musty odor, visible mold, or damp nesting material after cleaning season. If you find these issues, increase end-of-season cleaning quality and ensure the box is fully air dried before closing for winter. During the season, do not introduce disinfectants inside the box while birds are actively using it.
Can I mount the nest box on a fence or directly on a house wall?
Yes, but prioritize predator resistance and stability. A location that keeps the box on a smooth, climb-resistant support is best. Avoid mounting where squirrels or snakes can reach the box easily, and ensure you still can use or position a baffle effectively.
Do House Sparrows ever use the bluebird box I built?
They might, but correct hole sizing is your main defense. House Sparrows can enter openings as small as about 1 1/4 inches, so using an entrance diameter intended for smaller species (like the smaller chickadee-type opening) naturally reduces or blocks their access. If you see consistent aggressive occupancy by Sparrows, do not switch styles mid-season.
How far apart should I place boxes if I’m targeting multiple cavity-nesting birds?
For bluebirds, spacing matters more because they are territorial. Keep bluebird boxes at least about 300 feet apart. For wrens and chickadees, around 50 to 100 feet is usually sufficient. If you place boxes closer, you may increase conflict and lower overall nesting success.
What should I do with the nest material when a brood fledges or if a season fails?
When a successful brood fledges, you can remove old nesting material to encourage a new attempt, and discard it away from the box so birds do not reuse or attract unwanted pests. If a nest fails early, do not automatically remove it mid-season without species-specific guidance, because removal can sometimes discourage reuse for certain species.
Next Articles

How to Make a Bird Nest for Preschoolers: Easy DIY Guide
Step-by-step DIY bird nest craft for preschoolers with safe materials, sturdy build tips, and learning activities.
How to Make a Nest for a Bird: Step-by-Step Guide
Build a bird nest step by step by choosing the right nest type, materials, placement, and predator weather protection.
How to Make a Bird Nest Step by Step: DIY Guide
Beginner DIY guide on how to make a safe bird nest step by step with materials, measurements, placement, and maintenance