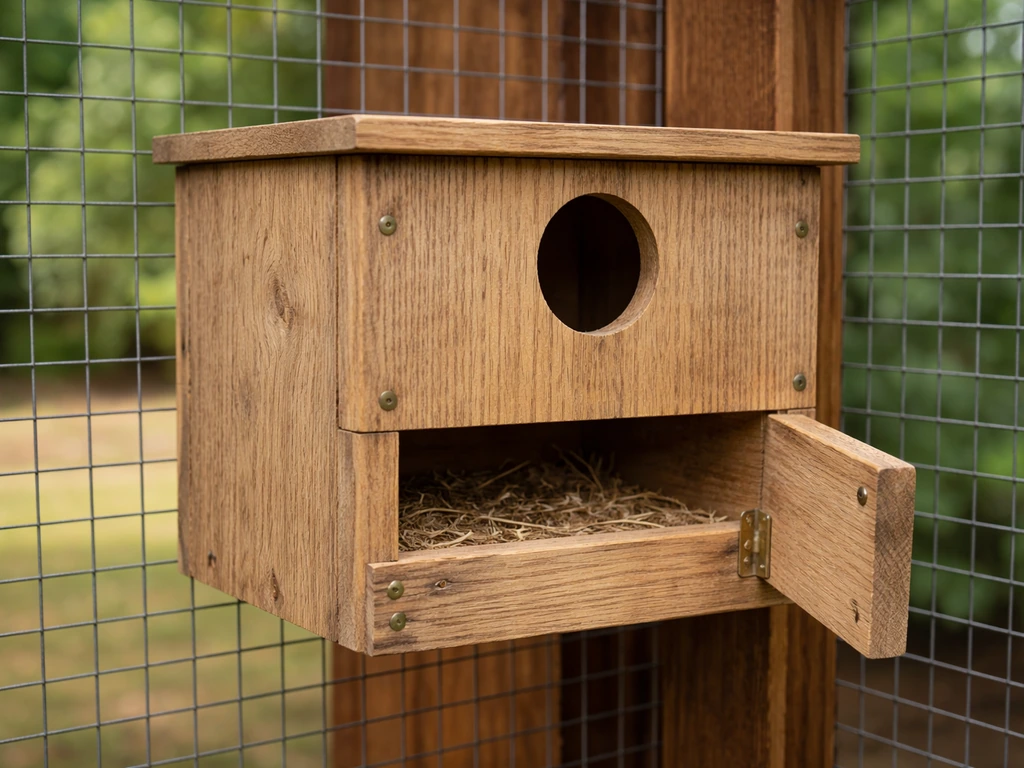
You can build a solid, safe lovebird nesting box in an afternoon with basic tools, a few pieces of untreated wood, and some galvanized screws. The key numbers to get right: a 50 mm (about 2 inches) entrance hole, a floor footprint of roughly 15 cm x 14.5 cm (6 x 5.7 inches), and an interior height of about 25 cm (10 inches). Get those three things right and you have a box lovebirds will actually want to use.
How to Make a Love Bird House Step by Step DIY

Marcus Thornton
6 May 2026
What kind of lovebird house to build
There are two main ways people think about a lovebird house: a decorative birdhouse meant to hang outdoors and attract wild birds, and a nest box designed for breeding lovebirds kept in an aviary or cage. For most people searching this topic, the nest box is what you actually want. If you want to know how to make love bird nest spaces that they actually choose, focus on the box style, entrance size, and safe materials nest box.
Lovebirds are parrots (Agapornis species), and they breed in enclosed wooden cavities, not open cup nests. Whether your lovebirds live in an outdoor aviary or a large indoor flight cage, the nest box is where they will lay eggs and raise chicks.
The classic design is a vertical rectangular box, sometimes called a grandfather-style nest box, with the entrance hole positioned near the top of one face. This mimics a natural tree hollow, which in the wild Fischer's lovebirds and their relatives seek out at heights of 2 to 15 meters. You don't need to replicate that height indoors, but the enclosed, top-entry feel of a vertical box is exactly what triggers their nesting instinct. A horizontal box (wider than it is tall) also works and can be easier to clean, but vertical is the more proven design and the one this guide focuses on.
One design decision worth making upfront is your cleanout access. A sliding panel on one end is a favorite among experienced lovebird keepers because it lets you peek in, remove old nests, and monitor eggs without disturbing the box much. A hinged side panel works just as well for a beginner. Avoid a top-only lid if you can, because lifting the roof stresses the birds more than opening a side panel. We'll build in a removable side panel in the steps below.
Materials and tools you'll need
The number one rule for lovebird box materials: untreated, unpainted wood only. Pressure-treated lumber contains pesticides and fungicides that are genuinely toxic to birds. Similarly, the interior of the box should never be painted or stained. Some finishes on the exterior are okay (more on that in the finishing section), but the inside surfaces where your birds will live, chew, and breathe need to stay raw wood. Pine, cedar, and fir are all excellent choices. Cedar naturally resists moisture and rot, making it great for outdoor aviaries. Pine is cheaper and easier to find at any hardware store. Either works fine.
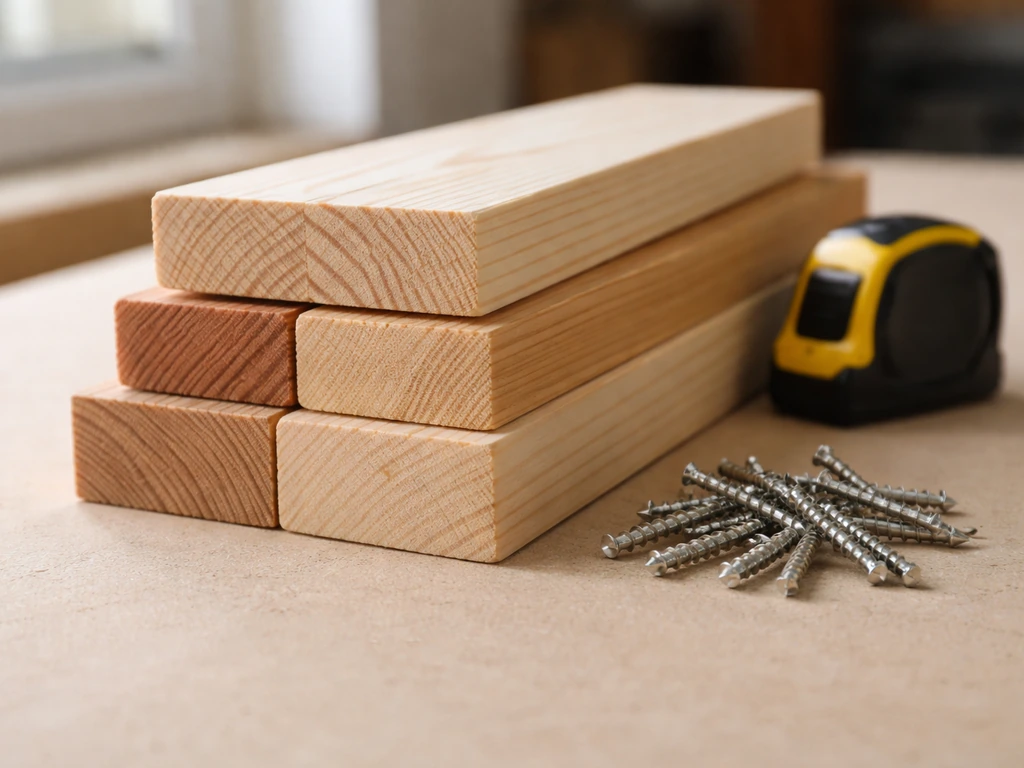
Materials checklist
- One piece of untreated pine or cedar board, 3/4 inch (19 mm) thick, approximately 6 inches (15 cm) wide and 5 feet (150 cm) long — this gives you all your panels from one board
- Galvanized screws, 1.5 inch (38 mm) — these won't rust and won't loosen over time the way nails do
- Wood glue (PVA, not epoxy or polyurethane — both can off-gas fumes harmful to birds)
- One 50 mm (2-inch) hole saw or spade bit for the entrance hole
- Small hardware cloth square (optional, for a predator guard — about 10 x 10 cm, 1/2-inch mesh)
- Two small hinges or a simple hook-and-eye latch for the cleanout panel
- Sandpaper, 80 and 120 grit
Tools checklist
- Hand saw or circular saw (a hand saw is completely fine for this project)
- Drill with 1/4-inch bit (for ventilation and drainage holes) and a 50 mm hole saw or 2-inch spade bit
- Tape measure and pencil
- Clamps (even two basic bar clamps help a lot during assembly)
- Screwdriver or drill driver
If you don't own a hole saw, most hardware stores sell them individually for a few dollars, or you can ask the lumber section staff to drill the entrance hole for you when you buy the board. Don't use a jigsaw for the entrance hole, the edges end up ragged and can splinter, which is a real hazard for birds pushing through repeatedly.
Cut list and dimensions
These dimensions are based on commercially validated lovebird nest boxes and align with what breeders actually use. The interior footprint is approximately 15 cm x 14.5 cm (roughly 6 x 5.7 inches) and the interior height is 25 cm (about 10 inches). The entrance hole is exactly 50 mm (2 inches) in diameter, centered on the front panel and positioned so its bottom edge sits about 17 to 18 cm (about 7 inches) above the floor. That drop distance is important: it gives chicks a ledge to sit at before fledging and makes it harder for eggs or chicks to roll out.
| Panel | Width | Height / Length | Quantity | Notes |
|---|---|---|---|---|
| Front (with entry hole) | 15 cm (6 in) | 25 cm (10 in) | 1 | Drill 50 mm hole, bottom of hole 17 cm from floor |
| Back | 15 cm (6 in) | 25 cm (10 in) | 1 | Add two small holes at top for mounting |
| Floor | 14.5 cm (5.7 in) | 14.5 cm (5.7 in) | 1 | Drill four 6 mm (1/4-in) drainage holes near corners |
| Top (roof) | 16.5 cm (6.5 in) | 16 cm (6.3 in) | 1 | Slight overhang keeps rain out if outdoors |
| Fixed side | 14.5 cm (5.7 in) | 23.5 cm (9.3 in) | 1 | Glued and screwed permanently |
| Cleanout side panel | 14.5 cm (5.7 in) | 23.5 cm (9.3 in) | 1 | Hinged or sliding for access |
A quick note on thickness: all panels should be 3/4 inch (19 mm). Thinner wood warps, splits under screws, and provides almost no insulation. I've seen people try to use 1/2-inch plywood to save money and the boxes start failing within a season. The extra few dollars for proper thickness is worth it every time.
Step-by-step assembly
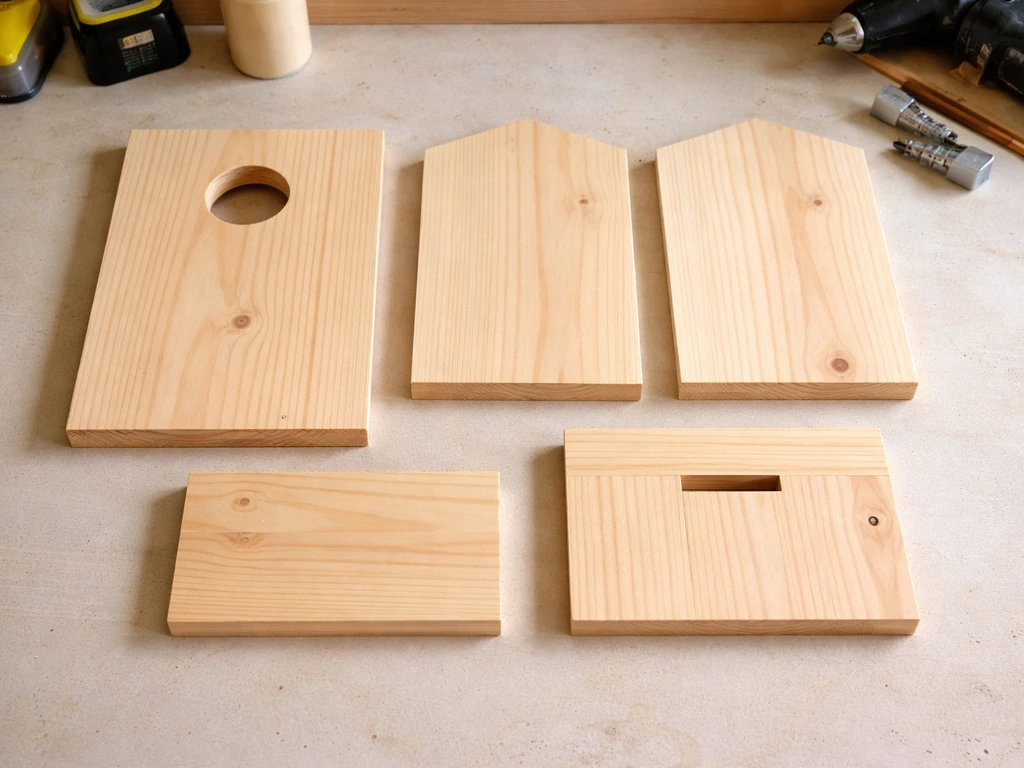
Step 1: Cut your panels
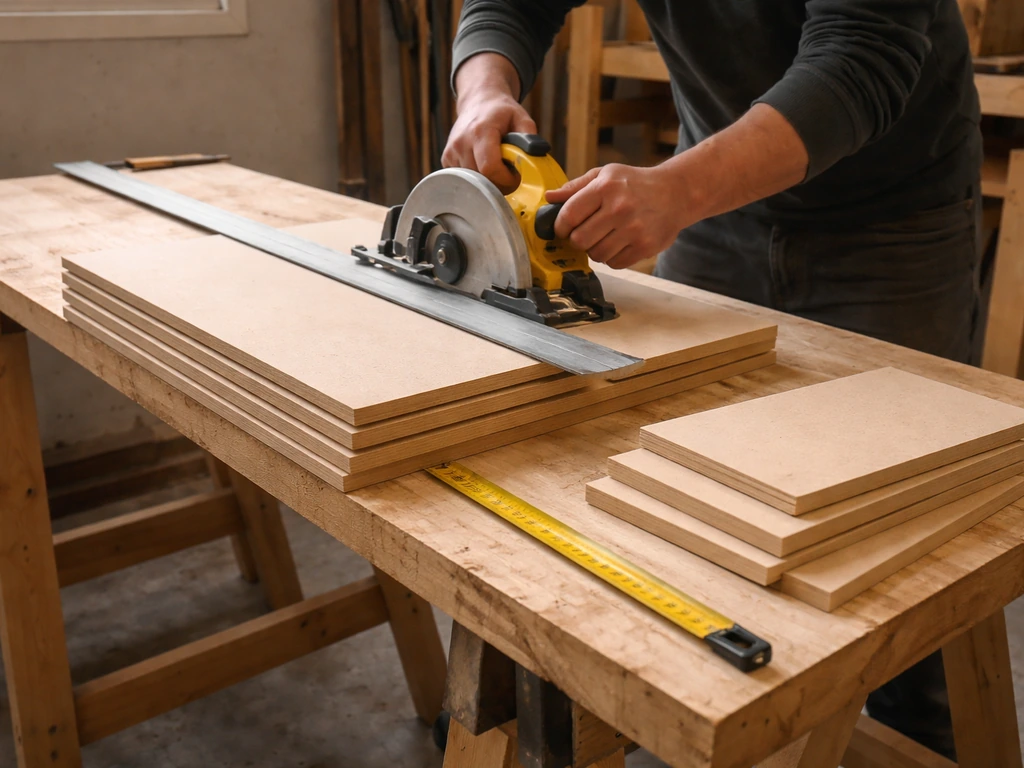
Cut all six panels to the dimensions in the cut list above. If you prefer, you can follow the full how to make a bird nest step by step process for a more general nest-building approach before committing to this lovebird box plan. Sand the cut edges with 80-grit paper to remove splinters, then follow up with 120-grit for smooth surfaces. Pay extra attention to the inside faces of all panels, those are the surfaces your birds will contact constantly.
Step 2: Drill the entrance hole
On the front panel, mark the center of the entrance hole so its bottom edge is 17 cm up from the bottom of the panel. Drill the 50 mm hole with your hole saw. This is the most important cut in the whole project: 50 mm is the right size for lovebirds. Go larger and predators or other birds can get in. Go smaller and your lovebirds will chew the hole bigger anyway, but you'll stress them in the process. After drilling, sand the inside edge of the hole smooth, rough edges cause feather and skin abrasion over time.
Step 3: Add ventilation and drainage holes
Before assembly, drill your ventilation holes into the fixed side panel and the cleanout panel: two or three 6 mm (1/4-inch) holes near the top of each side, about 2 cm from the top edge. These allow hot air to escape in summer, which matters a lot if the box is in a warm aviary or mounted in a sunny spot. On the floor panel, drill four 6 mm drainage holes near the corners.
NestWatch recommends adding drainage holes to the floor so water can drain away, with guidance calling for at least four holes around the 3/8" to 1/2" range On the floor panel, drill four 6 mm drainage holes near the corners. . Even indoors, moisture from droppings and nesting material builds up fast, and a wet floor breeds bacteria.
Those four small holes make a big difference.
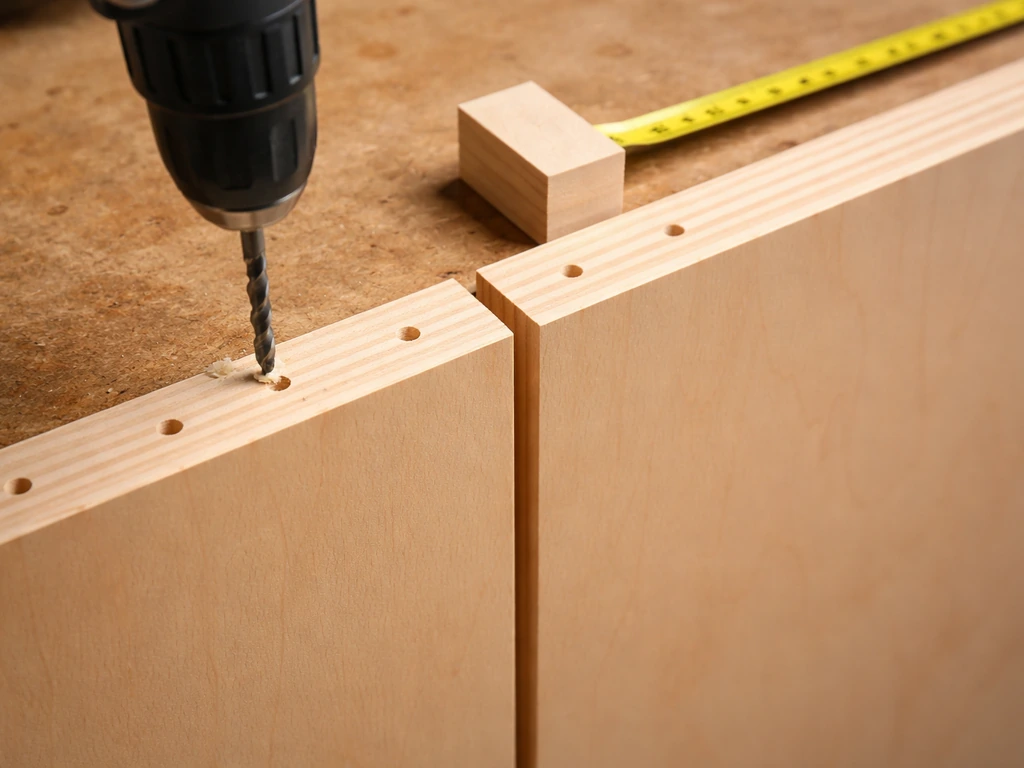
Step 4: Assemble the box
- Attach the floor to the front panel first. Apply a thin bead of wood glue along the bottom edge of the front panel, clamp the floor in position, and drive two screws through the front into the floor edge. Pre-drill your screw holes to avoid splitting.
- Attach the back panel to the floor the same way. You now have a U-shape: floor with front and back panels standing up.
- Slide the fixed side panel in and glue and screw it to both the floor and the front/back edges. This is the panel that stays permanently.
- Attach the roof. Glue and screw it to the tops of the front, back, and fixed side. Leave a slight overhang on all sides if the box will live outdoors.
- Fit the cleanout panel. Attach it with two small hinges at the bottom edge, so it swings outward and down. This pivot-at-bottom design is the safest and most intuitive — the door drops open, you see everything inside, and it latches closed with a simple hook-and-eye. Alternatively, cut a channel and make the panel slide out vertically like a drawer.
- Check the fit of the cleanout panel. It should close firmly with no gaps a predator's claw could hook into, but open without forcing.
Step 5: Add a predator guard (optional but highly recommended for outdoor use)
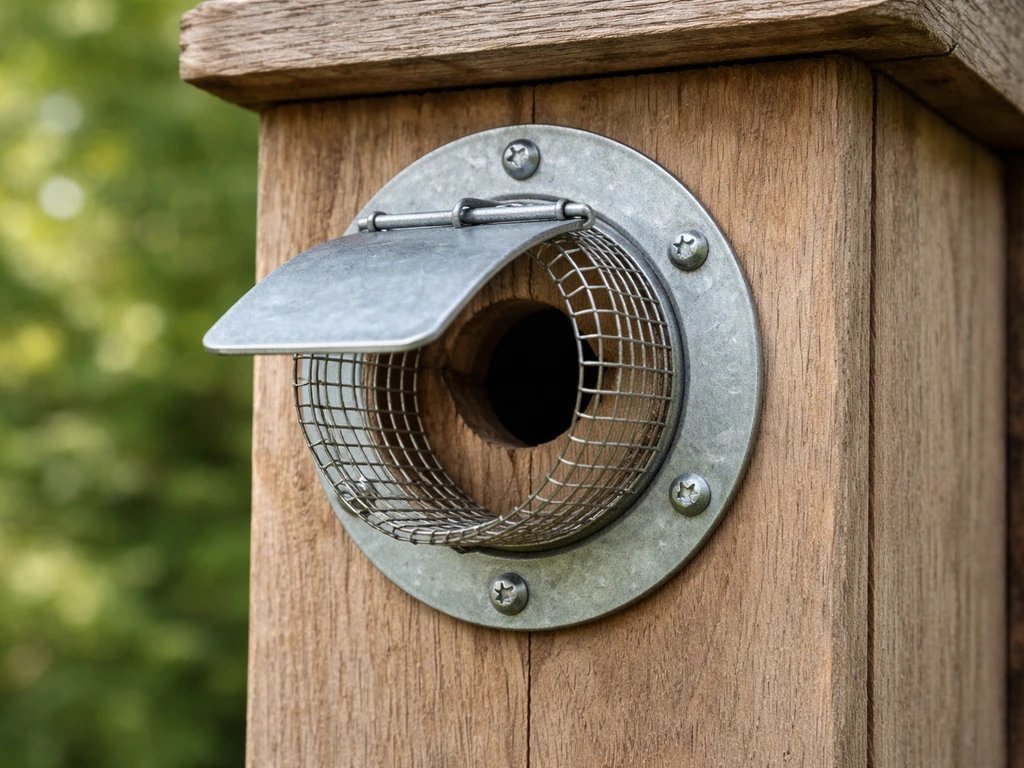
If your box is in an outdoor aviary or attached to a structure where cats, rats, or other animals could reach the entry hole, a Noel guard is the simplest protection you can add. Cut a small rectangle of 1/2-inch hardware cloth about 8 x 8 cm, bend it into a short tunnel shape, and staple or screw it around the entrance hole so it protrudes outward 5 to 6 cm. This extension forces any predator to reach further to get to the hole and exposes their leg or paw to the sharp wire perimeter. It takes about five minutes to add and it genuinely works.
Finishing, mounting, and placement
The interior of the box gets nothing, no paint, no stain, no sealant. Leave it as raw wood. Lovebirds will chew the interior, and anything you put on those surfaces ends up in their system. The exterior is a different story. If the box will live outdoors, a light coat of exterior wood stain (oil-based, allowed to cure fully for at least two weeks before birds use the box) on the outside only will extend the life of the box significantly. Lighter colors work better in sunny spots because they reflect heat. Never use lead-based paint, epoxy, or paint thinner anywhere near the box.
For mounting inside an aviary or cage, attach the box high up on one wall, ideally in the highest corner available. Lovebirds feel safest when they can nest above eye level. You can drive two screws through pre-drilled holes in the back panel directly into the aviary wall or frame. Make sure the box is level and completely stable, a box that wobbles or swings will be abandoned. If you're attaching to a wire aviary panel, use small bolts and washers rather than screws, which won't grip wire safely.
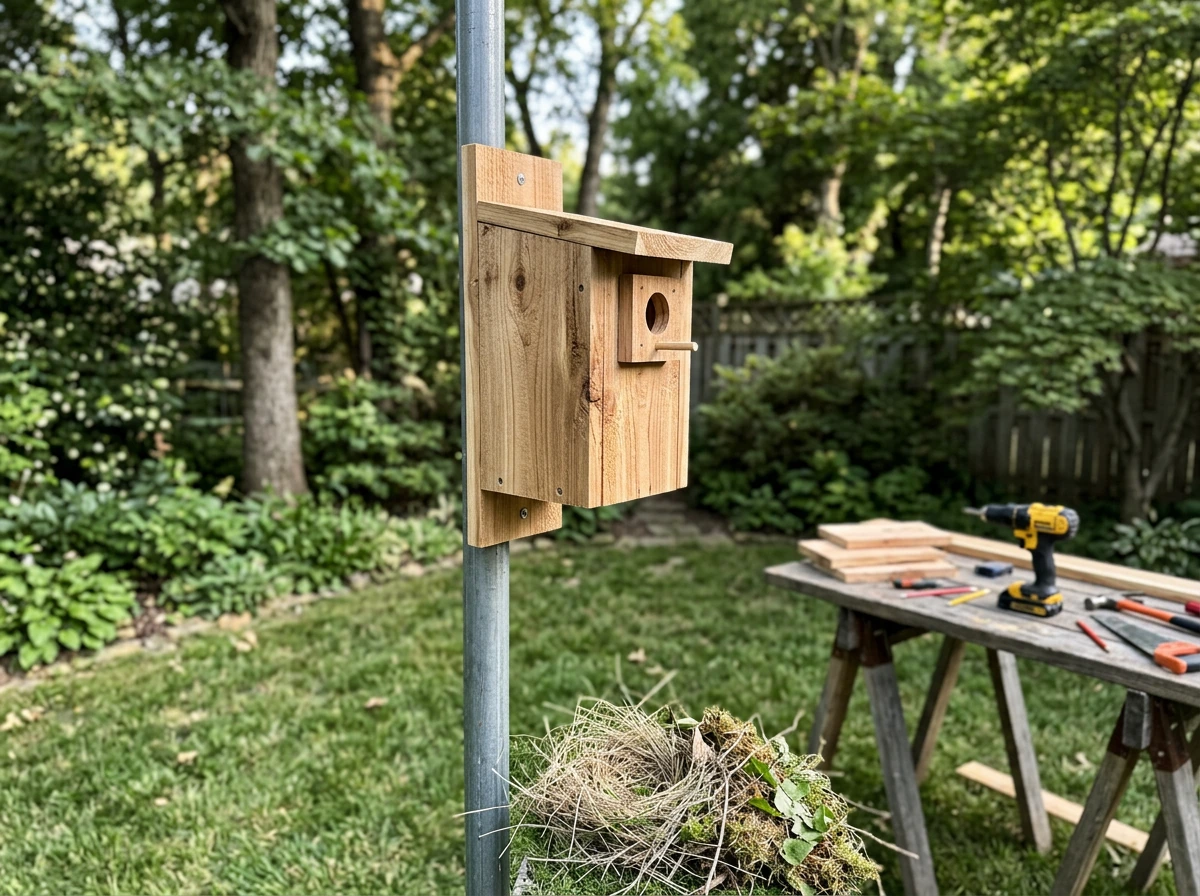
For outdoor or wild-bird applications, mount the box on a pole or tree at least 1.5 to 2 meters off the ground (remember, wild lovebirds nest at up to 15 meters, so higher is generally better if you can manage it). Orient the entrance hole away from the prevailing wind and direct afternoon sun. A north or east-facing entry is ideal in most climates.
One thing I always add before handing over a finished box: a handful of nesting material placed just inside the box. Lovebirds carry nesting material tucked in their feathers, and a head start of dried grass, palm fronds, or untreated willow twigs signals that this is a safe, ready space. This small step dramatically increases how quickly a pair will commit to a new box.
Keeping the box clean and troubleshooting problems
Cleaning schedule
After each breeding cycle, open the cleanout panel and remove all old nesting material completely. Old nests compact into a dense mat that harbors mites, blowflies, and bacteria, parasites that can genuinely harm the next clutch. Use a stiff-bristled brush to scrub the interior walls and floor. A diluted vinegar solution works well for sanitizing without leaving toxic residues. Let the box dry completely in open air before returning it to the aviary. Skipping this step is the single most common maintenance mistake people make.
Check the box at least once per season even when it's not actively being used. Look for cracks, warped panels, loose screws, or any gaps that have opened up. A small gap in a corner is easy to fill with untreated wood filler or a scrap of wood glued in place. Catching these early keeps the box structural and predator-proof for years.
What to do if your lovebirds won't use the box
If your pair is ignoring the box after two to three weeks, work through this checklist before assuming the design is wrong. First, check the entrance hole diameter, if it looks chewed or enlarged, the birds found it too tight and fixed it themselves, which means you need a fresh front panel with a clean 50 mm hole. Second, check the location: is the box in the highest available spot? Is it stable? Any vibration or movement will put lovebirds off completely. Third, check if a second bird or other species is harassing the pair near the box. Competition stress kills nesting attempts fast.
Sometimes lovebirds just need time to feel safe with a new structure. A box that smells strongly of fresh wood can be off-putting at first. Leaving it in the aviary for a few weeks before expecting use, and placing some of the pair's own droppings or used nesting material inside, can accelerate acceptance.
For parakeets, the nest-making needs are different than a fixed lovebird box, so use a parakeet-specific nest guide for the right materials and placement parakeet bird nest. If you want a more natural nest approach, you can also follow a guide on how to build a bird nest for your species. If you're building a nest rather than a hard-sided box, the approach is quite different, that's territory worth exploring separately.
For preschoolers, focus on a simple, safe bird-nest craft using everyday materials and close supervision bird nest for preschoolers. If you meant a true nest for a bird rather than a rigid nest box, look for species-specific instructions for the right nesting materials and structure a nest rather than a hard-sided box.
Ventilation problems and overheating
If you notice the birds panting near or inside the box, or if they abandon it during hot weather, ventilation is probably the issue. You can add extra 6 mm holes near the top of the side panels without disassembling anything, just drill from outside while the box is mounted. Adding a second row of ventilation holes about 2 cm below the first doubles airflow without affecting box security. In very hot climates, moving the box to a shadier corner of the aviary is often the simplest fix.
FAQ
How long should I let the lovebird house dry after cleaning with vinegar?
For cleaning between clutches, avoid scrubbing so aggressively that you roughen or open the wood grain. Use a stiff brush only on debris, then let the vinegar solution sit briefly before rinsing with clean water. Afterward, dry the box fully with airflow, ideally 24 to 48 hours, because trapped moisture promotes mites even if the box looks dry.
Can I hang or attach the lovebird house without screwing into the wall or frame?
If you want to mount it without drilling the back panel, use an aviary-rated hanging bracket or two sturdy straps that do not contact the entrance tunnel. Whatever method you use, the box must not rock, even slightly, when the birds move around it. Test stability by gently pushing the box before introducing your pair.
What should I do if the lovebirds enlarge the entrance hole after a few weeks?
Yes, but treat it as a temporary fix. If the entrance hole is already enlarged from chewing, you typically need to rebuild or replace the front panel, because simply adding a ring or patch can create sharp edges and new access points for predators. The safest repair is a fresh front board with a correctly drilled 50 mm hole and sanded interior edge.
Can I seal or varnish the inside of the lovebird house to make it easier to clean?
Do not. Any sealer, varnish, interior stain, or epoxy on the inside is a common mistake because lovebirds chew everything they can reach, and coatings can also trap odor and moisture. If you need weather protection outdoors, apply finishes only to the outside surfaces, and give it at least two weeks to cure fully before the box is used.
Should I provide one nest box per pair, or multiple boxes in the same area?
For most setups, one box per breeding pair is the best starting point. If you offer two boxes, some pairs will start laying in one and then switch, which increases nest material mess and may delay egg laying. If you do provide multiples, space them apart in the cage or aviary to reduce competition and confusion.
The box smells like fresh wood, will that stop my lovebirds from nesting?
If the box smells strongly of fresh wood, it can discourage use, but you can also reduce odor by airing it outdoors in shade with good airflow for several days before installation. Don’t wipe the interior with chemicals or cleaners. Placement also matters, choose a calm corner away from high-traffic areas and sudden disturbances.
Is it okay to add a Noel guard for outdoor mounting, and will it make cleaning harder?
Yes, but do it carefully. For outdoor use, add the predator guard only if it can be maintained, meaning you can still clean around it during cycle resets. Make sure the hardware cloth tunnel does not create sharp wire ends, and keep the protrusion consistent at about 5 to 6 cm so predators cannot easily reach around the guard.
How can I improve ventilation if my box is already assembled and installed?
Ventilation holes work best when they are near the top and spaced so you do not weaken structural panels near the entrance. If you add extra holes while the box is mounted, drill from the outside to reduce splintering, and smooth any edges you create. In hot climates, moving the box to a shadier location often prevents heat stress more effectively than increasing ventilation alone.
My lovebird house floor stays damp even with drainage holes, what should I check?
Do not use the drainage holes as an excuse to keep the box constantly wet. If you notice persistent dampness, improve airflow around the mounted box, avoid direct afternoon rain exposure, and verify that the mounting position allows runoff away from the entrance tunnel area. Replace or rebuild if panels have softened or warped.
If my lovebirds won’t use the nest box, what troubleshooting steps should come first?
If your pair ignores the box for two to three weeks, start with location and security first. Even a stable box can be rejected if there is harassment at the entrance or vibrations from nearby activity, so observe for several hours at the times your birds are most active. Only after that should you reassess entrance sizing, because a truly wrong hole diameter is less common than placement and disturbance issues.
Next Articles
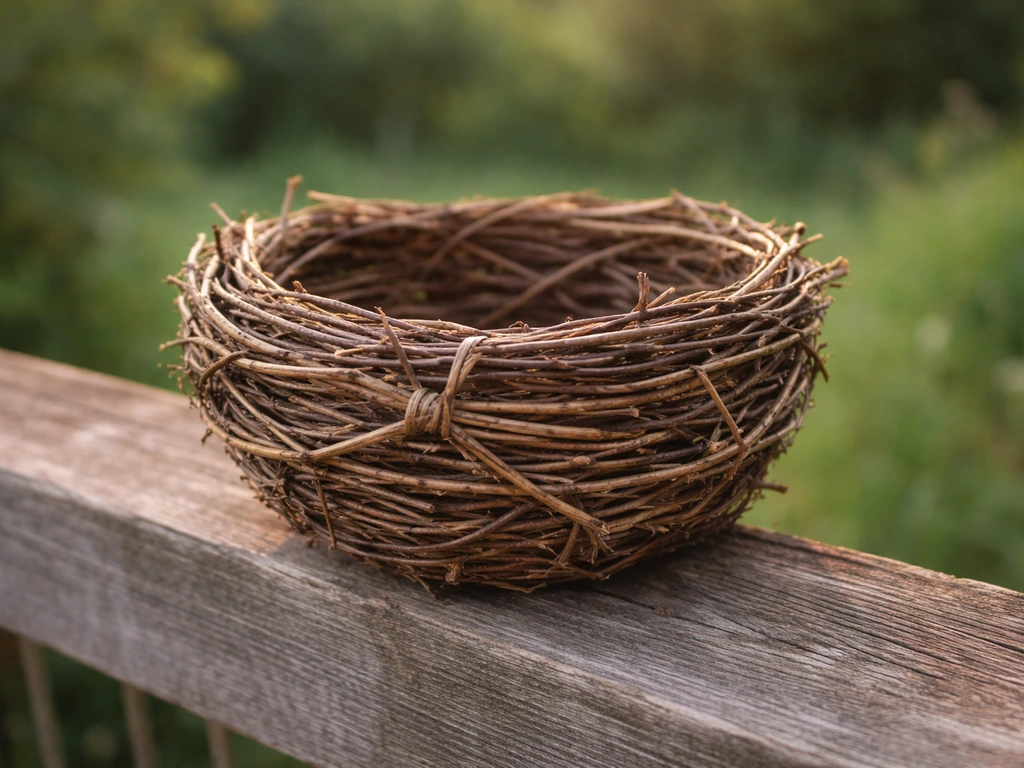
How to Make a Bird Nest Out of Twigs: DIY Steps
Step-by-step DIY for a twig nest bowl, from safe twig choice and weaving to placement, sizing, and bird-safe stability.
How to Build a Bird Nest: DIY Steps for Real Nests
Step-by-step guide to build a realistic bird nest or nesting box, choose materials, mount safely, and maintain by season

How to Make a Bird Nest for Preschoolers: Easy DIY Guide
Step-by-step DIY bird nest craft for preschoolers with safe materials, sturdy build tips, and learning activities.