You can absolutely build a twig nest structure at home using sticks, natural fiber, and a little patience. The basic process is this: gather flexible and rigid twigs, form a rough bowl shape using the thicker sticks as a frame, weave and stack finer twigs to fill the walls, bind everything with natural fiber, and line the inside with softer materials. That said, before you grab your first stick, it helps to understand exactly what you're building and whether it matches what local birds actually need.
How to Make a Bird Nest Out of Twigs: DIY Steps

Marcus Thornton
5 May 2026
What you're actually building here
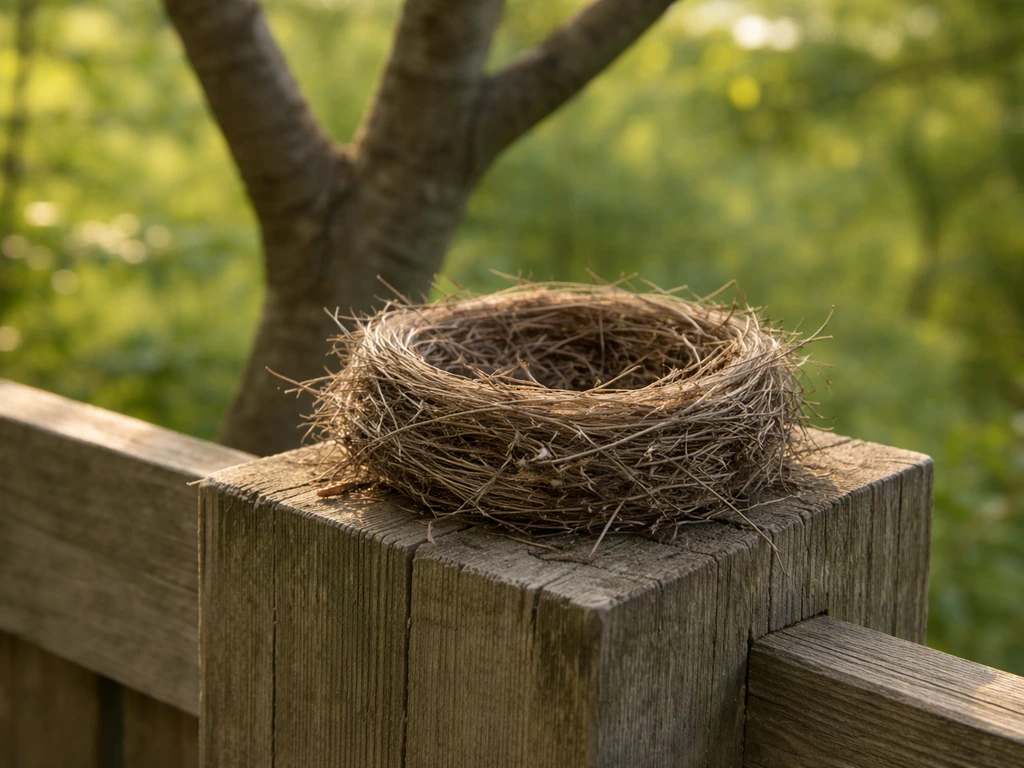
A twig nest you make by hand is best described as a nesting support or nest platform, not a guaranteed plug-and-play home for birds. Here's why that matters: wild birds are extremely particular about their nests. A robin builds a tight mud-reinforced cup. A song sparrow lines its nest with fine grasses and animal hair. A tree swallow won't even look at an open stick bowl because it needs a cavity with a small entrance hole. So when you build a twig structure, you're essentially giving birds a helpful head start on a cup-style nest, not handing them a finished home.
That's not a reason to skip the project. Nest platforms made from twigs work well for species like robins, mourning doves, and phoebes that naturally build open cup nests on sheltered ledges or in shrubs. They're also genuinely useful as craft projects, educational activities for kids, and decorative pieces that can hold bird-provided nesting material. You can also adapt these instructions into a kid-friendly how to make a bird nest for preschoolers activity with safe materials and close supervision craft projects. Just go in knowing what you're making so you can set it up where it'll actually do some good.
Materials and tools you'll need
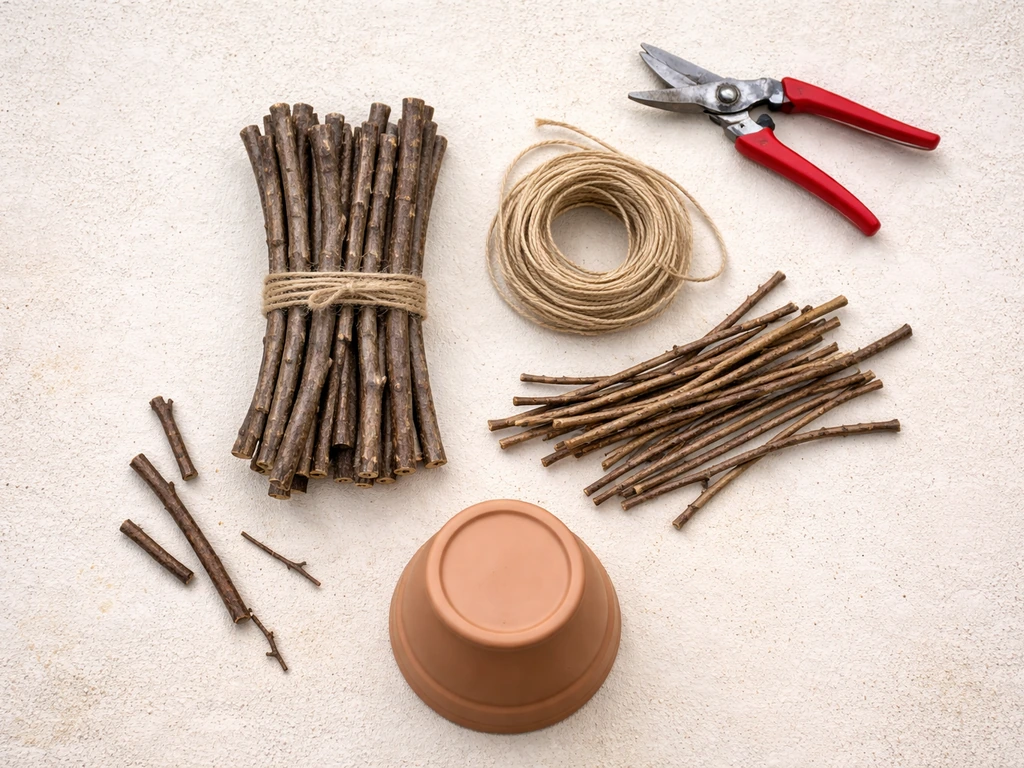
One of the best things about this project is that almost everything can be sourced for free from your yard or a local park. Here's what to gather before you start.
Twigs and sticks
- Thick base twigs: 8 to 12 sticks roughly pencil-thickness or slightly larger, 10 to 14 inches long, for the outer frame
- Medium weaving twigs: 20 to 30 sticks about 4 to 8 inches long and 3 to 5mm thick, flexible enough to bend without snapping
- Fine inner twigs and plant stems: a loose handful of thin, pliable stems (dried grasses, thin willow shoots, or flexible plant stalks) for filling gaps and smoothing the interior shape
- Best sources: your own yard after a windstorm, prunings from non-toxic shrubs like willow, apple, hawthorn, or birch
Avoid twigs from toxic plants like yew, black walnut, oleander, or rhododendron. Even dried, these can be harmful if birds chew or line nests against them. If you're not sure what a plant is, skip it and use something you can identify confidently.
Binding materials
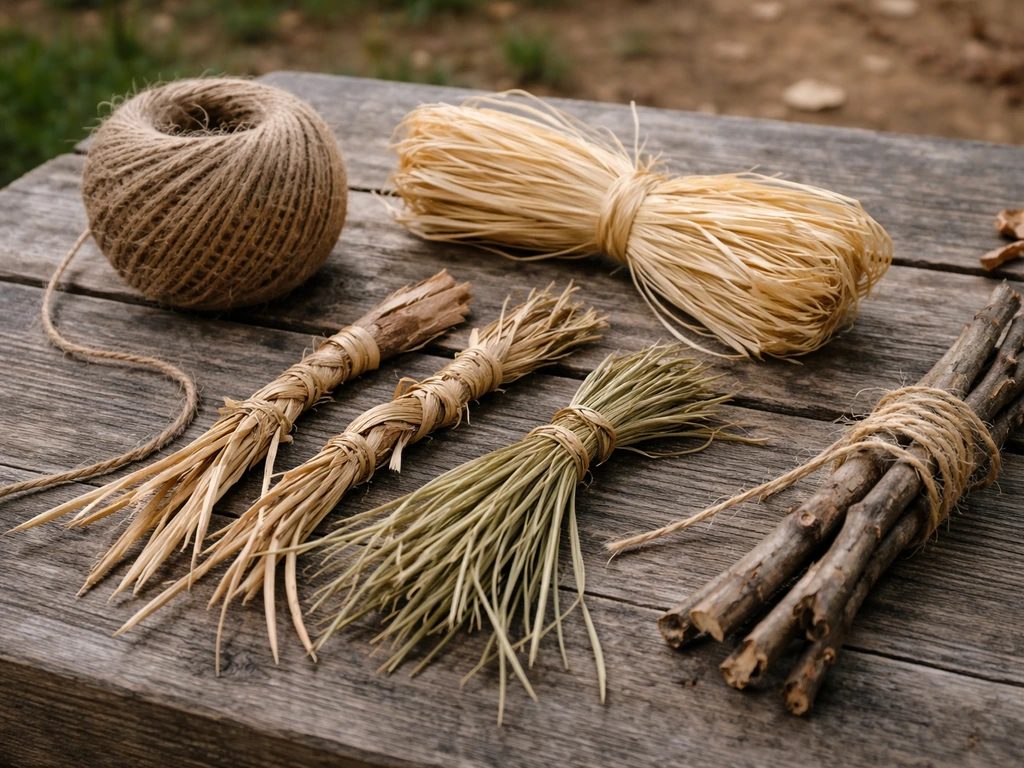
- Natural jute twine or raffia: inexpensive, biodegradable, and safe if birds pull at it
- Dried plant fiber: inner bark strips from willow or dogwood, dried grass bundles twisted together
- Mud or soft clay: used sparingly to fill the inner bowl and lock twigs in place, just like birds do naturally
- Avoid: plastic zip ties, synthetic rope, rubber bands, wire with sharp ends, or any adhesive not explicitly labeled bird-safe
Tools
- Pruning shears or strong scissors for trimming twigs to length
- A round bowl or flowerpot (about 4 to 5 inches in diameter) to use as a shaping form
- Needle-nose pliers to help thread twine through tight twig gaps
- A small bucket or bowl of water to soak fine twigs and make them more flexible
- Optional: a glue gun with a non-toxic, low-temp glue stick if you want extra stability for a decorative piece (skip this for a functional outdoor nest)
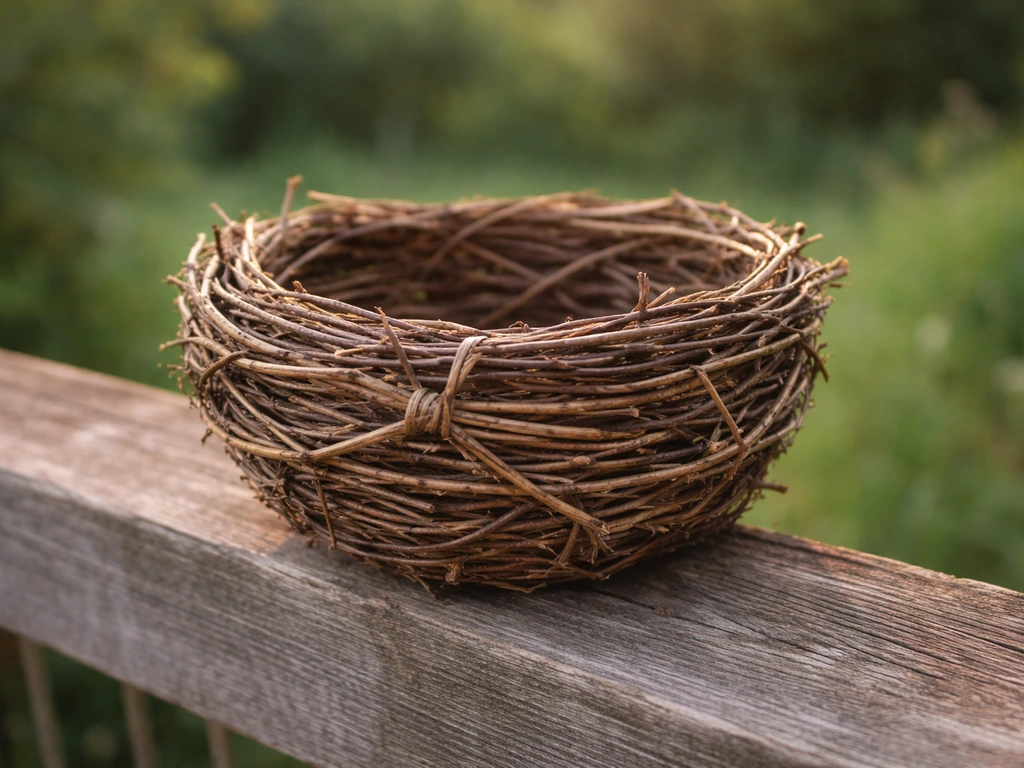
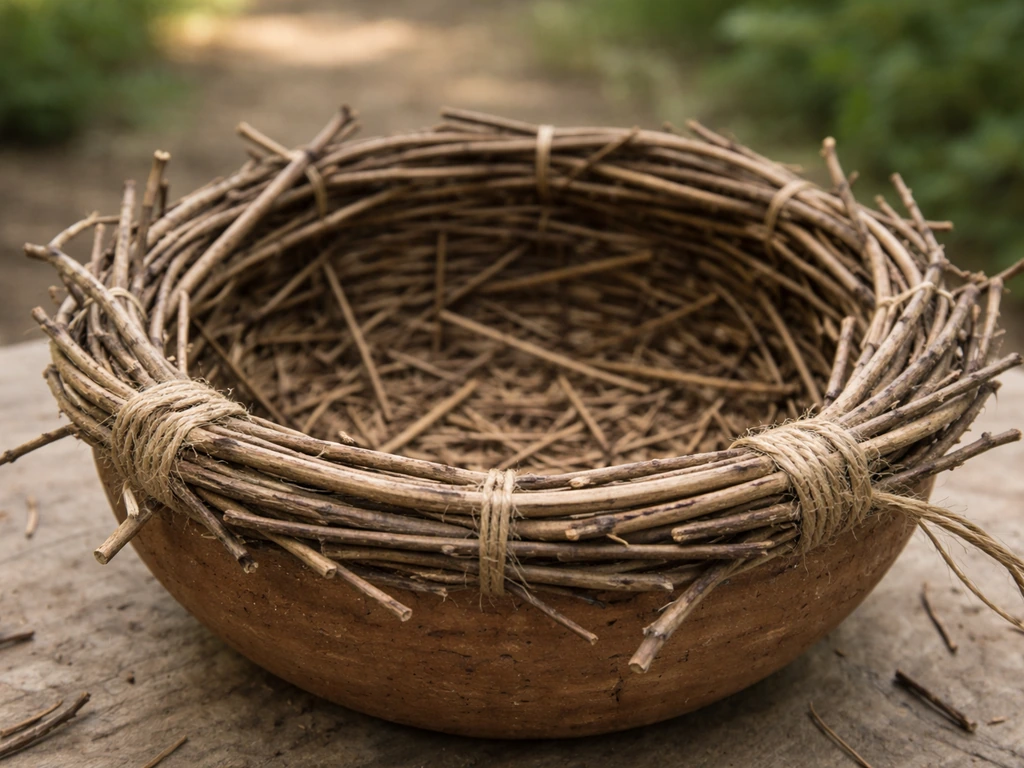
How to build the twig nest, step by step
I'll walk you through the method I've settled on after a few failed attempts. My first nest looked fine but fell apart in the rain because I used synthetic twine that slipped loose. These steps address that so yours holds together. Follow the step-by-step guidance in the next sections to learn exactly how to assemble and secure a bird nest how to make a bird nest step by step. If you want more detail, follow a complete guide on how to make a nest for a bird from start to finish. If you want a step-by-step guide on how to build a bird nest, follow the twig-size and placement tips later in this article.
- Sort and prep your twigs: Separate your sticks into the three size categories above. Soak your medium and fine twigs in water for 20 to 30 minutes so they bend instead of snap. Trim any jagged broken ends with your shears.
- Build the base frame: Lay four of your thickest twigs in a rough square or cross shape, overlapping at the ends. Use jute twine to lash each overlap point with 5 to 6 tight wraps and a secure knot. This is your foundation, so take your time here. A sloppy frame means the whole bowl will sag.
- Shape the walls using your bowl as a mold: Turn your round bowl upside down and drape the next layer of medium twigs over its curved surface so they curve upward naturally. Lay them like spokes radiating from the center, spaced about half an inch apart. Lash them to your base frame where they cross.
- Weave the side walls: Take your finer, more flexible twigs and weave them horizontally around the outer wall, going over and under the spoke twigs as you work your way up. This is the same basic basket-weave technique used for centuries. Every 2 to 3 rows, tie a piece of jute twine around the outside to lock the weave in place while you work.
- Fill gaps and refine the shape: Use your thinnest plant stems to fill in any gaps, especially at the base of the bowl. Pack them in loosely, pointing in different directions, to mimic how birds naturally interlock nest material.
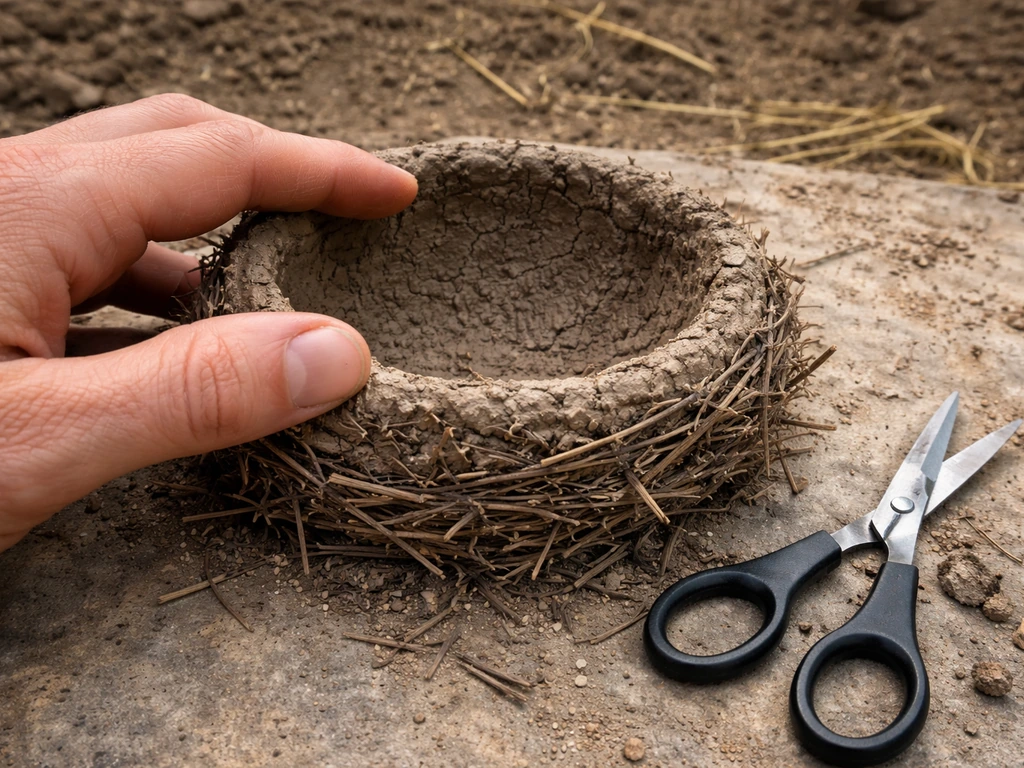
- Line the interior: Mix a small amount of clay or soft mud with dry grass or plant fiber and press a thin layer into the inner bowl surface. Smooth it with your fingers. This binds the bottom twigs together and gives the inside a more finished surface. Let it dry completely, ideally 24 to 48 hours in a warm spot.
- Check for sharp ends: Run your hand carefully around the entire inside surface. Any twig end poking inward can injure eggs or hatchlings. Trim or tuck them down with pliers.
- Final binding pass: Do one more round of jute twine wraps around the outside upper rim of the nest to prevent the walls from spreading over time.
Getting the size and placement right
Size matters more than most people expect. A cup nest that's too small won't hold a clutch of eggs safely, and one that's too wide won't retain the warmth eggs need. For a general-purpose open cup nest aimed at robins, phoebes, or mourning doves, aim for an interior cup diameter of about 4 inches and a depth of about 2 to 2.5 inches. The overall outer diameter will be closer to 6 to 8 inches with the twig walls.
Where and how high to put it
Placement is honestly where most DIY nest projects succeed or fail. Here's what works. Mount the nest on a sheltered ledge, a tree branch fork, or a flat board nailed to a fence post, where it has overhead cover from rain. If you want a more sheltered setup than a ledge, you can also look at how to make a hanging bird nest as an adjacent option for placement. American robins often nest 5 to 15 feet off the ground, so aim for that range. Face the open cup away from prevailing wind and direct afternoon sun. A spot with morning light and afternoon shade is close to ideal for most open-cup nesters.
- Height: 5 to 15 feet for most open-cup nesters; lower is fine for ground-nesting support species
- Cover: position under an eave, a dense branch, or a cedar shake overhang to keep rain out
- Wind: face the open cup away from the direction of your prevailing wind
- Sun: morning sun is welcome, harsh afternoon sun is not
- Proximity to cover: place within 10 to 15 feet of shrubs or trees so birds have a quick escape route if startled
Attaching it securely
The nest needs to stay put in wind, rain, and the weight of a brooding bird. For a ledge mount, use a flat board (about 6 by 6 inches) screwed to the wall or post, then lash the nest to the board with jute twine passed through small holes drilled in the board corners. For a branch fork, wedge the nest in naturally and add two or three wraps of jute twine around the branch and the outer rim of the nest. Avoid wrapping wire directly around branches, as it can girdle the wood over time.
Finishing touches and bird safety
Once the mud lining has dried fully, do a final safety check before you put the nest outside. This is the step I skipped on my early builds and regretted every time.
- No sharp protrusions: feel inside the cup with bare fingers and snip or bend any stiff twig tips flush with the surface
- No synthetic materials: remove any plastic ties, nylon string, or rubber components used during shaping that you may have left in accidentally
- Stable, not wobbly: shake the nest firmly. It should not flex or shift. If it does, add more binding at the weak points before mounting
- No chemical treatments: do not paint, varnish, stain, or apply any preservative to the nest. These off-gas chemicals that can harm eggs and nestlings
- Avoid netting: never use loose mesh or garden netting near the nest, as birds can become fatally entangled in it
If you want to encourage birds to line the cup themselves (which results in a much more species-appropriate nest), place a small pile of dry grass, pet hair (free of flea treatment chemicals), cotton batting, and short plant fibers within 10 feet of the nest. For safety, the U.S. Fish & Wildlife Service also advises blank" rel="noopener noreferrer">avoiding string, twine, yarn, dryer lint, and pet hair because they can create hazards for birds. Birds will collect and incorporate what suits them. blank" rel="noopener noreferrer">Avoid dryer lint, which gets dense and soggy when wet and can trap nestlings.
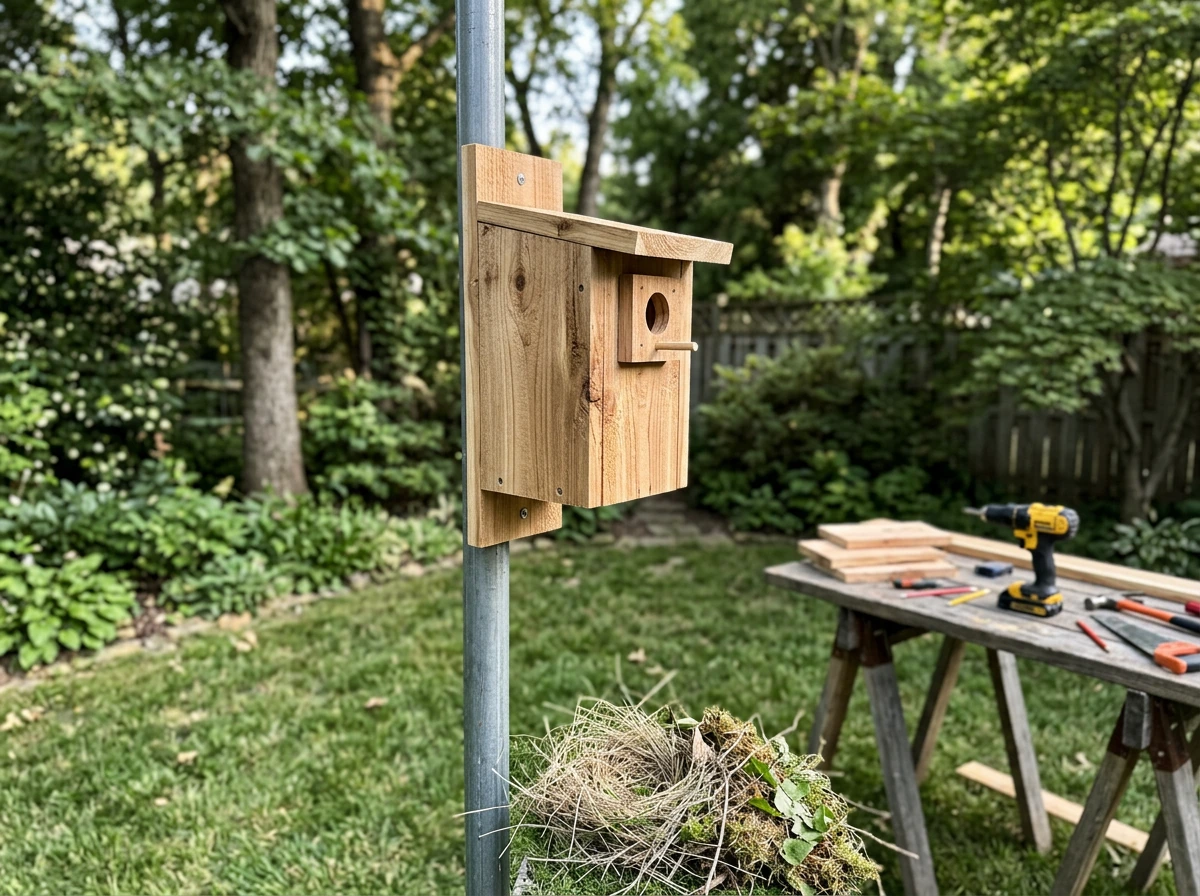
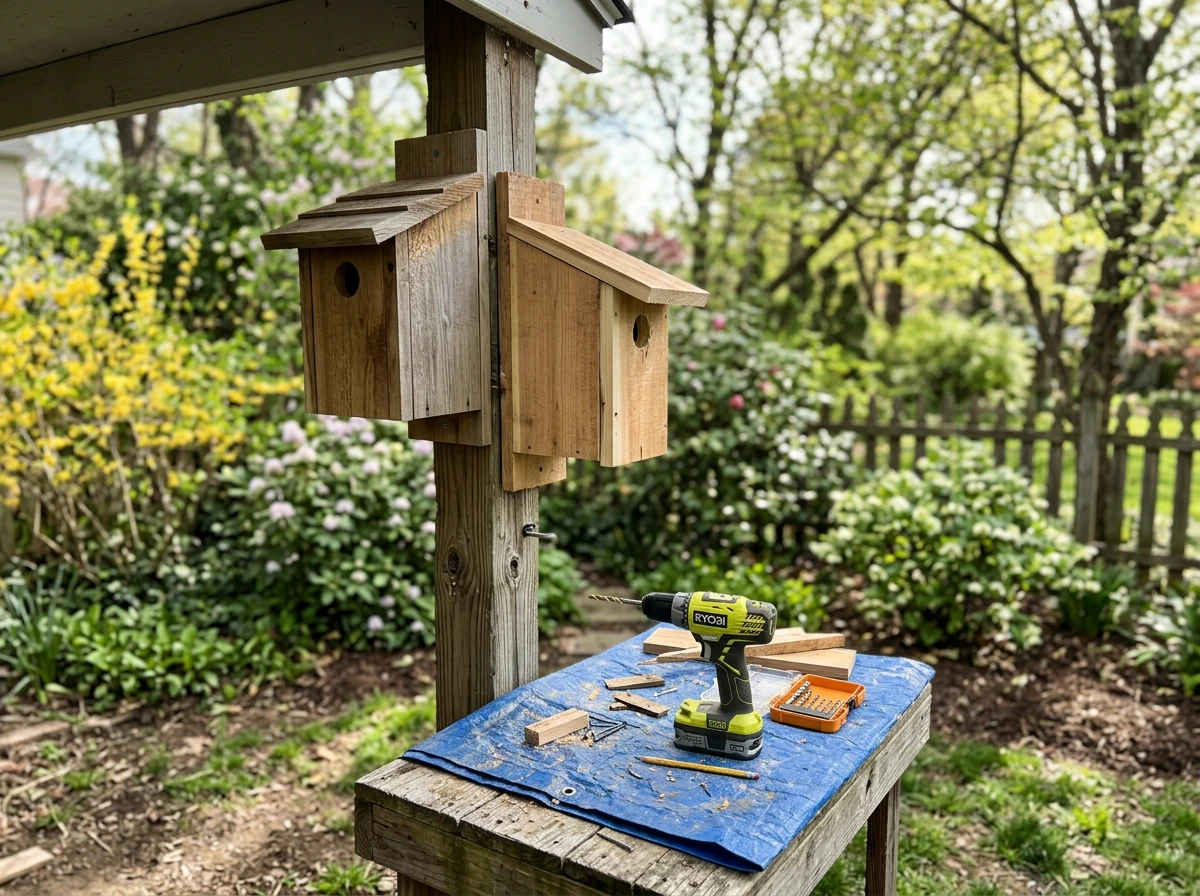
When a birdhouse or nesting box is the better choice
A twig nest structure is a great project, but it's genuinely not the right solution for every bird or every goal. Cavity-nesting species like bluebirds, chickadees, wrens, and tree swallows won't use an open cup nest at all. They need an enclosed box with a precisely sized entrance hole. A bluebird box needs a 1.5-inch entrance hole. A house wren box needs 1.125 inches. No amount of careful twig work will substitute for that.
| Project type | Best for | Not suitable for | Skill level |
|---|---|---|---|
| Twig nest / nest platform | Robins, mourning doves, phoebes, song sparrows | Cavity nesters (bluebirds, wrens, chickadees) | Beginner |
| Enclosed birdhouse / nesting box | Bluebirds, wrens, chickadees, swallows, flickers | Open-cup nesters | Beginner to intermediate |
| Nesting material station | All species that build their own nests | Species that don't use the supplied materials | Beginner |
If you're interested in building for a specific species, it's worth exploring purpose-built nesting box plans designed around the exact dimensions that species needs. Lovebird nest boxes, parakeet nesting setups, and hanging nest designs for different songbirds all follow species-specific size and entry requirements that an open twig cup just can't replicate. If you want to learn how to make love bird nest, focus on the same principles of size, entry access, and secure placement that work for species-specific boxes. If you’re specifically trying to make a lovebird nest box, use a purpose-built design with the right entrance size and ventilation for lovebirds lovebird nest boxes. The twig nest is a fantastic starting point for getting comfortable with nest construction and understanding what birds need, and it can lead naturally into tackling more species-specific projects once you've got the basics down.
If your main goal is to attract birds to your yard this season, the fastest win is actually combining a simple twig nest platform with a nearby nesting material station and some dense shrub cover. That trio gives multiple bird species options and dramatically improves the odds that something moves in. The twig nest alone is charming and satisfying to build, but birds will always vote with their feet, so give them as many good reasons to stay as you can.
FAQ
Should I put the twig nest outside immediately after building it, or let it “cure” first?
If your design includes a lining or any adhesive or mud components, let everything dry completely before mounting. Also wait at least 24 to 48 hours after assembly in dry weather so the fibers are settled, since a nest that feels damp or loose can discourage birds during the clutch period.
How do I stop squirrels or other animals from stealing the nest or knocking it down?
For a ledge mount, secure the holding board to the post with screws (not just twine) and keep the nest tight against the board surface. Avoid loose overhanging twigs that create handles, and place the nest where there is overhead cover but limited side access for climbing animals.
Can I use rope, jute, or string instead of natural fiber to bind the twigs?
Use jute twine or other natural fibers that flex without slipping, avoid smooth synthetic cords that can loosen when wet. If you must use store-bought thread or twine, test it by soaking a short strand in water and see if it still holds a knot after drying.
What if I’m seeing nesting behavior but no one is using the twig cup?
First, verify you built the right nest type for local species. If your area has cavity nesters, birds will ignore an open cup no matter how well it is made. Second, confirm placement (morning light, afternoon shade, sheltered from rain), and give birds time, often several days to a couple of weeks, to investigate and bring materials.
How do I choose the right twig diameter so the nest holds weight safely?
Use thicker twigs for the rim and structural walls, finer twigs only for weaving the gaps. If the rim flexes when you gently press it with a finger, it is likely too weak for brooding weight. Aim for snug weaving with minimal gaps, then add lining support so eggs are not sitting on hard, uneven sticks.
Is it okay to line the nest with dryer lint, grass clippings, or insulation?
Avoid dryer lint, it becomes dense and can trap or chill nestlings when wet. Grass clippings can work only if they are clean, dry, and untreated, but many gardeners prefer pet hair without flea treatment chemicals or soft plant fibers because they stay airy and less likely to mat.
What should I do if the first rain loosens the nest?
That usually means binding is slipping or the twigs are not interlocked tightly. Rebuild with a sturdier rim, use natural twine passed through small holes in a mounting board (for ledges), and ensure the lining is fully dry before mounting. Also avoid placing it where splashback directly hits the cup.
How often should I check or replace the twig nest?
Check briefly and minimally to reduce disturbance. If you see active eggs or chicks, avoid frequent handling. Replace only if the structure is broken, moldy, or repeatedly loosens in storms, because an unstable nest can injure nestlings.
Can I build multiple twig nests in the same yard?
Yes, but spacing matters. Place nests far enough apart that territorial birds are less likely to conflict, and prioritize different micro-sites (one in a shrub edge, one on a sheltered ledge, one in a branch fork). Too many near each other can reduce acceptance even if they are well made.
What if I want to help but I’m worried about harming birds with my scent or touch?
Minimize handling once the nest is assembled, and avoid touching the interior lining. If you want to add a material pile nearby to encourage lining, place it within about 10 feet of the nest so birds do the work without you needing to insert feathers or fibers directly into the cup.
Next Articles
How to Build a Bird Nest: DIY Steps for Real Nests
Step-by-step guide to build a realistic bird nest or nesting box, choose materials, mount safely, and maintain by season

How to Make a Bird Nest for Preschoolers: Easy DIY Guide
Step-by-step DIY bird nest craft for preschoolers with safe materials, sturdy build tips, and learning activities.
How to Make a Nest for a Bird: Step-by-Step Guide
Build a bird nest step by step by choosing the right nest type, materials, placement, and predator weather protection.