You can absolutely build a classic drinking bird toy at home, and the full process takes maybe an afternoon once you have your materials together. Fair warning up front though: the authentic, repeating drinking bird relies on a sealed internal fluid (typically methylene chloride, a volatile solvent) to create the pressure and phase-change cycle that makes it dip. That means this project sits somewhere between a craft build and a chemistry demonstration rather than a purely woodworking-style DIY. If you want the real physics to work, you need to understand what's actually happening inside the glass. This guide walks you through the full build, setup, and troubleshooting so you end up with a bird that dips reliably, not one that just sits there looking decorative.
Drinking Bird Toy How to Make: Step by Step DIY Guide

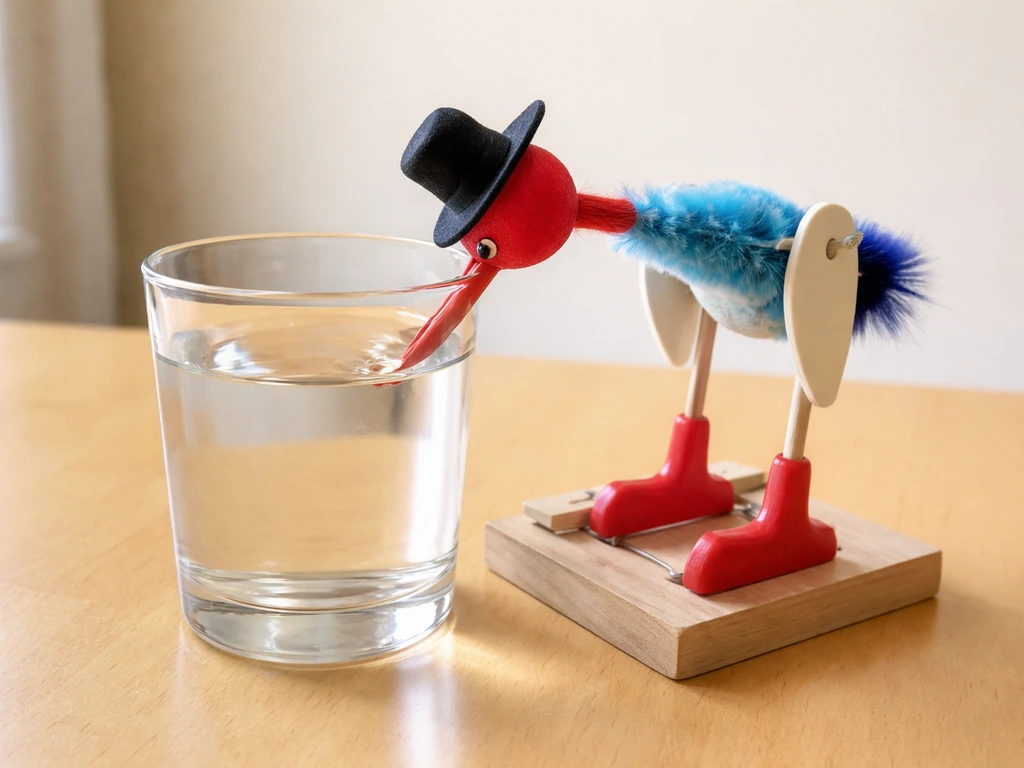
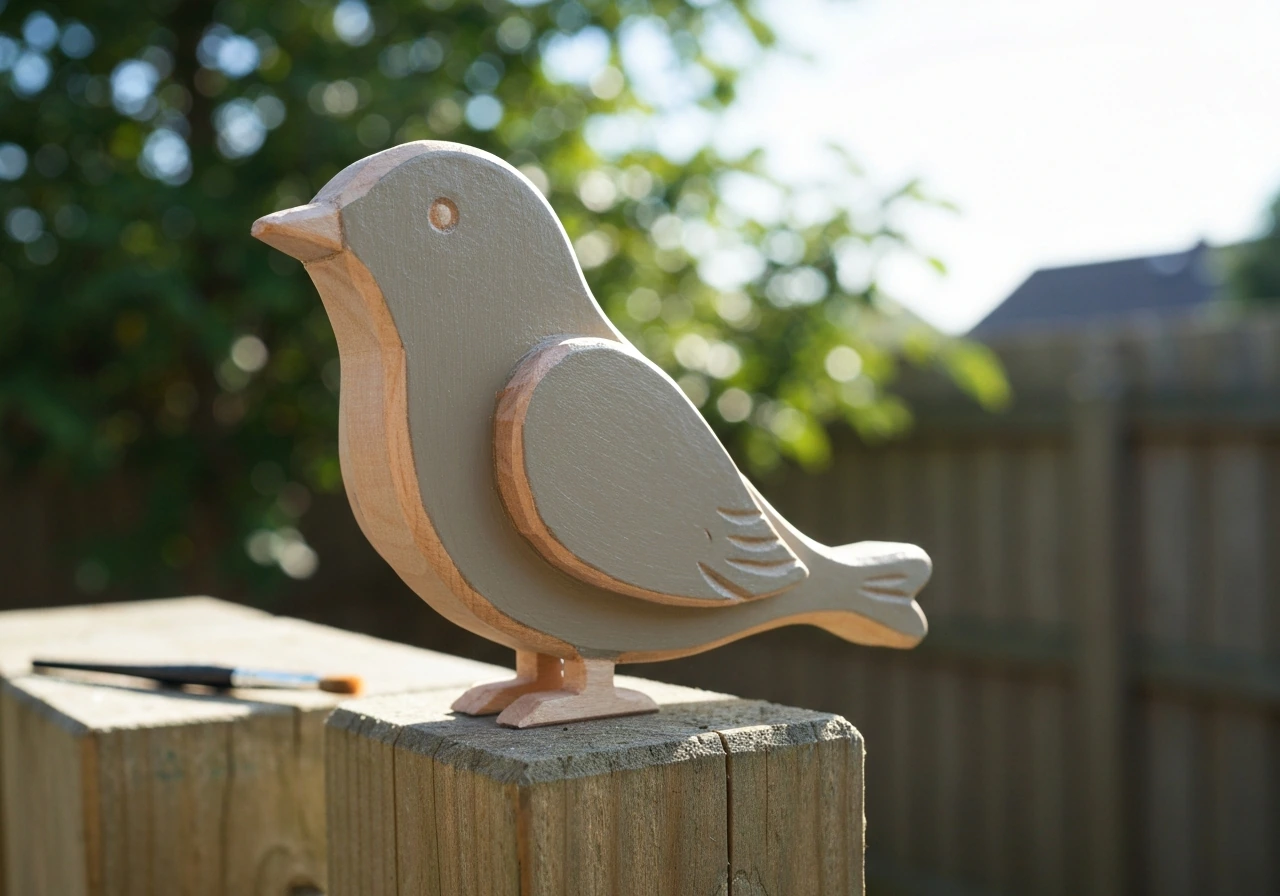
Just to set context for this site: the drinking bird toy is a maker project, not an item for live birds. Think of it the same way you would any other hands-on bird-themed build like a decorative wooden bird carving or a pivot-mounted windmill scarer. If you want a more straightforward woodworking project, you can apply similar layout and balance ideas to learn how to make a wooden bird decorative wooden bird carving. If your goal is specifically a carved wooden bird, you can follow this guide to learn how to make a wooden bird step by step. It's a conversation piece, a science demonstration, and a satisfying tinkering project all in one. If you mainly want a carved-display version, see how to make a bird stand out of wood for a more purely woodworking-focused approach.
What the Drinking Bird Actually Needs to Work
Before you build anything, it's worth understanding the mechanism so you're not guessing when things go wrong. The classic drinking bird is a heat engine made of two glass bulbs (head and body) connected by a glass tube. The tube runs straight down into the bottom bulb almost to its base, kind of like a straw sitting in a glass of lemonade. The top bulb (the head) is covered in a porous felt or flock material that acts as a wick. The whole sealed system contains a small amount of volatile working fluid, typically methylene chloride (also called dichloromethane or DCM).
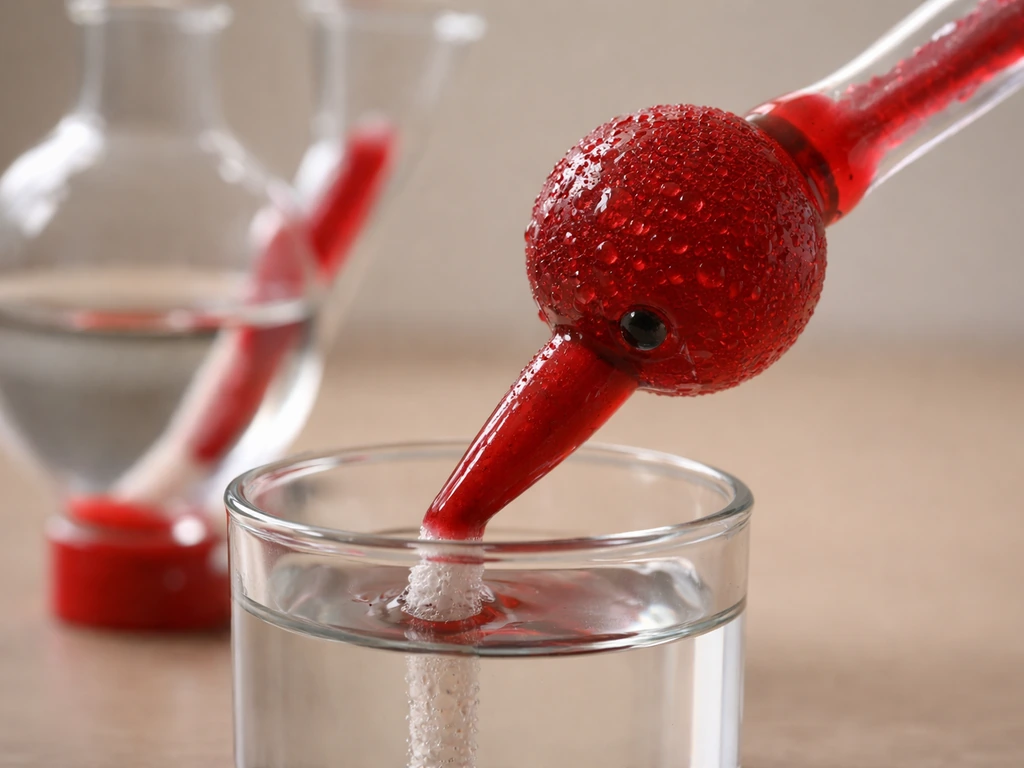
Here's the cycle in plain language: you wet the head/beak, the water evaporates off that felt surface, which cools the top bulb. Chemical Education Xchange explains that the drinking bird's motion is linked to blank" rel="noopener noreferrer">evaporative cooling and changing vapor pressure caused by temperature differences between the bird’s head and body. The cooler top bulb condenses some of the DCM vapor inside it, dropping the vapor pressure at the top relative to the warmer bottom bulb. That pressure difference pushes the liquid up the tube toward the head, making the bird top-heavy. It tips forward and 'drinks.' When the tube end rises above the liquid surface in the bottom bulb during the tip, vapor pressure equalizes, the liquid drains back down, and the bird rocks upright again. Repeat indefinitely as long as the beak stays damp or a temperature differential is maintained.
Three things are non-negotiable for the cycle to run: the head must be wet (or cooler than the body), the glass tube must almost reach the bottom of the lower bulb, and the pivot point must sit roughly halfway between the bottom bulb and the colored neck section. Get those three things right and the bird will drink on its own.
Materials and Tools You'll Need
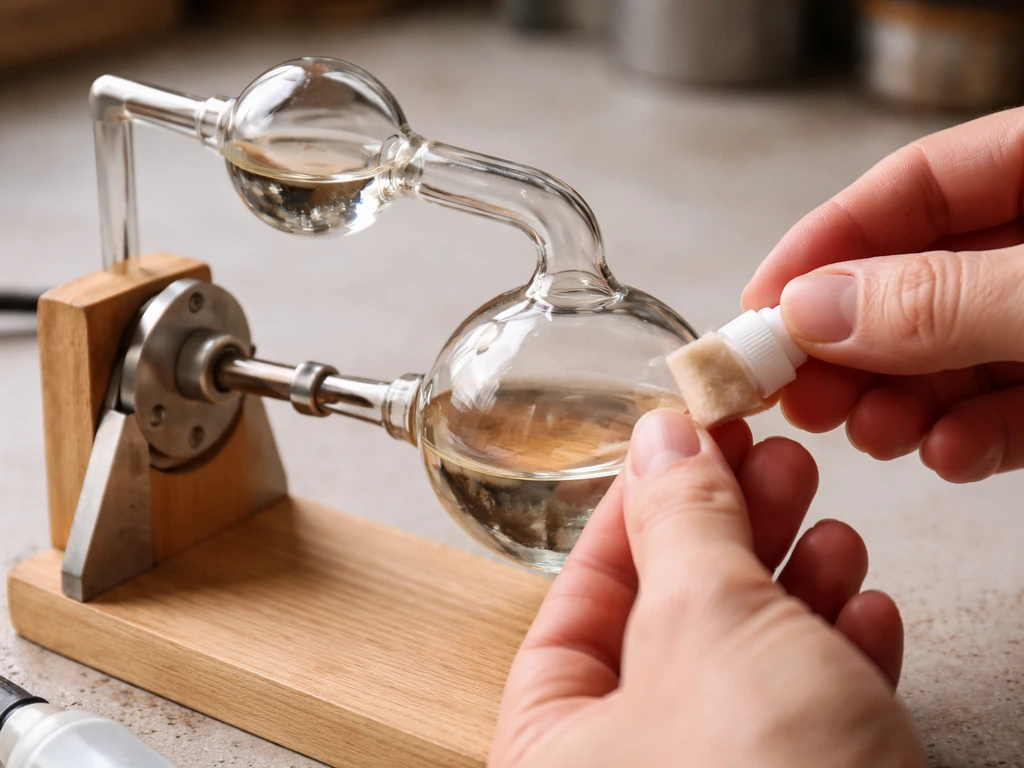
There are two routes here. Route one is assembling the glass-and-fluid components yourself, which requires access to scientific glassware and methylene chloride. Route two, which I recommend for most DIYers, is starting with a bare-bones commercial drinking bird blank or a disassembled unit and building the stand, hat, and wick yourself while leaving the sealed glass mechanism intact. Let me give you the full list for both the mechanism components and the stand/finishing elements.
For the Glass Mechanism (if sourcing/sealing yourself)
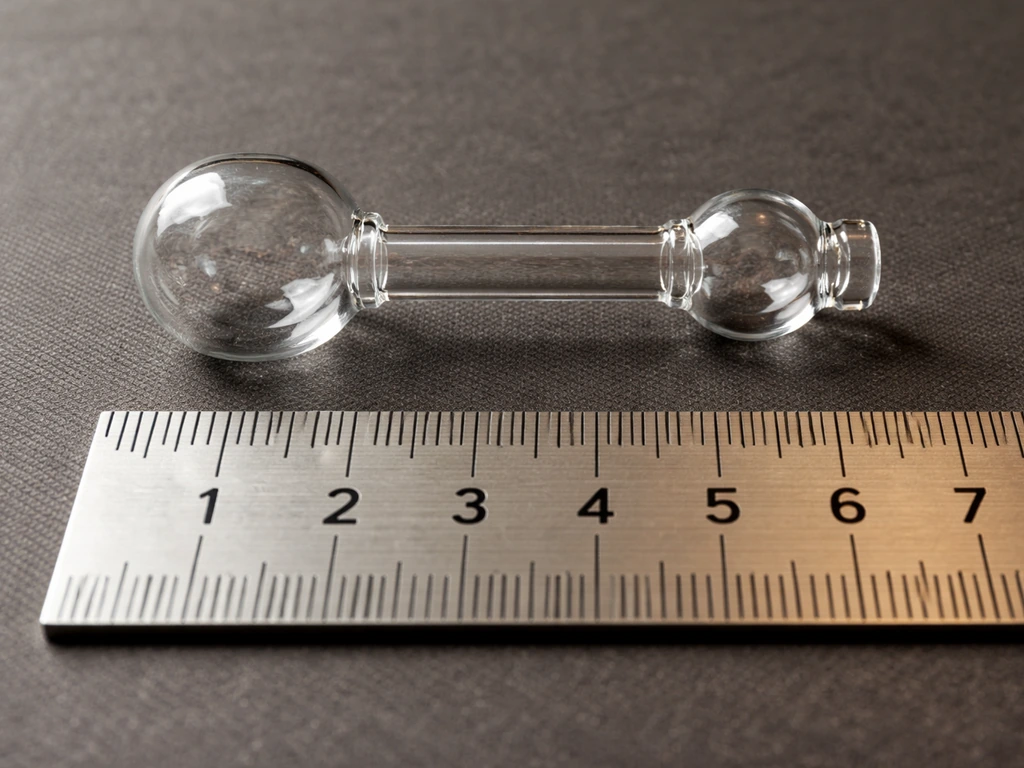
- Two small borosilicate glass bulbs, roughly 25-30mm diameter for the body and 20-25mm for the head
- One straight glass tube, approximately 5-6mm outer diameter and long enough to span both bulbs with the tube reaching near the base of the bottom bulb
- Methylene chloride (DCM) as the working fluid — handle only with nitrile gloves, eye protection, and ventilation; avoid skin and eye contact
- A propane torch or heat gun for flame-sealing the glass (experienced glassworkers only)
- Small funnel for fluid loading before sealing
For the Stand, Wick, and Finishing
- Thin metal rod or stiff wire (about 1.5-2mm diameter) for the pivot/yoke — a straightened coat hanger works well
- Wire cutters and needle-nose pliers
- Scrap hardwood or a thick wooden dowel (approx 10-12cm length) for the base/feet
- Small wooden block or spool for the base platform, roughly 8x5cm
- Drill with a small bit (2-3mm) for the pivot hole
- Felt fabric or pipe cleaner for the beak wick (felt is most authentic and absorbs well)
- Craft glue or hot glue gun
- Acrylic paint and a small brush for decorating the hat and body
- A small plastic or glass cup, about 50-60mm tall, for the water cup
- Nitrile gloves and safety glasses for any handling of the working fluid
Tools Summary
- Wire cutters and pliers
- Drill with small bits
- Hot glue gun
- Small paintbrush
- Ruler and marker for measuring pivot placement
Step-by-Step Build Instructions
These steps assume you're working with a pre-sealed glass mechanism (the two-bulb-and-tube assembly) and building the stand and finishing elements yourself. If you're sealing your own glass from scratch, complete the glasswork and fluid loading first, then pick up at Step 2.
- Inspect your glass mechanism. Hold the tube-and-bulb assembly up to the light and confirm the glass tube extends nearly to the bottom of the lower bulb. There should be a small gap, maybe 2-3mm, between the tube end and the very base of the bulb. If the tube sits too high, the fluid won't be picked up efficiently during pressure differentials and the cycle will be weak or fail entirely.
- Identify and mark the pivot point. Lay the glass assembly on a flat surface and find the midpoint between the top of the lower bulb and the bottom of the colored neck (the narrower section between the two bulbs). Mark this point on the tube with a felt-tip marker. This is where your metal yoke will sit. Getting this placement wrong is the single most common reason a homemade bird doesn't dip smoothly.
- Bend the metal yoke. Cut a 12-15cm length of your metal wire. Using pliers, bend it into a U-shape with the two arms parallel and spaced just wide enough to cradle the glass tube snugly at your marked pivot point. Crimp each arm inward slightly so the yoke grips the tube without needing glue. The yoke arms should extend outward horizontally about 4-5cm on each side to rest on the support posts.
- Build the support stand. Take your wooden base block and drill two small vertical holes, spaced exactly as wide apart as your yoke arms, near the center of the block. Cut two short wooden dowels or stiff wire lengths about 5-6cm tall and glue them into the holes. These are your support posts. The top of each post should have a small notch or wire loop so the yoke arms can rest and pivot freely. Test the pivot action by resting the yoke on the posts and nudging the assembly: it should rock forward and back with almost no resistance.
- Attach the beak wick. Cut a small strip of felt approximately 15mm wide and long enough to wrap around the front of the head bulb and fold down over the beak area (the lower front of the top bulb). Glue it on with craft glue, not hot glue directly on the glass, and press it gently into place. The felt needs good contact with the glass surface so it can transfer moisture through evaporation. A pipe cleaner wrapped around the lower part of the head bulb also works well in a pinch.
- Add decorative elements. Paint the wooden base and glue on any small felt or foam hat shapes for the top of the head bulb. Traditional drinking birds have a top hat and felt body covering, but this is purely cosmetic. Just make sure any decoration on the head/beak area remains porous and doesn't seal off the wick. Solid paint over the felt will block evaporation and kill the cycle.
- Position the water cup. Place your small cup on the wooden base in front of the bird, positioned so that when the bird tips forward to roughly 45 degrees, the beak just reaches into the water. The cup lip should be about level with the beak when the bird is upright, with a gap of no more than 10-15mm. Too far away and the beak won't dip into the water; too close and the bird will knock the cup over.
Setting Up the Water Mechanism and Running Your First Test
Fill the cup with plain tap water, right up to near the brim. A full cup is important for the first run because you need the beak to actually contact water when the bird dips, and the beak's reach is fixed by your pivot geometry. A half-empty cup won't work until the bird is dipping with enough angle.
Now wet the head completely. The easiest way is to submerge the entire head/top bulb in the cup of water for a few seconds, then lift the assembly back onto the stand. The felt wick should be thoroughly soaked. This is how commercial drinking birds are typically started: a full submersion of the head to saturate the wick, then positioning in front of the cup. Don't just drip a bit of water on the top; you want the whole felt surface damp so evaporation can cool the bulb evenly.
Set the bird upright on its stand facing the cup and give it a very gentle forward nudge. Within a minute or two in normal room conditions (roughly 20-25°C with moderate airflow), you should see the bird begin to lean forward as the top-heavy fluid shifts toward the head. It will tip into the water, pause briefly, then rock back upright as the pressure equalizes. From that point, the cycle should continue on its own without further intervention.
One thing worth knowing: the bird dips faster when evaporation is faster, which means drier air, a bit of airflow, or a warm room will increase the cycling rate. In very humid conditions the evaporation slows and so does the bird. That's not a defect, it's the physics working exactly as intended. If the bird won't start at all even after wetting the head, try the SFU trick of gently warming the lower bulb with your hands or briefly holding it near a warm surface. The heat differential jump-starts the pressure cycle.
Troubleshooting: Leaks, No Movement, and Erratic Dipping

Most problems with a homemade drinking bird trace back to one of three areas: the pivot geometry, the wick condition, or the fluid seal. Here's how to diagnose each.
The Bird Won't Start Dipping
- Head not wet enough: Re-submerge the head in the cup and resaturate the wick fully before trying again.
- Cup too far from the beak: Slide the cup closer so the beak can reach the water surface when the bird is at about 45 degrees forward lean.
- Body getting wet: If water splashes onto the lower bulb or body tube, it cools the bottom bulb and reduces the temperature/pressure differential that drives the cycle. Keep the body dry. Dry it off with a paper towel and retry.
- Room too humid: The bird needs evaporation to cool the head. In very humid conditions, try a gentle fan blowing lightly across the head to boost evaporation rate.
- Pivot friction too high: If the yoke isn't rocking freely on the support posts, even a correct fluid cycle won't tip the bird. Check that the yoke arms can pivot without sticking.
The Bird Dips but Knocks Over the Cup
- Pivot collar is too high: Slide the metal yoke very slightly downward (toward the lower bulb) to change the balance point. Even a 2-3mm shift can reduce the impact force at the end of the tip.
- Cup is too light or too small: Use a heavier cup with a wider base so it doesn't get knocked around.
- Dipping angle too steep: Check that the support post height gives the bird a 30-45 degree forward lean at full dip, not a near-vertical nose-dive.
Dipping is Weak, Slow, or Irregular
- Wick dried out or clogged: Replace the felt wick if it has become stiff, painted over, or mineral-crusted from hard water. Distilled water can help reduce mineral buildup on the wick.
- Tube placement is off: If the internal tube doesn't reach near the base of the lower bulb, the fluid won't shift reliably. On a commercial sealed unit you can't fix this, but on a self-built unit re-check your tube depth.
- Temperature too uniform: The bird needs a head-to-body temperature difference. Position it away from air conditioning vents blowing directly on the body, and make sure the head stays in slightly cooler, moving air.
Fluid Leaking from the Glass
If you see colored fluid on the outside of the glass, stop handling the bird immediately. Methylene chloride is a skin and eye irritant and should not be ingested or come into contact with skin. Put on nitrile gloves, place the unit in a sealed bag, and dispose of it according to your local chemical disposal guidelines. Do not try to re-seal a cracked drinking bird glass at home. For a self-built unit with a compromised seal, the glass assembly needs to be rebuilt from scratch with fresh glasswork.
Safety, Storage, and Keeping It Working Long-Term
The drinking bird is marketed as a toy but it genuinely contains a hazardous chemical inside the sealed glass. Treat it accordingly. The working fluid is methylene chloride, which can stain surfaces, irritate skin and eyes, and should never be ingested. Keep it out of reach of young children due to both the small parts and the chemical contents. Always handle the glass assembly with dry hands and avoid dropping it onto hard surfaces.
Everyday Use Tips
- Use distilled or filtered water in the cup to reduce mineral deposits on the felt wick over time.
- Keep the body and lower bulb dry during operation. If water splashes on the body, the evaporation differential breaks down and the bird stops.
- Don't leave the bird running indefinitely next to an empty cup. Once the cup is dry, either refill it or stop the bird by removing it from the stand so it doesn't rock dry for hours.
- A single wet start from a full cup of water can sustain cycling for many minutes; refill the cup when it drops more than halfway.
Storage
Store the bird upright in a dry location away from direct sunlight and heat sources. Extreme heat can increase the internal vapor pressure and stress the glass seals. If you're putting it away for a while, make sure the wick is completely dry before storage to prevent mold on the felt. A small cardboard tube or sleeve over the glass body protects it from accidental impacts on a shelf.
When to Replace Parts
| Component | Sign It Needs Replacing | Fix |
|---|---|---|
| Felt wick/beak | Stiff, crusty, or water-repellent rather than absorbent | Peel off old felt, clean the glass surface, glue on fresh felt strip |
| Water cup | Cracked, too shallow, or wrong height for your pivot setup | Swap for a new cup and re-check the dip angle |
| Pivot yoke/wire | Bent out of alignment or creates friction on the support posts | Re-bend or replace the wire; ensure free-rocking pivot |
| Base/support posts | Wobbly or posts have shifted so pivot height is uneven | Re-glue posts and re-level on a flat surface |
| Glass mechanism | Any visible crack, fluid leak, or discoloration on the outside glass | Dispose of safely as chemical waste; replace with new sealed unit |
The felt wick is the part you'll replace most often, maybe every few months with regular use. Everything else on a well-built stand should last for years. The glass mechanism itself, as long as you don't drop it, can last decades. I've seen drinking birds that are 30+ years old still cycling perfectly because the glass seal is intact and someone kept up with the felt.
If you enjoy this kind of precision, mechanism-driven maker project, the drinking bird pairs well with other bird-themed builds that involve careful balance and pivot work. If you mainly want a bird-related project beyond the toy, learning how to make a bird baffle is a useful adjacent option for keeping birds away. A wooden bird carving on a dowel stand or a pivot-mounted windmill bird scarer uses similar principles of weight distribution and free rotation, and the woodworking skills from those projects translate directly to building a solid drinking bird stand. If you want a more dedicated outdoor scare tactic instead, you can also learn how to make a bird baffle and place it where birds tend to land.
The drinking bird is one of those projects that looks deceptively simple but teaches you a surprising amount about heat transfer, vapor pressure, and mechanical balance just by building and tuning it. Get the pivot geometry right, keep the wick fresh, and wet the head thoroughly for your first test. That's really all there is to it.
FAQ
Can I use any liquid besides water to wet the head and make the bird dip?
For reliable cycling, use water. Other liquids can change evaporation rate and cooling behavior, which usually alters (or stops) the pressure swing that drives the mechanism. If you test with something else, expect the cycle timing to shift and the felt may not wick properly.
How do I know my pivot point is in the right spot if the bird keeps rocking or never tips?
If it tips too easily and never returns cleanly, the pivot is likely too far toward the bottom bulb. If it refuses to tip, the pivot is likely too far toward the head/neck section. Make small stand adjustments (a few millimeters at a time) and retest, because tiny geometry changes dramatically affect the balance threshold.
What should the felt wick look like right after soaking, and how long should it stay wet?
After soaking, the felt should look uniformly saturated, with no dry patches or crusty areas. For best starts, soak fully and then begin testing within a short window, because the wick can start evaporating before the bird is positioned, which slows or prevents the initial temperature differential.
Why does my bird run for a short time, then stop even though the head is still damp?
Common causes are incomplete wick saturation at the beginning, a draft that evaporates unevenly, or the head not reaching the water surface during each dip cycle. Check that your cup water level is high enough for consistent beak contact, and confirm the tube end geometry is correct so the pressure equalization drain happens each time.
Does room temperature really matter, or can I fix slow cycling another way?
Temperature matters because the cycle depends on a temperature difference between bulbs. If the bird runs slowly in cool rooms, warm the environment rather than modifying the glass. Also note that more airflow increases evaporation and cycling rate, while high humidity slows it down.
Is it safe to touch the drinking bird while it is operating?
Handling is best kept minimal. Even though the mechanism is sealed, the exterior felt and glass can still contact surfaces that you later touch. Avoid getting the internal fluid to the outside, wear nitrile gloves if you ever see any staining, and do not allow children to handle the glass assembly.
What if the bird smells strongly or I see residue on the stand or cup?
Stop immediately if you notice any unusual odor or any colored material transfer to the outside surfaces. The presence of internal fluid on the glass indicates a compromised seal, and the unit should be bagged and disposed of according to local chemical disposal guidance rather than being repaired or re-used.
How should I clean the bird between tests without damaging the wick?
After testing, let the bird dry upright with the wick fully exposed to air. Avoid soaking or scrubbing the glass assembly aggressively, which can disturb positioning or wick contact. If the wick becomes discolored, replace it rather than trying to clean it thoroughly, because residue can interfere with wicking and evaporation.
My cup is the right size, but the bird still will not start. What’s the fastest checklist?
Verify three things in order: the wick is fully saturated (not just damp), the pivot geometry places the tube end into the near-base range of the bottom bulb, and the water level is near the brim so beak contact is guaranteed during each dip. If those are correct and it still will not start, gently warm the lower bulb externally to create the initial temperature differential.
How often should I replace the wick, and what storage habits prevent mold?
With regular use, plan on wick replacement every few months. For storage, ensure the wick is completely dry before putting the bird away, store it upright, and keep it away from direct sun and heat sources to reduce both mold risk and stress on seals.
Can I make the stand heavier or lighter to make it dip faster?
Changing mass changes the tipping threshold, but it can also make the cycle unreliable if the pivot geometry is no longer correct. If you want a faster rhythm, adjust conditions (dryness and airflow) rather than adding weight. If you do modify the stand, do it in small increments and verify the bird can both tip and return each cycle.
Learn how to make a wooden bird with a beginner-friendly materials list, step-by-step build, and durable outdoor sealing

Step-by-step DIY plans to build a chimney swift bird house, with correct dimensions, placement, and weatherproofing for

Step-by-step DIY for building an oriole bird house with right dimensions, weatherproofing, predator-safe placement, and