Making a wooden bird is one of those projects that sounds fancier than it actually is. You can build a charming, durable wooden bird figure for your backyard in a single afternoon with basic tools, a few scraps of wood, and a little patience. The trickiest part is usually deciding what kind of wooden bird you actually want to make, so let's start there.
How to Make a Wooden Bird: Step-by-Step Outdoor Build

Marcus Thornton
7 Apr 2026
Choosing the right wooden bird project type
"Wooden bird" can mean a lot of different things depending on who you ask. Before you buy a single board, get clear on which of these you're after, because the build process is pretty different for each.
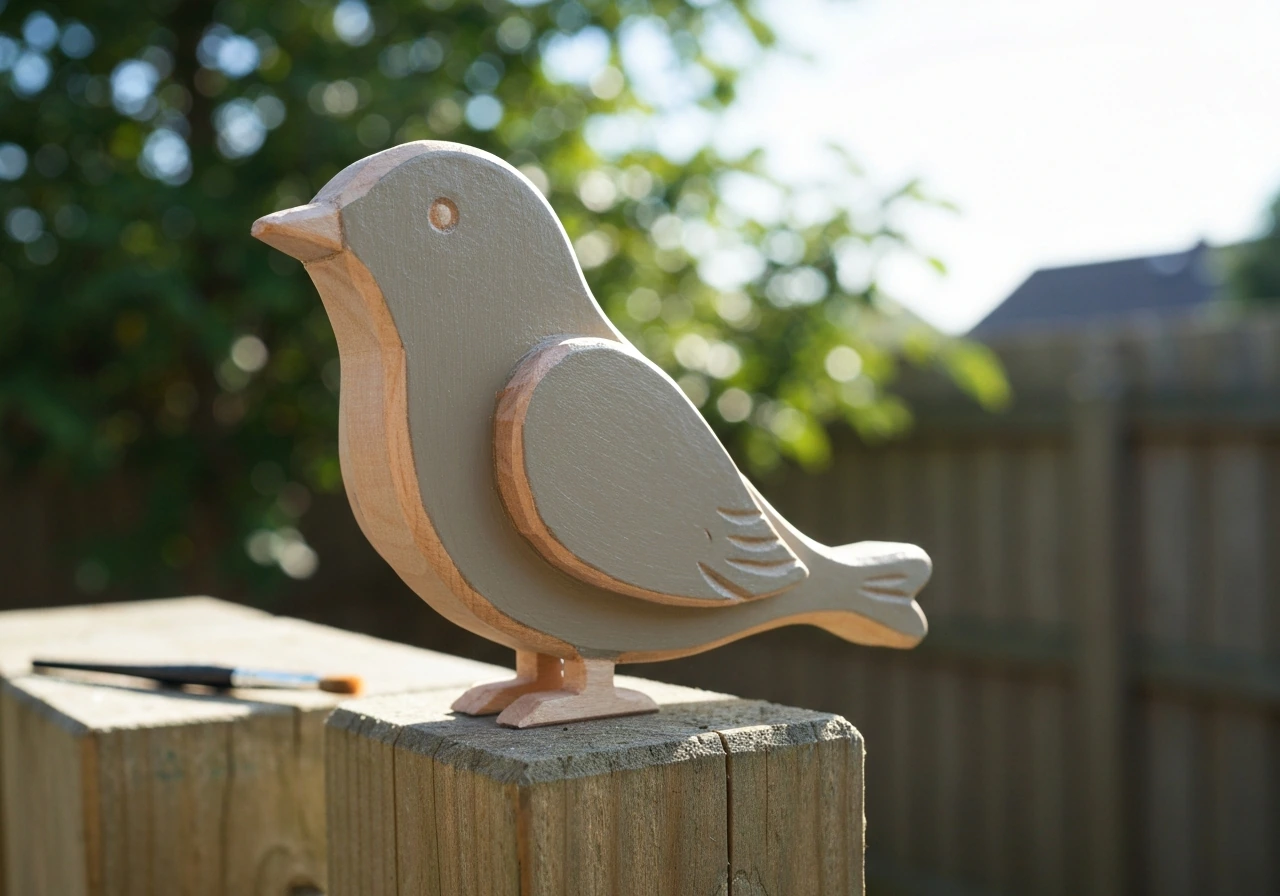
- Decorative sculpture or garden stake: A flat or 3D bird shape cut from plywood or solid wood, painted and mounted on a stake or fence post. Great first project, no joinery required.
- Hanging ornament or mobile: A smaller flat bird silhouette with a hole drilled at the top for cord. Easy to batch-produce and looks great in a cluster.
- Functional birdhouse or nesting box built to look like a bird: A more advanced build where you construct an actual nesting box and give it a stylized bird shape. Combines craft with real habitat value.
- Bird-shaped feeder or enrichment toy: A wooden bird body that doubles as a seed dispenser or backyard enrichment piece. If you have a pet bird or want to add interactive features to your yard, this crosses into toy territory.
- Kinetic whirligig or garden scarer: A wooden bird with moving wings, designed to spin in the wind. These are fun builds and serve a dual purpose.
For most beginners, I'd recommend starting with a flat decorative silhouette or a simple 3D assembled bird with a few distinct body parts (body, wings, beak). It gives you a finished piece that looks great without requiring carving skills or complex joinery. If you're curious about more functional builds after this project, you can explore things like making a bird stand out of wood to display your finished piece, or eventually work up to a nesting box or feeder version.
Materials and tools for a DIY wooden bird
Here's the good news: you probably have most of what you need already. I've built bird figures from fence board offcuts, pallet slats, and even old cabinet doors. The wood doesn't need to be perfect. For an outdoor piece that will hold paint and seal well, aim for a softwood like pine or cedar (cedar is naturally weather-resistant) or a smooth plywood like 1/2-inch birch ply for flat silhouettes.
| Item | Best Option | Budget Alternative |
|---|---|---|
| Main body wood | 1/2" cedar or pine board | Pallet slat or fence offcut |
| Wings / thin details | 1/4" plywood | Craft wood sheet or thin hardboard |
| Adhesive | Wood glue + CA glue for instant tack | Wood glue alone (needs clamping time) |
| Fasteners | 1-inch brad nails or small screws | Toothpicks + wood glue for tiny parts |
| Sealant | Exterior polyurethane or spar urethane | Exterior-rated decoupage medium |
| Paint | Exterior acrylic craft paint | Leftover house paint (water-based) |
| Sandpaper | 80-grit and 220-grit | Sanding block at any grit |
For tools, a jigsaw is your best friend for cutting curves in a bird silhouette. A scroll saw gives cleaner cuts but isn't necessary. If you only have a handsaw, stick to blocky, geometric bird shapes (think mid-century modern style) that use straight cuts. You'll also want a drill with a basic bit set, a sanding block or orbital sander, clamps (even binder clips work for small parts), and a paintbrush.
Step-by-step build process (cutting, shaping, joining)
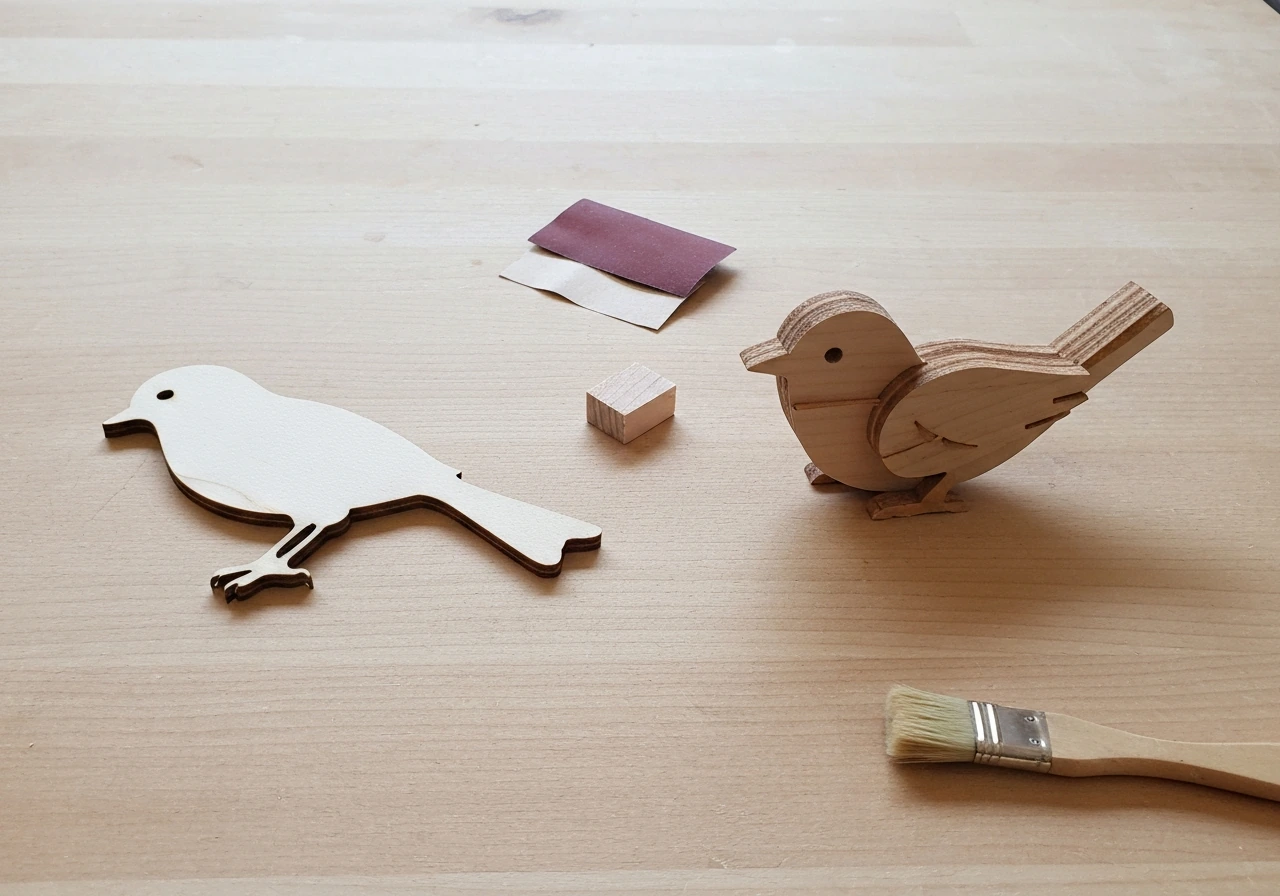
I'll walk you through building a simple 3D assembled bird: a rounded body with flat wings and a beak. This method works whether you want a decorative figure, a garden stake, or a base for a more functional piece later.
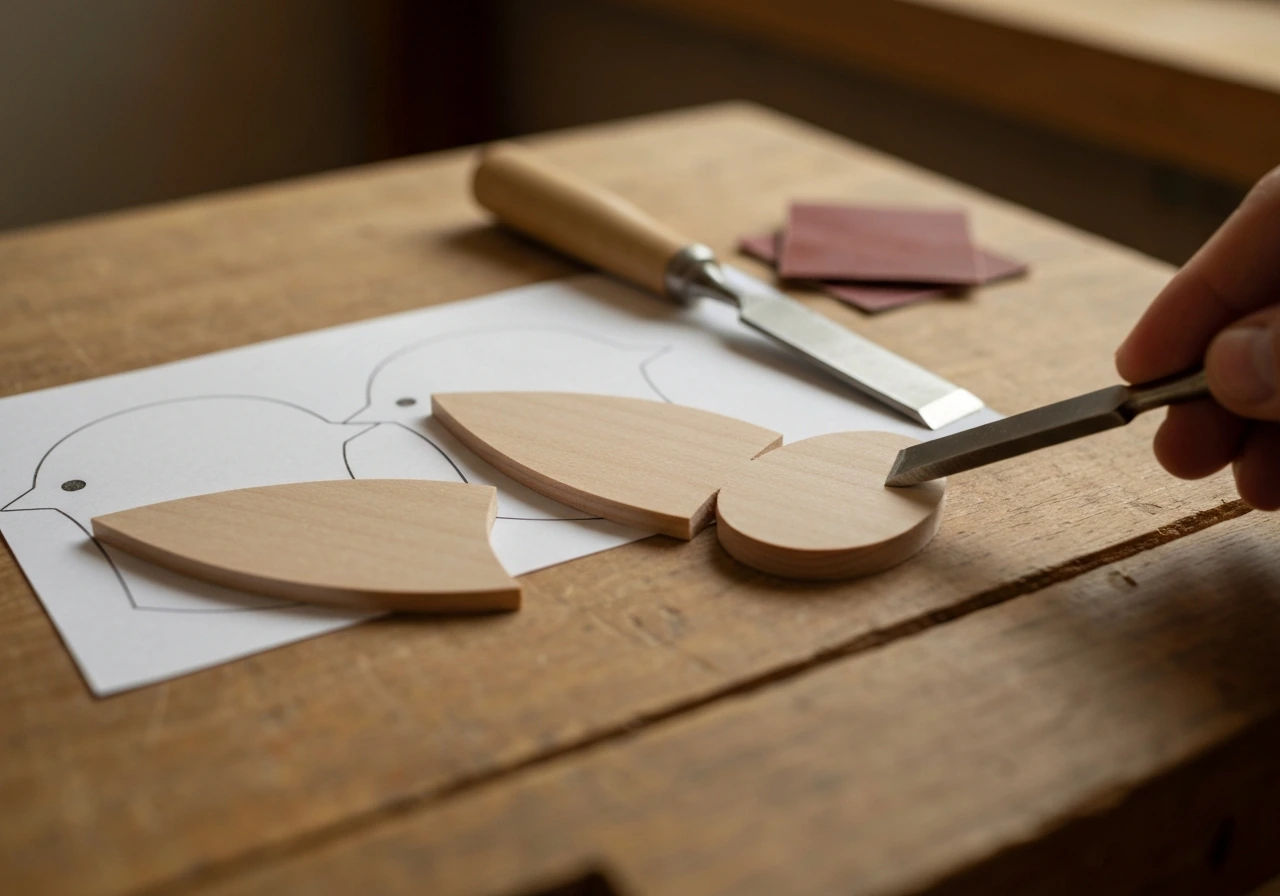
- Draw your bird template on paper first. A simple robin or sparrow silhouette works great. The body should be roughly 6–8 inches long for a garden-scale piece. Cut out the paper template and trace it onto your wood with a pencil.
- Cut the body shape using a jigsaw. Go slow around curves and let the blade do the work. Don't force it. Sand the cut edges starting with 80-grit to remove any roughness, then smooth with 220-grit.
- Cut the wings separately from thinner wood or plywood. Wings can be flat ovals or more detailed feather shapes. Two wings per bird, mirrored.
- Cut a small wedge or triangle for the beak from scrap wood. Drill a tiny pilot hole in the beak and the body so you can pin them together with a brad nail later.
- Sand all pieces to 220-grit before assembly. It's much easier to sand individual parts than the finished assembled bird.
- Attach the wings using CA glue (super glue) for an immediate hold, then run a thin bead of wood glue along the seam for long-term strength. Hold each wing in place for 30–60 seconds until the CA glue grabs. This two-glue method is a trick I learned after several wings fell off mid-project.
- Attach the beak using a brad nail and wood glue. Clamp or hold until set.
- If you plan to use the bird as a functional nesting box or feeder, drill any necessary openings now before finishing. For a nesting box, NestWatch recommends at least four drainage holes in the floor at 3/8" to 1/2" diameter to prevent water buildup inside.
Let the glue cure fully (at least 2 hours for wood glue, overnight is better) before moving to finishing. A USDA Forest Products Laboratory wood adhesives technical document discusses how curing or set time and clamping time work together as part of how a wood bond forms blank" rel="noopener noreferrer">glue cure fully. Rushing this step is how you end up re-gluing wings in your driveway at sunset.
Finishing, weatherproofing, and safety for outdoor use
This step is where a lot of beginner projects fail. Paint alone won't protect wood outdoors. You need a proper sealant over your paint, and the sealant needs to be the right kind. For any piece going in your backyard, use a water-based exterior polyurethane or spar urethane. Avoid solvent-heavy finishes like traditional varnishes if birds (especially pet or captive birds) will have direct contact with the piece, since fumes and residue can be harmful. Water-based exterior acrylics and their companion sealants are the safest bet.
Apply two coats of sealant minimum, letting each coat dry fully between applications. For pieces in very sunny or exposed spots, a third coat is worth the extra hour of work. Before applying your second coat, lightly sand with 220-grit to knock down any raised grain, then wipe clean. One thing to keep in mind: if you're sealing wood that's been sitting outside or in a damp garage, check that the moisture content isn't excessive. Sealing very wet wood can trap moisture and cause mold issues down the line. If the wood feels damp, let it dry indoors for a few days first.
After the final coat, plan around the weather before you hang or mount the piece. At around 70°F (21°C), most exterior sealants need roughly 24 hours before rain exposure to cure properly. If the forecast looks iffy, keep your bird inside a bit longer. It's frustrating to rush a finish only to have it cloud up after the first drizzle.
A note on safety: if you're making a bird that will be near a functioning nesting box or feeder, avoid any paint or sealant that contains fungicides or bactericides (sometimes listed as mildewcides on the label). EPA defines antimicrobial pesticides as products intended to kill or mitigate the growth or development of microorganisms, including fungi and bacteria, or to protect surfaces and systems from biological deterioration fungicides or bactericides. These are fine for a fence but not for wildlife. Stick to plain exterior-rated products without biocide additives.
Painting and adding details (eyes, beak, feathers)
Paint before you seal. I know that sounds obvious, but I've watched first-timers seal their bird and then try to paint over it, only to have the paint bead up and peel. The order is: sand, prime (optional but helpful on raw wood), paint, seal.
Start with a base coat in your bird's main body color. Two thin coats work better than one thick coat. Exterior acrylic craft paint (the kind in small squeeze bottles at any craft store) is perfect for this. It's flexible when dry, which helps it survive temperature changes outdoors without cracking.
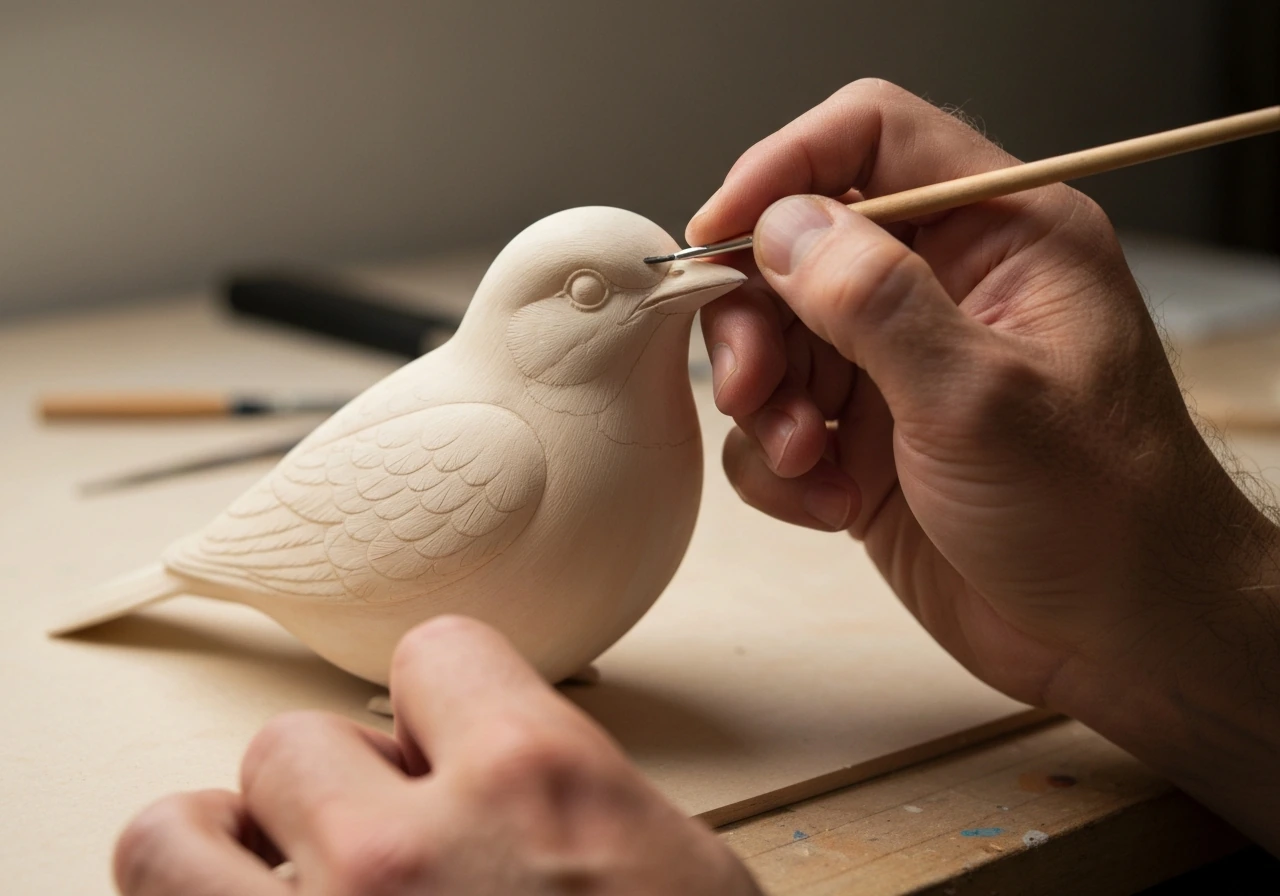
For details, a small round brush and a toothpick are your best tools. Eyes are easiest to paint as a dark circle with a tiny white dot offset to one side (that's what gives painted eyes life). For the beak, use a slightly darker or contrasting tone from the main body. Wing feathers can be suggested with a dry-brush technique: load a stiff brush with a lighter color, wipe most of it off on a paper towel, then lightly drag it across the wing surface. It creates a feathered texture without needing any carving.
If you want a more whimsical or stylized bird, you can skip realistic detail entirely and go with bold graphic patterns. Think folk-art style: bright solid colors, simple geometric shapes for feathers, a big black dot for the eye. These often look more striking from a distance in a garden than a carefully detailed realistic paint job.
For truly three-dimensional texture, you can score feather lines into the wood with a wood burner or a craft knife before painting. This takes more time but the result is genuinely impressive. If you later want to build a more interactive piece for backyard enrichment, the same painting and texturing techniques apply when you tackle something like a drinking bird toy style build.
Options for attachment: mounting, hanging, or turning into a functional feeder or toy
Once your bird is finished and fully cured, you have several good options for how to use it.
Garden stake or fence mount
The simplest option. Screw or glue a 1/2-inch dowel or a piece of rebar (wrapped in a short section of dowel) to the back of the bird. Push the stake into garden soil. For fence mounting, use a small L-bracket on the back and two exterior screws into the fence. This method is stable, easy to move seasonally, and works for any size bird.
Hanging from a branch or hook
Drill a hole through the top of the bird (at the balance point, usually just above the center of mass) and thread through a loop of outdoor-rated cord or a screw eye. Hang from a shepherd's hook, tree branch, or porch eave. If your bird has moving wings or any pivoting parts, test the hang angle before sealing so it faces the right direction in the breeze. If you get into kinetic builds down the road, the same hanging principles apply to a windmill bird scarer, which uses a similar pivot and mount approach.
Converting the body into a feeder or nesting feature
If you built your bird with a hollow interior or a separate cavity, you can add a small platform or tray to the belly area for seed, or fit a pre-drilled entrance hole and floor drainage into the body to make it a functioning nesting box. The key functional requirements don't change just because it's shaped like a bird: drainage, ventilation, and correct entrance hole sizing still matter. If you want to keep squirrels and other animals away from a feeder built this way, a bird baffle mounted on the same pole is a smart addition.
Using the bird as a target for a harmless garden deterrent
Some folks use a wooden bird silhouette mounted on a pivot point as a visual deterrent. This is different from an actual bird gun style scarer, which uses sound or motion instead. A spinning or reflective wooden bird can discourage nuisance birds from garden beds without any noise or moving parts, just by catching the light and shifting in the wind.
A quick note on project complexity vs. reward
Don't let the range of options overwhelm you. The simplest version of this project (a flat silhouette, two coats of paint, two coats of sealant, one screw eye for hanging) takes maybe 3–4 hours including drying time and costs next to nothing if you're working from scrap wood. From there, every build teaches you something that makes the next one better. Start simple, get it finished, hang it up, and see how good it feels to have something you made yourself out in the garden. That feeling is usually enough to launch project number two pretty quickly.
FAQ
Can I make a wooden bird using scrap wood that is already weathered or split?
Yes, but choose the method based on whether the bird will be outdoors year-round. For an outdoor bird, plan to use exterior-rated wood glue or clamps during assembly, then seal thoroughly after painting. If you are building a flat silhouette from plywood, you can often skip complex joinery and instead rely on glue plus small braces on the back to prevent warping.
What should I do if my scrap wood already has old paint or a finish on it?
If the wood is painted or sealed already, scuff-sand first so the primer and paint can grip. If there is peeling paint, remove loose layers to bare wood. Then use an exterior primer (or a thin bonding coat) before your color coats, and seal after painting to keep old coatings from bleeding or flaking.
Where do beginners usually lose protection on an outdoor wooden bird?
For exterior joints, wood movement is the enemy of cracking and separation. Use two thin coats of sealant and pay extra attention to edges, cuts, and any end grain where moisture enters. If your bird has multiple glued pieces (body, wings, beak), avoid over-saturating that area and let each sealant layer dry completely before the next.
Is any clear coat okay, or do I need a specific type for outdoor use?
Don’t use standard indoor varnish or interior polyurethane for a backyard piece. Indoor finishes can turn cloudy, soften, or fail under UV exposure and temperature swings. Stick to the exterior water-based options mentioned in the article, and if the bird will be in direct sun, consider that an extra sealant coat is often the difference between long-lasting color and early peeling.
How can I tell if my wood is dry enough before I start painting and sealing?
Sealing too soon can trap moisture, but drying longer is usually safer than rushing. If you are unsure, do a quick check by pressing a dry finger or paper towel against the wood surface, especially on the back and inside corners, if moisture is present it will feel cool or damp. If it feels damp, let it dry indoors for a few days before priming and painting.
Do I need primer, or is paint directly on wood always fine?
Yes, you can add a primer, but it is most helpful on raw, porous, or uneven wood, and it is especially useful for paint that looks patchy on end grain. After priming, still paint with thin coats, then seal with exterior polyurethane or spar urethane. Skipping primer is possible on smooth ply, but it often costs you more time repainting later.
What should I do if my paint peels or beads on the wooden bird?
If the paint beads or peels after sealing, the most likely cause is that the surface was sealed first or not sanded before painting. Fix it by letting everything cure, then lightly sand to remove the slick surface, clean off dust, repaint, and re-seal. Avoid thinning paint with water beyond what the label allows, because very thin paint can turn streaky and chip more easily outdoors.
How do I mount the bird so it stays steady in wind and weather?
Choose mounting hardware based on the mounting surface. For fence mounting, use exterior screws and an L-bracket, and avoid bare metal that can rust where it touches the wood. For garden stakes, ensure the dowel or rebar is straight and add a secure back brace if your bird is large to prevent rocking in wind.
Can I turn my wooden bird into a nesting box or seed feeder safely?
If you are adding a cavity for nesting or a tray for seed, ventilation and drainage matter even for small builds. Drill or add drainage holes low in the cavity, keep the entrance size appropriate for the target bird, and avoid coating the interior surfaces with anything not meant for wildlife contact. Also, keep the removable tray idea simple so you can clean it without damaging the structure.
If I want moving wings on my bird, how should I change the finishing and sealing steps?
Yes, but keep the finish compatible with movement. If you plan pivoting wings, leave enough clearance between parts, seal after all final sanding and test fitting, then check that the sealant does not glue parts together during curing. For pieces that rotate, use extra attention to sealing the edges of the hinge areas, since those spots experience the most flex and wear.
Next Articles

How to Build a Chimney Swift Bird House DIY Guide
Step-by-step DIY plans to build a chimney swift bird house, with correct dimensions, placement, and weatherproofing for

How to Build an Oriole Bird House: Step-by-Step DIY
Step-by-step DIY for building an oriole bird house with right dimensions, weatherproofing, predator-safe placement, and

How to Build a Chickadee Bird House Step by Step
Step-by-step DIY chickadee bird house with cut list, chickadee entry sizing, ventilation, drainage, and mounting tips.