You can make several genuinely engaging bird toys from popsicle sticks today using materials you probably already have at home. The key is keeping construction simple, sanding everything smooth, skipping toxic glues and finishes, and adding enrichment elements like cotton rope or foraging pockets to make the toy worth a bird's attention. Whether you're building for a backyard feeder setup or a caged pet bird like a budgie or parrot, popsicle sticks are a fantastic starting material because they're lightweight, splinter-manageable, untreated (as long as you buy the right kind), and cheap enough that you won't feel bad tossing a worn-out toy after a few weeks.
How to Make Bird Toys With Popsicle Sticks Safely

Marcus Thornton
2 May 2026
Choosing the right popsicle-stick toy design for your bird
Before you cut a single stick, think about who the toy is actually for. A cockatiel, a budgie, and a backyard chickadee don't interact with objects the same way. Smaller birds like budgies and finches need lighter, smaller-scale toys with fewer loose parts. For budgies specifically, aim for lighter, smaller-scale designs with fewer loose parts and rounded, sanded edges lighter, smaller-scale toys.
Medium birds like cockatiels and conures want something with a bit more structural weight to chew through. Larger parrots need thicker, denser builds because they'll demolish a single-layer popsicle stick design in about ten minutes. Parrots can be especially destructive chewers, so choosing the right size and build style is key to successful DIY bird toys larger parrots. For backyard birds, the goal is usually a foraging or puzzle toy hung near a feeder, not an inside-cage enrichment piece.
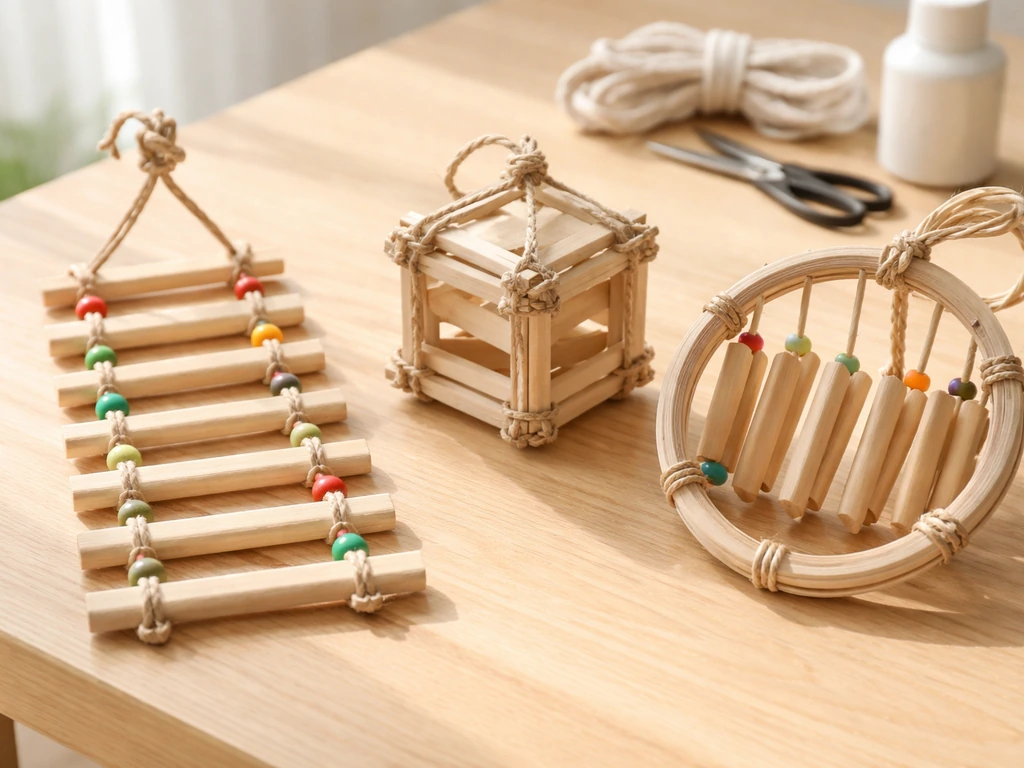
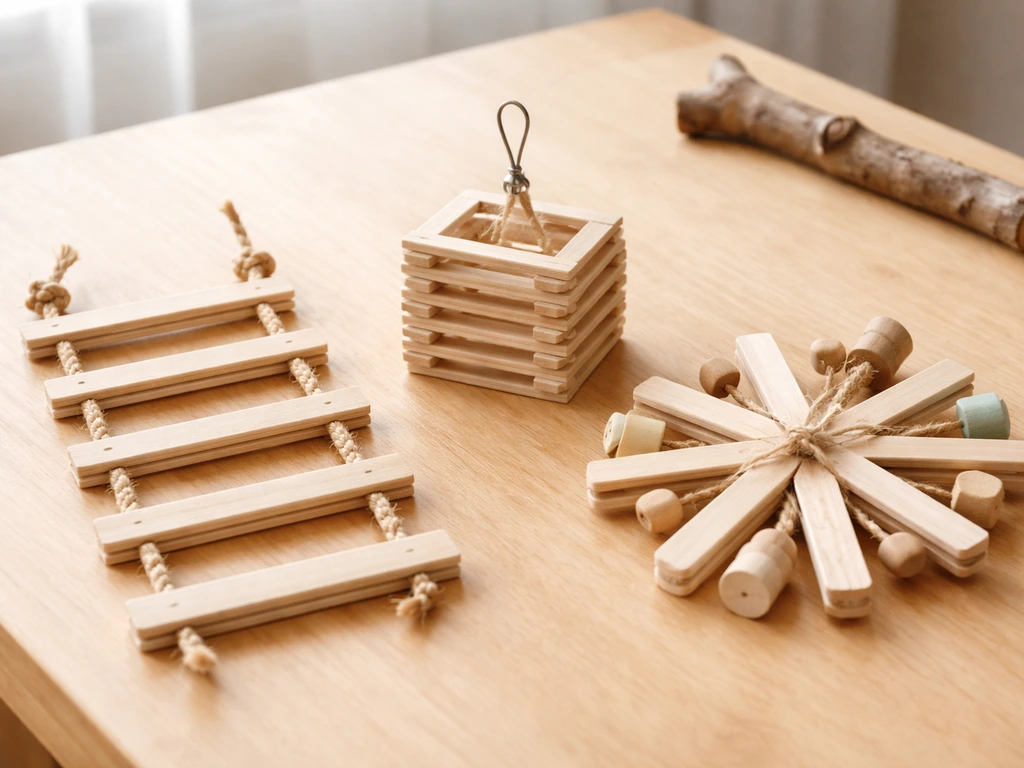
The designs I'll walk you through below fall into three styles: a flat chew ladder, a hanging block cube, and a foraging spinner. All three use popsicle sticks as the primary structure. Pick the one that matches your bird's size and curiosity level, or build all three if you want to test which style gets the most interaction.
- Flat chew ladder: great for budgies, cockatiels, small parrots, and even backyard birds when hung near a feeder
- Hanging block cube: best for medium to large parrots who like to manipulate and dismantle objects
- Foraging spinner: works across bird sizes and is the most mentally stimulating of the three because food is involved
Safety first: what's actually safe and what to avoid
I can't stress this enough: the most common mistake in DIY bird toys is using the wrong adhesive or the wrong metal hardware. Birds chew everything, and if they ingest something toxic, it can kill them fast. Here's what you actually need to know before you start building.
Wood and stick safety
Buy plain, unfinished craft popsicle sticks from a craft store or online supplier. The ones sold in bulk bags are typically untreated birch or basswood, which are both bird-safe. Do not use popsicle sticks from ice cream bars unless you're certain they're untreated and uncoated, and even then, wash and dry them thoroughly. Once you have your sticks, run every single one through your fingers before building. If you feel any cracks, splinters, or rough points, sand them down with 220-grit sandpaper before using. A splinter in a bird's mouth or crop is a real hazard, and sanding takes about ten seconds per stick.
Adhesives and finishes
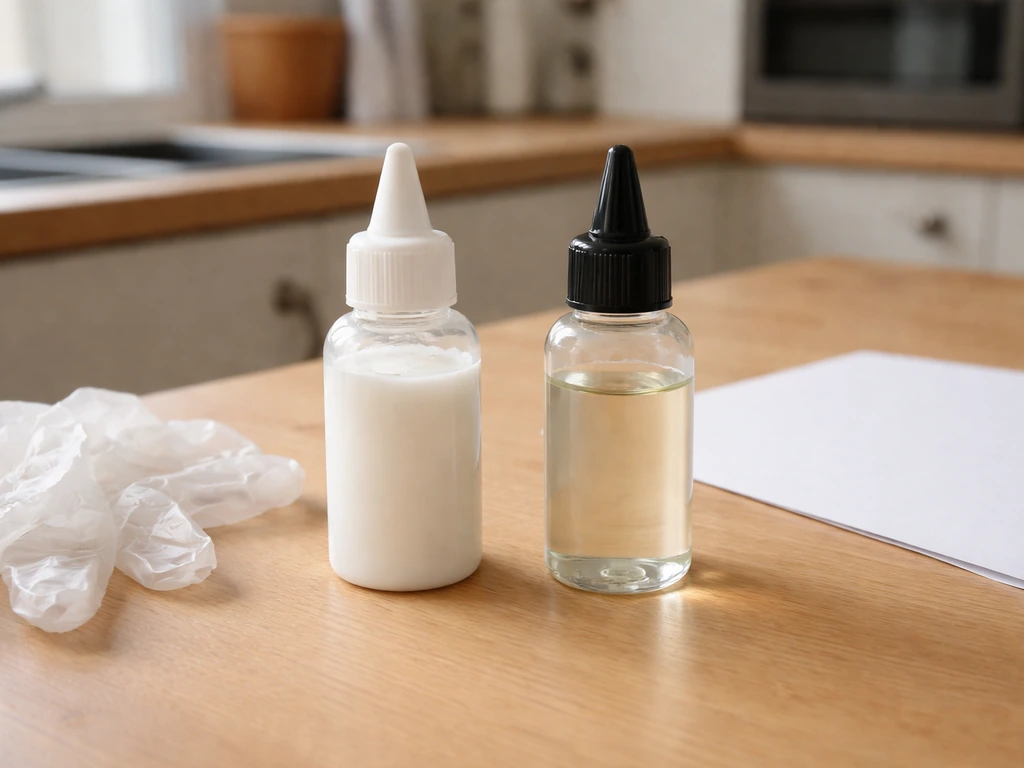
Skip craft glue, super glue, epoxy, and anything that lists solvents in its ingredients. The only adhesive I recommend for bird toys is plain, food-grade white glue (like basic PVA) used sparingly, or better yet, skip glue entirely and use mechanical fasteners like untreated cotton twine or stainless steel wire. If you need a finish, beeswax rubbed on and buffed off is the safest option. Never apply spray paint, polyurethane, shellac, or any aerosol coating to a bird toy. If you want a colored look, learn how to dye wood for bird toys in a way that stays bird-safe and avoids harmful finishes.
Hardware hazards
This is where a lot of DIYers go wrong. Galvanized (zinc-coated) hardware and soldered (lead-containing) metal parts are toxic to birds. For metal hardware, stainless steel is recommended as the safest option compared with zinc-plated or galvanized parts and unknown alloys [Galvanized (zinc-coated) hardware and soldered (lead-containing) metal parts are toxic to birds. ](https://janglybirdtoys.
com/blogs/fascinating-parrots/stainless-steel-is-superior-for-pet-birds). Toy-Safety (Cockatiels) also emphasizes avoiding galvanized wire or hardware and unsafe toy components, which aligns with bird toy safety principles [Galvanized (zinc-coated) hardware and soldered (lead-containing) metal parts are toxic to birds. ](https://bbevs. com.
au/sites/site-7755/documents/Toy-Safety. pdf). That means standard craft-store jump rings, many cheap key rings, and most galvanized wire are off the table. Use stainless steel wire, nickel-plated quick links, or solid stainless steel snap hooks instead.
Avoid open chain links that a bird's beak or toe can get caught in, and never use bell clappers with removable clappers or any small metal piece that can be swallowed.
Rope and fiber add-ons

If you're adding rope, use 100% natural cotton or untreated sisal. Avoid nylon, polyester, and dyed synthetic ropes. Keep rope lengths short enough that the bird can't get a loop around its neck or foot, and trim any frayed ends immediately when you see them.
Everything you'll need before you start
Here's a complete list. You don't need all of it for every design, but having these on hand means you can build all three toy styles without stopping mid-project.
Materials
- Plain, unfinished craft popsicle sticks (100-count bags are ideal; jumbo sticks for larger birds, standard for smaller)
- 100% natural cotton twine or untreated sisal rope (thin diameter, about 2-3mm)
- Stainless steel wire (22-24 gauge works for most builds; 18 gauge for heavier cube builds)
- Stainless steel or nickel-plated quick link or snap hook for hanging (one per toy)
- Untreated wooden beads, cork pieces, or small pinecones for enrichment add-ons
- Unbleached paper (paper bag scraps, parchment paper scraps) for foraging inserts
- Plain, unsalted seeds or small treats for foraging toys
- 220-grit sandpaper
- Beeswax (optional, for finishing)
Tools
- Craft drill or a simple hand drill with a 1/16" or 3/32" bit (for threading wire or twine through sticks)
- Wire cutters and needle-nose pliers (for bending and securing stainless steel wire)
- Scissors
- Ruler
- A small clamp or binder clips (helpful for holding pieces while drying if you use any PVA glue)
If you don't have a drill, you can push a thick needle or a heated skewer tip through popsicle sticks to create holes, though a drill is much faster and cleaner. A toothpick can also widen a smaller hole if needed.
How to build three different popsicle-stick bird toys
Toy 1: The flat chew ladder
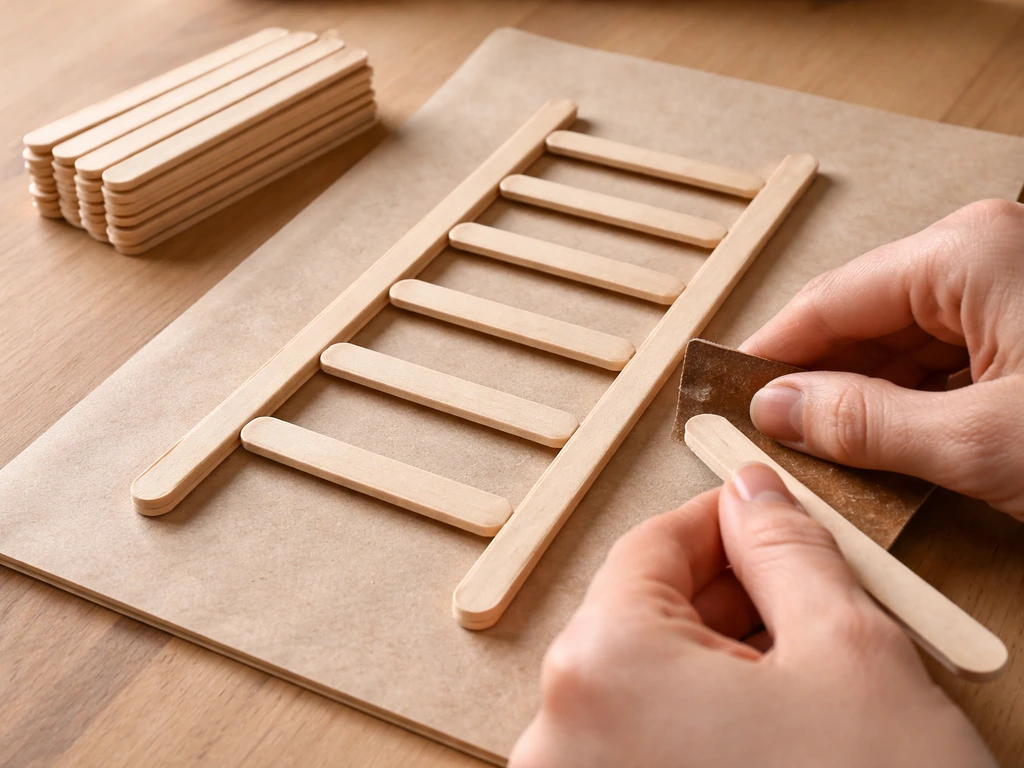
This is the simplest build and a great starting point. It looks exactly like what it sounds like: a ladder shape made from popsicle sticks, hung vertically in a cage or from a hook.
- Sand all your sticks and set aside 10-12 standard popsicle sticks for the rungs and 2 jumbo sticks (or 2 stacks of 2 standard sticks glued flat together) for the side rails.
- Drill a small hole about 5mm in from each end of every rung stick.
- Drill matching holes at even intervals (about 2.5cm apart) down each side rail.
- Cut two lengths of cotton twine, each about 40cm long. Thread the first length through the left-side holes of all rungs, then through the rail holes, tying a small knot below each rung to hold spacing. Repeat for the right side.
- Pull the top ends of both twine lengths together and tie them to a stainless steel quick link or snap hook. This is your hanging point.
- Trim any loose twine ends to under 1cm so there's nothing to get tangled in.
- Give every junction a tug test: if anything slides or loosens, re-tie before offering the toy.
The ladder is especially popular with cockatiels and budgies, who will climb it, swing on it, and chew the rungs down over time. When the rungs get chewed thin, replace the whole toy rather than just the rungs, because the cotton twine may be weakened too.
Toy 2: The hanging block cube
This one takes a bit more time but produces a satisfying 3D structure that larger birds love to dismantle. Think of it as a hollow cube frame built from stacked popsicle sticks.
- Sand all sticks thoroughly. You'll need about 40-50 sticks depending on the cube size you want.
- Build four flat squares by layering sticks in a log-cabin style: place two sticks parallel, then two sticks perpendicular on top crossing the ends, and repeat until each square is 3-4 layers tall. Secure each corner junction with a short length of 22-gauge stainless steel wire twisted tightly with needle-nose pliers.
- Connect the four squares into a cube shape by wiring their corners together, again using stainless steel wire. Twist wire ends flat against the wood so there are no sharp points sticking out.
- Run a central hanging wire through the top face of the cube (thread it diagonally through two opposite top corners) and twist it into a loop above the cube, then attach a quick link.
- Do a final safety check: feel all wire ends and bend down any that protrude. Shake the cube to confirm it's structurally solid before giving it to the bird.
I made my first cube with craft glue instead of wire and a medium-sized conure reduced it to a pile of sticks in under two days because the glue joints failed. Wire connections hold up far better and are actually safer because the toy doesn't collapse unpredictably.
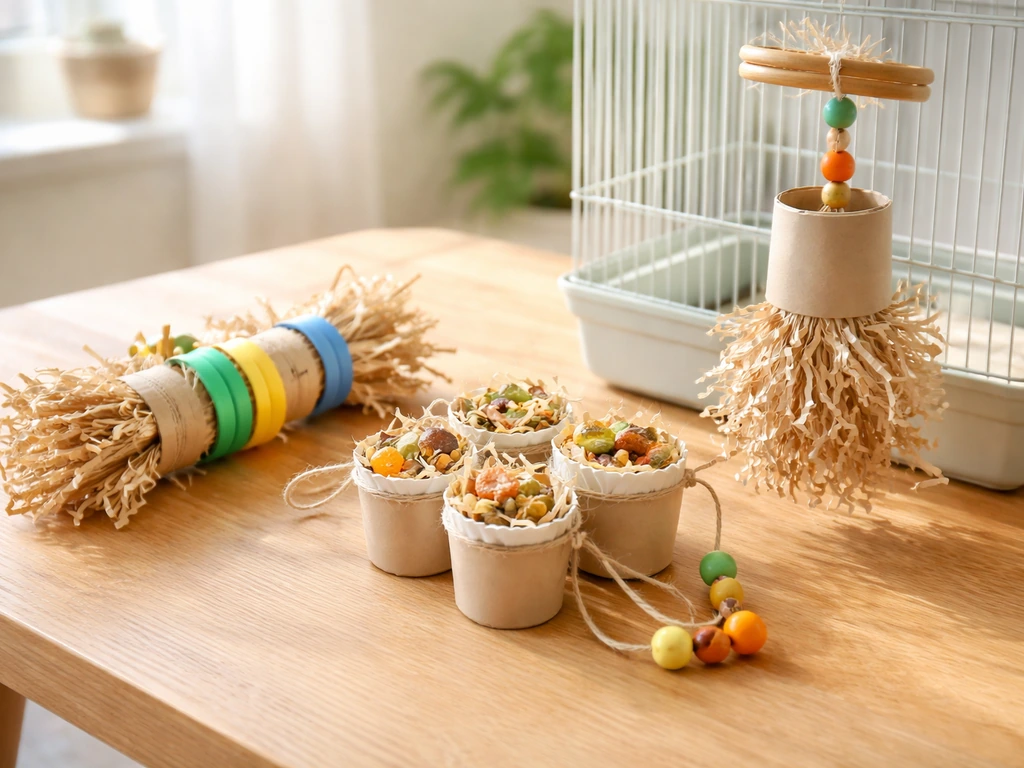
Toy 3: The foraging spinner
This is the most enriching design because it involves food and problem-solving. The basic idea is a central dowel (or a few popsicle sticks wired together into a rod shape) with small foraging pockets attached at intervals.
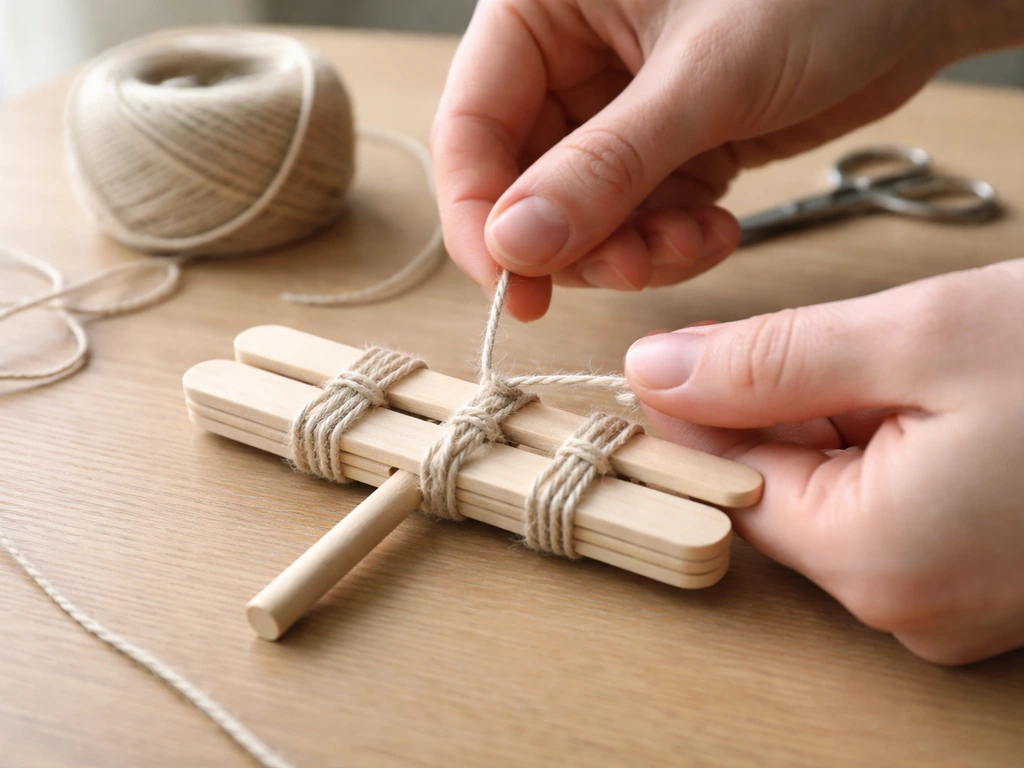
- Bundle 3 popsicle sticks together side by side and wrap them tightly with cotton twine at three points along their length to form a sturdy central rod. Tie off and trim twine ends.
- Cut 6-8 small squares of unbleached paper (about 5x5cm each). Fold each square into a small envelope or cone shape and crease the folds firmly.
- Place a small amount of seeds or a treat inside each paper pocket and fold the top closed loosely (you want the bird to be able to open it, so don't seal it shut).
- Attach each pocket to the central rod by wrapping a short piece of cotton twine around the rod and through a small hole punched in the back of the paper pocket. Tie securely.
- Space pockets evenly along the rod and alternate their orientation (some facing left, some right) so the toy spins and swings when the bird investigates one side.
- Attach a hanging loop of cotton twine or a snap hook to one end of the central rod.
Replace the paper pockets every time you refill the toy. Paper is meant to be destroyed, and that's the point. Old pockets that have been chewed wet and re-dried can harbor mold, so fresh paper inserts every refill is a good rule.
Add-ons that actually increase enrichment
A plain popsicle-stick toy is fine, but adding variety keeps birds engaged longer and gives them more sensory input. Here are the add-ons I've had the best results with, plus how to attach them safely.
Knots and texture
Tie knots in cotton twine at random intervals along any hanging section of a toy. Birds spend a surprising amount of time working at knots with their beaks, which is great beak exercise. Use simple overhand knots or figure-eight knots. Avoid slip knots or anything that could tighten around a toe.
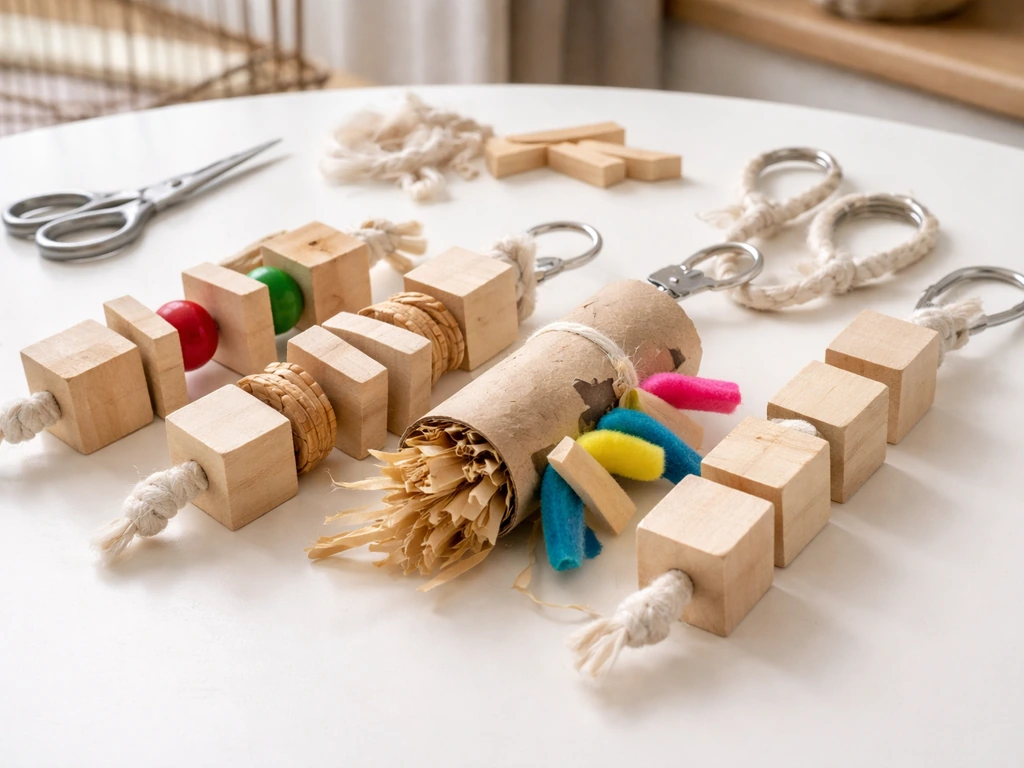
Wooden beads and cork
Thread untreated wooden beads onto the cotton twine between popsicle stick rungs or around the cube. Natural cork pieces (from plain wine corks, not synthetic cork) are also excellent because birds love the texture and can chew them safely. Skewer cork pieces on twine or wire them loosely to the toy frame.
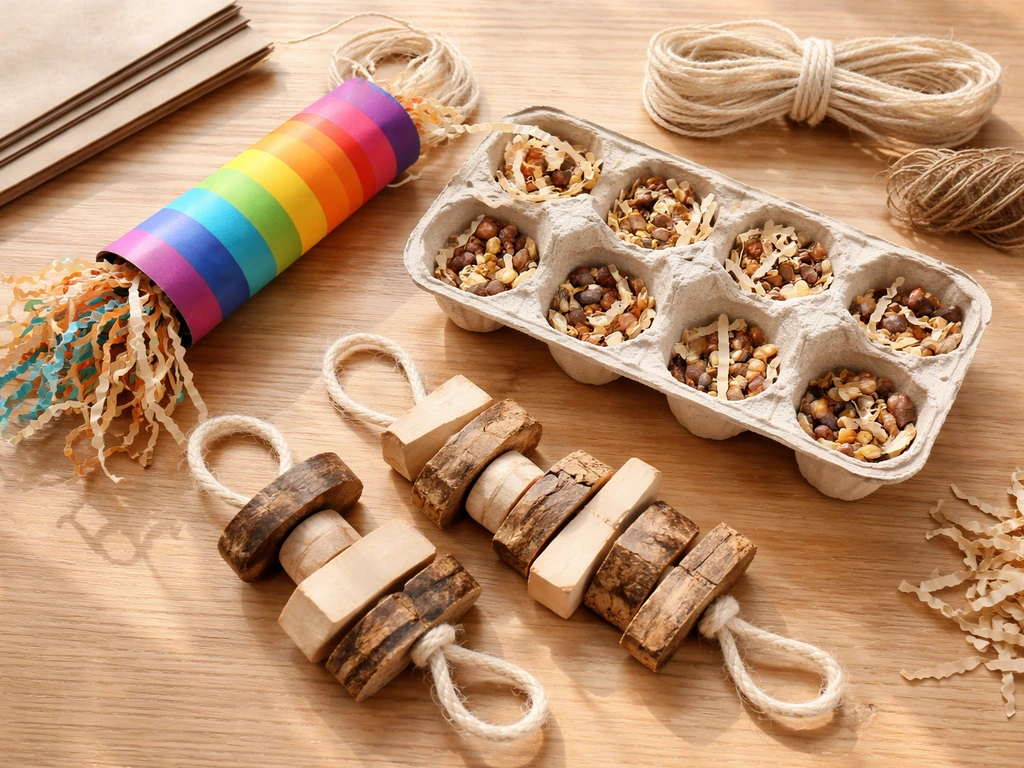
Foraging inserts
Beyond the foraging spinner, you can tuck small bits of paper, dried leaf pieces, or even a small piece of millet spray into any of the other toy designs. The ladder is great for this: weave a few small paper strips through the rungs so the bird has to pull them out. It turns a simple chew toy into a puzzle.
Hanging methods that add movement
A toy that moves when touched is more interesting than one that hangs rigid. Instead of attaching your toy directly to a fixed hook, add a 10-15cm length of cotton rope between the toy and the cage attachment point. This creates swing. For backyard setups, hang the toy from a flexible branch rather than a rigid post so it sways in the breeze.
Finishing, drying, and where to actually hang the toy
Finishing safely
If you used any PVA glue on your build, let it dry completely in a well-ventilated area for at least 24 hours before offering the toy to a bird. PVA is non-toxic once cured, but wet glue can be sticky and unpleasant for a bird to chew. If you want to treat the wood at all, rub a small amount of raw beeswax onto the sticks with a cloth and buff it off. It adds a very slight barrier against moisture without any toxic risk. Skip any other finish entirely.
Where to hang the toy for cage birds
Hang toys at perch height or slightly above, never directly over food and water dishes (chewed debris falls). For smaller birds like budgies, hang the toy near a perch they already use frequently so they discover it naturally. Don't fill the cage with toys all at once: introduce one new toy at a time and rotate every week or two to keep things novel. Shy birds sometimes take a few days to approach a new object, so don't panic if the toy is ignored initially.
Where to hang the toy for backyard birds
For outdoor setups, hang foraging toys within 1-2 meters of an existing feeder so birds already visiting the area discover it easily. Position at a height between 1.5 and 2.5 meters off the ground to keep it accessible to small birds while reducing predator risk. Choose a spot with partial cover nearby (a shrub or tree branch) so birds have a quick escape route if startled. Avoid hanging toys directly in full sun all day since the heat can degrade cotton rope faster and make wood crack.
Keeping the toy safe over time: maintenance and when to replace it
DIY toys don't last forever and they shouldn't have to. Part of the appeal of making your own is that you can rebuild a fresh one anytime. But while a toy is in use, check it regularly to catch hazards before they become problems.
What to check and how often
- Every 2-3 days: look for frayed or unraveling rope or twine ends. Trim immediately with scissors. A frayed end can become long enough to loop around a toe or leg.
- Weekly: check all wire connections on cube-style toys. Any wire that has been chewed loose or bent open needs to be re-twisted or the toy retired.
- Weekly: inspect popsicle sticks for deep cracks or splinters that weren't there before. Chewing can create new sharp edges. Sand them down or remove that stick.
- Every refill (foraging spinner): replace paper pockets with fresh ones. Never reuse old, chewed, or wet paper.
- Monthly (outdoor toys): check for mold, especially at knot points and anywhere the toy has been exposed to rain. Discard and replace any moldy sections entirely.
When to retire the whole toy
Replace the entire toy when: the structure is visibly compromised (more than a third of the sticks are chewed through or missing), the twine or rope is frayed in multiple spots and you've been trimming it repeatedly, any part has gotten wet and dried out more than a few times (the wood weakens and can splinter unpredictably), or you simply can't remember when you made it. A good rule of thumb is to build fresh toys every 4-6 weeks for active chewers and every 2-3 months for lighter-use scenarios. Since popsicle sticks cost almost nothing, this is easy to do without guilt.
If you want to go deeper on safe construction practices, the principles here overlap closely with general DIY bird toy safety guidance and species-specific designs for budgies and parrots, which involve similar material rules but different sizing and structural considerations. The same approach that makes these popsicle-stick builds safe applies across most homemade bird enrichment projects: natural materials, mechanical fasteners over adhesives, no toxic metals, and regular inspection. Start with the flat chew ladder today since it requires the fewest tools and materials, and once that's done and hanging, you'll have a much clearer feel for how your bird interacts with homemade toys before you invest time in the more complex cube or spinner builds. If you want a broader DIY plan beyond popsicle sticks, follow this guide on how to make bird toys step by step.
FAQ
How can I tell whether my popsicle sticks are actually untreated and bird-safe?
Check for any label saying coated, dyed, “flavored,” or kiln-finished, and inspect both sides for sheen or coloring. If they came from ice-cream bars, wash in warm water, then smell after drying. If there is any lingering odor or slick coating, don’t use them. Sticks from bulk craft bags are usually safer when they are plain and unfinished.
Is PVA glue ever safe if I use it very sparingly?
Yes, once fully cured, but only if the bottle lists plain PVA (no fungicides, preservatives, or solvent additives). Use the smallest amount needed, let it dry at least a full day with good airflow, and do a chew test on the toy yourself by applying gentle pressure. If you can scrape off soft glue, it is not cured enough.
What hardware is safest if I want to avoid glue entirely?
Stainless steel wire ties, nickel-plated quick links, and solid stainless snap hooks are generally safer than galvanized or mixed-metal parts. Prefer closed or secured connections where there is no obvious gap. Avoid anything with a removable insert, small clapper parts, or decorative charms that could detach.
Can I use the same toy design for a budgie and a conure if they share the same cage?
Usually no. Even if the toy fits, the smaller bird tends to be more vulnerable to tight spaces and loose parts. Build separate toys per bird or choose the smallest safe scale for the budgie, then monitor for aggressive chewing that could create sharp edges or swallowable fragments.
How do I prevent cotton rope from becoming a strangulation risk?
Keep rope short (so there is no long drape), and secure it so the bird cannot pull it into a long loop. Replace rope immediately if it frays in multiple spots or if trimming has made it thinner. Also avoid designs where the rope hangs directly where a foot can get caught between rungs and rope.
What should I do if I accidentally used the wrong metal, like galvanized wire?
Do not try to “rinse it off” or cover it with beeswax. Replace the entire toy or at least every section containing the wrong metal hardware, because chewing can expose fresh metal and birds can ingest debris over time.
How often should I inspect the toy, and what specifically am I looking for?
At least weekly for active chewers, and after any heavy chewing session. Look for new splinters, edges that have lost sanding smoothness, any rope fray that spreads, and tiny metal or bead chips. If you see wet residue from foraging pockets or a musty smell, remove the toy and rebuild.
Are wooden beads, cork, or dried leaf pieces safe if my bird likes to shred them?
They can be safe if they are untreated and large enough that chunks cannot be swallowed whole. If you see beads cracking into small pieces, replace them. With dried leaves or paper inserts, remove all remnants promptly and restart with fresh material, since moisture plus repeated chewing can lead to mold or rot.
Can I hang a toy over food or water if it is tied tightly?
Avoid it even if it seems secure. Chewed bits, paper dust, and frayed rope can fall into dishes and create contamination or choking risk. If you must place it near dishes, raise it higher and add a barrier behind the toy so debris cannot drop directly into water bowls.
What’s a safe way to introduce homemade toys to a shy bird?
Start with one lightweight toy and place it near a preferred perch the bird already uses, but don’t force it into the bird’s route. Offer it at the same time each day, and remove it after a short trial if the bird shows stress. Once the bird investigates, then begin rotating toys weekly or every two weeks.
How do I know when it is time to rebuild instead of replacing parts?
Replace the full toy if structural pieces are repeatedly stressed, for example if you find multiple loose rungs, gaps at wire joints, or multiple snapped connection points. Partial repairs also matter: if rope has been trimmed more than once or the wood fibers look fuzzy, the next chew session can produce unpredictable splinters.
Next Articles
Bird Toys You Can Make at Home: DIY Ideas and Safety
DIY bird toys you can make at home with step-by-step builds, safe materials, and safety checks for enrichment.
How to Make Bird Toys for Parrots and Parakeets
Step-by-step DIY parrot and parakeet toys: safe materials, sizes, build today projects, secure hanging, care and trouble
How to Make Bird Toys: Easy DIY Chewing, Climbing, Foraging
Step-by-step DIY bird toys for chewing, climbing, and foraging with safe materials, mounting, and cleaning tips.