You can build a homemade bird house that local birds will actually move into, using basic tools, cheap lumber, and an afternoon. I've made plenty of them, including a few early ones that never got a single tenant because I got the entrance hole wrong or skipped drainage. This guide covers everything I wish I'd had from the start: the right dimensions for real species, a beginner-friendly build plan, how to make it look great without making it unsafe, and how to keep it working season after season.
How to Make Homemade Bird Houses: Cheap and Decorative DIY

Marcus Thornton
23 Mar 2026
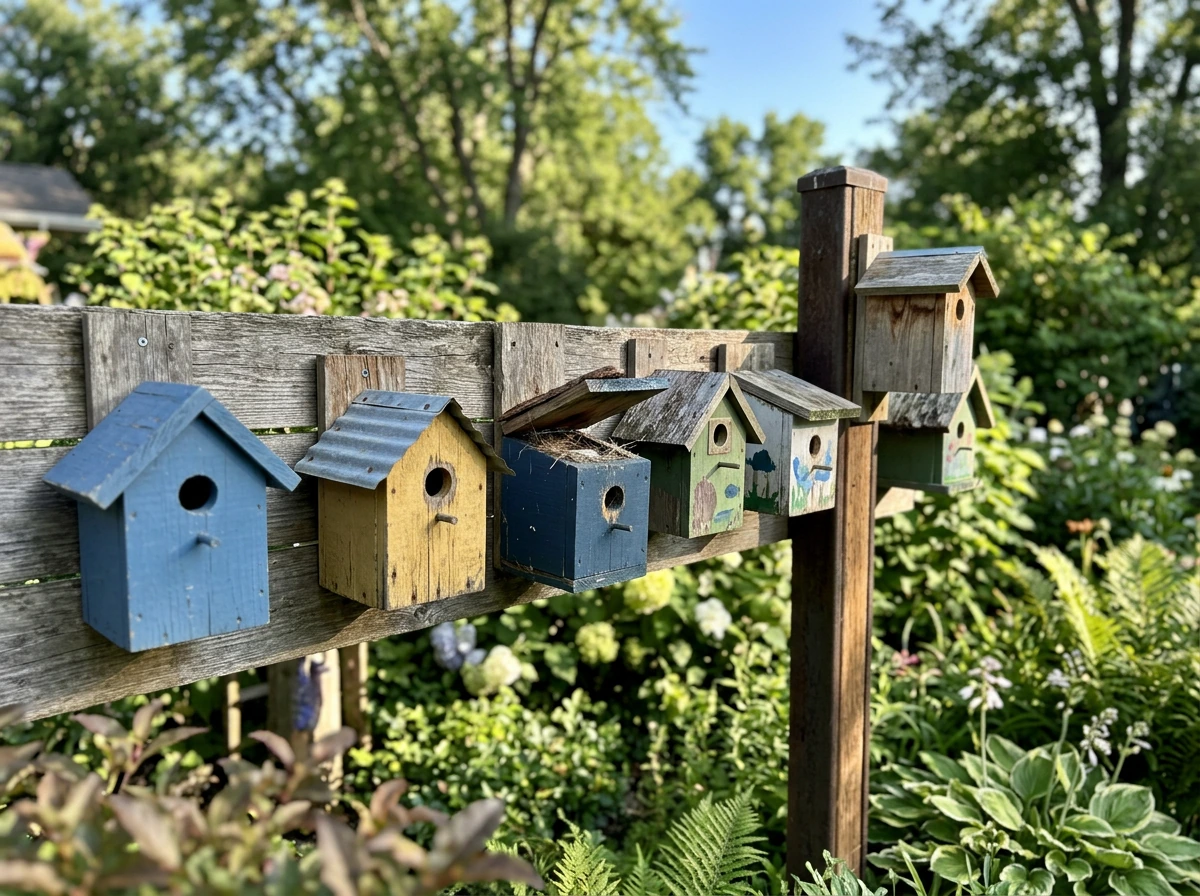
Choosing the right bird house design for local birds
The single biggest mistake beginners make is building a generic "bird house" without thinking about which bird they want to attract. Different cavity-nesting species need different entrance hole diameters, interior floor sizes, and mounting heights. Get those wrong and the house sits empty, or worse, gets taken over by starlings or house sparrows that outcompete the birds you actually wanted.
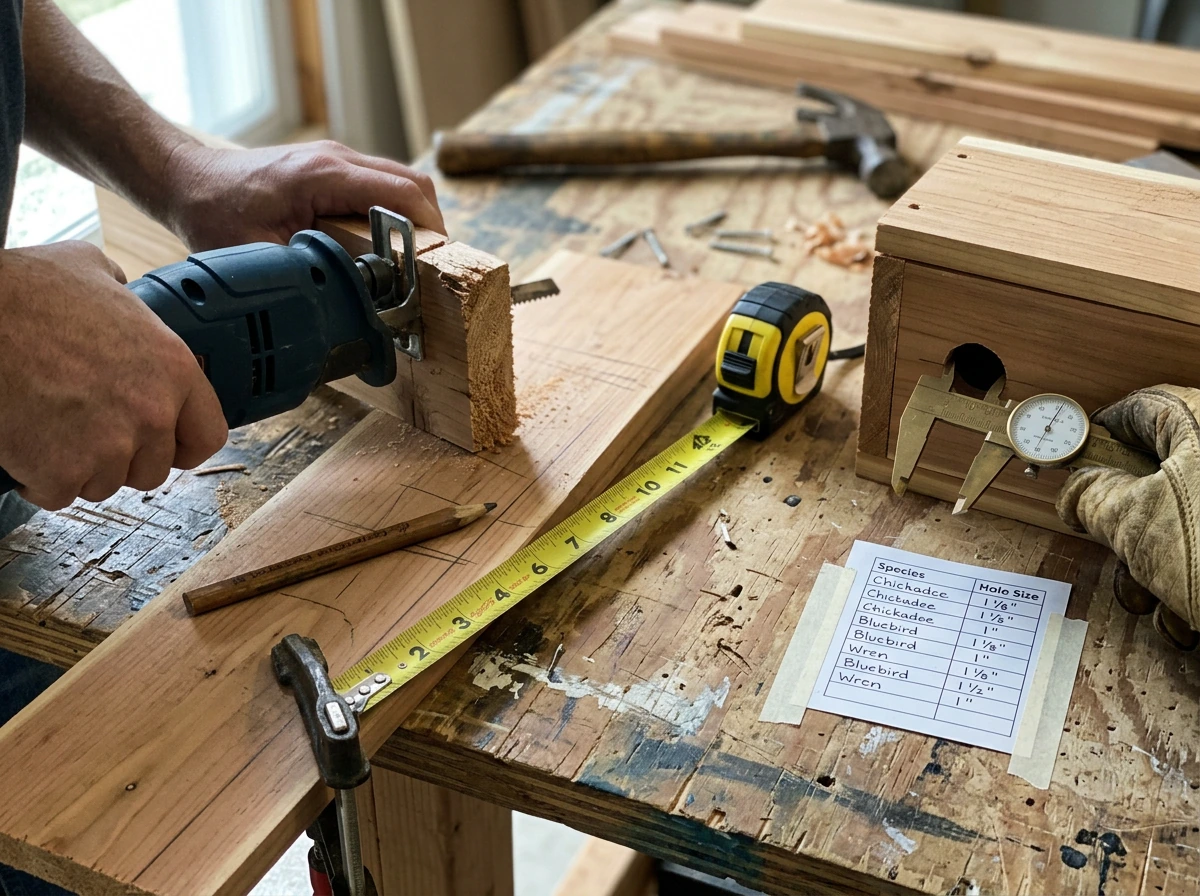
The entrance hole diameter is the most critical measurement. Think of it as the lock on the front door: size it for your target species and you naturally exclude most unwanted guests. Here are the three most common backyard cavity nesters and what they need:
| Species | Entrance Hole Diameter | Floor Size | Interior Height | Hole Height Above Floor | Mount Height Above Ground |
|---|---|---|---|---|---|
| Eastern Bluebird | 1.5 inches (round) or 2.25" H x 1.375" W (oval) | 5x5 inches | ~10 inches | ~8.75 inches | 3–6 feet |
| Carolina Chickadee | 1.125 inches | 4x4 to 5x5 inches | 9–12 inches | 6–8 inches | 5–15 feet |
| House Wren | 1.125 inches | 4x4 inches | 8–10 inches | 6–7 inches | 5–10 feet |
If you live in the eastern U.S. and want bluebirds, the Eastern Bluebird specs above are your target. If you're in the west, Western Bluebirds use the same 1.5-inch hole. Chickadees and wrens share the same 1.125-inch entrance diameter, which makes building for them nearly interchangeable. If you want to go deeper on species-specific builds, there are dedicated guides on how to make bluebird houses and other species-focused designs that pair well with this general build plan.
One thing I want to be clear about: blank" rel="noopener noreferrer">skip the perch. Almost every decorative bird house you see at a garden center has a little wooden dowel below the entrance. Experts from NestWatch to the Texas Bluebird Society all say the same thing: birds don't need it, and it actively helps predators get a foothold to raid the nest. Leave it off entirely.
Cheap DIY materials and tools you can use today

You do not need to buy anything fancy. My first successful bird house came from a single piece of rough-cut cedar fence picket I pulled from a neighbor's renovation pile. The key is using the right type of wood and avoiding anything that could harm the birds.
Best wood choices (and what to avoid)
Untreated wood is non-negotiable. Pressure-treated lumber contains pesticides and fungicide chemicals that you do not want inside a nest box, and NestWatch is explicit about this. Stick to these options:
- Cedar: the gold standard. Naturally rot-resistant, lightweight, and widely available. Fence pickets (typically 5/8" to 3/4" thick) are cheap and often free from demo projects.
- Redwood: similar properties to cedar, slightly pricier but excellent if you can find offcuts.
- Pine: very affordable and easy to work with. Not as rot-resistant as cedar, so it benefits from an exterior coat of paint or exterior-grade wood sealant on the outside only.
- Repurposed pallet wood: works well if it's untreated hardwood. Check for a "HT" (heat treated) stamp rather than "MB" (methyl bromide treated). HT is fine, MB is not.
- Plywood (exterior grade, untreated): usable for the roof and back panel where weathering is a concern.
Avoid MDF, particle board, OSB, and any pre-finished or pressure-treated lumber. They don't hold up outdoors and some off-gas chemicals you don't want near nesting birds.
Tools you actually need
- A drill and a spade bit or hole saw (sized to your target species' entrance hole)
- A handsaw or jigsaw (a miter saw makes life easier but isn't required)
- A tape measure and pencil
- Sandpaper (80-grit for rough edges, 120-grit for finishing)
- Exterior-grade screws (1.5" to 2" deck screws work great; they're stronger than nails and let you open the box for cleaning)
- A drill bit for pilot holes (prevents splitting in thinner wood)
If you don't own a hole saw, a hardware store will often drill the entrance hole for you for a dollar or two. Some will even cut your lumber to length. There's no shame in using those services, especially when you're starting out.
Step-by-step instructions: basic homemade bird house build
This plan is for a standard bluebird-sized box, which is one of the most useful and well-documented designs out there. If you're building for chickadees or wrens, just swap in the smaller dimensions from the table above. The construction method is identical. If you want to try a gourd bird house, use the same species-specific entrance sizing and mounting ideas as this basic build how to make gourd bird houses.
Cut list for a bluebird box
| Part | Dimensions | Qty |
|---|---|---|
| Front panel | 5" wide x 10" tall | 1 |
| Back panel | 5" wide x 14" tall (extra height for mounting) | 1 |
| Side panels | 5" wide x 10" tall (cut top edge at slight angle to match roof slope) | 2 |
| Floor | 5" x 5" | 1 |
| Roof | 7" wide x 8" deep (overhang on all sides) | 1 |
Use 3/4-inch thick lumber throughout. The extra back panel height gives you a surface to screw directly to a post or tree without needing a separate bracket.
Build sequence
- Cut all your pieces to the dimensions above. If you're cutting the side panels, angle the top edge at about 5–10 degrees so the roof sits flush with a slight forward pitch. This slope sheds rain toward the front and away from the entrance.
- Drill the entrance hole in the front panel. Center it horizontally, and position the top of the hole about 8.75 inches above where the floor will sit (for bluebirds). Use a 1.5-inch hole saw or spade bit and go slow to avoid tear-out on the back side.
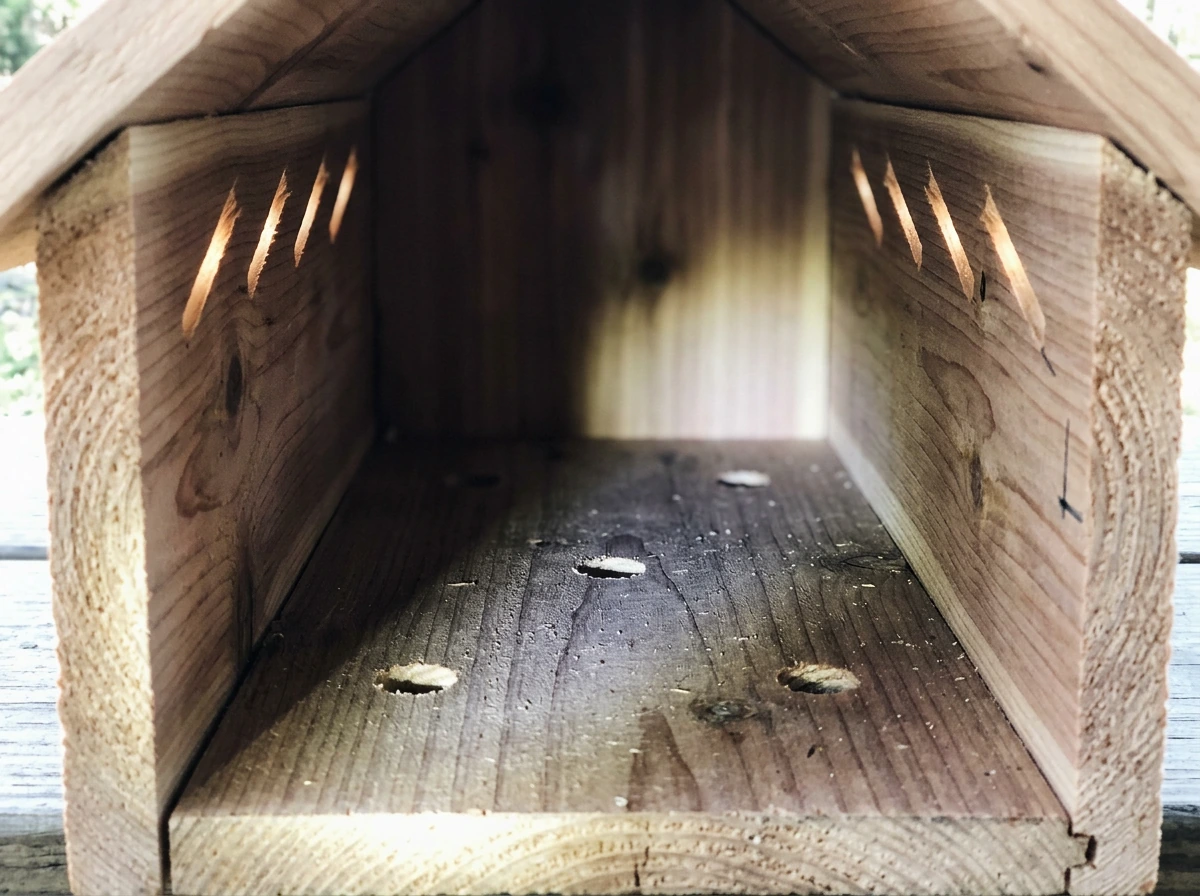
- Drill drainage holes in the floor: at least four holes, each 3/8 to 1/2 inch in diameter, one near each corner. Alternatively, you can clip or bevel the four corners of the floor piece by about 3/8 inch each, which achieves the same drainage without drilling.
- Drill ventilation holes in the side panels: two holes per side, positioned near the top, drilled at a 30-degree upward angle. About 3/8-inch diameter works well. Angling them upward lets air circulate while keeping rain out.
- Lightly rough up the inside face of the front panel below the entrance hole with a chisel or coarse sandpaper. This gives baby birds something to grip when they're ready to fledge. A smooth interior is a trap.
- Assemble the box: attach the sides to the back panel first using 2-inch screws with pilot holes. Then attach the front panel. Leave one side panel attached with a single pivot screw at the top so it can swing open for cleaning and inspection. Add a simple hook-and-eye latch at the bottom to keep it shut.
- Drop the floor in from the bottom or screw it in from below. Make sure it sits recessed about 1/4 inch up from the very bottom edge of the walls so any driven rain doesn't pool against it.
- Attach the roof last. Overhang it at least 2 inches past the front of the box and 1 inch on each side. Screw it down or use a piano hinge if you want the roof to open as a second access point for monitoring.
- Sand all exterior edges smooth. Splinters catch moisture, crack faster, and are rough on birds during entry.
That's it. A functional, safe bird house. Before you move on to decorating, do a quick check: hold it up and look through the entrance hole with a flashlight to confirm there's no sawdust or debris inside, the drainage holes are open, and the side panel opens and latches cleanly. Once your basic build is complete, follow the step-by-step process below to finish and verify it so birds can move in.
Making it decorative without breaking function
Here's where a lot of people get nervous, thinking they have to choose between a bird house that works and one that looks good in the garden. You don't. You just need to know the rules: finish the exterior, leave the interior bare, and avoid toxic ingredients.
Paint and finish rules
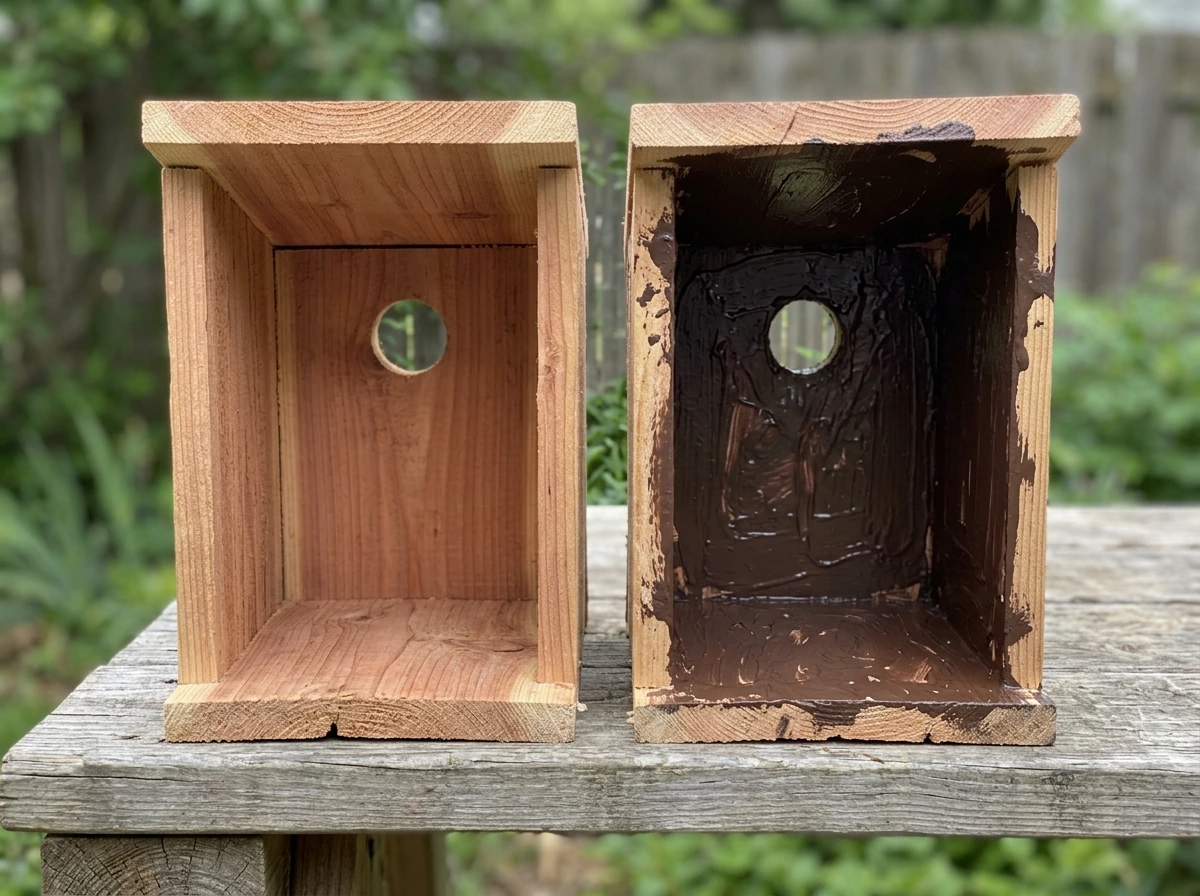
- Never paint or stain the interior of the box. The inside should be raw, unfinished wood. Period. The U.S. Fish & Wildlife Service is clear on this, and it's one of the most common mistakes on store-bought decorative houses.
- Avoid paints containing lead, zinc, or chromate. These compounds are toxic to birds. Stick to modern latex or acrylic exterior paints, which are generally safe once fully cured.
- Let paint cure for at least 48–72 hours (longer in humid weather) before mounting. Fresh paint off-gases solvents that birds will avoid and that aren't great for nestlings.
- Light or natural colors work best in warmer climates because dark colors absorb heat and can overheat the interior. Greens, tans, and grays blend into the landscape and don't scare birds.
- Exterior wood sealant or linseed oil on cedar and redwood is a great low-fuss option that protects the wood without heavy pigment.
Decorative ideas that won't hurt birds
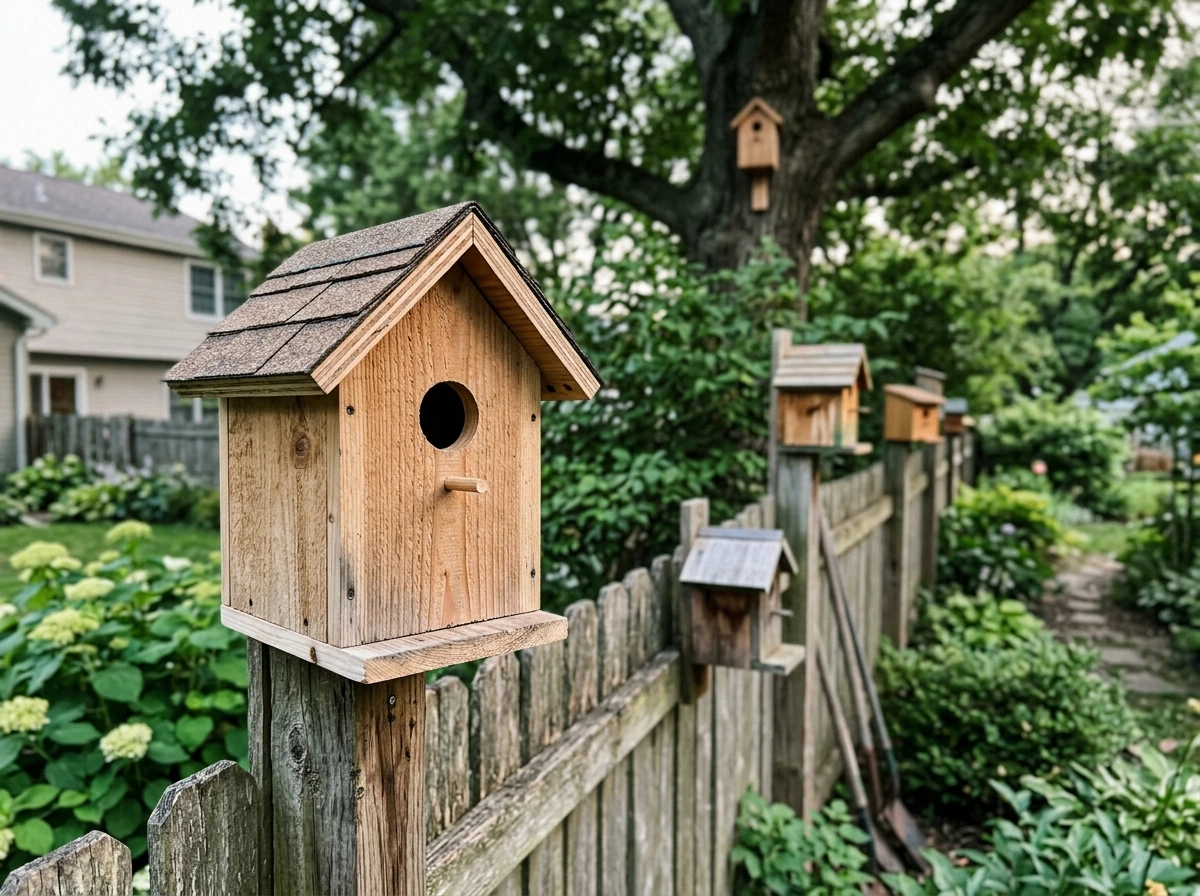
The exterior of the roof and walls is your canvas. Wood-burning (pyrography) creates beautiful patterns without adding any chemical residue. Exterior-grade wood stain in layered tones gives a natural look. Stenciled designs with exterior latex paint are popular and easy, especially for kids who want to help. You can also glue thin strips of bark, driftwood pieces, or pinecone scales to the exterior walls for a rustic texture, using waterproof wood glue like Titebond III. Just make sure nothing you attach blocks the entrance hole, the vent holes, or the drainage holes. And skip anything that adds weight to the roof that could stress the mounting hardware.
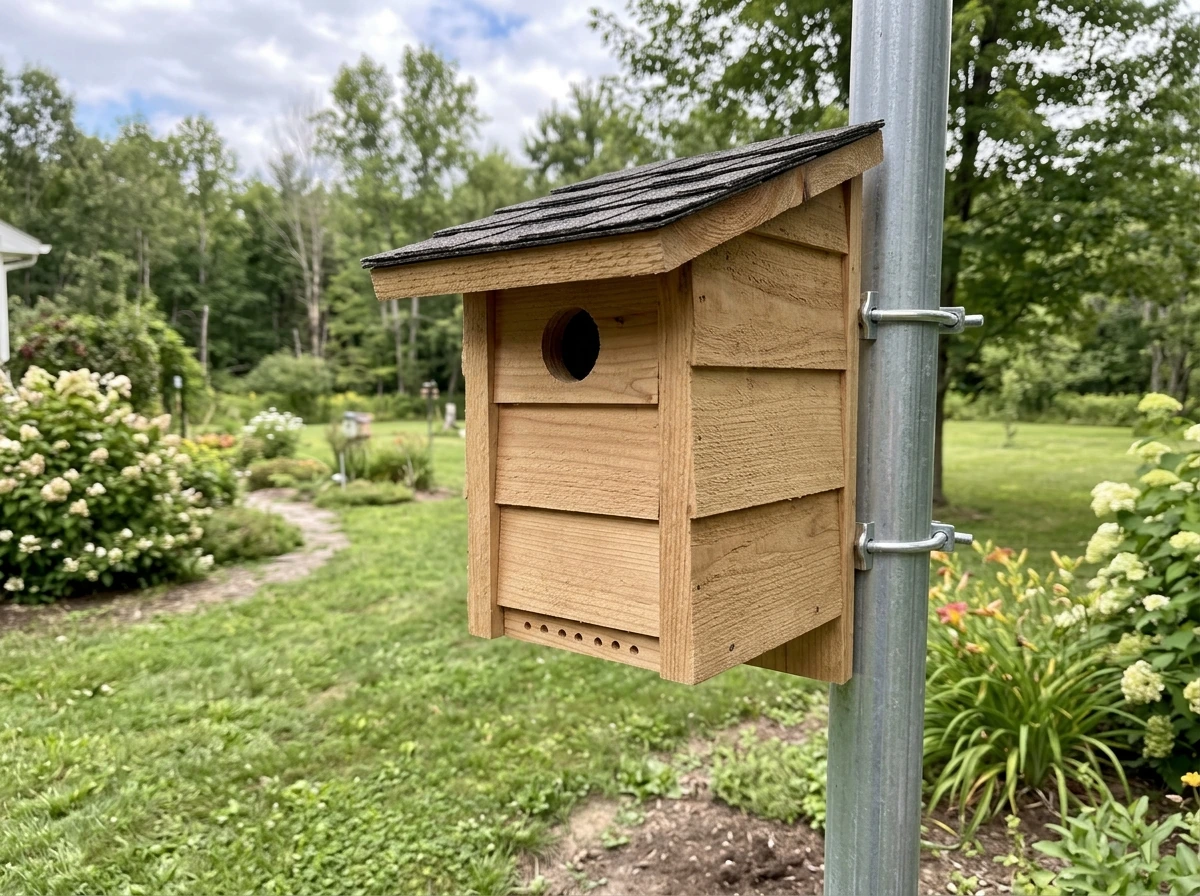
Roof materials are another good decorative outlet. A small piece of copper flashing, cedar shingles, or even a living moss roof (kept away from the vent openings) can make a basic box look genuinely beautiful. If you go with shingles, make sure they overhang the front edge by at least 2 inches to protect the entrance from rain. Check out the step-by-step birdhouse building guide on this site for more roof treatment ideas that work at different skill levels.
Mounting, placement, airflow, drainage, and safety checks
A beautifully built bird house mounted in the wrong spot is a box that no bird will use. I've moved houses three or four times before finding the right location in my own yard. These guidelines cut out that trial and error.
Height and orientation
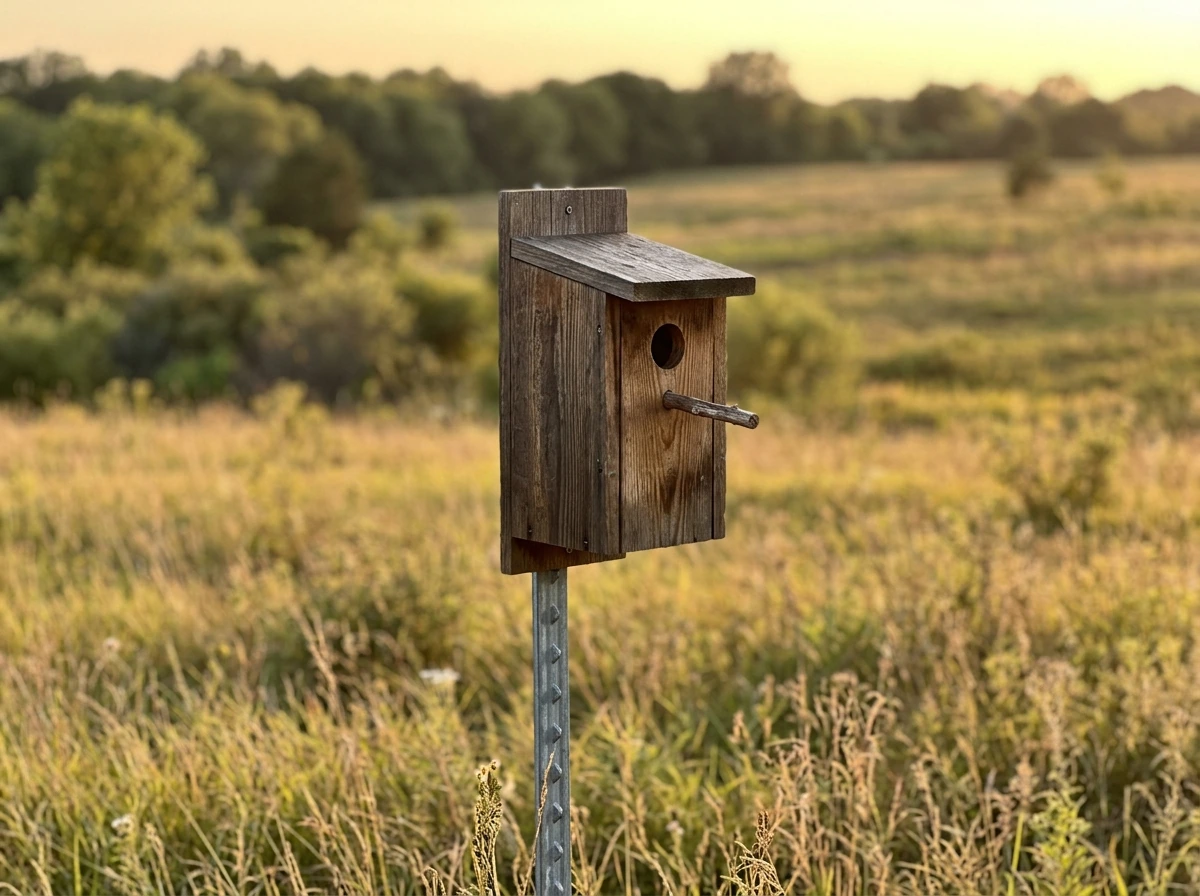
For bluebirds, mount the box 3 to 6 feet above the ground, in an open area with a clear flight path to the entrance. Chickadees and wrens prefer 5 to 15 feet high, often near woodland edges or shrubby areas. Face the entrance hole away from prevailing winds, generally pointing east or southeast in most of North America. This catches the morning sun (which warms the box gently) and keeps driving rain out of the entrance.
Predator protection
Mounting location matters enormously for predator deterrence. A metal or PVC pipe post is far better than a wooden post because raccoons, cats, and snakes struggle to climb smooth round surfaces. If you're using a wooden fence post or tree, add a predator baffle: a cone-shaped or cylindrical metal guard installed below the box that prevents climbing animals from reaching the entrance. NestWatch specifically calls out predator baffles as a key part of responsible nest box placement. And remember, no perch below the entrance hole. That small detail matters more than most people realize.
Airflow and drainage checklist
Before you mount the box, run through this quick check:
- At least four drainage holes (3/8" to 1/2" diameter) in the floor, or clipped/beveled corners
- At least two ventilation holes per side near the top, drilled at an upward angle
- Roof overhangs at least 2 inches past the front panel and 1 inch on each side
- No perch installed below the entrance hole
- Interior is raw, unfinished wood
- Exterior paint or finish is fully cured
- The swing-open side panel opens and latches easily (you'll thank yourself at cleaning time)
- The entrance hole diameter matches your target species
If all of those check out, you're ready to mount. Use galvanized or stainless steel hardware so it doesn't rust and weaken over time. Check that the box is level or tilted very slightly forward (a degree or two) so any water that does get in runs toward the drainage holes rather than pooling at the back.
Maintenance, cleaning schedule, and when to replace parts
A bird house isn't a set-it-and-forget-it project. The boxes that attract birds reliably year after year are the ones that get cleaned and inspected on a schedule. The good news is it's not much work once you're in the habit.
When and how to clean
The Oklahoma Department of Wildlife Conservation recommends cleaning nest boxes about seven to ten days after each nesting season ends, which in practice means checking after you're confident the last brood has fledged and before a new nest gets started. For bluebirds, some managers clean the box immediately after fledging so the parents can start a second clutch with fresh housing. Always wear gloves when handling old nesting material. Old nests can harbor parasites, mites, and bacteria.
The actual cleaning process is simple: remove all old nesting material, brush out debris, and let the box air dry fully. Once a year, usually in fall after the season ends, give the interior a wipe-down with a 10% bleach/water solution or a diluted white vinegar wash. Let it dry completely before closing it back up. Do not use bleach at full strength and do not leave the box wet.
Annual inspection checklist
Late winter, before birds start scouting nesting sites, do a full inspection:
- Check all screws and mounting hardware for rust or looseness. Replace any that are corroded.
- Look for cracks in the wood, especially around the entrance hole and along joints. Small cracks can be sealed with exterior wood glue or caulk.
- Confirm drainage holes are still open and not clogged with debris.
- Check ventilation holes for spider webs, mud dauber nests, or wasp activity.
- Inspect the roof for warping or separation from the box. Re-seal or re-screw as needed.
- Look for signs of rot or soft spots in the wood, especially on the floor and lower side panels.
- Make sure the latch mechanism on the swing-open panel still works cleanly.
When to replace the whole box
Most well-built cedar or redwood boxes last 10 to 15 years with proper maintenance. Pine boxes might need replacement sooner, around 5 to 8 years depending on your climate. Replace the box (or at least the floor panel) when you see: soft, spongy wood that you can dent with a fingernail, persistent mold that returns after cleaning, entrance holes that have been enlarged by woodpeckers beyond your target species' dimension, or hardware that can't be re-secured. A rotting floor is a nest failure waiting to happen, so don't wait until it gives way.
The good news: once you've built one, building a replacement takes a fraction of the time. You'll already have your cut list, you'll know exactly which entrance hole diameter you need, and you'll probably have most of the materials on hand. ...a fraction of the time. You'll already have your cut list, you'll know exactly which entrance hole diameter you need, and you'll probably have most of the materials on hand. That's the real payoff of making your own bird houses rather than buying them: you understand exactly how they work, and fixing or replacing them is easy.
FAQ
Can I paint or stain the inside of a homemade bird house to make it look nicer?
Yes, but only if the finish is fully cured and never touches the inside. Keep the interior completely bare, and if you’re staining or painting the exterior, do it well before installing so fumes are gone (especially after winter storage).
Should I make the floor removable for easier cleaning?
You can use a removable floor, but only if it can’t rattle or fall out. If you hinge or latch it, make sure it stays closed against wind and that screws or latches are placed so birds do not access the hardware from inside.
What’s the safest way to seal gaps in a DIY bird house?
Avoid regular outdoor caulk and foams inside or near the entrance. Use wood-only joints and, if you need sealing for weatherproofing, apply it only to the exterior seams and allow full drying time. Any sealant that smells strong after drying can deter birds.
What should I do if my entrance hole ends up too large?
Use the smallest entrance diameter that matches your target species, and keep the hole round. If a hole gets enlarged by woodpeckers, you generally need to replace the affected face or floor panel, because a slightly bigger opening can invite competitors.
How many ventilation holes should a homemade bird house have?
Most cavity nesters do best with good air circulation, so do not over-vent. Instead, rely on the design’s drainage and the small gaps that naturally occur between exterior panels. Adding extra large vent holes can let cold air and rain blow directly into the nest.
Is it okay to add a decorative perch if I cover it with paint or sand it smooth?
No, a perch can be replaced by safe alternatives if you want the look, such as decorative carving or painting outside the access area. Keep the area immediately below the entrance smooth and free of footholds.
How can I make sure the bird house stays dry during driving rain?
If you get frequent storms or heavy rain, extend the roof overhang and keep the box angled slightly forward as recommended, then verify drainage holes are not blocked by paint, glue, or decorative trims. Do not add weight to the roof that strains mounting hardware.
My bird house isn’t getting tenants, what should I troubleshoot first?
If you’re seeing a bird house ignored after setup, first confirm the entrance size matches your target species for your region. Then check placement, height, and predator baffles, because those factors usually matter more than cosmetics. Also wait through one season, since site fidelity can take time.
Can I clean the box with bleach, and when is it safe to put it back up?
After cleaning, keep it closed and do not rush reinstallation immediately if the interior still smells of bleach or vinegar. Let it air dry completely and confirm there is no odor before mounting.
Can I install multiple homemade bird houses near each other?
In many yards, birds will use multiple boxes, but conflicts happen if boxes are too close or entrances face each other. A practical rule is to separate boxes by at least several yards for small songbirds, and avoid stacking them tightly so one box’s predators can reach another’s entrance.
Next Articles
How to Make Bluebird Houses: Step-by-Step DIY Guide
Build bluebird nesting boxes with exact hole, size, ventilation, predator guards, placement, and easy step-by-step DIY.
Do It Yourself Bird Houses: Plans, Kits, and Build Steps
DIY bird house plans and kits with build steps, hole sizing, ventilation, safe materials, installation and maintenance t
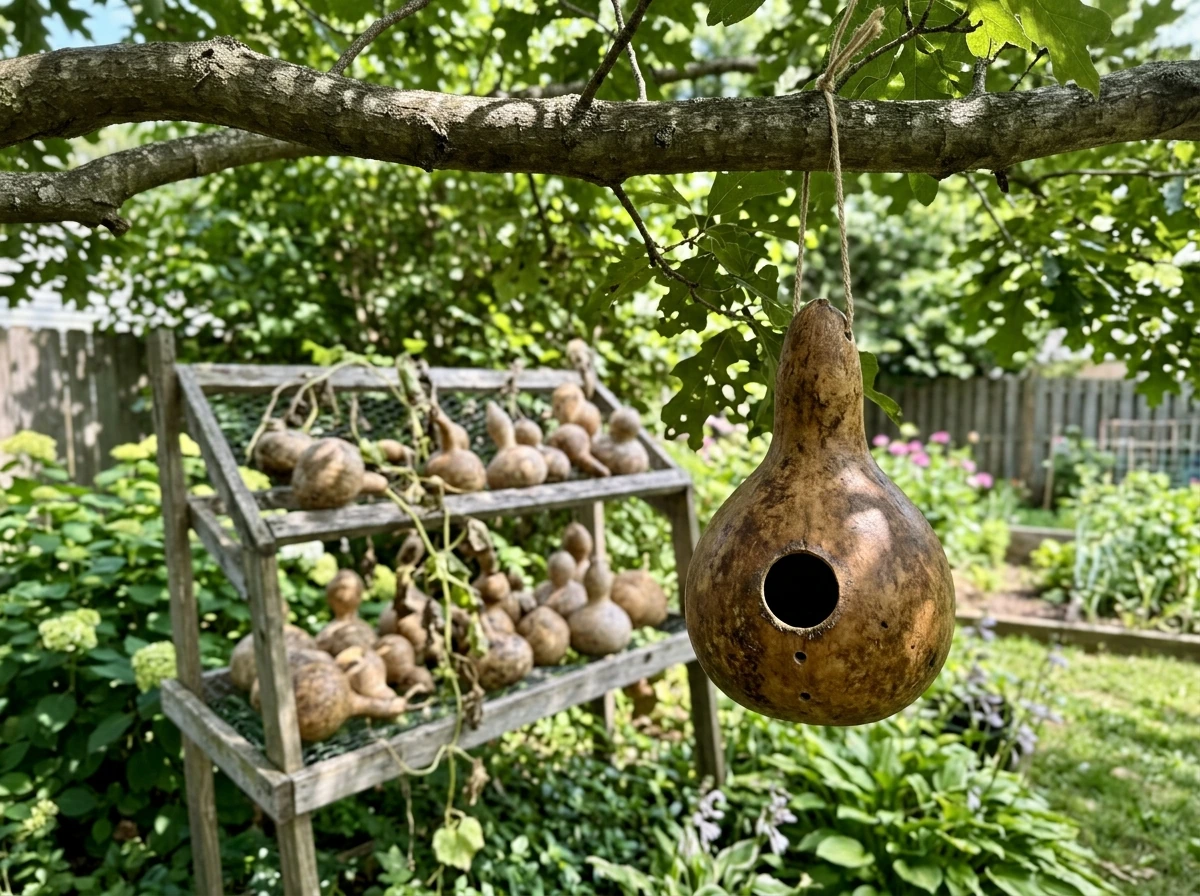
How to Make Gourd Bird Houses: Drying to Mounting
Step by step gourd bird house DIY: dry and cure gourds, cut openings, add drainage, mount safely, finish for outdoors.