A pigeon bird house is not the same thing as a standard backyard birdhouse. Pigeons are larger, more social birds with very specific roosting and nesting habits, so the design rules are completely different. The good news is that building one yourself is a genuinely achievable weekend project, even if you have only basic tools and some reclaimed lumber. This guide walks you through exactly what to build, how big to make it, where to put it, and how to keep it safe and clean so your pigeons actually use it and stay healthy.
How to Make a Pigeon Bird House: DIY Build Plan

Marcus Thornton
23 Mar 2026
What a pigeon house actually needs to be
Most people searching for a "pigeon bird house" are not looking for the little decorative box you hang from a tree for a wren. They want a sheltered roosting and nesting structure, sometimes called a pigeon loft or a nesting box bank, where pigeons can sleep safely, pair up, and raise young. Think of it less like a traditional birdhouse and more like a small, purpose-built shelter with compartments inside.
Pigeons need three things from a housing structure that most small birdhouses completely ignore: enough interior volume for their size (a single pigeon takes up roughly the space of a large hardback book when roosting), a dedicated entry and exit point for each compartment, and serious attention to ventilation. Stale air and moisture are the top killers in pigeon housing. A stuffy, damp box leads to respiratory disease fast. So from the start, think of ventilation not as an afterthought but as a core design feature.
You also need to understand that pigeons are colony birds. A single-compartment box rarely gets used long-term. The moment you have two pairs, you have territorial conflicts. Building in at least four compartments from day one saves you from having to rebuild later, which I learned the hard way with my first prototype.
Choosing the right type of housing for your setup
Before you cut a single piece of wood, decide which style of pigeon housing fits your situation. The three most practical options for a backyard DIY builder are a wall-mounted nesting box bank, a freestanding ground-level loft cabinet, and a raised loft structure. Each has its place depending on your space, budget, and how many birds you're supporting.
| Type | Best For | Approx. Size | Difficulty | Notes |
|---|---|---|---|---|
| Wall-mounted nesting box bank | Small backyards, 2-6 birds, renters or beginners | 24-48 inches wide, 12-18 inches deep per row | Beginner | Mounts to a wall or fence; easiest to build and clean |
| Freestanding loft cabinet | Yards with moderate space, 6-12 birds | 36-60 inches wide, 18-24 inches deep, 24-36 inches tall | Intermediate | Sits on legs or a raised platform; good all-rounder |
| Raised loft structure | Serious hobbyists, 12+ birds, racing pigeon keepers | Full shed size (6x8 ft or larger) | Advanced | Full walk-in access; beyond the scope of a weekend build |
For most readers here, the freestanding loft cabinet hits the sweet spot. It gives you enough compartments to keep a small flock happy, it is portable enough to reposition if placement turns out to be wrong, and it does not require any permanent construction. That is the design this guide focuses on. If you are interested in simpler single-species boxes for other birds, check out the step-by-step guides elsewhere on this site for context on how different species change the design rules.
What you need before you start building
Materials
- Exterior-grade plywood, 3/4 inch thick (one full 4x8 sheet covers a basic 4-compartment cabinet)
- Pine or cedar 2x2 lumber for internal framing and perch rails (about 12 linear feet)
- Galvanized wood screws, 1.5 inch and 2.5 inch (two boxes of each)
- Exterior wood glue
- Waterproof exterior paint or wood sealant (light-colored or natural finish is best for heat reflection)
- Galvanized wire mesh, 1/2 inch hardware cloth, about 2 square feet for ventilation panels
- Small galvanized hinges for access doors (2 per door, at least 4 doors planned)
- Door latches or turn-button catches to secure compartment doors
- 4 adjustable metal leg levelers or 4x4 post legs to raise the structure off the ground
- Roofing felt or corrugated metal/plastic sheeting for the roof (slightly oversized to create an overhang)
- Staple gun and staples for securing mesh
- Non-toxic wood preservative or outdoor sealant for cut edges
Tools
- Circular saw or jigsaw (a hand saw works fine but takes longer)
- Power drill and bits
- Tape measure and pencil
- Square
- Sandpaper, 80 and 120 grit
- Staple gun
- Level
- Safety glasses and dust mask (wear the mask every time you sand or cut, and again when cleaning later)
You can absolutely substitute reclaimed wood as long as it has not been treated with anything toxic. Old fence boards, pallet wood that is stamped HT (heat treated), and shed offcuts all work well. Avoid pressure-treated lumber for any interior surface that birds will contact directly, as the preservatives used can be harmful.
The build plan: dimensions, layout, and entry
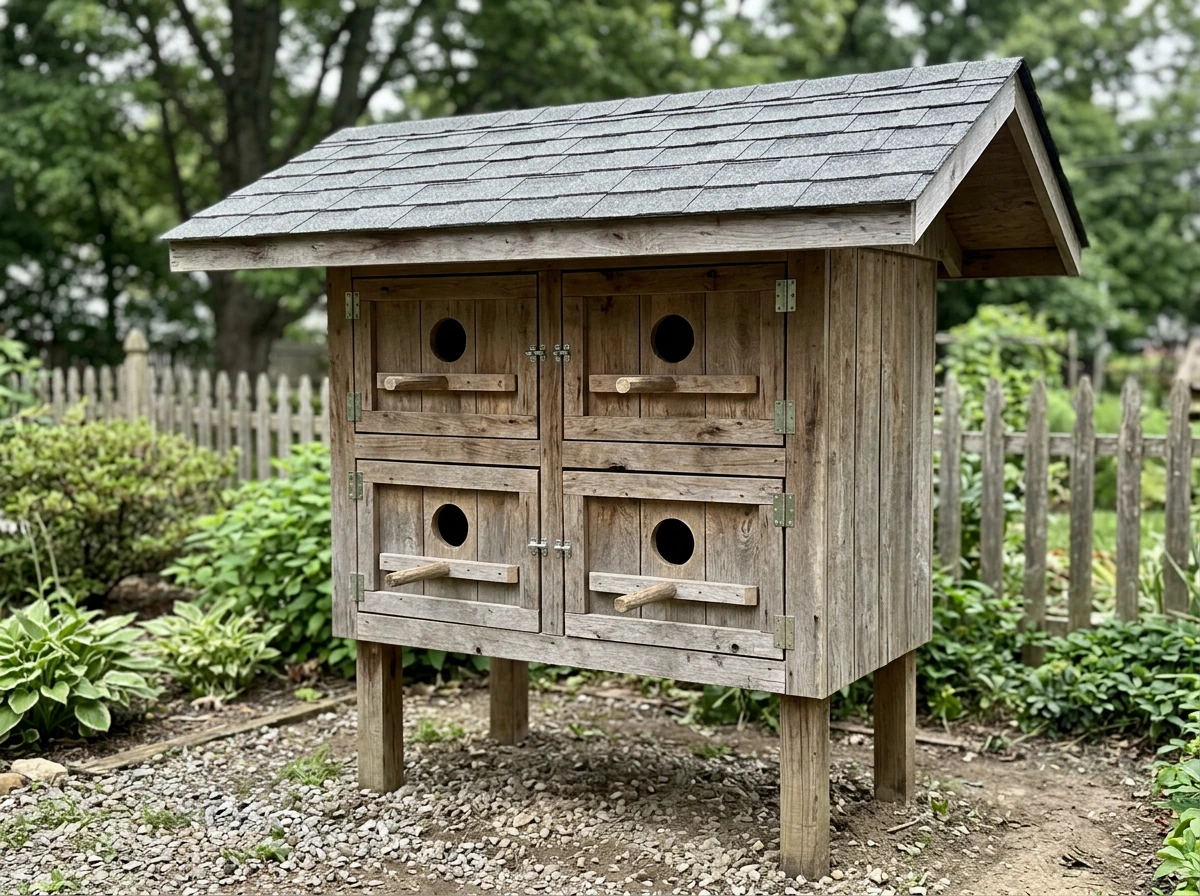
This plan produces a 4-compartment freestanding cabinet measuring roughly 48 inches wide, 18 inches deep, and 24 inches tall (not counting the legs or roof). Each compartment is 12 inches wide, 18 inches deep, and 12 inches tall. That gives a single pair of pigeons enough room to move, turn around, and settle on a nest bowl without feeling cramped. If you want 8 compartments, simply stack two rows and extend the height to about 30-32 inches above the legs.
Step 1: Cut your panels
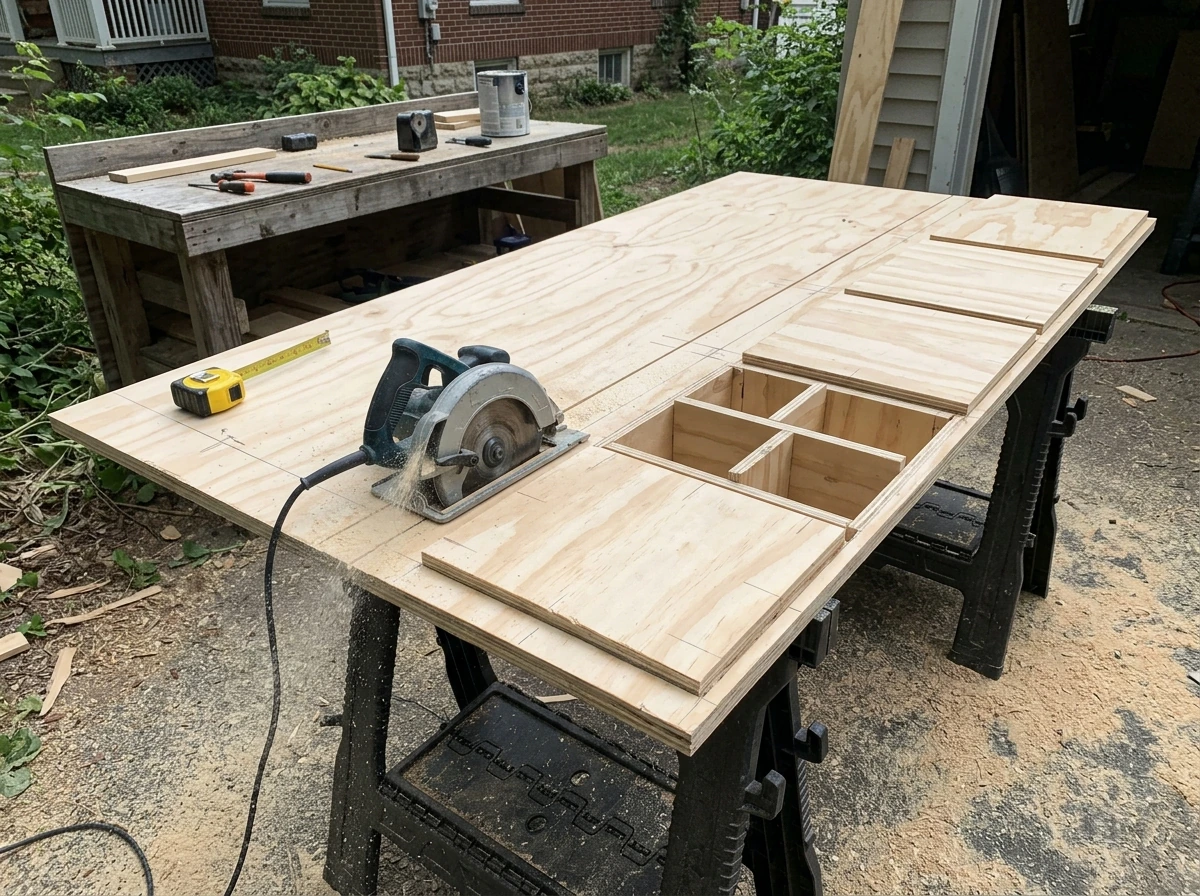
From your 3/4 inch plywood, cut the following pieces. Top and bottom panels: 48 inches x 18 inches (cut 2). Side panels: 18 inches x 24 inches (cut 2). Interior dividers: 17.5 inches x 24 inches (cut 3, so you get 4 equal bays). Back panel: 48 inches x 24 inches (cut 1). The front of each compartment will be an individual hinged door, so do not cut a full front panel.
Step 2: Cut the ventilation openings
On the back panel, cut a ventilation strip near the top: a row of slots or a continuous opening about 3 inches tall running the full 48-inch width. Cover this with 1/2 inch hardware cloth stapled securely on the inside. Do the same near the bottom of the back panel, but make this lower strip about 2 inches tall.
This intake-low, exhaust-high design lets fresh air enter near the floor and push stale warm air out at the top, which is exactly how efficient pigeon loft ventilation works. One giant hole on one side creates drafts; two separated openings create flow.
The goal for any pigeon housing is to keep the internal temperature between roughly 50°F and 86°F (about 10°C to 30°C) and humidity below 65%, and this simple two-strip design goes a long way toward hitting those numbers without mechanical help.
Step 3: Assemble the box
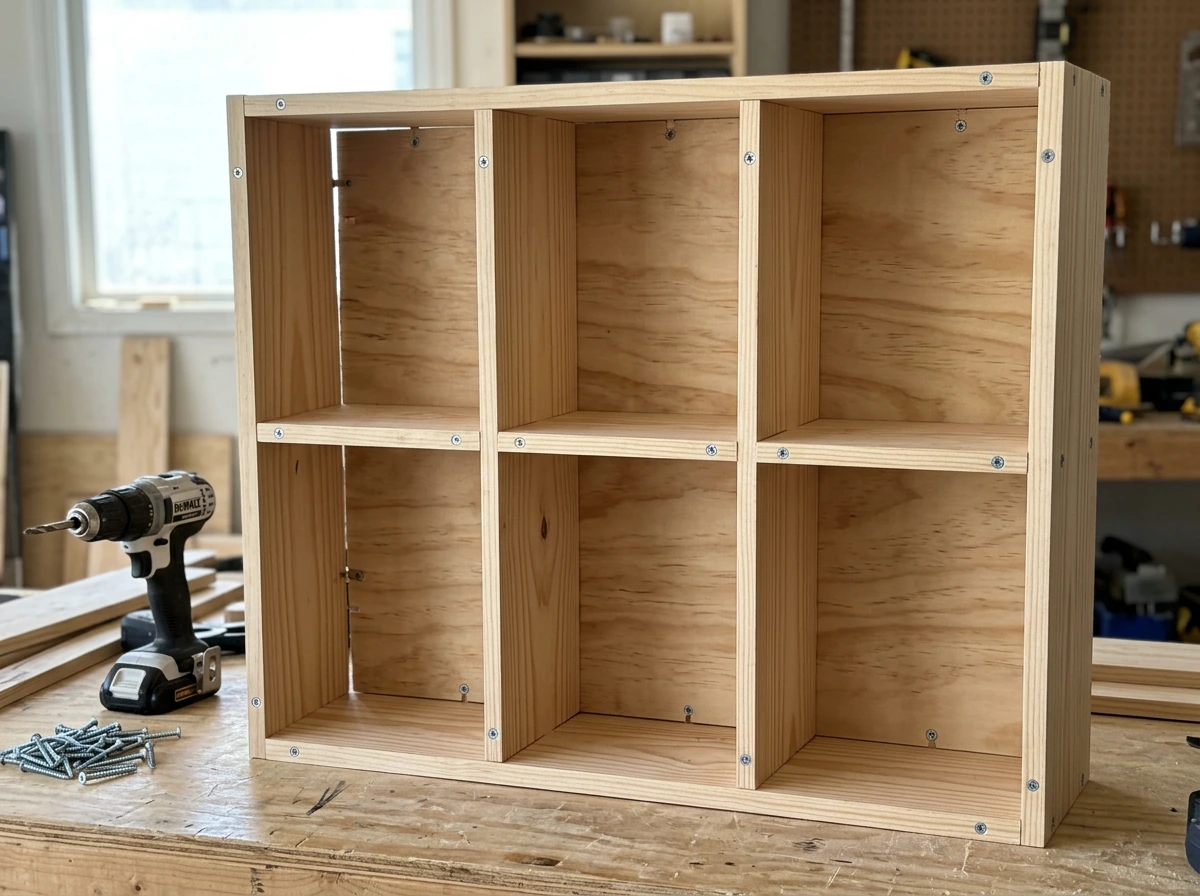
Attach the bottom panel to the two side panels first, using glue and 2.5-inch screws. Then attach the back panel. Drop in and screw the three interior dividers at equal 12-inch intervals. Fit the top panel last. Check for square with your diagonal measurements before the glue sets: both diagonal measurements from corner to corner should be identical. If they are not, nudge the frame gently before the glue grabs.
Step 4: Build and hang the front doors
Cut one front door panel per compartment: 11.5 inches wide by 11.5 inches tall (leaving a small margin). In the lower portion of each door, cut the entry/exit opening. For pigeons, this opening should be 6 inches wide and 7 inches tall, centered horizontally and positioned so its bottom edge sits about 1.5 inches above the floor of the compartment. This raised threshold helps keep nesting material inside and discourages smaller sparrows from moving in. Hang each door on two hinges at the side, so the door swings fully open for cleaning. Add a turn-button latch to keep it closed.
Below each entry opening, attach a 2x2 perch rail that protrudes about 4 inches outward from the front face of the cabinet. Pigeons land on the perch, then step up and in through the opening. Without the perch, they hover awkwardly and often give up.
Step 5: Add drainage and the floor finish
Sand the interior floor of each compartment smooth, seal it with exterior sealant, and let it cure fully before introducing birds. Drill two 1/4-inch drainage holes in each compartment floor near the back corners. This keeps condensation and spilled water from pooling, which is a direct cause of mold and respiratory problems.
Step 6: Build the roof and legs
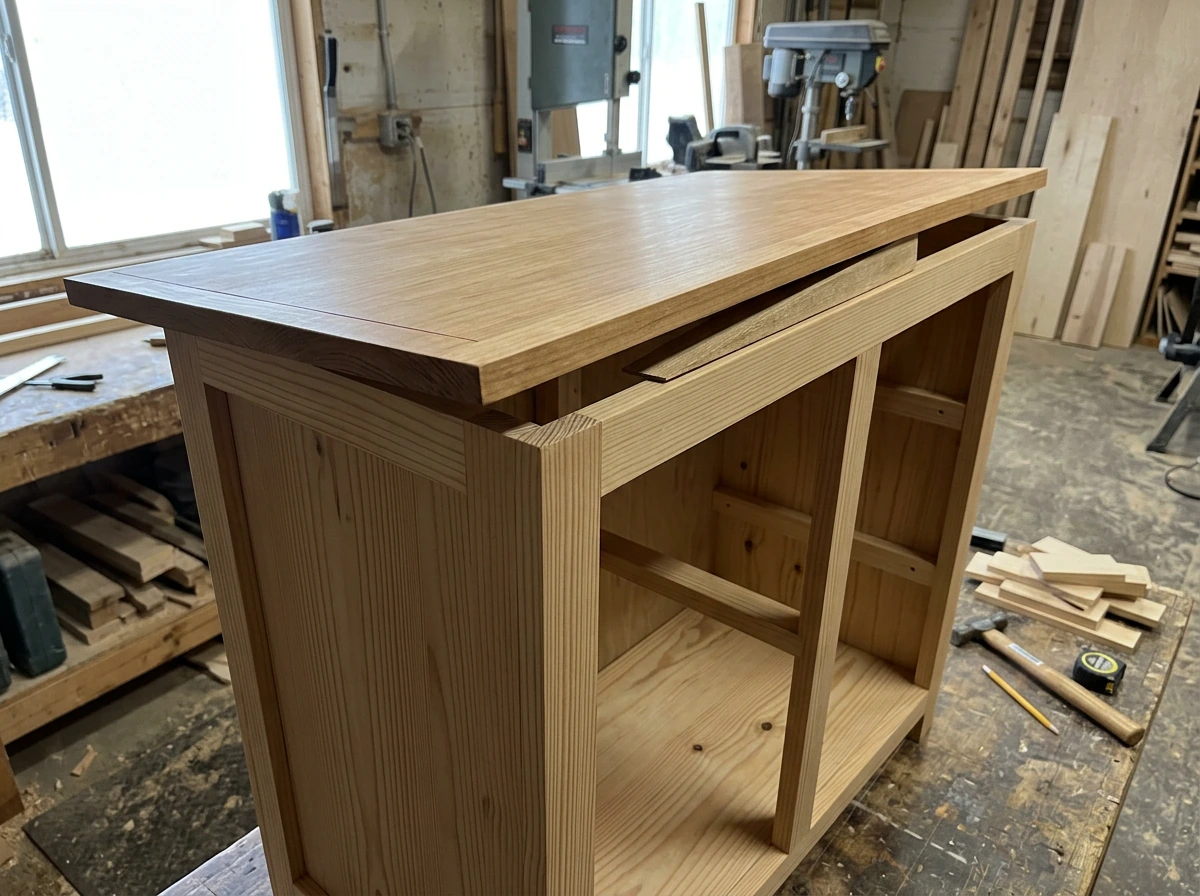
Cut a roof panel 50-52 inches wide and 20-22 inches deep, so it overhangs on all sides by at least 1-2 inches. Add a slight front-to-back slope by shimming the back edge of the roof up about 2 inches, then cover the roof panel with roofing felt or corrugated sheeting stapled and overlapped away from the slope direction so rain drains off the front rather than pooling. Attach the roof with hinges at the back so you can tilt it up for access and cleaning.
Attach 4x4 post legs to the bottom of the cabinet, long enough to raise the floor of the structure at least 18-24 inches off the ground. This elevation lets air circulate underneath, keeps rodents from nesting directly below, and makes drainage work properly. Level the legs with adjustable feet or shim the posts if your ground is uneven.
Where to put it and how to protect it
Placement basics
Position the cabinet so the front entry doors face roughly south or southeast in the northern hemisphere. This gives the birds morning sun on their entry perches (they love it) while keeping the back of the structure shaded during the hottest part of the afternoon. Avoid positioning the back ventilation panel directly into the prevailing wind, especially in winter, because that will push cold air straight through the structure instead of allowing gentle flow.
Keep the structure at least 10 feet away from dense shrubs or low-hanging branches that cats and raccoons can use as launch pads. A clear approach path in front of the entry points also matters: pigeons are wary birds and will not use a housing structure where they cannot land, assess the situation, and then enter. Give them 6-10 feet of open space in front.
Predator protection
- Wrap each leg post with a metal predator guard (a 12-inch sheet metal collar works well) or smear the lower portion with grease to stop climbing
- Make sure all hardware cloth ventilation panels are fastened with staples AND a bead of wood glue or screwed-on wood strips; raccoons will pry out staples alone
- Close all compartment doors at night if you are managing a closed flock, or fit the entry openings with a one-way trap-door flap that allows birds in but slows exit until you open the full door in the morning (this is standard practice in racing pigeon setups)
- If hawks are a local problem, add a 12-inch roof overhang at the front so birds land on the perch under cover rather than in open air
Cleaning and maintenance schedule
Pigeon droppings accumulate fast and carry pathogens that are genuinely hazardous to human health, blank" rel="noopener noreferrer">including histoplasmosis and psittacosis. Always wear a dust mask when cleaning the structure, not just a light paper mask but an N95 or better. CDC guidance for preventing psittacosis recommends blank" rel="noopener noreferrer">wetting cage surfaces with water or disinfectant before cleaning to help reduce aerosolization of contaminated material. The Association of Avian Veterinarians specifically flags respiratory protection as essential when working with pigeon and dove environments, and this is not the kind of advice to skip.
- Weekly: Remove and replace nesting material in active compartments. Spot-clean obvious droppings from perches and floors with a scraper
- Monthly: Open all compartments fully, scrape floors clean, and wipe down with a diluted white vinegar solution (1 part vinegar to 3 parts water). Let dry completely before closing
- Quarterly: Inspect all hardware cloth panels for damage, check screws for rust or loosening, examine the roof for leaks or lifted edges, and re-apply wood sealant to any raw or worn areas
- Annually: Full strip-down, deep clean with an avian-safe disinfectant, and treat all exterior wood surfaces with fresh exterior paint or sealant
Safety checks and fixing common problems
Poor airflow and condensation
If you notice condensation on interior walls or a persistent musty smell, your ventilation is not working well enough. The fix is almost always to increase the size of your lower intake strip or add a second intake point on a side panel (not the back if it faces the wind). For a detailed overview, see the article on how to build bird houses step-by-step. If you want a fuller guide to building a birdhouse from start to finish, follow the step-by-step instructions here: how to build bird houses step-by-step. Do not just cut one big hole, because that trades poor airflow for cold drafts, which is equally harmful. Targeted intake-and-exhaust design is the answer every time.
Dampness inside compartments
Moisture usually enters from two places: a leaking roof joint or wicking through the floor from ground contact. Check your roof overhang and re-seal any gaps. If the floor is the problem, confirm your drainage holes are open and unblocked, and consider adding a thin layer of sand or dry pine shavings as an absorbent floor substrate.
Overcrowding and territorial fighting
Pigeons are loyal to their compartment but aggressive about it. If you see constant chasing and displacement, you have more birds than compartments. The solution is either to add a second stacked row (following the same build plan), or to reduce flock size. Do not just add perches in a shared open space, because that does not give each pair a defined territory and the fighting continues.
Unwanted birds moving in
Sparrows and starlings will investigate any opening. The 6x7-inch entry opening in this plan is large enough to be comfortable for pigeons but awkward for smaller birds to defend as a nest site, especially with the raised threshold. If sparrows persist, temporarily reduce the entry width to 5 inches using a removable wooden insert until your pigeons are established and occupying all compartments.
Structure instability
A wobbly structure is a problem for two reasons: pigeons feel unsafe and will stop using it, and it puts stress on joints that eventually fail. Check that all four legs are plumb and level when the structure is loaded. Add diagonal bracing between the legs if the unit rocks. Stake the legs loosely to the ground in high-wind areas without rigidly anchoring them, so you can still move the structure if you need to.
Birds not using the structure at all
New pigeons often ignore a structure for days or even weeks. Introduce them by keeping them confined inside the closed cabinet for 3-7 days (with food and water inside) before opening the entry doors. This "homing" period teaches them that the structure is their home base. Skipping this step is the single most common reason a freshly built pigeon house sits empty.
You are ready to build this today
The plan above is a genuinely achievable weekend project. Day one is cutting and assembling the box. Day two is adding the roof, legs, ventilation mesh, doors, and exterior finish. Let the sealant cure for 24-48 hours, place the structure, and you are ready to introduce your birds. If you want to go bigger or dive into more complex entry trap-door systems, those are natural next steps once you have had a season with this basic cabinet and understand how your specific flock uses the space.
For other species-specific builds and general DIY birdhouse principles, the step-by-step birdhouse guides on this site cover everything from bluebird boxes to gourd bird houses, how to make gourd bird houses properly depends on the gourd shape, dimensions, and entry hole sizes, The core building skills transfer directly, so building this pigeon cabinet is a great foundation for any bird housing project you tackle next.
FAQ
Can I build a pigeon bird house using just a single compartment instead of multiple bays?
You can build a single-compartment version, but plan for lower long-term use if you have more than one pair. Pigeons are colony birds, and once multiple birds want the same space you usually see constant displacement and poor nesting success. If you want to start small, consider building 4 compartments from day one, or be ready to limit the flock to one pair.
What entrance size should I use if I’m seeing sparrows or starlings investigating the doors?
If smaller birds keep entering or trying to nest, use a temporary removable insert to reduce the effective opening. The standard plan uses a raised threshold and a 6-inch by 7-inch entry, which pigeons can manage but many smaller birds defend poorly. A 5-inch reduced-width insert is often enough to discourage competitors until pigeons occupy all compartments.
Do I need to seal the inside wood, or is sanding enough?
Sanding smooth and sealing the interior floor helps control moisture and makes cleaning safer. Sealant on the floor only is usually the best tradeoff, because you still want walls to dry properly through ventilation. Let any sealant cure fully before birds arrive, otherwise fumes can irritate the birds’ respiratory system.
How do I stop mold if I still get damp corners even with drainage holes?
First confirm the drainage holes are actually open and not blocked by sealant, wood debris, or a tight fit of the cabinet floor. Then address roof leaks and floor wicking, both of which commonly overwhelm drainage. If needed, add a thin absorbent substrate like dry pine shavings or sand on the floor, and monitor humidity, not just smell.
How can I tell whether my ventilation design is working before adding birds?
After the structure is assembled (with the roof on), check for condensation during typical humid or cool periods. Persistent musty odor or wet wall spots are signals airflow is insufficient or uneven. If that happens, the fastest adjustment is increasing lower intake size or adding a second intake point on a side panel, avoiding a single large hole that creates drafts.
Is it safe to use pallet wood or reclaimed fence boards for the interior?
It can be, if the material is suitable. Look for pallet markings, choose HT (heat treated) rather than unknown or chemically treated boards, and avoid pressure-treated lumber for any surface birds contact directly. If you cannot verify treatment, use new untreated boards for interiors.
How far from shrubs and buildings should I place the cabinet to prevent predator “launch points”?
Keep the front entry doors in an open approach area so pigeons can land and assess before entering. Also keep the structure at least about 10 feet away from dense shrubs or low branches that cats and raccoons can use. If you cannot create open space, the pigeons may not use the house even if it’s perfectly built.
What’s the best way to introduce new pigeons so they actually use the loft?
Introduce them by keeping them confined inside the cabinet with food and water for 3 to 7 days, then open the doors. This homing period helps them treat the structure as a safe base. Many owners skip it and end up with a newly built house that remains empty for weeks.
My structure wobbles slightly, will pigeons reject it?
Yes, wobble often reduces use because pigeons feel unsafe and joints experience stress that leads to loosening. Level the legs, verify diagonal measurements during assembly, and add diagonal bracing if it rocks. In windy areas, staking can help, but avoid hard anchoring that makes relocation or adjustments impossible.
Can I mount the cabinet on an existing deck or concrete slab?
You can, but you should still maintain an elevated floor and airflow underneath. If you set it directly on a slab without clearance, drainage and under-ventilation suffer, increasing dampness and condensation. Use adequate leg height or spacers so the bottom stays elevated and water can leave the system.
What should I do if pigeons fight constantly even though I have enough compartments?
Constant chasing usually means the flock still exceeds the available defined territory. Because pigeons are loyal to their compartment, “shared space” solutions like extra perches in front often do not resolve conflict. The practical fix is either reduce the number of birds or expand to a second stacked row using the same compartment plan.
Do I need a special mask and cleaning routine for pigeon droppings?
Use respiratory protection when cleaning, typically an N95 or better, because pigeon droppings can carry respiratory hazards for people. Also avoid dry sweeping that aerosolizes dust. Clean on a schedule, ventilate the area, and allow sealant and roof materials to fully cure before you start handling the interior with birds present.
Next Articles
How to Make Homemade Bird Houses: Cheap and Decorative DIY
Step-by-step guide to build cheap, decorative bird houses with correct size, ventilation, drainage, safe finishes, and m
How to Make Bluebird Houses: Step-by-Step DIY Guide
Build bluebird nesting boxes with exact hole, size, ventilation, predator guards, placement, and easy step-by-step DIY.
Do It Yourself Bird Houses: Plans, Kits, and Build Steps
DIY bird house plans and kits with build steps, hole sizing, ventilation, safe materials, installation and maintenance t