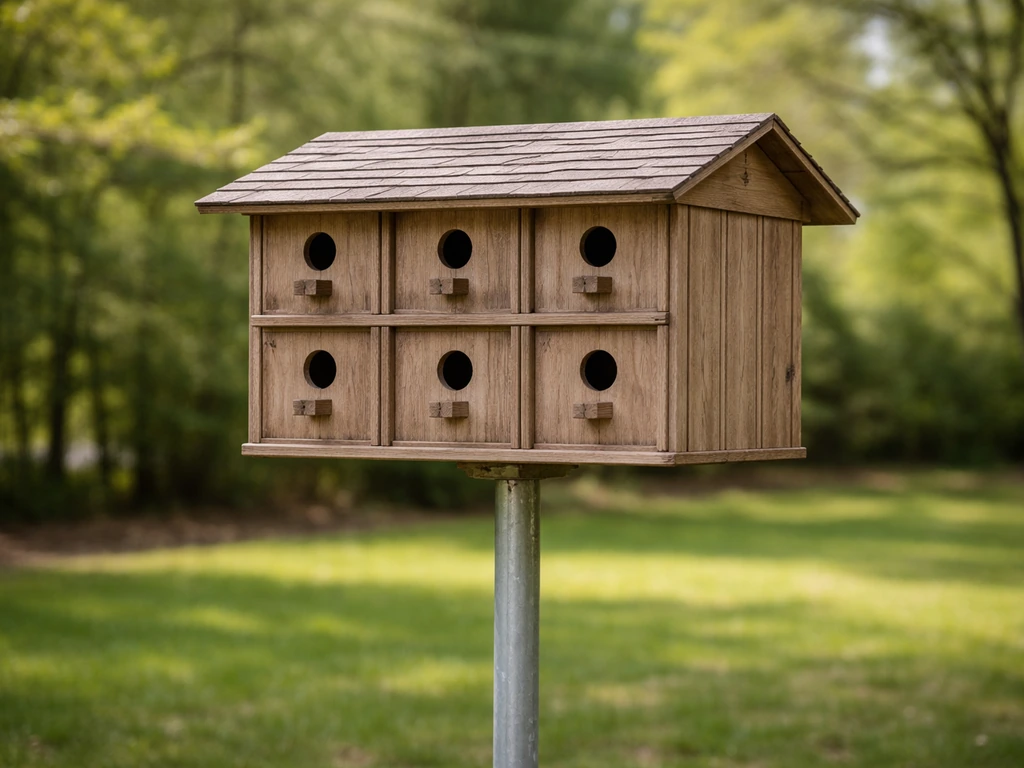
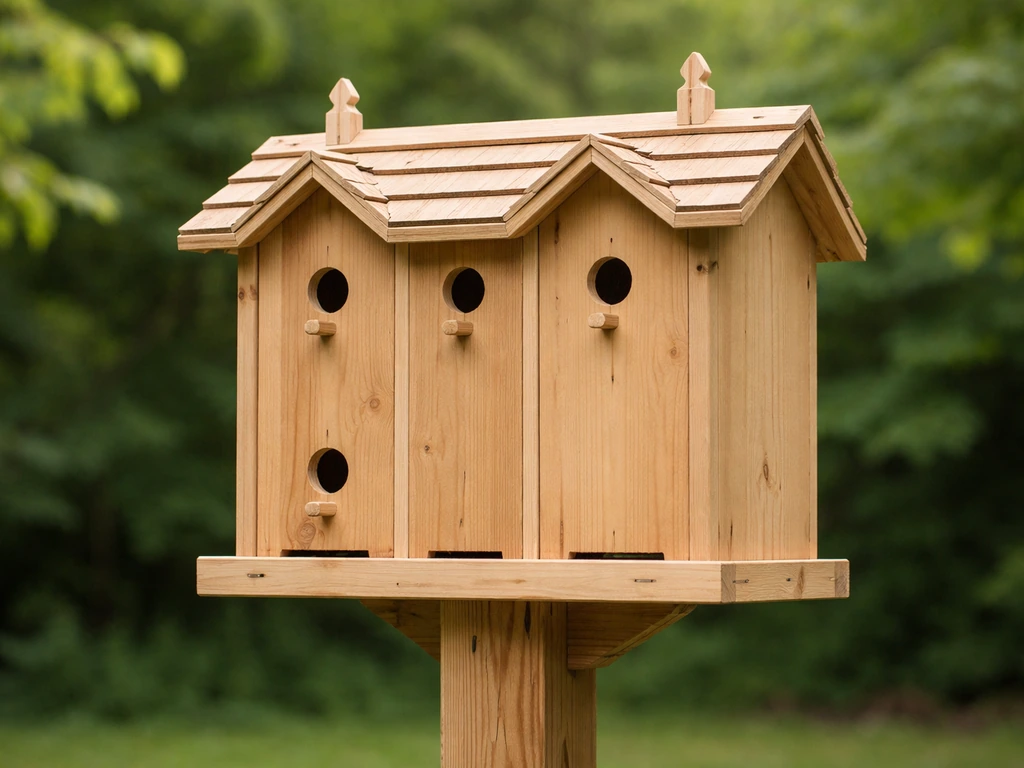
A bird condo is basically an apartment building for birds: multiple nesting compartments grouped together on a single structure, each sized and configured for a specific species. You can build a solid, functional one in a weekend using cedar or exterior-grade plywood, a few basic tools, and a clear plan for which birds you want to attract. If you're wondering how to build a bird room, use these same species-focused guidelines for size, materials, and placement bird condo. The key is matching every detail, from entrance hole size to mounting height, to the species you're targeting. Get that right, and the birds will move in on their own timeline.
How to Build a Bird Condo: Step-by-Step DIY Plan

Marcus Thornton
12 May 2026
Decide which birds you're targeting and what the condo should provide
Before you cut a single board, figure out which birds live in your area and what kind of nesting setup they actually want. A bird condo isn't a free-for-all. Different species have very different requirements, and cramming incompatible birds into shared space creates conflict and drives everyone away.
The most practical backyard condo targets two or three compatible species in separate, well-spaced compartments. Eastern Bluebirds are a popular choice: they need a 1.5-inch entrance hole, a floor area around 4x4 to 5.5x5.5 inches, and the entrance hole should sit roughly 4.5 to 6 inches above the floor of the box. House Wrens are a great second species to plan for, but keep their compartments well separated from bluebird units because wrens are aggressively territorial and will harass bluebirds. Wrens want a slightly smaller entrance, about 1.25 inches, and they prefer being near woody vegetation like shrubs and forest edges.
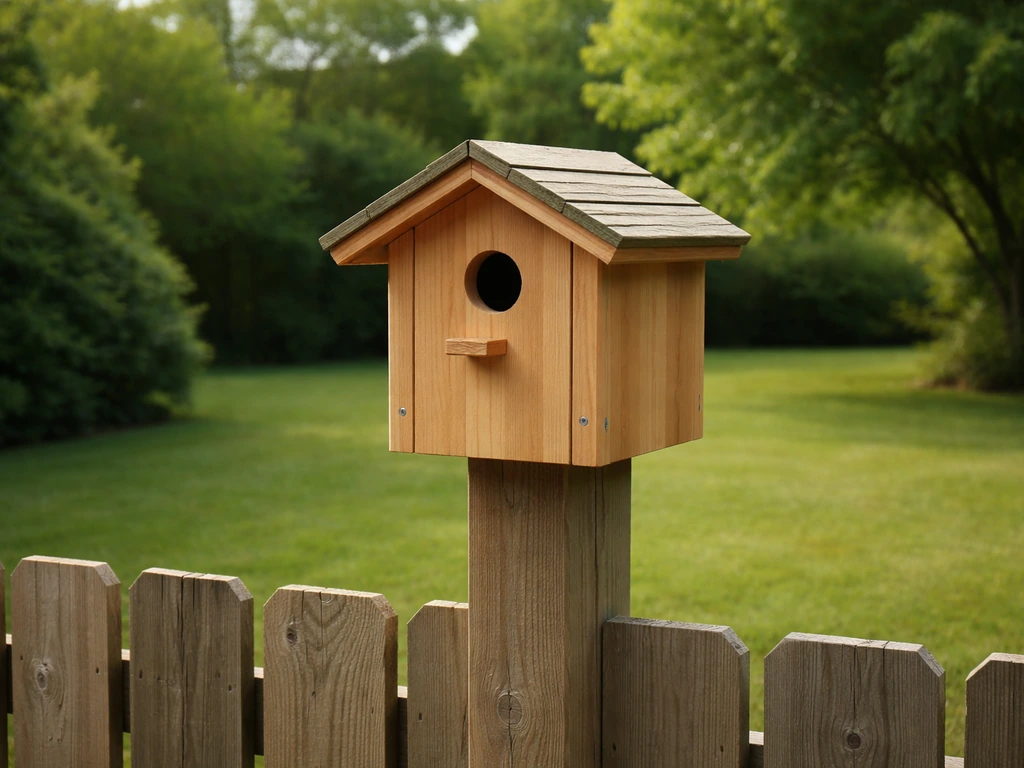
The 'condo' concept works best when you treat each compartment as its own standalone birdhouse that just happens to share a mounting structure. Ask yourself: What species are in my yard right now? What habitat do I have, open field, woodland edge, or suburban garden? The answers determine your compartment count, sizes, and spacing.
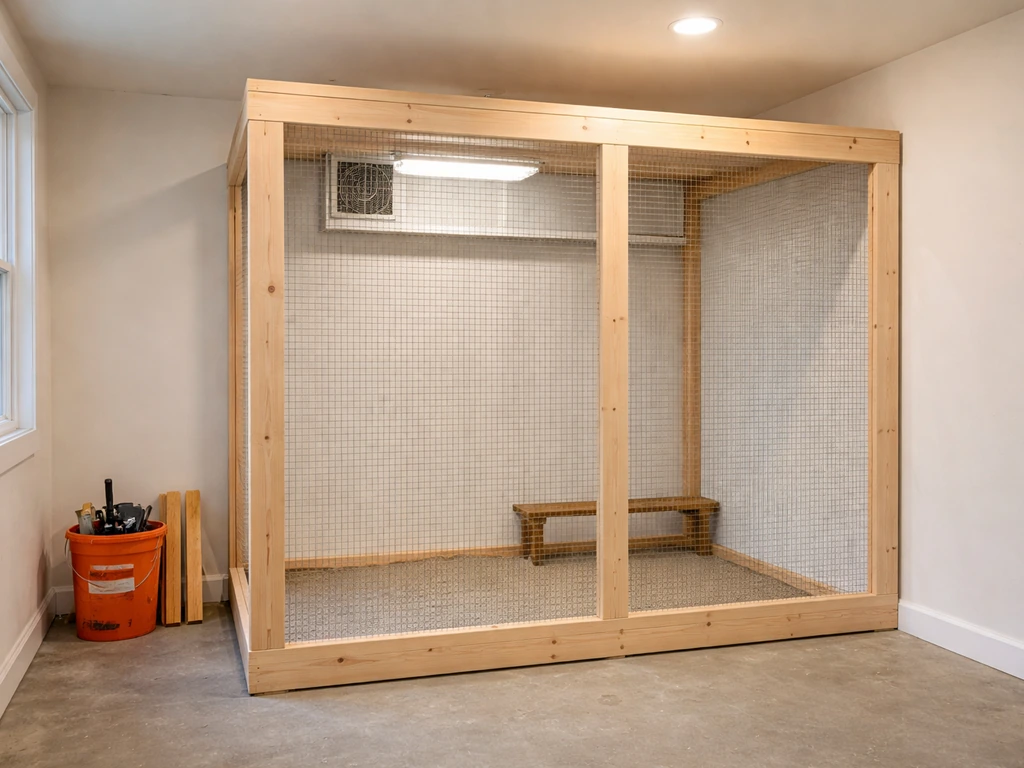
If you're also interested in larger enclosed habitat structures for birds you keep or rehabilitate, that's a different project, closer to building a bird aviary, but the multi-unit nesting box condo we're covering here is specifically for attracting wild backyard species. If you meant Minecraft instead of a real-world bird condo, you can follow specific step-by-step guides for building a bird aviary in Minecraft.
If you want to go beyond a single condo and create a more spacious enclosed setup, learn more about how to make bird aviary designs that suit your species. If you want to create a larger, enclosed space, you can adapt the same planning principles to a bird aviary design building a bird aviary.
Choose the right location, height, and placement rules
Placement is where most first-timers go wrong. You can build a beautiful condo and have it sit empty for two seasons because it's in the wrong spot. Here's how to get this right.
Height and orientation
Eastern Bluebird compartments should be mounted 3 to 6 feet off the ground, with the entrance facing open space, ideally east, north, or south rather than west. Facing west means the afternoon sun blasts directly into the opening during the hottest part of the day, which can overheat nestlings. House Wren compartments do better at 5 to 10 feet, mounted within about 100 feet of woody vegetation where they like to forage and find nesting material.
Spacing between units
This is the part that surprises people. Eastern Bluebirds are territorial and will actively fight over nesting sites. The North American Bluebird Society recommends spacing bluebird boxes at least 100 yards apart, with 125 to 150 yards being even better. Mountain and Western Bluebird boxes need even more room, somewhere between 200 and 300 yards. That means your condo shouldn't have two bluebird compartments right next to each other. Instead, either target one bluebird pair per condo structure, or pair a bluebird compartment with wren compartments on the same post since wrens, despite being territorial with each other, occupy different enough space and habitat to coexist on a shared structure if the compartments are physically separated.
What to avoid when siting your condo
- Areas where cats regularly patrol. Predator guards help, but a yard with roaming cats is genuinely risky for nesting birds and fledglings.
- Dense canopy directly overhead, which gives raccoons and squirrels easy access routes.
- Spots that flood or collect standing water near the base of your mounting pole.
- Full western exposure that offers no shade during hot afternoons.
Pick materials and dimensions
Good material choices protect birds from weather, predators, and toxic off-gassing. Bad ones look fine at first and then warp, rot, or leach chemicals into the nest. Here's what actually works.
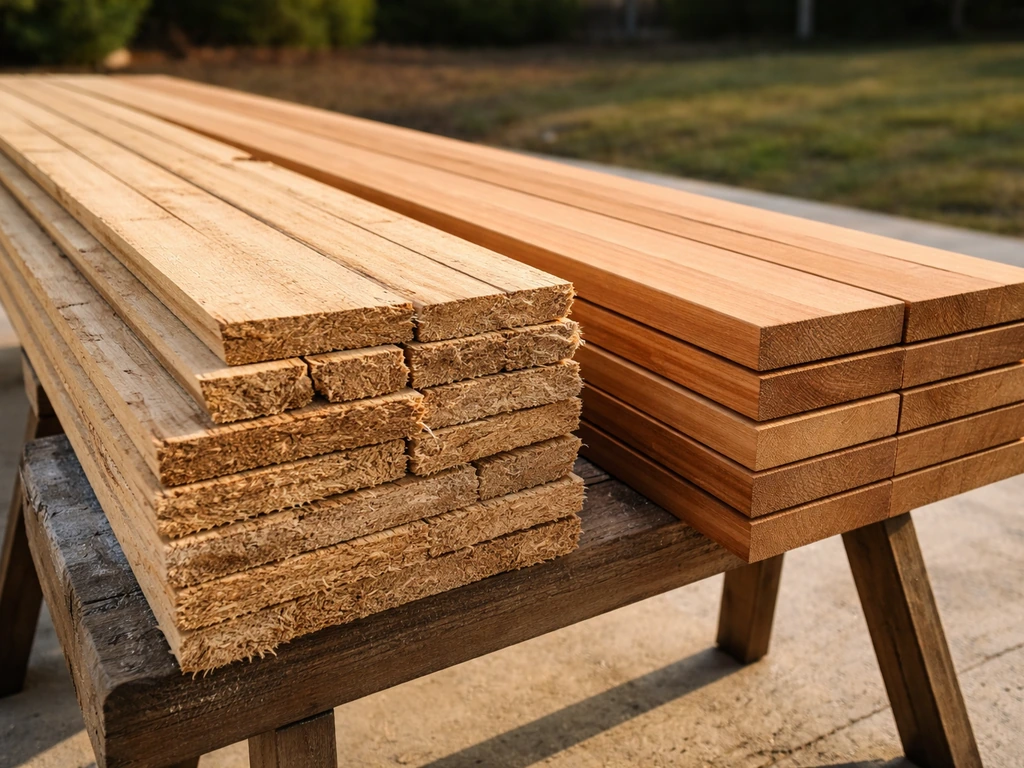
Wood selection
Use 3/4-inch rough cedar, exterior-grade plywood, pine, or redwood. Rough-sawn wood is better than smooth on the inside of compartments because it gives fledglings something to grip as they climb toward the exit. Never use pressure-treated lumber inside a nesting compartment. The preservatives used in treated lumber, even modern versions, are not appropriate for birds sitting in close contact for weeks. Avoid plywood with interior glues if you're cutting panels that will be exposed to weather.
Finishes and hardware
Leave the interior of every compartment completely unfinished and unpainted. On the exterior, use a water-based exterior paint or a natural stain if you want weather protection. Darker colors absorb more heat, so stick to light colors or natural wood tones for the roof and south-facing walls. Use galvanized or stainless screws throughout, not standard steel, which rusts quickly outdoors and weakens joints within a season or two.
Species dimensions at a glance
| Species | Entrance Hole Diameter | Floor Size | Hole-to-Floor Depth | Mounting Height |
|---|---|---|---|---|
| Eastern Bluebird | 1.5 inches | 4x4 to 5.5x5.5 inches | 4.5 to 6 inches | 3 to 6 feet |
| House Wren | 1.25 inches | 4x4 inches | 4 to 6 inches | 5 to 10 feet |
Ventilation and drainage
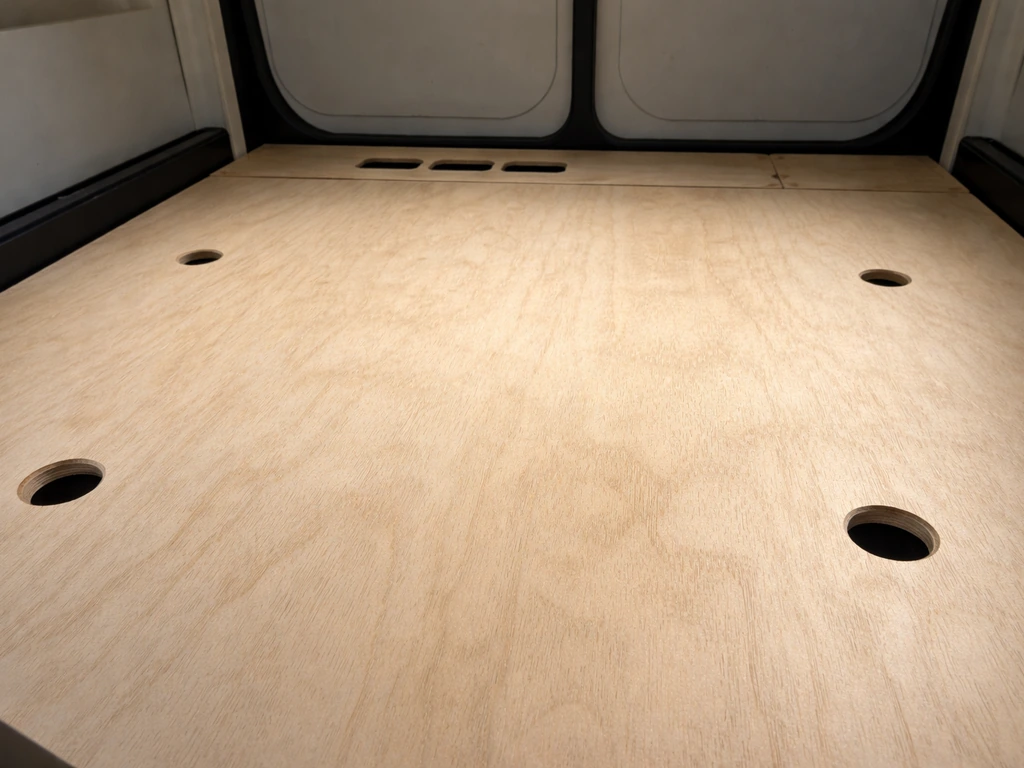
Every compartment needs both. For drainage, drill four holes about 3/8 to 1/2 inch in diameter near the corners of the floor panel, or notch the corners slightly instead. For ventilation, leave a small gap under the roof overhang or drill two or three small holes near the top of each side wall. The goal is airflow that prevents heat buildup and dries out any moisture that sneaks in. A double-roof design, where a second thin roof panel sits on top of the main roof with a small air gap between them, significantly cuts down on interior overheating in summer. It adds maybe 30 minutes to your build and is absolutely worth it.
Step-by-step build plan for a basic bird condo
This plan builds a two-unit condo: one Eastern Bluebird compartment and one House Wren compartment, side by side on a shared back panel and post-mounting system. If you are in Australia, you can use the same principles, just swap in native species and adjust dimensions and placement to match local requirements like in our guide on how to build a bird aviary in Australia one Eastern Bluebird compartment and one House Wren compartment. You can scale it up or down from here.
What you'll need
- 3/4-inch rough cedar or exterior-grade plywood (one 4x8 sheet covers both compartments with room to spare)
- Galvanized 1.5-inch and 2-inch exterior screws
- Drill with 1.5-inch and 1.25-inch hole saw bits (or spade bits)
- Circular saw or jigsaw
- Tape measure, pencil, square
- Sandpaper (80 and 120 grit)
- 4x4 or 2x4 pressure-treated post for mounting (exterior post, not interior compartments)
- 24-inch galvanized stovepipe, 8-inch diameter, for predator baffle
- Exterior wood glue (optional but adds strength)
- Light-colored exterior paint or stain for the outside
Cut list
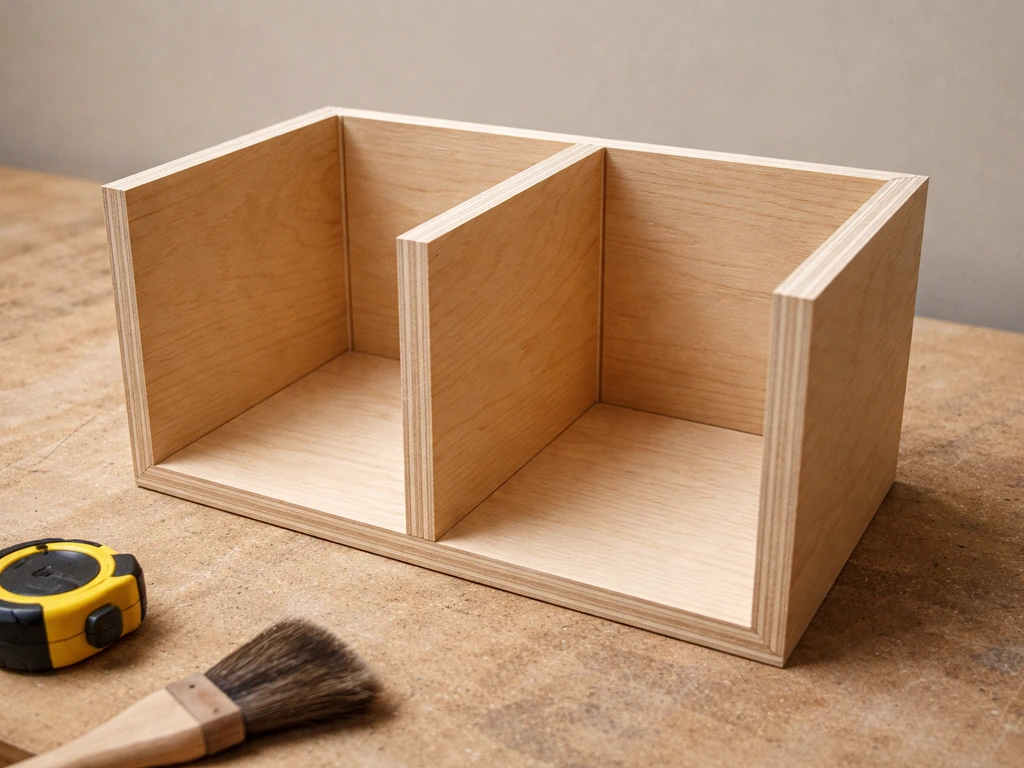
For each compartment, cut: two side panels at 4 inches wide by 10 inches tall, one floor panel at 4x4 inches (drill or notch drainage at corners), one front panel at 4 inches wide by 10 inches tall (with entrance hole centered 4.5 to 6 inches from the floor), and one roof panel at 6 inches deep by 5 inches wide with a slight slope for rain runoff. The shared back panel runs the full combined width of both units plus any divider space, and is about 12 to 14 inches tall to allow for mounting hardware at top and bottom.
Assembly steps
- Cut all panels to size and lightly sand any rough edges on the interior faces. The interior walls and floor should stay rough-textured, but splinters on cut edges can injure birds.
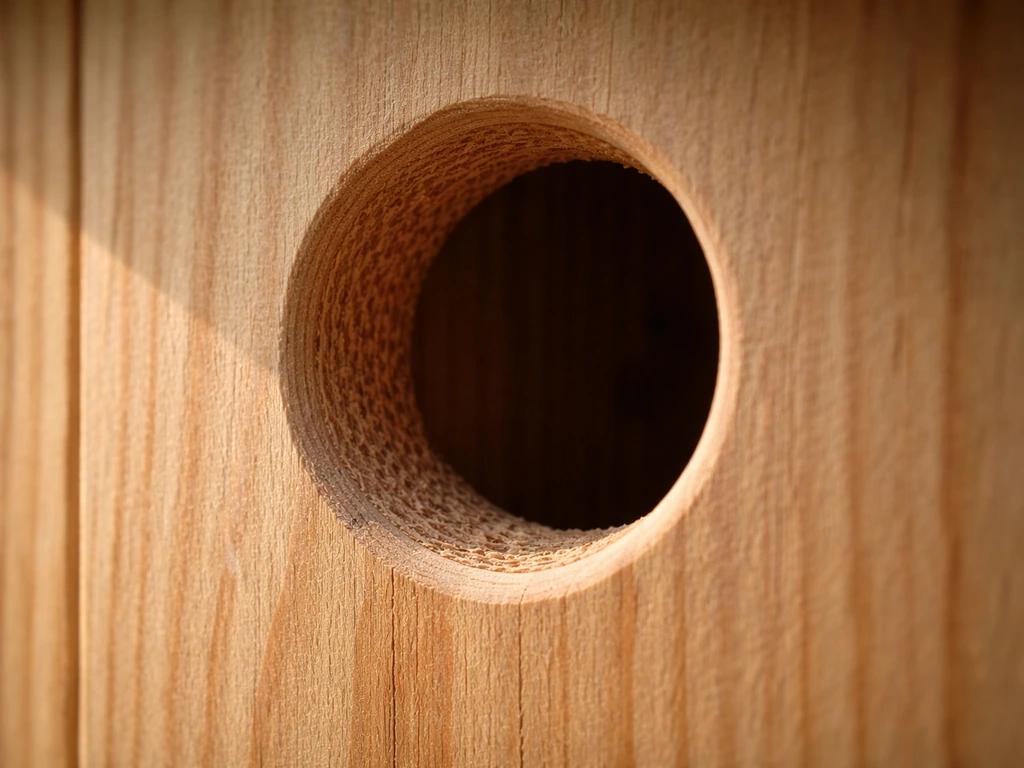
- Drill the entrance holes. For the bluebird unit, use the 1.5-inch hole saw; for the wren unit, use the 1.25-inch bit. Center each hole on the front panel, positioned so the bottom of the hole is 4.5 to 6 inches from the floor panel. Sand the edges of each hole smooth.
- Drill four drainage holes, 3/8 to 1/2 inch each, near the corners of each floor panel. Drill ventilation holes near the top of each side panel if you're not using a vented roof design.
- Assemble each compartment box: attach the side panels to the floor first, then attach the front and back panels. Use glue at the joints and drive two screws per joint. Keep the roof loose for now.
- Attach both completed compartments to the shared back panel, leaving a gap of at least 3 to 4 inches between units so birds entering one compartment don't feel crowded by activity at the next.
- Attach the roof panels with a slight forward slope (about 15 degrees is plenty) so rain runs off the front. Let the roof overhang the front and sides by at least 2 inches to shield the entrance holes.
- If building a double roof, cut a second roof panel slightly larger than the first and attach it over the primary roof using small wood spacers, 1/2 inch thick, at the corners to create the air gap.
- Sand all exterior edges and apply two coats of light-colored exterior paint or stain to the outside only. Let it cure fully before mounting.
Add features for comfort and safety
Entrance hole edges and interior grip
After drilling, the entrance hole edges must be smooth on the outside to prevent feather damage, but leave the inside of the hole and the wall below it slightly rough. Fledglings use those micro-textures to haul themselves up to the exit. If your wood came smooth, score a few shallow horizontal grooves below the entrance hole on the interior face of the front panel.
Cleaning access
Build in a way to open each compartment for annual cleaning. The easiest method is a hinged side panel or a front panel that pivots open from the bottom on two screws that act as a hinge axis, held closed at the top by a single turn-button latch or a screw you back out each fall. If you skip this, cleaning means destroying the box or skipping the cleaning entirely, and skipping it creates parasite buildup that hurts the next year's occupants.
Predator protection
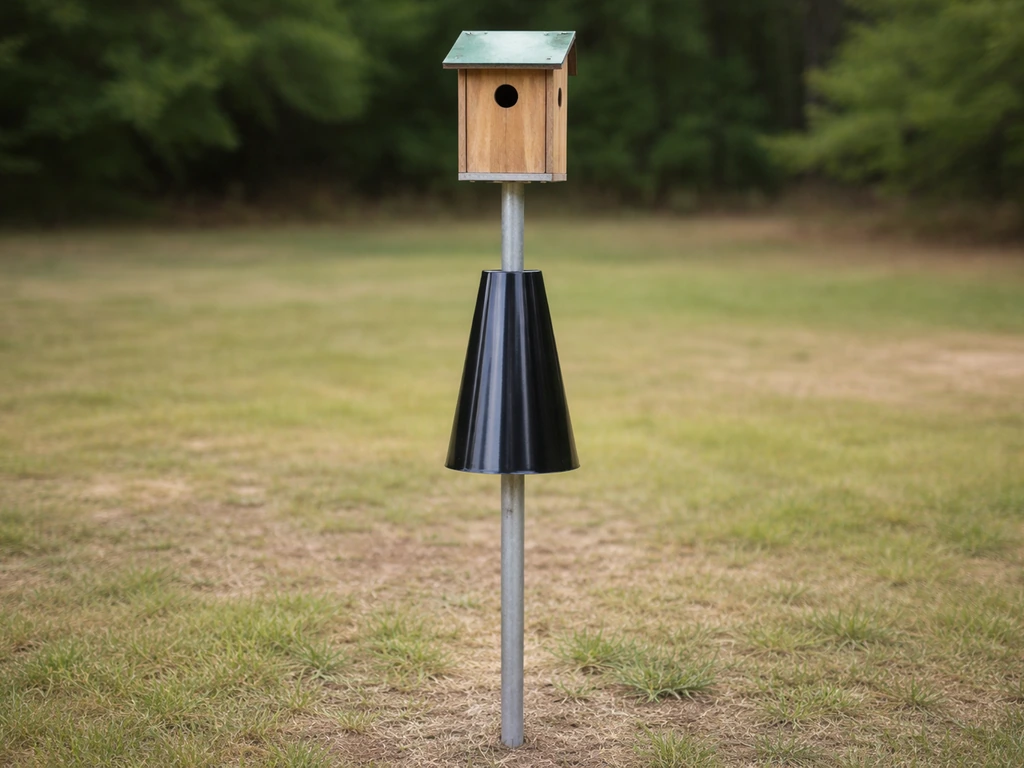
Mount your condo on a smooth metal pole rather than a wooden fence post or tree, and add a predator baffle below the box. A 24-inch long galvanized stovepipe with an 8-inch diameter works very well: slide it onto the pole before you mount the condo so it hangs below and can't be bypassed later. Raccoons, snakes, and squirrels hit the smooth pipe and can't get a grip. This one feature makes more difference to nesting success than almost anything else you can add. Do not skip it.
Also consider the entrance hole itself as a predator barrier. A 1.5-inch hole is the right size for a bluebird but too small for a starling to enter, which is exactly the point. The Oklahoma Department of Wildlife Conservation recommends a standard Eastern Bluebird entrance hole diameter of 1.5 inches 5-inch hole. Do not make the holes larger 'just in case.' Use the species-specific dimensions and stick to them.
Install, monitor, and maintain between seasons
Installation
Slide the stovepipe baffle onto the pole first, then set the pole at least 18 to 24 inches into the ground. Concrete isn't strictly necessary but adds stability in windy areas. Attach the condo to the pole with two lag bolts through the shared back panel, making sure the entrance holes are oriented correctly for your target species. Bluebird compartments face open field; wren compartments can face slightly toward vegetation.
Monitoring during nesting season
Check on your condo every 5 to 7 days during active nesting season. Open the box quickly and quietly, glance in to assess egg count or nestling development, then close it back up. One important rule: once nestlings are 13 days old or older, stop opening the box. At that age they can be startled into fledging prematurely, which dramatically reduces their survival odds. Also, when checking, don't stand directly in front of the entrance hole. Stand to the side so an adult bird coming back doesn't see you blocking the exit and panic.
End-of-season cleaning
Once nesting activity is completely finished, usually by early fall, open each compartment and remove all old nesting material by hand or with a stiff brush. Scrape any debris stuck to the walls or floor. You don't need to disinfect with harsh chemicals, but a diluted bleach solution (1 part bleach to 9 parts water) wiped inside and allowed to dry fully before closing is a reasonable option if you found evidence of mites or blowfly larvae. Leave the box open to air out for a day or two, then close it back up. Never remove an active nest mid-season unless there's a specific management reason.
Spring inspection and repairs
Before breeding season begins, reopen each compartment and check for winter damage: warped panels, loose screws, water-stained floors (a sign of drainage or roof problems), and any gaps that a mouse or sparrow could exploit. Tighten all hardware, re-seal any roof joints that look like they're lifting, and confirm the predator baffle is still snug on the pole. Replace any compartment that's structurally compromised rather than patching it with material that might fail mid-season.
Troubleshooting common build and attraction problems
Nobody's moving in
Give the condo at least one full nesting season before deciding something is wrong. Birds scout locations in late winter and early spring. If it's been up since spring and nothing has happened by midsummer, check your placement. Is the entrance facing an open area? Is the condo too close to dense shrubs that give predators cover? Is the mounting height correct for your target species? These three factors solve the majority of 'nobody showed up' situations.
Wrong species are using it
House Sparrows are the most common intruder in bluebird boxes. They're cavity nesters too, and they're aggressive about claiming boxes. If sparrows move in, remove their nest (house sparrows are not protected under the Migratory Bird Treaty Act in the US, so this is legal). Keep removing it until the sparrows give up or until bluebirds claim the compartment. You can also try relocating the condo to a more open area, since sparrows prefer nesting near human structures while bluebirds prefer open fields.
Condensation or water inside the box
If you're finding wet nesting material or water-stained floors, check your drainage holes first. They may be plugged with debris. Also check whether the roof overhang is sufficient. It should extend at least 2 inches past the front panel. If the roof joint at the back is lifting, reseal it with exterior caulk. A double roof layer with an air gap helps with condensation caused by temperature swings, especially in spring.
Predators are raiding the boxes
If you're finding disturbed nests, missing eggs, or dead nestlings with no obvious cause, predation is the most likely culprit. First, confirm your baffle is in place and intact. If you're on a wooden post or tree, move the condo to a smooth metal pole with a baffle: there's no predator guard you can attach to a tree that works as reliably. If cats are the problem, consider whether the site itself needs to change. The California Bluebird Recovery Program is direct about this: if cats are regularly in the area, don't install nesting boxes there.
Overheating in summer
If nestlings are found dead with no sign of predation or disease during hot spells, overheating may be the cause. Ensure ventilation holes are open and not blocked. If you didn't build a double roof, you can add a shade roof by screwing a second board above the existing roof with spacers. Reorienting a west-facing entrance to face north or east makes a significant difference in afternoon heat load.
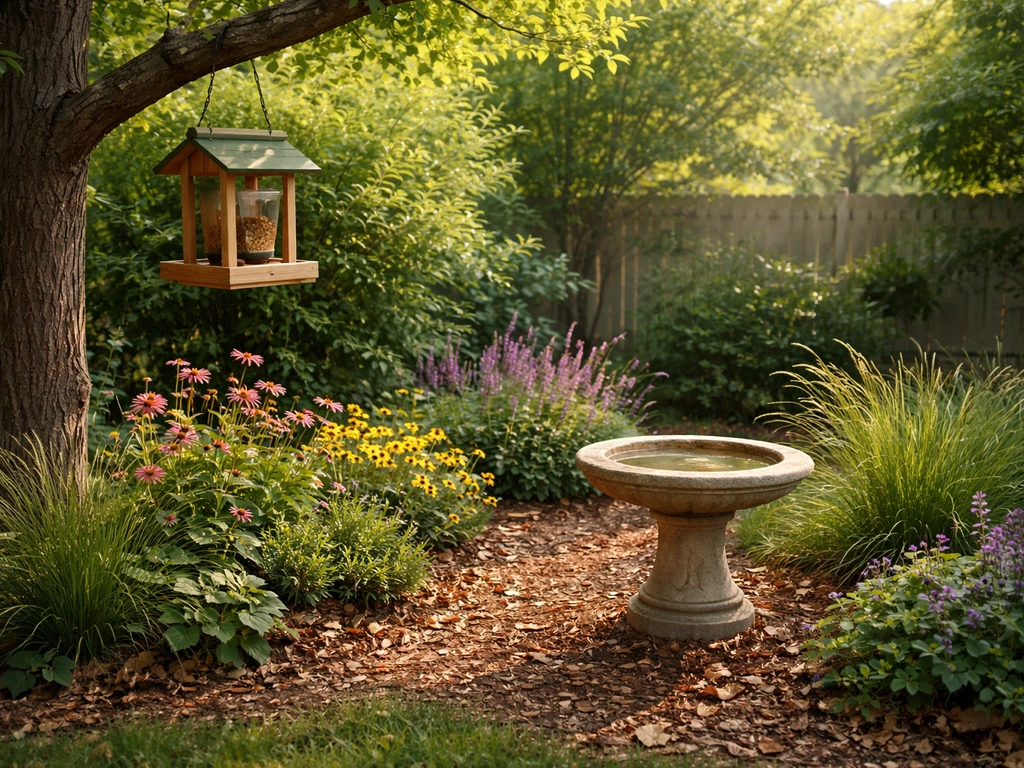
Building a bird condo is a genuinely satisfying project, and unlike some backyard builds, the results show up in real time over the following nesting seasons. If you want to go a step further, add plants and water sources so the birds have food and shelter, not just a place to nest how to build a bird garden.
Once you know how to build a bird condo, you can also expand the concept into a bird hotel with multiple units and species-specific features build a bird hotel. Get the dimensions and placement right, install the predator baffle before anything else goes up, and build in that cleaning access from day one. The birds don't care if the finish is perfect. They care that the entrance hole is exactly the right size and the inside feels safe.
FAQ
Can I make one condo “generic” so any bird will use it?
It usually backfires. Birds pick nest boxes by entrance size, cavity dimensions, and habitat cues, so a generic box often attracts the wrong competitor (like House Sparrows) or causes multiple species to reject it. Instead, build separate compartments sized for your intended species and keep bluebird compartments physically separated from wren ones.
How do I choose the right compartment spacing on the shared condo?
For species that compete strongly, spacing is about more than wall thickness. If you’re combining bluebirds with wrens on the same structure, add a dedicated divider between compartments and place them far enough apart that adults cannot easily interact through the openings. If you’re running two bluebird compartments, do not place them side by side, you need yard-scale spacing to reduce fights.
What if birds start nesting, can I change the box or move it?
Avoid moving or modifying once incubation begins. Nest interruption increases abandonment risk, and changes to entrance orientation or height can permanently reduce success. If you must manage a problem, wait until the nesting cycle is complete (typical early fall) or until the birds fully leave, then repair and reposition.
Do I need to add a perch in front of the entrance hole?
Generally no for these cavity-style boxes, and adding one can increase predator success because it gives climbing animals an extra grip point. Keep the entrance area clear, and focus on entrance size, correct mounting, and a predator baffle.
How can I tell if drainage holes and ventilation are actually working?
Check after rain or early morning condensation. If you see persistent dampness, the drainage holes may be clogged with wood shavings or debris, and ventilation gaps may be too small or blocked by roof overhang alignment. Reopen the box after the nesting season and verify that water can escape from the floor corners and that airflow paths near the top are unobstructed.
Should I paint the inside of the compartments to protect the wood?
No, interiors should stay unfinished and unpainted because coatings can trap moisture, change texture, and introduce unwanted chemicals near the nest. Use exterior protection only on the exterior surfaces, and keep inside faces rough for fledglings’ grip.
What’s the best way to prevent mites and blowflies without strong chemicals?
Aim for prevention: clean out the compartments after nesting ends, ensure the box dries quickly between uses, and maintain proper ventilation. Only use a diluted bleach wipe if you see evidence like larvae or mites, and make sure the box fully dries and airs out before closing and before the next season.
Are metal poles always required, can I use a wooden post if it’s smooth?
A smooth metal pole with a predator baffle is the most reliable setup. Wood can still provide grip for climbing predators, even if you try to smooth it. If you’re currently using a tree or wooden post and you’re seeing repeated predation or disturbed nests, switching to a smooth metal pole is usually the most effective fix.
How far away should cats be from the nesting area?
If cats regularly roam where the boxes are installed, relocating the entire box may not be enough. The practical approach is site selection, choose areas with minimal cat presence, and consider additional deterrents outside the condo itself. Also place boxes so dense hiding cover for predators is reduced near the entrances.
What if I don’t see any nesting activity by midsummer?
Recheck three things first: entrance orientation (not facing harsh afternoon sun), mounting height for the target species, and habitat match (open field versus woodland edge). Also verify there is adequate spacing between bluebird compartments or that you are not placing two bluebird units too close on the same structure.
Can I add more compartments to increase chances of nesting?
More compartments can increase options, but only if each compartment matches a species’ needs and you can still meet predator-spacing and habitat cues. Adding compartments that invite the wrong competitors can reduce success for your target species, so scale gradually and plan separate habitat zones where possible.
Do I need to remove a nest immediately if I find an intruder like House Sparrows?
Remove the nest as soon as you confirm it is active, then keep checking and removing until sparrows stop trying to claim that compartment or until your target birds take over. Do not delay because repeated use by sparrows can deter bluebirds even after the sparrow nest is removed.
What should I do if entrance holes have rough edges or splinters?
Smooth the entrance edges on the outside so feathers are not damaged, and do not enlarge the holes beyond the species dimensions. After smoothing, run your hand lightly along the perimeter and check that the interior beneath the entrance retains a slightly rough texture for fledglings to grip.
Next Articles
How to Build a Bird Hotel: DIY Step-by-Step Guide
Step-by-step DIY bird hotel build guide with sizes, materials, ventilation, drainage, predator-proofing, and maintenance
How to Build a Bird Garden: Step-by-Step DIY Guide
Step-by-step DIY how to build a bird garden: location, plants, feeders, water, nesting shelters, and maintenance for rea
How to Build a Bird Room: DIY Step-by-Step Guide
DIY step-by-step plan to build a safe indoor bird room, from layout and materials to ventilation, cages, and enrichment.