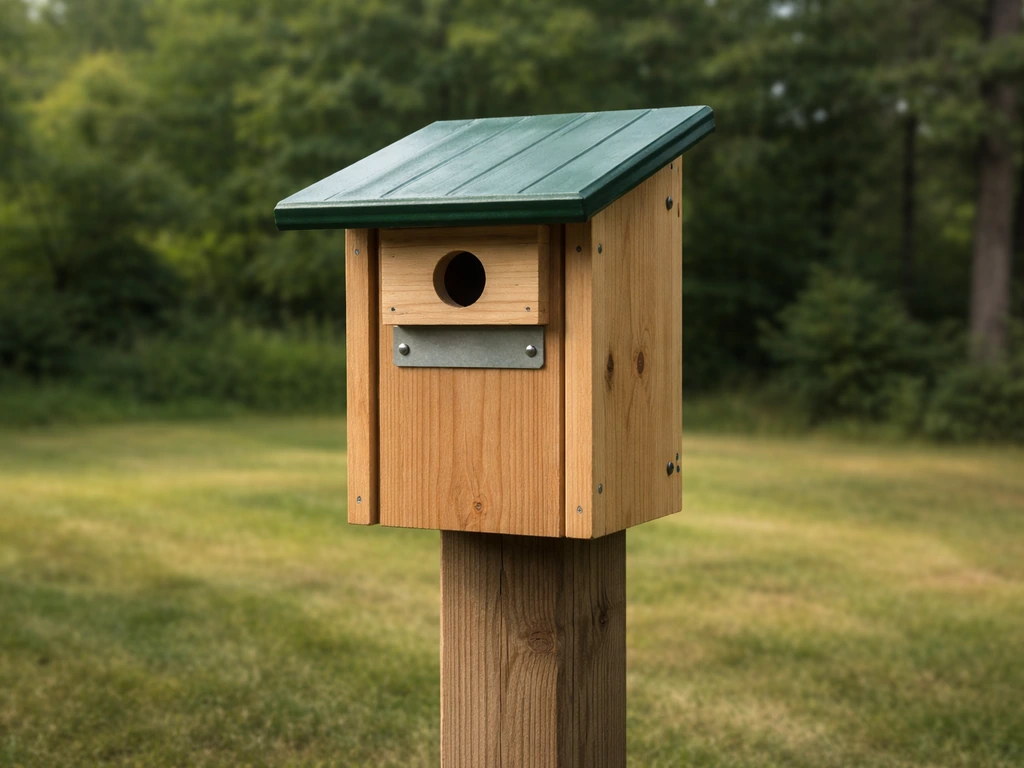
Building a starling nesting box takes about an afternoon and a handful of basic materials. You need a box with a 6x6 inch floor, 16 to 18 inches deep, with a 2-inch entrance hole placed 14 to 16 inches above the floor, mounted 10 to 25 feet off the ground. Get those four numbers right and you have a box starlings will actually use. Everything else in this guide helps you make it last, stay dry, stay safe from predators, and stay easy to clean season after season.
How to Build a Starling Bird House Step by Step

Marcus Thornton
25 Apr 2026
What starlings actually need in a nesting box
European starlings are cavity nesters, meaning they want an enclosed, dark, protected space that mimics a natural tree hollow. They are not fussy about location the way some birds are, but the physical dimensions of the box matter a lot. If the box is too shallow, it won't feel secure. If the entrance hole is even slightly off, you either exclude them entirely or invite every other bird in the neighborhood to compete.
Here are the core specs, pulled from nest-box construction references used by wildlife agencies:
| Dimension | Measurement |
|---|---|
| Floor size | 6 in × 6 in |
| Box depth (interior) | 16 to 18 in |
| Entrance hole diameter | 2 in |
| Entrance hole height above floor | 14 to 16 in |
| Mounting height above ground | 10 to 25 ft |
The 2-inch entrance hole is the number that matters most. Starlings can squeeze through a hole as small as 1 9/16 inches, but a clean 2-inch hole is the accepted standard for a box intentionally designed for them. If you are building for smaller birds like bluebirds, swallows, or chickadees and want to keep starlings out, you'd use a smaller hole (1 1/2 inches or less). If you’re aiming for a swallow, you’ll want to adjust the entrance hole size and box placement to match swallow preferences swallows. For this build, we're going the other direction: a proper 2-inch opening designed specifically to welcome starlings.
One thing worth being upfront about: starlings are not native to North America and are not protected under the Migratory Bird Treaty Act. Some birders actively discourage providing nest boxes for them because they compete aggressively with native cavity nesters like bluebirds and tree swallows. If you have active bluebird or swallow boxes on your property, be thoughtful about where you place a starling box. Keep it well away from native-species boxes to reduce conflict. That said, if starlings are already nesting on your property and you want to give them a dedicated, safe structure you can monitor and manage, a purpose-built box is absolutely the right approach.
Tools and materials you will need
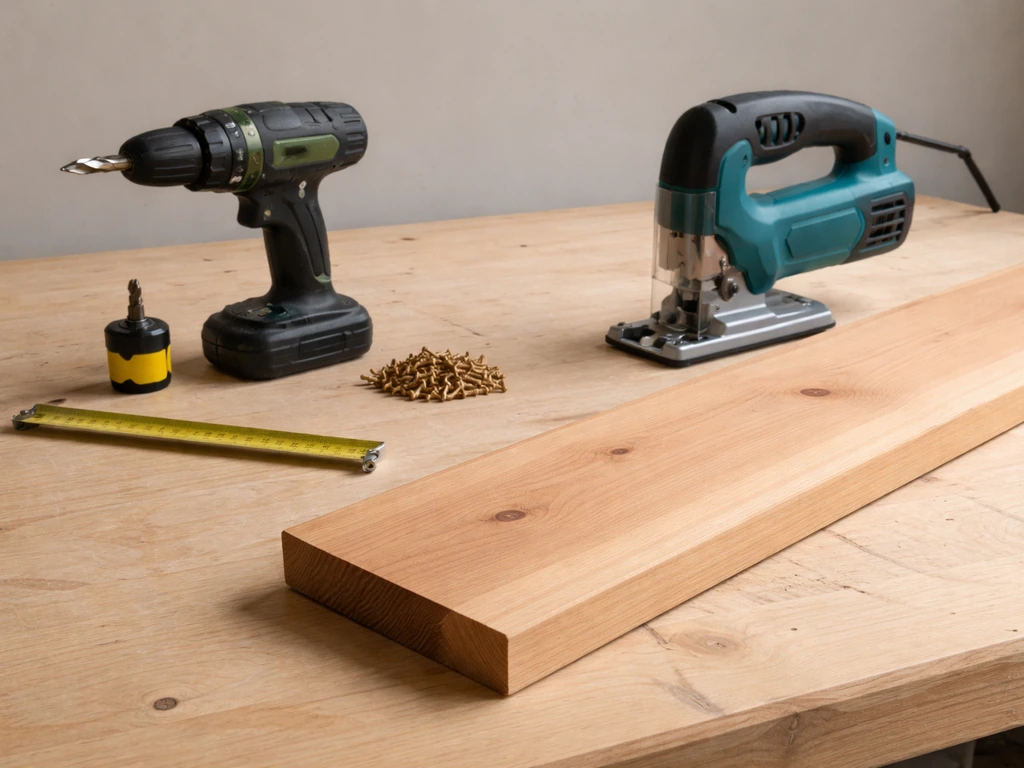
This is a beginner-friendly build. You do not need a workshop full of power tools. A jigsaw or drill with a hole saw bit, a circular saw or handsaw, and a drill for screws and ventilation holes will get you all the way through. Here is the complete list:
Materials
- One piece of untreated lumber, 1x8 (nominal), at least 6 feet long — cedar, pine, or fir all work well; reclaimed wood is a great budget option as long as it hasn't been treated with preservatives
- Exterior-grade wood screws, 1 5/8 inch (box of 25 is plenty)
- One galvanized or stainless steel hinge (for the clean-out panel)
- One hook-and-eye latch or small turn button to keep the clean-out panel shut
- Waterproof wood glue (optional but adds longevity at joints)
- Exterior wood stain or paint in a light, natural color (for weatherproofing — more on this below)
Tools
- Circular saw or handsaw for cutting panels
- Drill with standard bits
- 2-inch hole saw bit (for the entrance hole — this is the single most important bit to get right)
- 1/4-inch drill bit (for ventilation holes)
- 3/8-inch drill bit (for drainage holes, if not cutting corners)
- Tape measure and pencil
- Sandpaper, 80 grit
- Clamps (helpful but not essential)
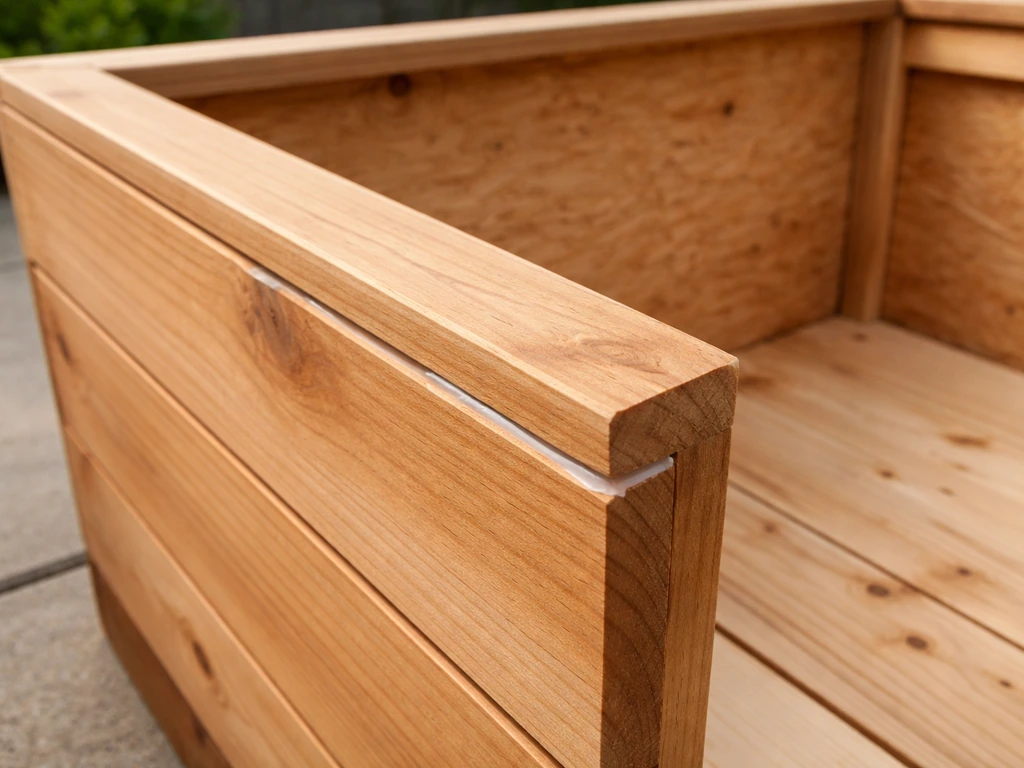
A word on wood choice: rough-sawn or rough-cut lumber is ideal because the textured surface gives birds something to grip on the inside. If you can only find smooth dimensional lumber, rough up the interior walls with your saw blade or a coarse rasp, especially below the entrance hole, so fledglings can climb out. Avoid pressure-treated wood entirely. The chemicals in it are harmful to birds.
Cut list and step-by-step assembly
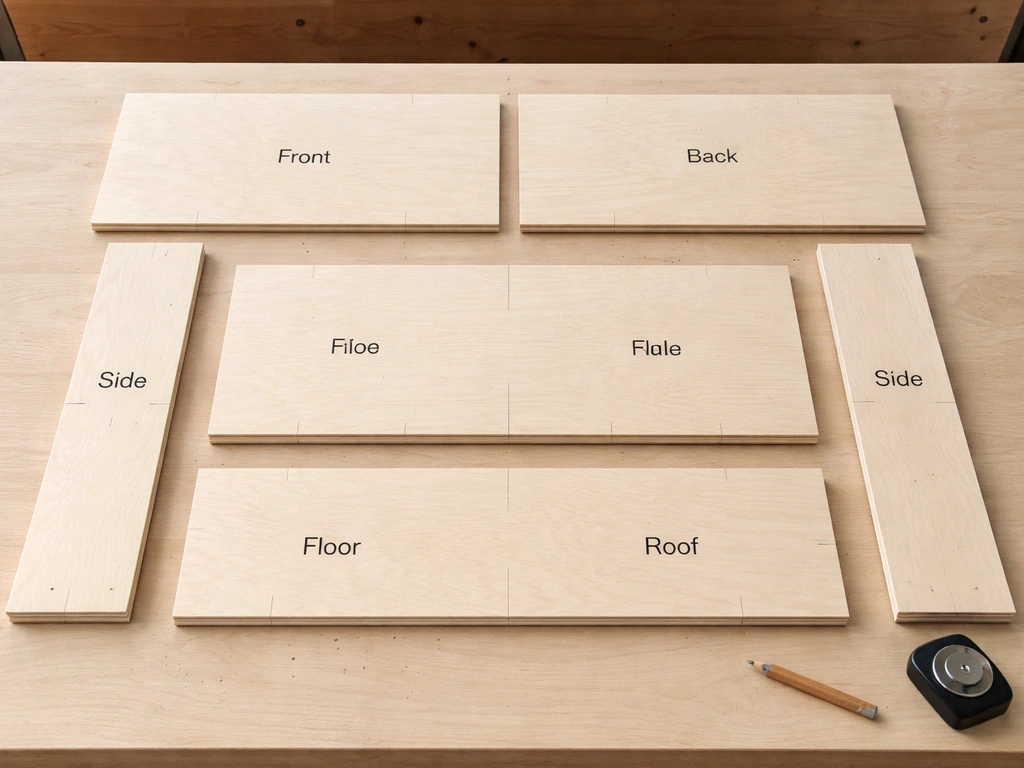
Cut list
All dimensions below are for the interior of the box. Using a nominal 1x8 board (actual width about 7 1/4 inches), rip or trim your pieces to the widths listed. The finished interior will be 6 inches wide, achieved by accounting for the thickness of two side walls.
| Panel | Width | Length | Quantity |
|---|---|---|---|
| Front | 6 in | 18 in | 1 |
| Back | 6 in | 22 in | 1 (longer for mounting) |
| Two sides | 6 in | 18 in | 2 |
| Roof | 8 in | 8 in | 1 (overhang front and sides) |
| Floor | 6 in | 6 in | 1 |
The back panel is cut longer than the others (22 inches) so you have a flange above and below the box for screwing it directly to a post or tree. This is the simplest mounting method and it works well.
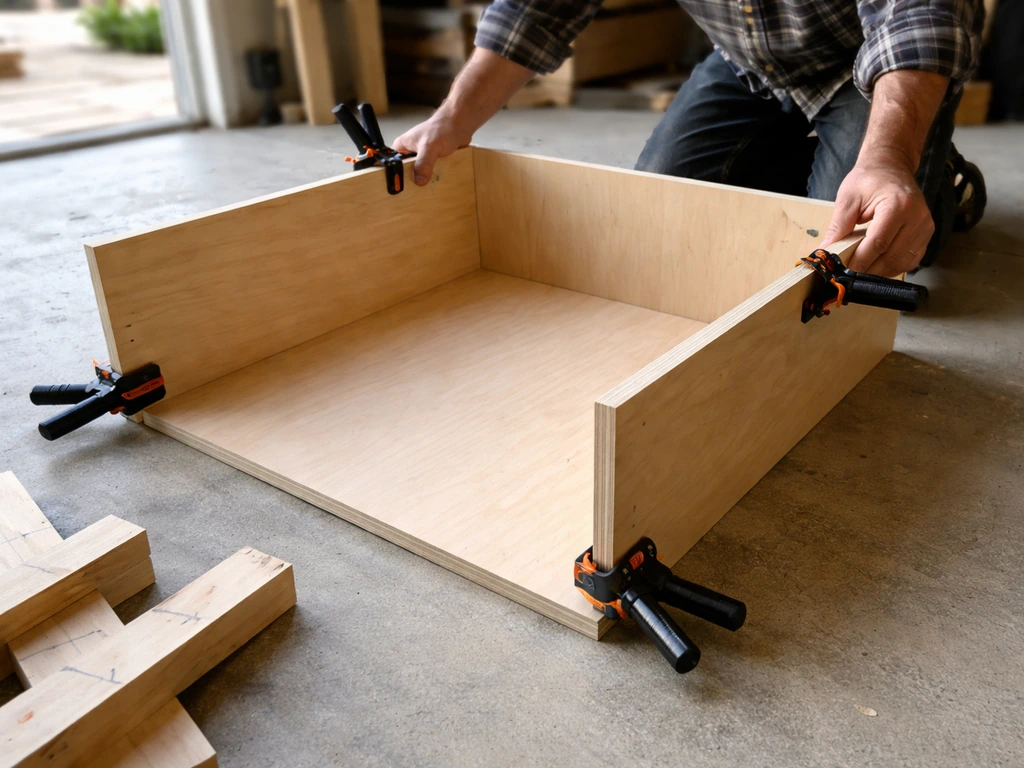
Assembly sequence
- Cut all panels to the dimensions in the cut list. Label each piece with a pencil so you don't mix them up.
- Prepare the floor panel: either cut a small triangle off each corner (about 3/8 inch) or drill a 3/8-inch hole near each corner. This is your drainage, and skipping it is one of the most common reasons nest boxes fail — pooled water kills eggs and chicks.
- Drill the entrance hole in the front panel: measure 14 to 16 inches up from the bottom edge and center the 2-inch hole saw on that mark. Drill slowly to avoid splintering. Clean up the edges with sandpaper.
- Rough up the interior of the front panel below the entrance hole with coarse sandpaper or a few saw-kerfs scored horizontally. This gives fledglings traction when they climb to the exit.
- Drill ventilation holes: on each side panel, drill two or three 1/4-inch holes about 1 inch down from the top edge. These let heat escape in summer without letting rain in.
- Attach the side panels to the back panel using exterior screws. Pre-drill to avoid splitting. Keep the tops of the sides flush with the back, or slightly lower if you want a slight roof pitch.
- Attach the front panel between the two side panels, screwing through the sides into the front edges. The front should sit flush with the sides.
- Attach the floor panel inside, resting on the bottom edges of the front, back, and sides. Screw up through the floor into each wall. Leave a 1/4-inch gap at one side if you want extra drainage.
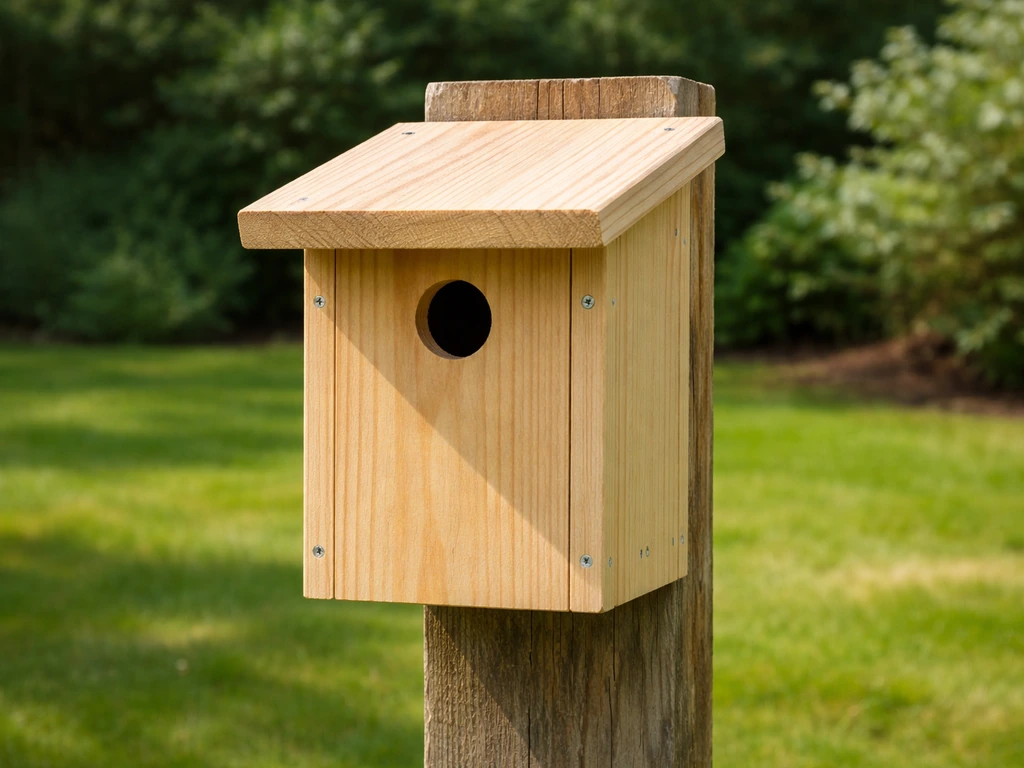
- Attach the roof with a slight overhang on the front (at least 2 inches) and sides (1 inch each). This keeps rain off the entrance hole. Screw down through the roof into the tops of the side panels and front panel.
- On one of the side panels, convert it to a hinged clean-out door: instead of screwing both edges solidly, hinge the top edge to the box and add a latch at the bottom. This lets you swing it open for cleaning between seasons without dismantling the box.
Entry hole, ventilation, drainage, and keeping predators out
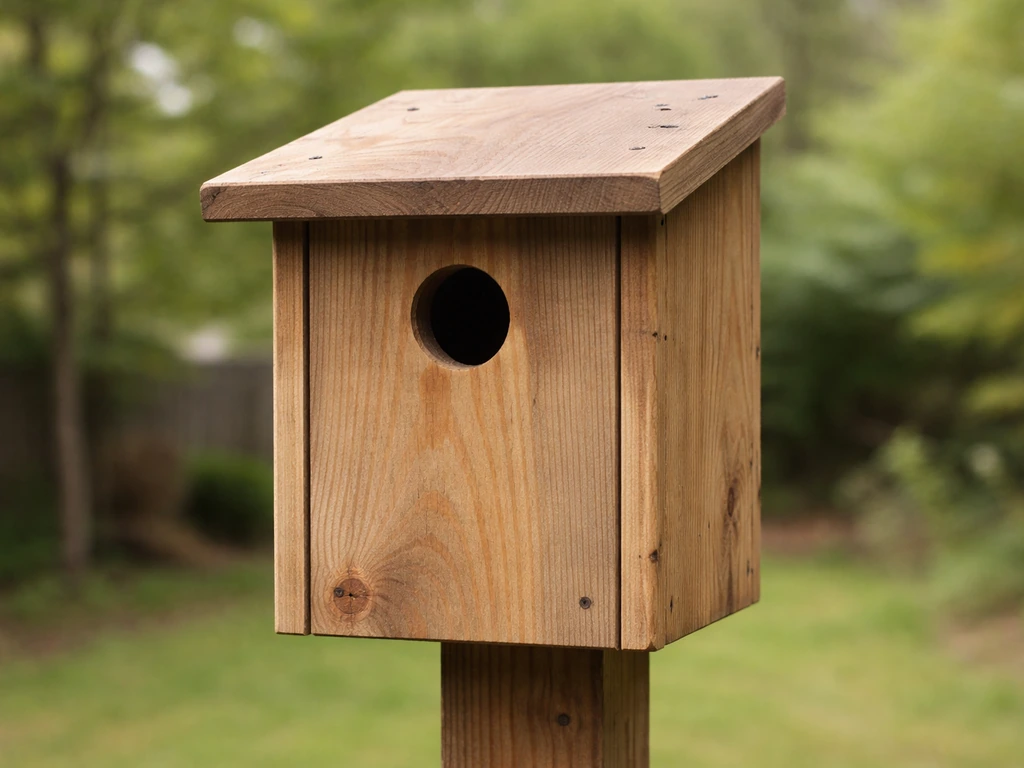
You already have the 2-inch entrance hole handled, but the placement and design of that hole matters beyond just the diameter. The hole should be centered side to side on the front panel and positioned 14 to 16 inches above the floor. This height protects nestlings from reach-in predators because even a determined raccoon paw has limits. A roof with a 2-inch or deeper overhang above the hole also makes it harder for predators to perch and dig in.
Some builders angle the entrance hole slightly downward (5 to 10 degrees) to help shed water and make it harder for a predator's arm to get a clean angle inside. It's a small detail but worth doing if you have a drill press or a steady hand.
For ventilation, those 1/4-inch holes on the sides just under the roof are doing real work. In summer heat, a nest box without ventilation can get hot enough to harm eggs and chicks. Two to three holes per side is enough. Do not drill ventilation holes low on the box where rain can blow in.
For drainage, the corner cuts or 3/8-inch holes in the floor are non-negotiable. Any moisture that blows in through the entrance has to have somewhere to go. A wet nest is a failed nest.
Predator-proofing is where a lot of DIY boxes fall short. The two biggest threats are cats and raccoons. If you are mounting on a pole, add a squirrel baffle (a cone-shaped metal or plastic guard) about 4 to 5 feet up the pole. This stops climbing predators from reaching the box. If you are mounting on a tree, predator guards are harder to use effectively, which is one reason pole mounting is generally preferred for managed nest boxes. You can also add a 3/4-inch-thick wooden block or metal plate around the entrance hole on the outside of the box, which extends the tunnel effect and makes it harder for a predator to hook a paw in through the opening.
Finishing, weatherproofing, and where to put the box
Weatherproofing
Leave the interior of the box completely unfinished and uncoated. Paint and stain fumes are harmful to birds, and the rough interior texture is intentional. For the exterior, a coat of exterior-grade, water-based wood stain in a light natural color (tan, gray, or light brown) is ideal. Dark colors absorb heat and can cook a nest on a hot day. Avoid glossy paints. Two thin coats on the outside surfaces, including the roof, will extend the life of the box significantly. Let it off-gas for a few days before putting the box out.
At every joint, a bead of waterproof wood glue under your screws adds another layer of weather resistance. Pay particular attention to the roof joints, since those take the most weather exposure over time.
Mounting and placement
Mount the box between 10 and 25 feet off the ground. Starlings are comfortable at height and will readily use boxes well above the reach of most predators. If 10 feet is the most you can safely manage with a ladder, that works. The higher end of the range (20 to 25 feet) is especially good if you have cats or raccoons active in your yard.
Face the entrance hole away from the prevailing wind direction in your area. In most of North America, that means orienting the hole to the south or southeast, which also catches morning sun and helps keep the interior dry. Avoid full western exposure, which gets the harshest afternoon heat.
Keep at least 50 to 100 feet of distance between your starling box and any nest boxes for native cavity nesters like bluebirds, tree swallows, or chickadees. Starlings are aggressive and will disrupt active nests if they feel competition. If you are building boxes for multiple species, this spacing is one of the most important habits to develop. Species like swallows and bluebirds already deal with enough pressure from invasive birds without a starling box right next door.
Cleaning, maintaining, and getting the box ready for next season
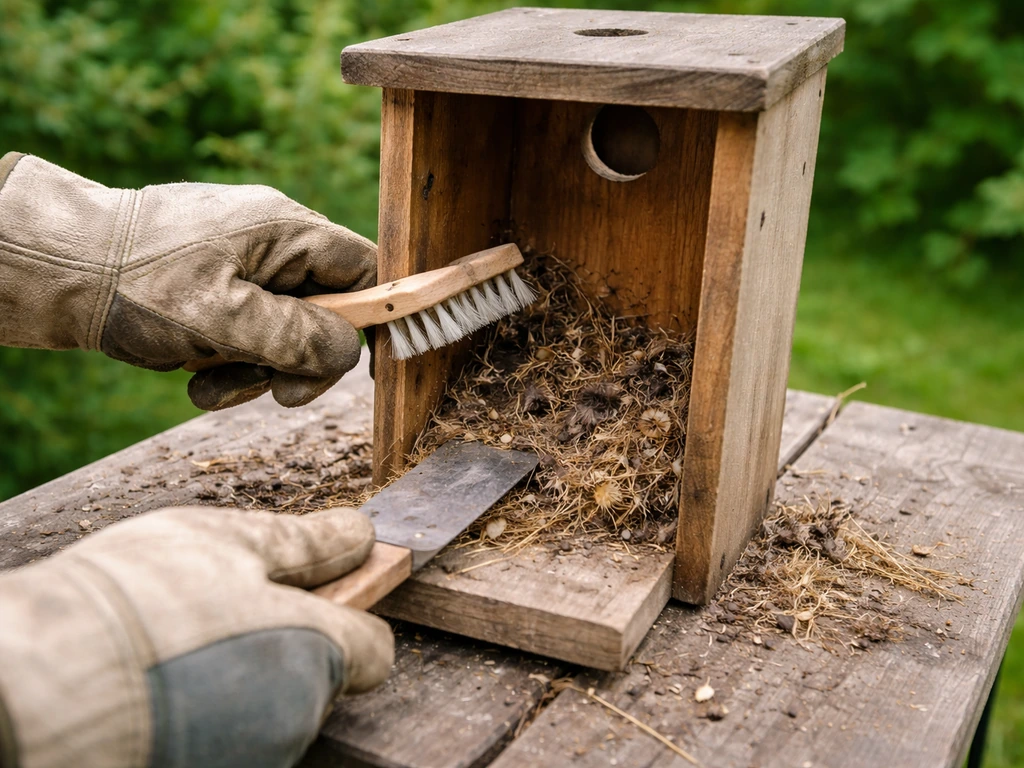
This is the part most first-time builders underestimate. A neglected nest box fills up with old nesting material, droppings, parasites, and sometimes unhatched eggs. A clean box is a healthy box, and starlings, like most cavity nesters, are more likely to return to a well-maintained site.
Clean the box after each brood has fledged, not just once a year. Starlings can raise two or even three broods in a single season, so you may be cleaning two or three times between spring and late summer. Open your hinged clean-out panel, scrape out all the old nesting material and droppings with a stiff brush or putty knife, and dispose of it away from the box. If you see signs of lice or mites (tiny moving specks, or excessive scratching behavior in the adults), wipe the interior with a weak bleach solution (one part bleach to nine parts water), then leave the box open for a full day to dry completely before closing it back up. Never use pesticide sprays inside a nest box.
At the end of the season, do a structural check. Look for loose screws, cracked panels, gaps that have opened up in joints, and any signs of rot at the floor or roof edges. Tighten or replace screws, re-caulk any open joints with exterior sealant, and touch up the exterior stain if it's peeling. A box that gets this treatment annually can easily last 10 to 15 years.
If you live in an urban or suburban area, monitoring your box weekly during nesting season is worth the effort. If you want to make your own chimney swift bird house too, you can use the same overall approach to measurements and placement, just tailored to their cavity needs monitoring your box weekly during nesting season. If you want to replicate this whole process from scratch, see our step-by-step guide on how to build an oriole bird house. If you want a similar hands-on project for smaller birds, follow this guide on how to build chickadee bird house next how to build an oriole bird house. You can check whether starlings are actively using it, whether the nest is progressing normally, and whether any unwanted birds have moved in. Early detection of problems is always easier to address than waiting until the end of the season.
Why starlings might ignore your box (and how to fix it)
You built the box, you mounted it, and nothing happened. Here are the most common reasons and what to do about each one.
| Problem | Likely Cause | Fix |
|---|---|---|
| No birds investigating the box at all | Box is too low or too exposed | Raise it to at least 10 ft; check that it's not in full open space with no nearby tree cover |
| Birds approach but don't enter | Entrance hole slightly too small, or finish fumes still off-gassing | Verify the hole is a clean 2 inches; let the box air out for another week |
| Birds start a nest but abandon it | Moisture or overheating inside | Check drainage holes aren't blocked; confirm ventilation holes are open; recheck roof overhang |
| Predator damage or nest destruction | Cat or raccoon access | Add a pole baffle; install a metal entrance hole guard; consider relocating to a taller mounting point |
| Box occupied by house sparrows instead | House sparrows found it first | Remove the sparrow nest (they are not protected) and monitor; house sparrows prefer lower mounting heights, so going higher helps |
| Starlings keep getting displaced by aggressive competition | Box is too close to other nest boxes | Move the starling box at least 50 to 100 feet from other species' boxes |
One thing I've seen trip people up is painting the entrance hole area a bright or contrasting color thinking it will attract birds. It doesn't help and may actually make them nervous. Keep the exterior natural-looking. Starlings are smart birds and they are drawn to locations that feel secure and hidden, not decorated.
If you built the box earlier in spring and it sat empty all season, don't give up on it. Leave it up through winter (starlings also roost in cavities during cold months) and you may find a pair scoping it out before the next nesting season even begins. Persistence and correct dimensions are the two things that matter most. If you want to apply these same principles to your own project, follow a dedicated guide on how to make a finch bird house next. Get both right, and you will have tenants.
Once you have this build under your belt, the skills transfer directly to boxes for other species. The structural approach is nearly identical whether you're building for swallows, doves, sparrows, or chickadees. If you are trying to tailor the same basic build style to a smaller bird, you will need to adjust the sparrow entrance size and overall dimensions accordingly doves, sparrows, or chickadees. If you are specifically building for doves, you can adjust the interior dimensions and entrance size to match dove nesting preferences. The main thing that changes is the entrance hole diameter and the box dimensions, each tailored to what that specific bird needs. Starlings are actually a great first build because the tolerances are forgiving and the birds themselves are bold enough to investigate new structures quickly, which means you get feedback on your work faster than you would with shyer species.
FAQ
If I built the exact dimensions, why are starlings not using my house?
Use the entrance height and the hole diameter as your primary “fit” checks, then confirm the floor is the right depth. A box can look correct from the outside but fail if the interior is effectively too shallow due to mis-cut panels or thicker-than-planned boards. Measure the finished interior depth from floor to roof underside (not the outside height).
How long should I leave a starling bird house up before assuming it will never be used?
Wait-and-see is normal, but rule out placement issues first. If you oriented the entrance into frequent rain or the box is too low, the cavity can feel unsafe even with correct dimensions. Also, if it sits near active bluebird or swallow boxes, starlings may be discouraged by conflict rather than disuse.
Can I sand, stain, or seal the inside of a starling bird house to make it nicer?
No, and it is a common mistake. Rough-up climbing surfaces are important below the entrance because fledglings need traction to exit. If you plan to make the interior rough, do it before assembly and avoid any sealed or coated interiors that turn the surface slick.
Will adding a larger roof overhang or extra protection change whether starlings will use the box?
If you are only adding an overhang, the safest approach is to keep the entrance centered and maintain the recommended entrance-to-floor height. Overhangs help predators and keep rain off, but if you extend the roof so far that airflow drops or the entrance feels drafty, you can unintentionally make it less attractive. Add exterior protection without changing interior dimensions.
Where should ventilation holes go, and what happens if I put them too low?
Yes, but do it at the right level. Ventilation holes belong just under the roof, and you should avoid punching holes low on the sides where wind-driven rain can blow in. A practical check is to hold a flashlight inside: if rain could enter a hole at an angle from your typical weather direction, reposition or relocate it.
I have trees on my property, can I mount the starling box on a tree instead of a pole?
If you want to make predator control stronger, focus on the most effective setup for your situation. Pole mounting is usually easier because squirrel baffles work reliably on smooth poles, while tree mounting often has gaps, irregular bark, and footholds that let predators bypass guards. If you must mount on a tree, plan for a custom guard and expect more monitoring.
What should I do if I see signs of lice or mites in the nest box?
Never rely on poison or pesticide inside the box. Instead, address mites and lice through cleaning and quick drying, after each brood has fledged or sooner if you see active signs. When you use a mild bleach wipe, let the box air out fully for a full day so residual fumes do not irritate adults and chicks.
Is weekly monitoring safe for nesting starlings, and how often should I check once chicks are present?
In most cases, you should keep it away during active nesting for both safety and effectiveness. Regular inspection can be fine if you do it quickly and gently, but weekly monitoring is best done early in the season and then adjusted once you see active chicks to avoid repeated disturbance. If the box has hinged access, minimize time open and close it promptly.
How do I decide which direction to face the entrance, especially in a hot or windy area?
Turn the box so the entrance faces away from your prevailing cold or wet winds, then prioritize heat management. In hot regions, avoid full west exposure because intense afternoon sun can overheat the cavity. A practical rule is: choose an orientation that gives morning sun but keeps the box out of harsh late-day glare.
How precise do I need to be with the entrance hole diameter and edge finishing?
Yes, you can accidentally exclude starlings with the wrong entrance height or hole finishing. Rough drilling ridges, paint buildup near the hole, or a slightly undersized opening can all make entry harder. Test the final opening by confirming the hole diameter stays near 2 inches and that the hole edges are not narrowed by glue, splinters, or finish.
If nothing happens the first year, should I take the box down or rebuild it?
It can take time if you put the box up late, but leaving it up through winter is still useful. Starlings can roost in cavities in cold months, and early scouting can happen before spring nesting. If it stays empty all year, then adjust placement, entrance orientation, and distance from native nest boxes rather than rebuilding immediately.
Next Articles
How to Make a Finch Bird House: DIY Build Guide
Step-by-step DIY finch bird house build with correct entry hole size, cut list, mount tips, and maintenance troubleshoot
How to Build a Sparrow Bird House Step by Step
Step-by-step DIY sparrow house plans with sizes, entry-hole specs, materials, mounting, and troubleshooting for success.
How to Build a Dove Bird House Step by Step
Step-by-step DIY instructions, cut list, and placement tips to build a safe dove bird house that attracts nesting pairs.