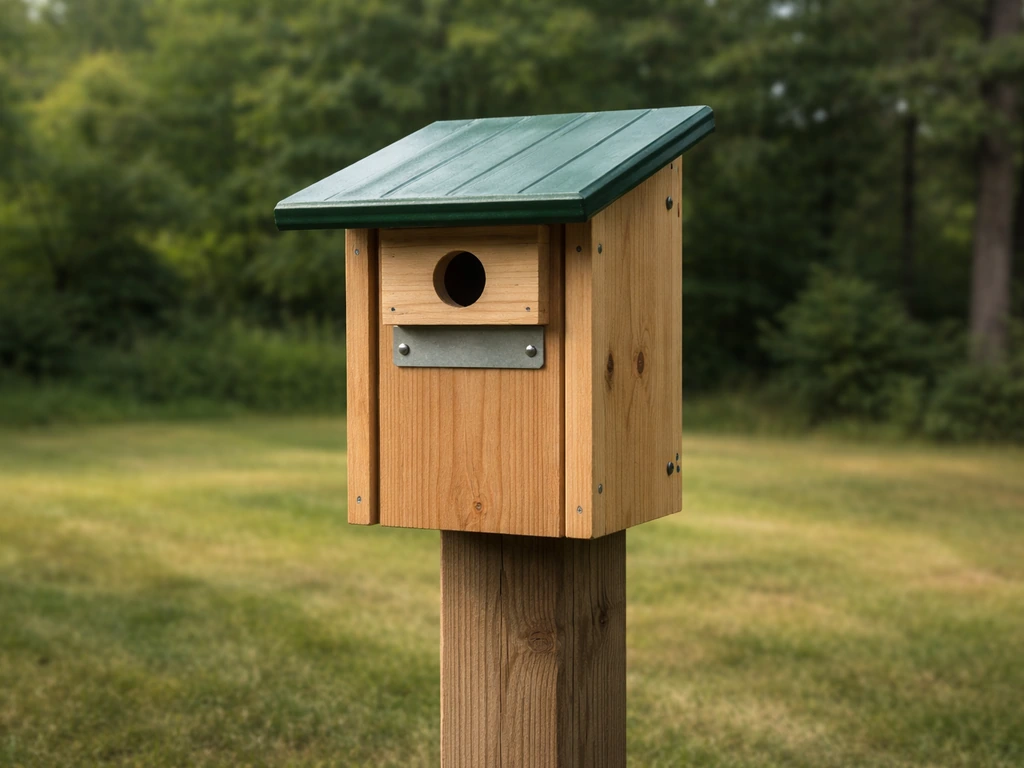
You can build a chickadee birdhouse in an afternoon with basic tools and a single board of untreated pine or cedar. The key measurements are non-negotiable: a 4" x 4" floor, a box height of 8–10", and a 1 1/8" entrance hole placed 6–8" above the floor. Get those three numbers right and you're most of the way there. Everything else, the wood choice, mounting height, predator guard, comes down to location and how long you want the box to last.
How to Build a Chickadee Bird House Step by Step

Marcus Thornton
26 Apr 2026

What chickadees actually need in a nest site
Black-capped chickadees are cavity nesters. In the wild they excavate rotting wood or use old woodpecker holes, so they're already primed to check out a well-placed nest box. They're not as picky as some species, but they do have firm preferences you need to meet or they'll pass your box over entirely.
Habitat matters first. Chickadees gravitate toward forest edges, woodlots, and yards with mature hardwood trees. They're not going to set up in the middle of an open field. If your yard has a mix of trees and open space, you're in good shape. Aim to place the box where it gets roughly 40–60% sunlight throughout the day, not full shade and not baking in direct afternoon sun.
Spacing matters too. Chickadees are territorial during nesting season, so you don't want to crowd boxes. A general guideline is one box per 10 acres, or at least 650 feet between boxes of the same species. If you're also building for swallows or other cavity nesters, that's a different situation, but for chickadees specifically, one well-placed box beats three boxes crammed into a small yard.
Dimensions and design details that actually matter
Here's where a lot of DIY birdhouses fail: the builder uses whatever entrance hole size feels right, or copies a generic plan that doesn't match any real species. For chickadees, precision here pays off.
| Dimension | Chickadee Spec | Why It Matters |
|---|---|---|
| Floor size | 4" x 4" | Matches natural cavity footprint; too large lets in competitors |
| Box interior height | 8–10" | Gives enough depth for nesting material and chick growth |
| Entrance hole diameter | 1 1/8" round | Lets chickadees in, keeps out starlings and house sparrows |
| Entrance hole above floor | 6–8" | Predator reach limitation; keeps nest safe from probing paws |
| Mounting height | 5–15 ft (ideal: 6–10 ft) | Accessible for monitoring but high enough to feel safe to birds |
Entrance hole: the number you can't fudge
The 1 1/8" entrance hole is specific for a reason. It's big enough for a chickadee to slip through comfortably, but too small for European starlings, which are aggressive competitors that will take over any nest box they can fit into. Because European starlings can take over any box they can fit into, getting the entrance hole size exactly right is also essential when you’re planning a starling bird house how to build a starling bird house. A hole even 1/4" larger opens the door to unwanted tenants. Drill this hole with a 1 1/8" spade bit or Forstner bit; don't try to approximate it with a hole saw meant for a larger size.
Ventilation, drainage, and wood choice
Ventilation keeps the box from turning into an oven in summer and prevents moisture buildup that causes mold. Drill two or three 1/4" holes near the top of each side panel, just below the roof line. For drainage, cut or drill 1/4" holes in each corner of the floor panel, or notch the corners slightly before assembly. Water sitting in the bottom of a box will rot the wood and kill eggs.
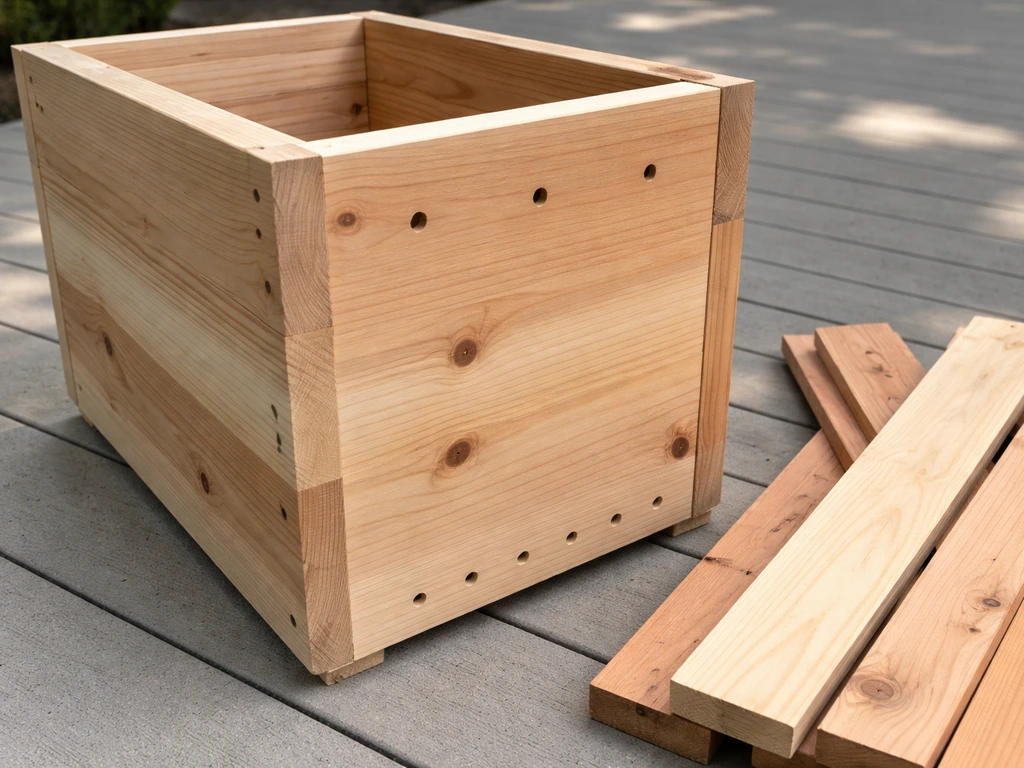
For wood, go with untreated cedar, pine, or fir. Cedar is the gold standard because it naturally resists moisture and insects and holds up for years without any finish. Pine works fine and is cheaper and easier to find at any hardware store. Avoid pressure-treated lumber entirely since the chemicals are harmful to birds. Rough-cut lumber on the interior surfaces is actually a plus because it gives chicks something to grip when they're ready to fledge.
One firm rule: do not paint the inside of the box. The exterior can get a light coat of exterior latex in a natural earth tone if you want it to blend in or last longer, but the interior must stay bare wood. No stains, no varnish, no paint inside.
Tools and supplies checklist
You don't need a full workshop for this. A drill, a saw, and a handful of screws will get you there. Here's everything you'll need:
- One board of untreated cedar or pine: 1" x 6" x 6 ft (nominal; actual thickness is 3/4")
- 1 1/8" spade bit or Forstner bit for the entrance hole
- Drill with standard drill bits (1/4" for ventilation and drainage holes)
- Circular saw, jigsaw, or miter saw for cuts (or ask the hardware store to cut the board for you)
- Galvanized deck screws, 1 5/8" length (galvanized won't rust and contaminate the interior)
- Tape measure and pencil
- Sandpaper (80-grit for rough edges on the outside only)
- Optional: exterior latex paint in earth tones for the outside surfaces only
- Optional: 1" wood shavings to place inside the finished box (not sawdust, which compacts)
A word on lumber: a standard 1" x 6" x 6 ft board at a home improvement store will cost you around $5–10 depending on species and where you live. Cedar costs a bit more but it's worth it for longevity. If you have scrap lumber sitting around, this is a great project to use it up, just confirm it's untreated.
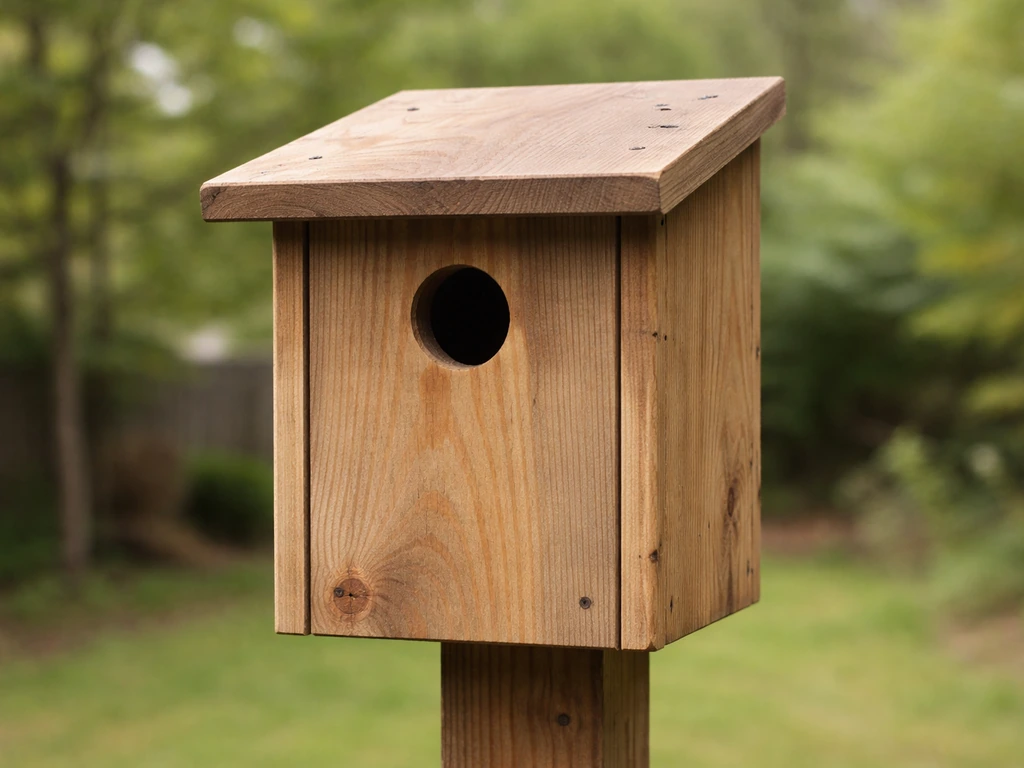
Cut list and step-by-step assembly
The cut list
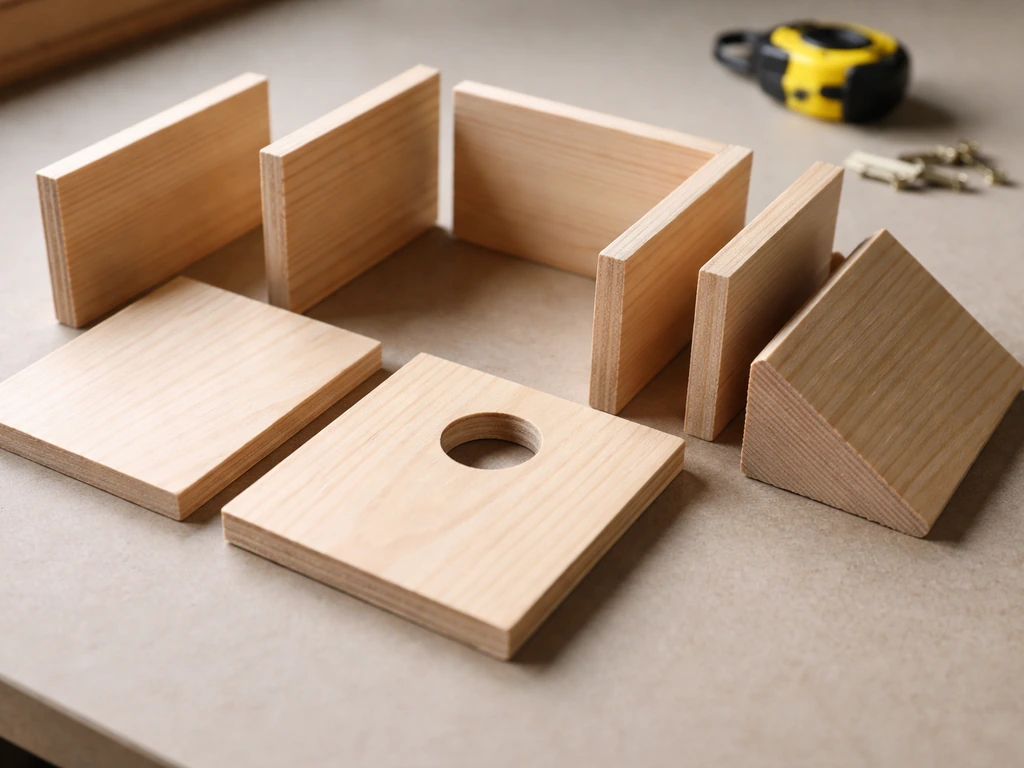
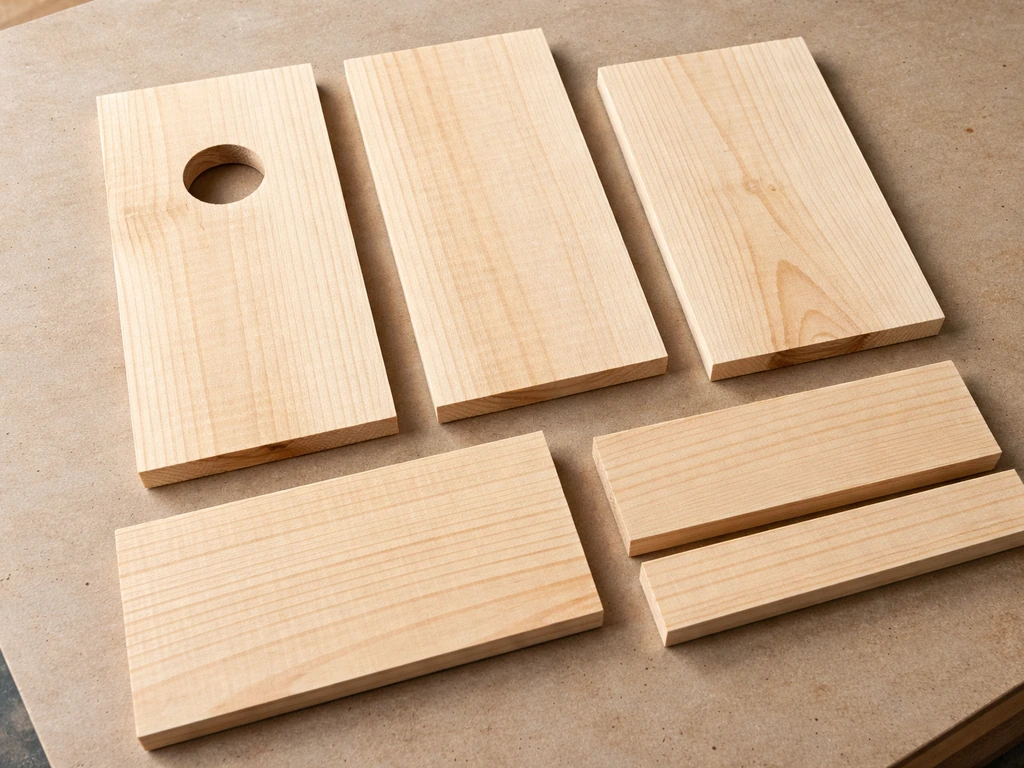
All pieces come from a single 1" x 6" x 6 ft board (actual width 5 1/2"). The floor is ripped down to 4" x 4" to stay within spec. Here's exactly what to cut:
| Piece | Dimensions (cut) | Quantity | Notes |
|---|---|---|---|
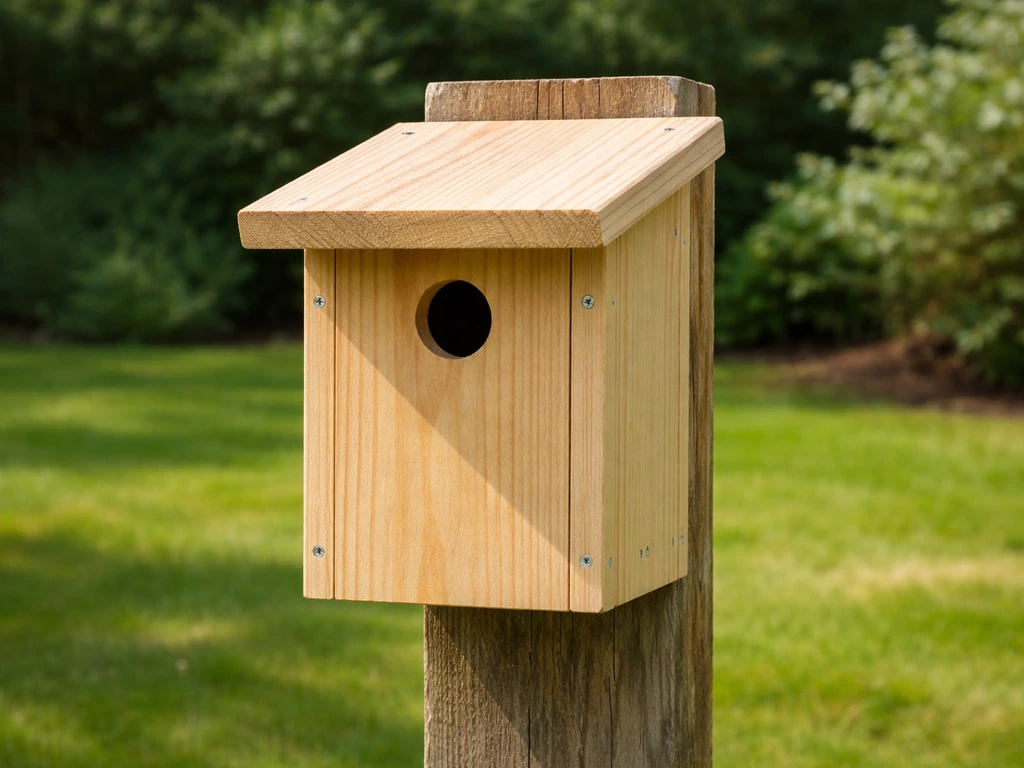
| Front panel | 5 1/2" wide x 10" tall | 1 | Entrance hole drilled 7" above bottom edge |
| Back panel | 5 1/2" wide x 12" tall | 1 | Extra height allows for mounting screw clearance |
| Side panels | 4" wide x 9" tall | 2 | Rip to 4" width; slight angle cut at top if using sloped roof |
| Floor | 4" x 4" | 1 | Corner notches or 1/4" holes for drainage |
| Roof | 6" wide x 7" long | 1 | Overhangs front by 2" to shed rain |
If ripping boards to 4" feels intimidating, many hardware stores will make cuts for you at little or no charge. Just bring your measurements written out.
Assembly order
- Drill the entrance hole first, before assembly. Mark the center of the front panel 7" up from the bottom edge, then drill through with the 1 1/8" bit. Drilling on a flat board is much easier than drilling into an assembled box.
- Drill ventilation holes in both side panels: two or three 1/4" holes near the top of each side, about 1/2" below where the roof will sit.
- Notch or drill the floor corners for drainage. Cut 1/4" notches at each corner with a saw, or drill a 1/4" hole near each corner.
- Attach the floor to one side panel first. Stand the side panel upright, position the floor flush with the bottom, and drive two screws through the side panel into the floor edge. Pre-drilling pilot holes prevents splitting.
- Attach the second side panel to the floor the same way. Now you have a U-shape: floor with both sides standing up.
- Slide the front panel into place. The bottom of the front should be flush with the bottom of the side panels. Drive screws through the front into the side panel edges, two per side.
- Attach the back panel. It sits taller than the front and sides by about 2", which is intentional for mounting. Screw through the back into the side panel edges.
- Add the roof last. Position it so it overhangs the front by about 2" (rain protection) and is centered side to side. Screw down through the roof into the top edges of the front and back panels. Alternatively, attach the roof with a single screw through the back so it can swing open for annual cleaning.
- Sand any sharp exterior edges lightly. Leave the interior completely alone.
- If painting, apply one coat of exterior latex in a muted earth tone (gray, brown, or tan) to the outside surfaces only. Let it fully dry before hanging.
Inside the box: add a handful of wood shavings
Chickadees will bring their own nesting material, but placing about an inch of coarse wood shavings (the kind sold for small animal bedding, not fine sawdust) in the bottom of the box gives them a head start and mimics the natural woody debris they'd find in a tree cavity. It's a small detail that makes the box feel more like home to them.
Where and how to mount the box
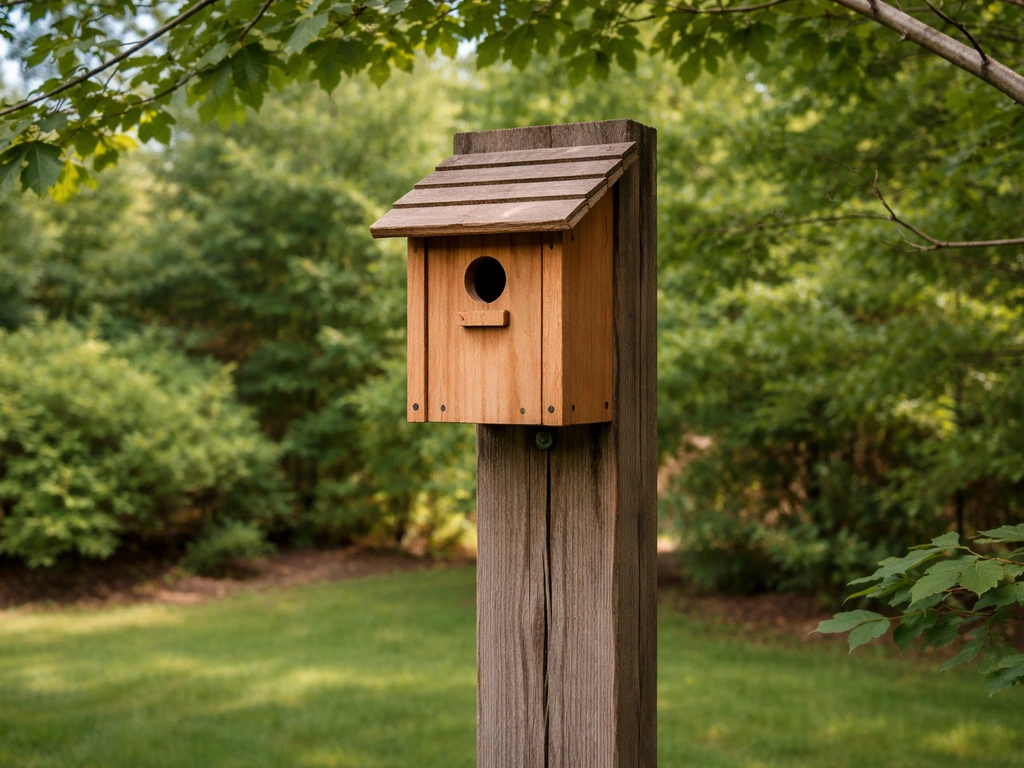
Mount the box between 5 and 15 feet off the ground, with 6–10 feet being the sweet spot for most backyard situations. It's high enough that the birds feel secure, low enough that you can actually monitor and clean it without a ladder every time.
Face the entrance hole away from the direction of your prevailing wind. In most of North America that means facing east or southeast, but check your local conditions. You want rain driving away from the hole, not into it.
A smooth metal pole is the best mounting option because it's much harder for climbing predators to scale than a wooden post or tree trunk. Use electrical conduit or a purpose-made nest box pole with a baffle (predator guard) mounted below the box. If you do attach the box to a tree, be aware that raccoons and cats can use branches to leap onto the roof and reach down into the entrance hole. Keep the box well away from any overhanging branches or nearby structures that could serve as a launch point.
A conical or stovepipe baffle mounted on the pole about 4–5 feet above the ground blocks climbing predators effectively. This isn't optional in areas with raccoons or feral cats. Hardware cloth is not recommended as a climbing deterrent because it actually gives predators something to grip.
Keeping the box in good shape (and troubleshooting if chickadees don't show up)
Annual cleaning routine
Clean the box at least once a year, ideally in late winter before the nesting season begins, or right after the last brood of the season fledges. Old nesting material harbors parasites like mites and blowfly larvae that will stress the next clutch of eggs. Remove all old material, scrub the interior with a stiff brush, rinse with a diluted bleach solution (1 part bleach to 9 parts water), and let it dry completely before closing it back up. Stand upwind while you work since old nest material can carry dust and pathogens. Add fresh wood shavings before rehanging.
If the box is still in the same spot and hasn't been moved or taken down, chickadees often return to the same site in subsequent years. That's a good sign the box is working. Don't relocate it mid-season or between seasons unless you have a clear reason, like a new predator threat.
If chickadees are ignoring your box
Give it a full season before you worry. Chickadees scout cavities and may investigate your box multiple times before committing. If a full spring and summer passes with no interest, work through this checklist:
- Check the entrance hole size with a caliper or hole-size gauge. Even 1/4" too large lets in competitors that can intimidate or evict chickadees.
- Look at the location. Is the box in full open sun with no tree cover nearby? Move it closer to a woodland edge or yard with mature trees.
- Is there a competing box or natural cavity very close by? Chickadees need territory, and if a better cavity is nearby they'll use it first.
- Is the box too exposed to wind from the front? Rotate the entrance to face away from the prevailing wind direction.
- Check for signs that house sparrows or other birds have moved in and are excluding chickadees. House sparrows will aggressively claim cavities even when the hole is technically too small for them.
- Inspect for moisture damage inside. A rotting or wet interior is a deal-breaker. Confirm your drainage holes are clear and the roof overhang is doing its job.
One thing I've learned from trial and error: patience is part of the process. The first season I put up a chickadee box it sat empty all spring. Second spring, a pair moved in within two weeks. The box didn't change. The birds just needed time to find it and feel safe. Keep the box clean, keep predators managed, and give it time. If you want to attract orioles, follow a similar DIY approach but use oriole-specific dimensions and entrance preferences for the best results oriole bird house.
A note on other species
If you get the building bug after finishing this project, the same basic construction approach works for other cavity nesters with just a few dimension changes. Swallows, wrens, and finches all use nest boxes with similarly simple designs but different entrance hole sizes and box depths. If you’re specifically aiming to attract finches, start by choosing the right entrance size and box proportions for finch nests, then follow the same careful build steps Swallows, wrens, and finches. If you want to build a swallow bird house, focus on swallow-specific entrance size and the right mounting height for their nesting preferences Swallows, wrens, and finches. The principles you've learned here, precise hole sizing, proper ventilation, clean interiors, and smart predator-resistant mounting, carry over to every species you build for. You can use those same basic box-building ideas to plan how to build a chimney swift bird house, with attention to swift-specific entrance and mounting needs. If you're aiming for sparrows instead, the same careful measurements and build details also apply, but you will need sparrow-specific dimensions and entrance size how to build a sparrow bird house.
FAQ
What thickness should I use for the board, and does it change chickadee acceptance?
The plan assumes a single-board box built from a typical 1-inch nominal lumber thickness. If your material is noticeably thinner, stiffness drops and the box can flex in wind, which may discourage nesting. If your board is thicker than standard, keep the interior cavity dimensions as close as possible to the 4x4 floor, 8 to 10 inch box height, and do not enlarge the entrance to “make room.”
Can I use hardware screws, and should I pre-drill holes to prevent splitting?
Yes, screws are fine, but pre-drilling near board ends helps prevent splits, especially in cedar. Use screws long enough to hold tight joints, but avoid driving so hard that you deform the entrance area or force misalignment in the panels, since even small gaps can become pest or predator entry points.
Should I add a hinged roof or removable back for easier cleaning?
A removable or hinged roof helps you clean without fully dismantling the box, but make sure it closes tightly and cannot be opened by birds or predators. If you add a roof fastener, place it so it is not exposed inside the box, and ensure weatherproofing stays on the exterior only.
Do chickadees nest immediately in a new box the same year it’s installed?
Often they will investigate quickly, but active nesting may not happen the first season. Chickadees need time to treat a box as safe, especially if local predators are present. Plan to evaluate interest after a full spring and summer, and keep the location consistent through the season.
How can I tell if the problem is size, location, or competitors like starlings?
If other cavity nesters occupy the box, the entrance sizing and placement are usually the issue. Starlings can take over when the hole is even slightly oversized, so re-check that you used an exact 1 1/8 inch bit. If no one uses the box, consider moving it to a more wooded edge or adjusting orientation to reduce rain-driven exposure, then give it another season.
What if my yard has lots of cats or raccoons, can I skip the baffle?
In areas with climbing predators, you should not skip it. A baffle mounted below the box and positioned correctly, roughly 4 to 5 feet above ground, blocks access that cats and raccoons use to reach the entrance. Also keep branches and nearby structures well away from the pole so predators cannot use a launch point.
Is it okay to attach the box to a fence or building wall?
It’s usually less ideal than a pole mount because walls, ledges, and nearby architectural features provide climbing routes. If you must mount to a structure, add a proper predator guard and ensure the box is far from any surfaces a cat or raccoon could use to leap. Keep the entrance facing away from prevailing rain, since a wall can channel runoff toward the hole.
How many bird boxes is too many for chickadees in one area?
For chickadees specifically, overcrowding can suppress nesting because they defend territories. A practical rule is one box per 10 acres, or at least about 650 feet between boxes of the same species. If you place multiple boxes for different species, keep entrances and spacing separate so competitors cannot easily use neighboring cavities.
Can I use nesting material from my yard or line the box heavily?
You should use a light layer of coarse wood shavings as described, not fine sawdust and not additional bulky nesting material. Chickadees collect and shape their own nesting debris. Overfilling can reduce ventilation and make it harder for chicks to maneuver, and fine materials can compact and hold moisture.
How strict do I need to be about cleaning, and what’s the safest approach?
Clean annually, ideally late winter before nesting begins or right after chicks fledge. When scrubbing, let the box fully dry before closing it back up, and remove all old debris since it can harbor mites and fly larvae. If you use a diluted bleach solution, use it only on the interior, rinse if needed, and avoid wetting the wood so deeply that it takes a long time to dry.
What should I do if chickadees start nesting and I need to access the box?
Avoid opening the box during active nesting. If you must address an emergency like damage from a storm, minimize handling time and do not leave the box open. Better prevention is to mount access-friendly on a pole so you can inspect from a safe distance without disturbing the nest.
Next Articles
How to Build a Starling Bird House Step by Step
Step-by-step DIY guide to build a predator-resistant starling nesting box with correct hole size, ventilation, drainage,
How to Make a Finch Bird House: DIY Build Guide
Step-by-step DIY finch bird house build with correct entry hole size, cut list, mount tips, and maintenance troubleshoot
How to Build a Sparrow Bird House Step by Step
Step-by-step DIY sparrow house plans with sizes, entry-hole specs, materials, mounting, and troubleshooting for success.