You can build a safe, functional parakeet nesting box in an afternoon with basic tools and a few dollars worth of untreated wood. For budgerigars (the most common pet parakeet), you want a box roughly 9 inches tall, 6 to 8 inches wide, and 6 to 7 inches deep, with a 2-inch entrance hole. That combination gives a breeding pair enough room to feel secure without so much open space that eggs or chicks end up in corners away from the hen.
How to Make a Parakeet Bird Nest: DIY Steps

Marcus Thornton
12 May 2026
What parakeets actually need in a nesting setup
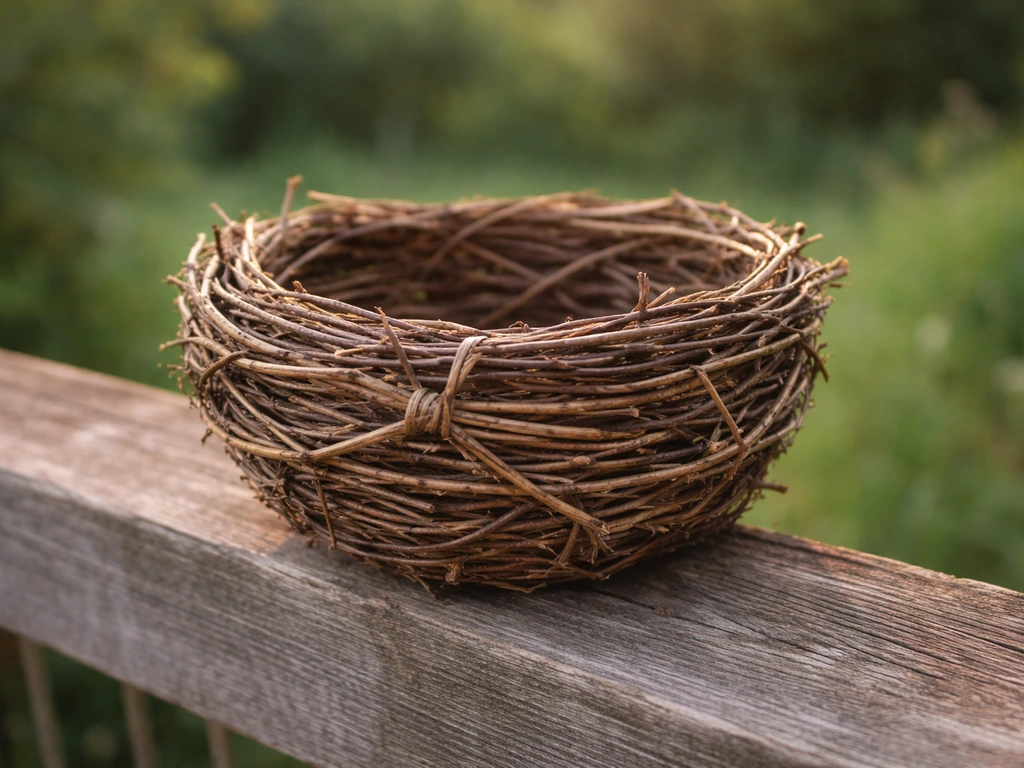
Parakeets are cavity nesters. In the wild, budgerigars nest inside hollow branches and tree trunks, which means they want an enclosed, dark, snug space, not an open cup nest like a robin would use. If you search for 'parakeet nest' and end up looking at woven grass baskets, those are for other parrot species. For budgies, you want a wooden box with a small round entrance hole, a solid floor, and sides tall enough that chicks can't tumble out before they're ready to fledge.
The key things a parakeet nesting setup needs to get right are: enough internal height (shallow boxes cause chicks to fledge too early), a small enough entrance hole to make the hen feel secure, good ventilation without drafts, easy access for you to check and clean, and safe, non-toxic materials throughout. Get those five things right and you're genuinely most of the way there.
Choosing the right nest type, size, and location
Box type: enclosed cavity every time
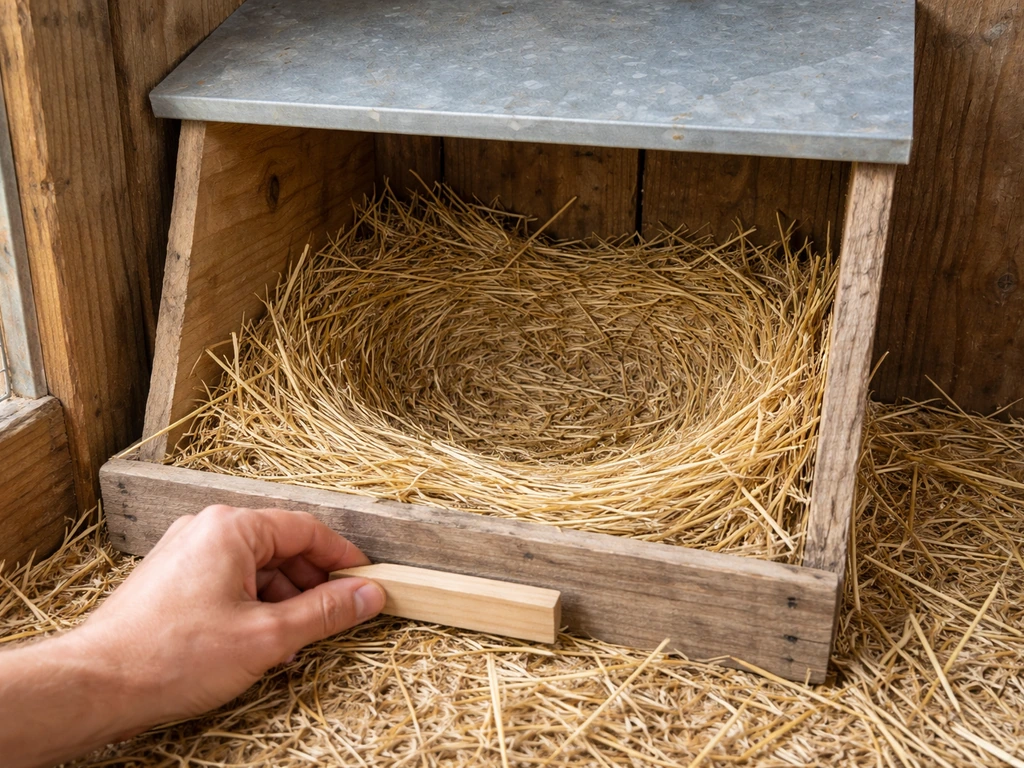
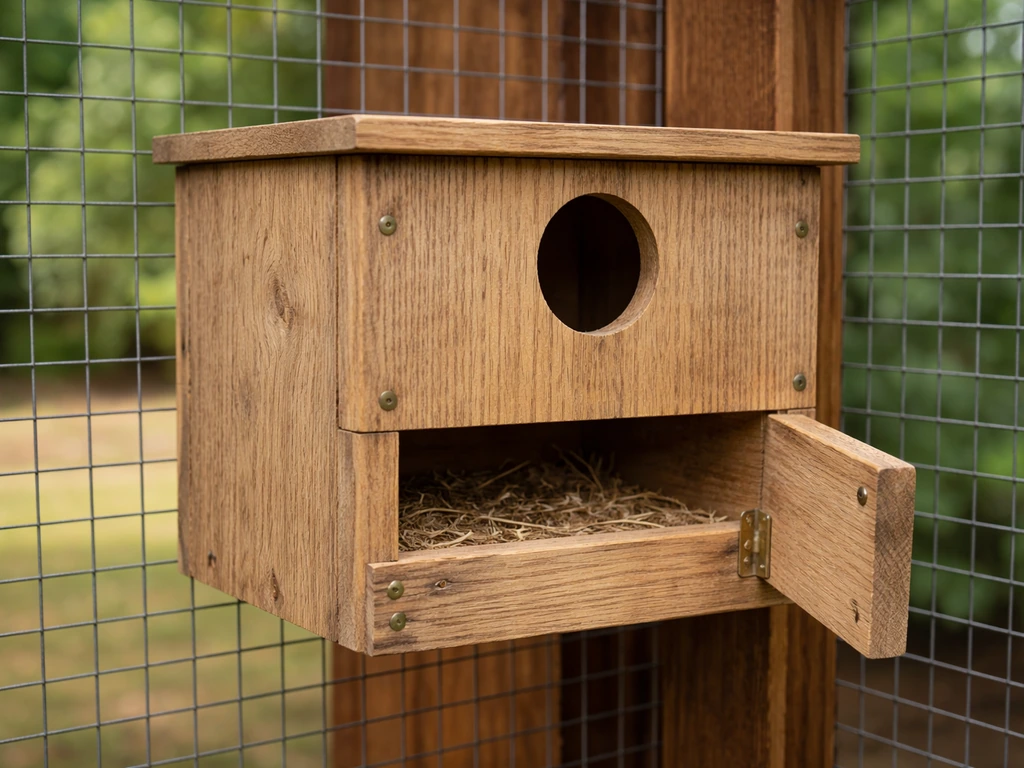
For budgerigars and most small parakeet species kept in cages or aviaries, a simple rectangular wooden nesting box is the go-to design. Forget open trays or hanging fabric pouches for breeding setups. A hanging bird nest is a different setup, but it helps to know how parakeet-style cavity nests are built before you adapt the design. Those might work as enrichment toys, but for actual egg-laying and chick-rearing you need four solid walls, a roof, a floor with a concave depression, and a round entrance hole on one of the short sides near the top.
Size guide for budgies

The dimensions that consistently work for budgerigars are 9 inches tall, 6 to 8 inches wide, and 6 to 7 inches deep. The 2-inch entrance hole is important, not just for fit, but because a hole that's too large makes the hen feel exposed and she may refuse to use the box. A hole that's too small stresses her every time she enters or exits. Stick to that 2-inch diameter and you'll have very few acceptance issues related to the entry.
| Spec | Recommended Measurement | Why It Matters |
|---|---|---|
| Internal height | 9 inches minimum | Prevents chicks from fledging too early |
| Internal width | 6 to 8 inches | Gives the hen room to turn without wasted space |
| Internal depth (front to back) | 6 to 7 inches | Keeps eggs and chicks centered near the hen |
| Entrance hole diameter | 2 inches | Budgie-sized fit; makes hen feel secure |
| Entrance hole height from floor | 6 to 7 inches up from base | Keeps chicks from falling out accidentally |
Where to put it: placement inside cage or aviary
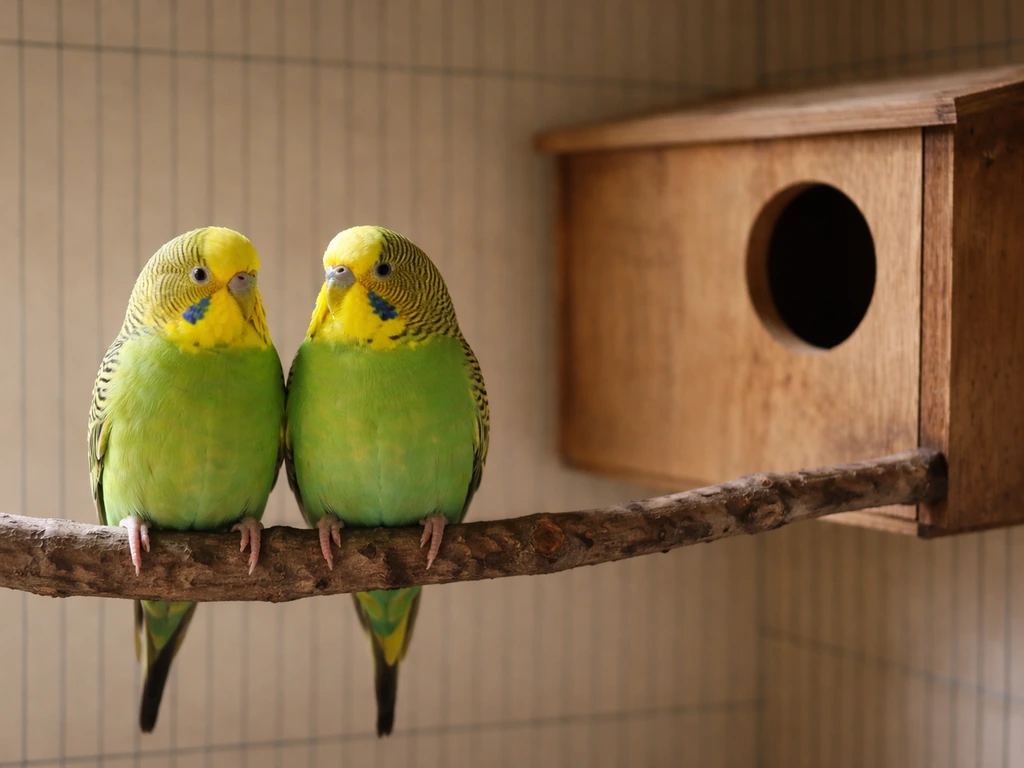
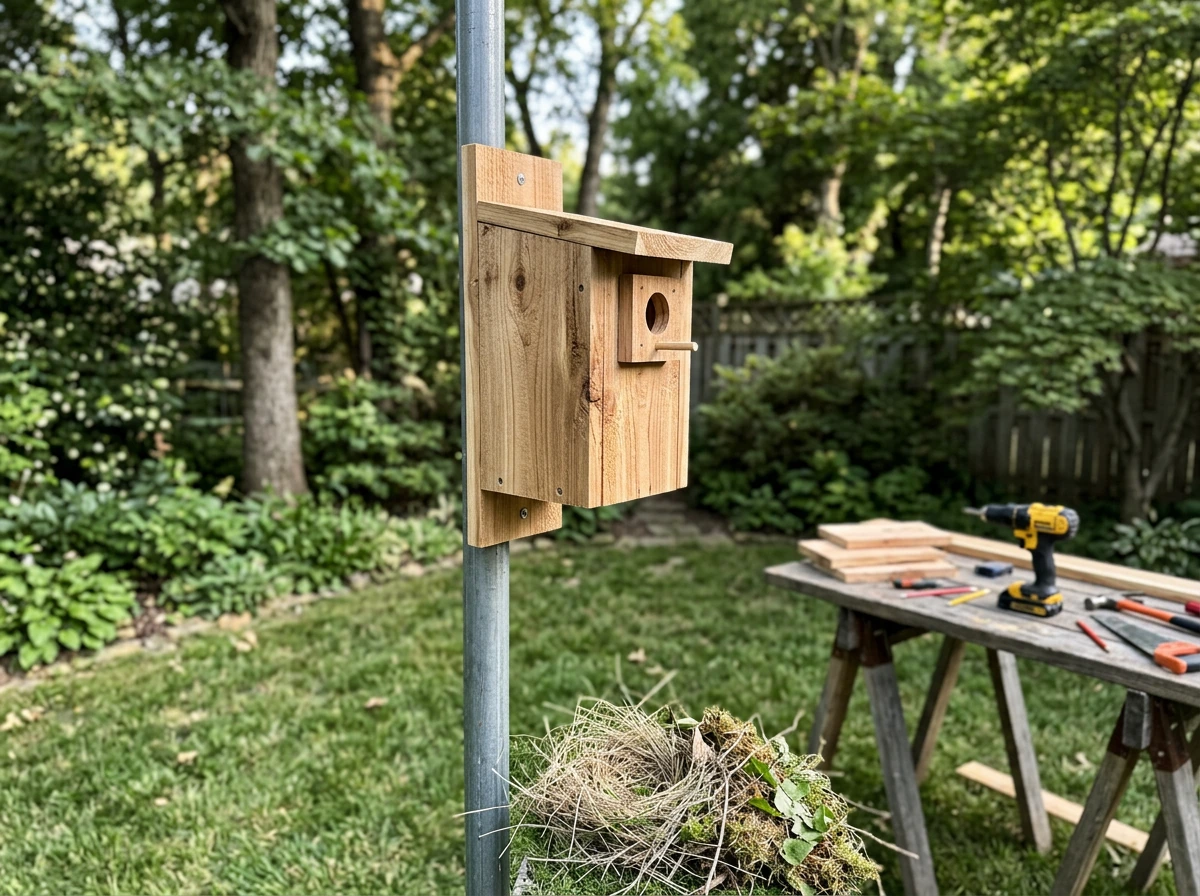
Mount the box high up on the cage or aviary wall. Parakeets feel safer when the nest is elevated, and a higher position also reduces foot traffic disturbance if you have multiple birds. Position it away from direct sunlight and away from any vents or fans that create drafts. The entrance hole should face into the aviary, not toward an exterior wall or window. If you have more than one pair breeding, space boxes far enough apart that hens can't see directly into each other's entrances, which can cause fighting.
For cage setups, the box typically mounts on the outside of the cage with the entrance hole accessible through the cage wire. This keeps interior cage space free and makes it much easier for you to open the side access door for checks without disturbing the whole cage.
Materials and tools you'll need
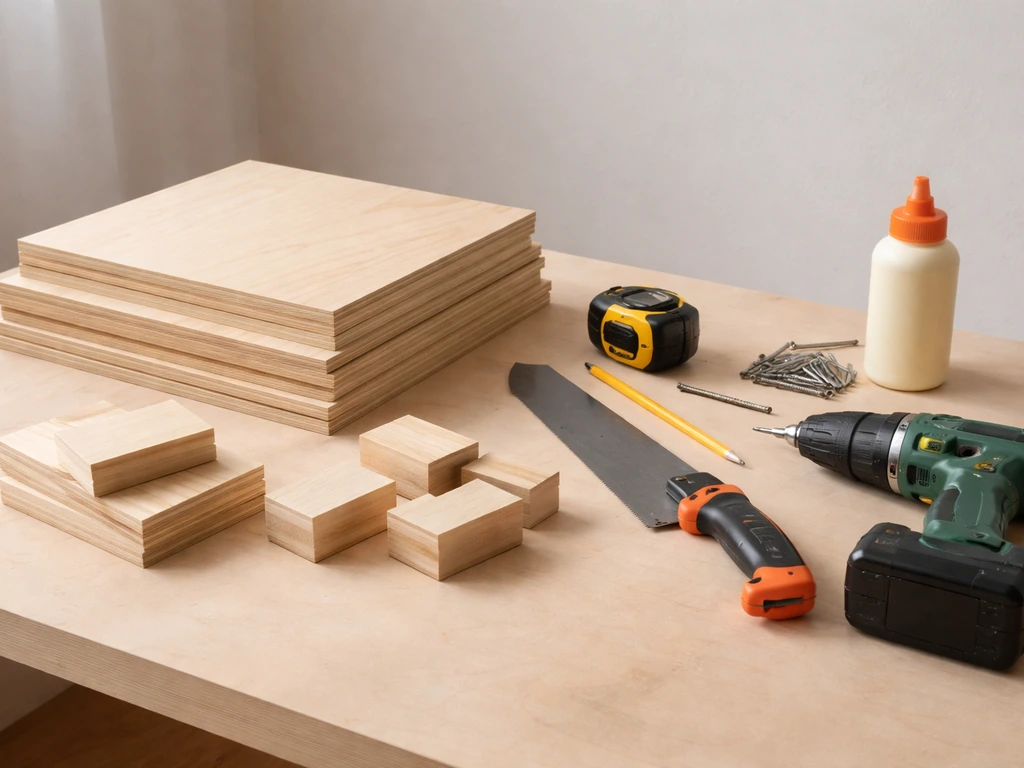
The safest and easiest material for a DIY parakeet nesting box is blank" rel="noopener noreferrer">untreated pine or plywood. Both are inexpensive, easy to cut, and importantly, they're non-toxic. I've also used untreated poplar and cedar offcuts with great results. What you absolutely want to avoid is MDF (it swells with moisture and contains formaldehyde binders), blank" rel="noopener noreferrer">treated or pressure-treated lumber, and any wood with paint, varnish, or stain on surfaces that will be inside the box. The birds will chew the interior, so assume anything coating the wood will be ingested.
Materials list
- Untreated pine board or plywood, at least 1/2 inch thick (a single 6-inch wide pine board usually covers all your cuts)
- Wood screws, 1.25-inch length, or non-toxic wood glue for joining panels
- One small hinge and a simple latch for the side access door
- A short wooden perch dowel (3/8 inch diameter, about 2 inches long) for just below the entrance hole
- Sandpaper, 80 grit and 120 grit, for smoothing all edges
- A handful of clean, dust-free sawdust or wood shavings for the concave floor (more on this below)
Tools list
- Tape measure and pencil
- Hand saw or circular saw for straight cuts
- Drill with a 2-inch hole saw bit for the entrance (a spade bit works too)
- Screwdriver or drill driver
- Clamps to hold panels while glue sets or while you pre-drill screw holes
- Sandpaper block or random orbital sander
If you don't own a hole saw, most hardware stores will cut it for you, or you can get a basic hole saw kit for under ten dollars that will last through dozens of projects. A jigsaw also works fine for the entrance hole if that's what you have on hand.
Step-by-step: building the nesting box
- Cut your panels. You need: two side panels at 9 inches tall by 6 to 7 inches deep, one front panel at 9 inches tall by 6 to 8 inches wide, one back panel the same dimensions as the front, one top panel to match the width and depth, and one floor panel to match the width and depth. Label each piece with pencil so you don't mix them up.
- Mark and cut the entrance hole on the front panel. Measure 6 to 7 inches up from the bottom edge and mark the center of the panel width. Use your 2-inch hole saw to drill the entrance hole at that center point. Sand the inside of the hole smooth with folded sandpaper so there are no splinters the hen will snag on entering or exiting.
- Sand all panels. Run 80 grit over all edges and faces, then follow up with 120 grit. Pay extra attention to inside corners and the floor panel. The interior doesn't need to be perfectly smooth (a little roughness actually helps the hen grip), but there should be no sharp splinters.
- Add the concave to the floor. Use a rounded chisel, a router, or even a large spoon gouge to carve a shallow oval depression roughly 4 inches wide and 1/2 inch deep in the center of the floor panel. This concave keeps eggs from rolling to the edges and holds nesting material in place. If you don't have carving tools, you can glue a 1/2-inch thick wooden ring (cut from scrap) to the floor surface to create a raised lip instead.
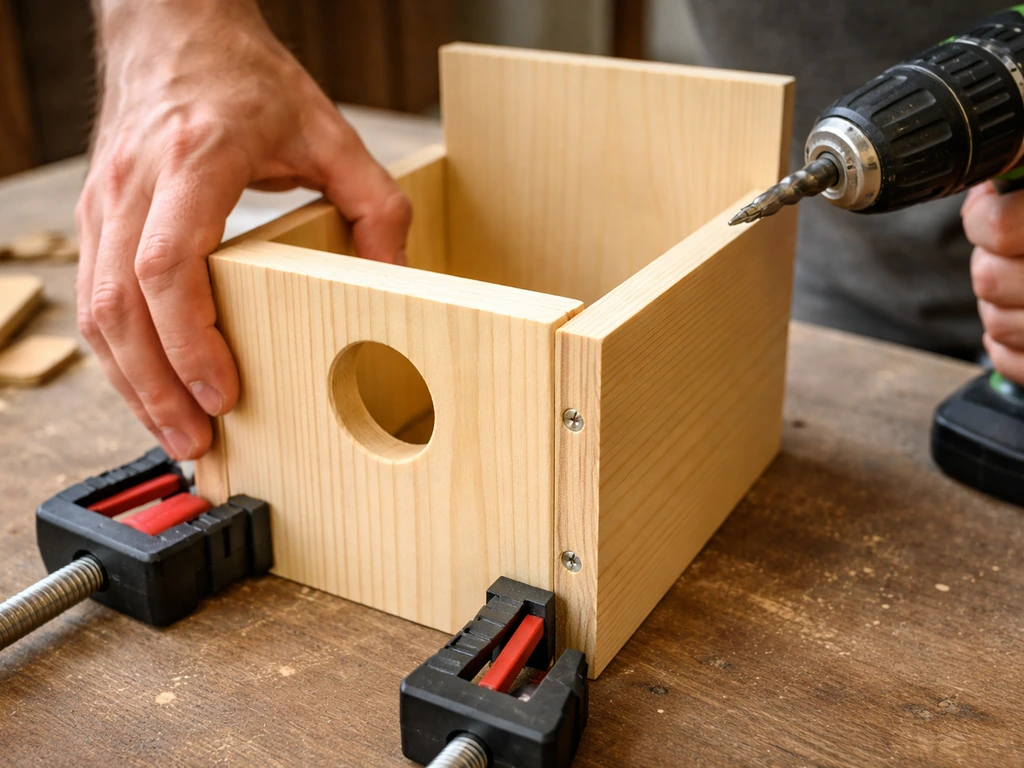
- Assemble the box. Start by attaching the floor to both side panels. Pre-drill screw holes to avoid splitting the wood, then screw or glue the sides to the floor. Attach the back panel next, then the front panel. Leave the top loose for now.
- Install the access door. The easiest approach is to make the entire side panel into a door by hinging it at the top and adding a small latch at the bottom. Alternatively, cut a 4-inch square hatch in the side panel and hinge that section instead. The important thing is that you can open the box from outside the cage without disturbing the hen too much. The Budgerigar Club's breeding guidance specifically calls out accessible doors as essential for checking, cleaning, and handling chicks.
- Attach the top panel. Screw or glue it in place, making sure all edges are flush. If you want ventilation, drill two or three 1/4-inch holes through the top or near the top of the back panel. This is especially worth doing in warmer climates.
- Install the entrance perch. Drill a small hole just below the entrance and glue in a short dowel perch, about 2 inches of stick protruding outward. This gives the hen a landing spot and makes entry less stressful.
- Attach mounting hardware. Screw two small L-brackets or a wire hook system to the back panel so the box can hang from or attach to the cage or aviary wire. Make sure the mount holds the box level, not tilted forward, or eggs can roll toward the entrance hole.
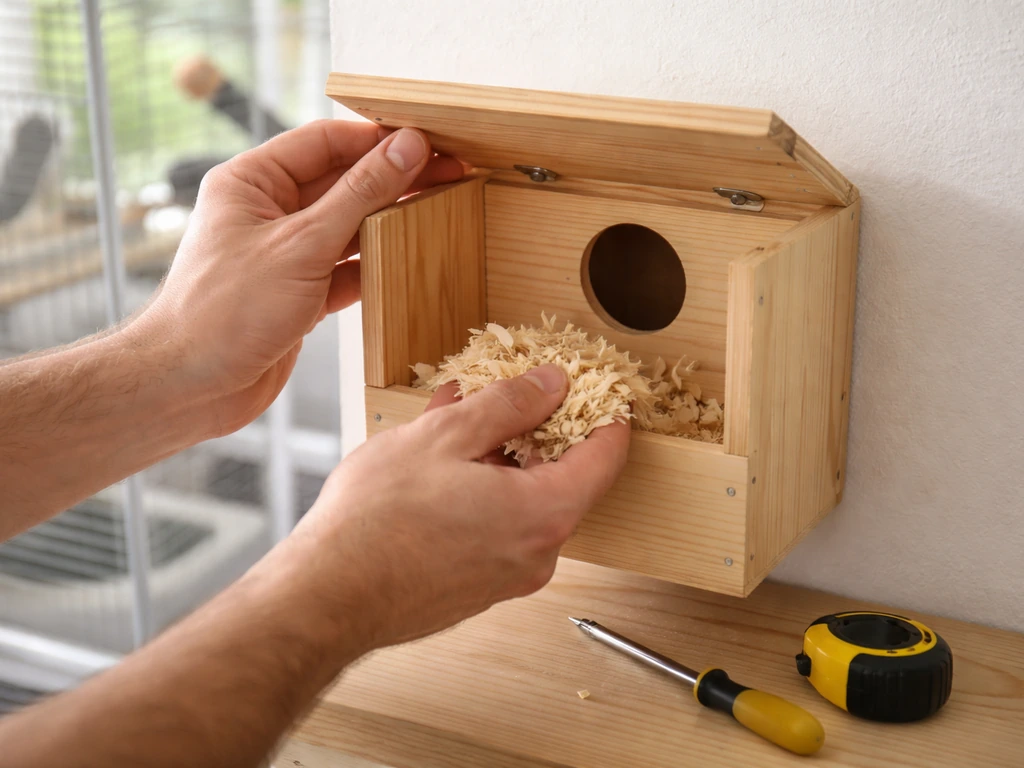
Adding nesting lining and material safely
Here's something that surprises a lot of first-time builders: budgerigars technically don't need nesting material the way a wild bird building a cup nest does. The Budgerigar Club confirms this, noting that hens will lay eggs directly in the concave of the box floor without any bedding at all. That said, adding a small amount of material helps absorb moisture from droppings and keeps the concave area more hygienic, which is good for egg and chick health.
The recommendation that works well in practice is a handful of clean, dust-free wood shavings or dry sawdust placed in the concave. The NCA fact sheet specifically backs this up, suggesting a handful of clean sawdust in the bottom concave. Pine shavings sold for small animal bedding are fine as long as they're labeled dust-free. Avoid cedar shavings (the aromatic oils can irritate respiratory systems), corn cob bedding (molds quickly), and anything scented or treated. Don't over-fill the concave, a shallow layer is all you need.
What to skip entirely
- Cotton fibers or string: chicks and adult birds can get toes or necks tangled
- Cedar shavings: aromatic compounds irritate budgie respiratory systems
- Straw or hay: can harbor mites and molds, especially in humid conditions
- Fabric scraps: ingestion risk and can mat down into a suffocation hazard for chicks
- Newspaper: ink chemicals are a concern and it becomes a slippery surface for eggs
Placement, monitoring, and keeping things clean
After you install it
Once the box is up, give the birds a few days to investigate it on their own before you assume it's been rejected. The hen will typically poke her head in, spend time sitting at the entrance, and eventually start spending time inside before any eggs appear. If you have a bonded pair that's already shown breeding behavior, you might see eggs within two to three weeks of introducing the box.
Checking on eggs and chicks
Check the box every one to two days once you know eggs have been laid, but keep checks brief and calm. Open the access door slowly, don't reach in repeatedly, and close it gently. Most hens tolerate brief checks without abandoning the nest, especially if they're accustomed to your presence. If you're checking for the first time and the hen is inside, tap gently on the box first so she exits on her own rather than flushing her out by surprise.
Cleaning schedule
Once a clutch has fledged and all chicks have left the nest, remove the box entirely for a thorough clean. Empty all old material, scrub the interior with hot water and a bird-safe disinfectant, rinse completely, and let it air dry for at least 24 hours before reusing or storing. During an active breeding cycle, spot-clean by replacing fouled shavings in the concave during your regular checks. Never use bleach at full strength or household cleaners inside a box that will immediately go back in use.
Troubleshooting common nest-setup problems
The hen won't go near the box
Give it at least two weeks before worrying. If she's still ignoring it after that, check a few things: Is the box mounted high enough? Is the entrance hole size correct at 2 inches? Is the box positioned where she feels secure, away from heavy foot traffic and other birds' sightlines? Sometimes darkening the interior by adding a small piece of cardboard just inside the entrance (which she'll likely chew away herself) can trigger initial interest. Also check that the pair is genuinely bonded and that the male is actively courting her before blaming the box.
Eggs keep rolling out of the concave
Your concave is probably too shallow or the box is tilted. Deepen the concave slightly with a chisel or gouge, and check that the box is mounted level or very slightly tipped back so eggs naturally roll toward the center. A small rim of wood glued around the concave edge adds cheap insurance against egg rolling.
The box smells bad or looks damp after a few days
Ventilation is probably insufficient. Add two or three small 1/4-inch holes near the top of the back or side panels if you haven't already. Also check that your wood shavings aren't too thick, a thin layer absorbs moisture without trapping it. Replace the shavings during your next check and see if the problem resolves. If the wood itself feels damp, the box may be positioned where it catches condensation or indirect splash from a water source, so relocate it.
The box wobbles or keeps shifting
An unstable box is a real problem because it stresses the breeding pair and can damage eggs. Use two mounting points rather than one, and make sure your L-brackets or wire hooks are secured to solid cage frame, not just the mesh. For heavier aviary-mounted boxes, a short shelf bracket underneath the box gives it a resting surface rather than hanging entirely on screws through the back panel.
Hen is aggressive at the box entrance
A certain amount of entrance-guarding is normal and healthy. If she's actively attacking the male or other birds, make sure other birds can't perch directly in front of the entrance. Remove any perches or cage accessories within a few inches of the box that give competitors a staging point. In colony aviaries, more boxes than breeding pairs is the rule of thumb: provide at least one extra box so subordinate hens have somewhere to go when they're being chased.
Building nesting setups for other birds follows a lot of the same logic, though the dimensions, materials, and lining choices shift depending on the species. If you're making something kid-friendly, you can adapt the idea into a simple bird nest activity that suits preschoolers how to make a bird nest for preschoolers.
If you want to try something more natural, see our guide on how to make a bird nest out of twigs for ideas you can adapt for appropriate birds and conditions. If you want the full process, this is similar to how to make a bird nest step by step with the right box, lining, and placement cavity-nesting principle.
If you're interested in expanding your projects, nesting approaches for other small birds or even lovebirds follow a similar cavity-nesting principle with some key differences in box size and accepted lining materials. Lovebird nesting boxes follow a similar cavity-nesting approach, but the box size and entrance details need to be adjusted for lovebirds.
If you want to tailor the plan for a pair, search for how to make love bird nest and match the box size and entrance to their needs lovebirds. This is the same kind of step-by-step process you can use to build a bird nest for your parakeets, from box size to safe materials.
FAQ
Can I use cardboard, fabric, or rope inside the nesting box for my parakeet nest?
Avoid any fabric, rope, or cardboard as lining. Chicks can get tangled or chew fibers that can irritate the throat. If you want lining, use only a thin, clean layer of dust-free wood shavings or dry sawdust in the concave, and keep it shallow so it does not collapse or form a deep nest.
Do parakeets need nesting material, or can they lay eggs directly on the box floor?
Budgerigars can lay eggs directly into the concave depression with no bedding, but adding a small amount of clean, dust-free shavings helps absorb moisture. Use a thin layer only (enough to lightly cover the concave), because thick bedding can trap moisture and make the area too damp.
How do I clean the nest without harming the eggs or chicks?
During active breeding, do spot-cleaning by replacing only the fouled shavings in the concave during brief checks. For full cleaning, remove the box only after all chicks have fledged, scrub with hot water plus a bird-safe disinfectant, rinse thoroughly, then air-dry at least 24 hours so no moisture or fumes remain.
What should I do if my hen lays eggs but refuses to stay in the box?
First confirm the setup basics: box placement high up, entrance hole about 2 inches, and ventilation without drafts. Then check that the concave is not too shallow and the box is level or slightly tipped back so eggs sit toward the center. If the box is in a high-traffic spot or facing direct light, relocate it because many hens abandon boxes that feel exposed.
Can I rotate or move the nesting box after the first eggs are laid?
Try not to move it once the hen has started using it. If relocation is unavoidable, do it in stages by slightly adjusting the position only, and do so well before laying begins next time if possible. Sudden changes during incubation can cause abandonment.
How often should I check the nest when eggs are present?
Check about every 1 to 2 days once you know eggs are laid, and keep each inspection calm and fast. Open the access door slowly, avoid reaching into the box, and if the hen is inside, gently tap the box so she exits on her own rather than flushing her unexpectedly.
What are signs the entrance hole is the wrong size?
If the entrance is too large, the hen may feel exposed and may not sit consistently, and drafts can increase. If it is too small, she may appear tense during entry or exit and may spend less time inside. Sticking to a 2-inch diameter and keeping the entrance facing into the aviary or cage area usually prevents these issues.
Should I add ventilation holes even if my box looks well-ventilated already?
If you see condensation, damp wood, or musty odor in the box area, add 2 or 3 small holes near the top of a back or side panel (about 1/4 inch). Make sure the ventilation does not aim directly into a fan, vent, or cold draft, because air movement that is too strong can chill eggs and chicks.
My parakeet keeps bouncing eggs or the eggs roll out. What can I adjust?
Most egg rolling problems come from a concave that is too shallow or a box that is not level. Deepen the concave slightly and ensure the box is level or very slightly tipped back. You can also add a small wooden rim around the concave edge to keep eggs from slipping away from the center.
Why is the hen attacking the other birds or guarding the entrance aggressively?
Some guarding is normal, but if she is actively attacking, reduce competition. Remove nearby perches or accessories within a few inches of the entrance that give other birds a staging spot, and in aviaries provide at least one extra nest box so subordinate hens have somewhere else to go.
Is it safe to use cedar or pine shavings in the box?
Pine shavings labeled dust-free are generally fine. Avoid cedar shavings because their aromatic oils can irritate the respiratory system. Also avoid corn cob bedding and any scented or treated materials, because they can mold quickly or introduce irritants.
When should I stop trying to fix the nest and instead reassess the pair or timeline?
Give the birds time, at least two weeks after installing the box, before assuming it failed. If she still ignores it, verify the pair is genuinely bonded and the male is actively courting. Then re-check box height, entrance size, and whether the placement feels secure away from heavy foot traffic and direct sunlight.
Next Articles
How to Make a Love Bird House Step by Step DIY
Step-by-step DIY lovebird house build with safe wood, size cut list, ventilation, cleanout access, and placement tips.
How to Make a Bird Nest Out of Twigs: DIY Steps
Step-by-step DIY for a twig nest bowl, from safe twig choice and weaving to placement, sizing, and bird-safe stability.
How to Build a Bird Nest: DIY Steps for Real Nests
Step-by-step guide to build a realistic bird nest or nesting box, choose materials, mount safely, and maintain by season