You can insulate a backyard bird aviary by layering bird-safe materials on the floor, walls, and roof, sealing gaps that let in drafts, and keeping at least one or two vents open so moisture can escape. The whole job is achievable in a weekend with basic hand tools, and most of the materials are available at any hardware store. The key rule is simple: stop cold air from getting in, but never seal the aviary so tight that damp air gets trapped inside, because wet air is more dangerous to birds than cold air.
How to Insulate a Bird Aviary: DIY Step-by-Step Guide

Marcus Thornton
1 Jun 2026
Understand your aviary type and climate needs first
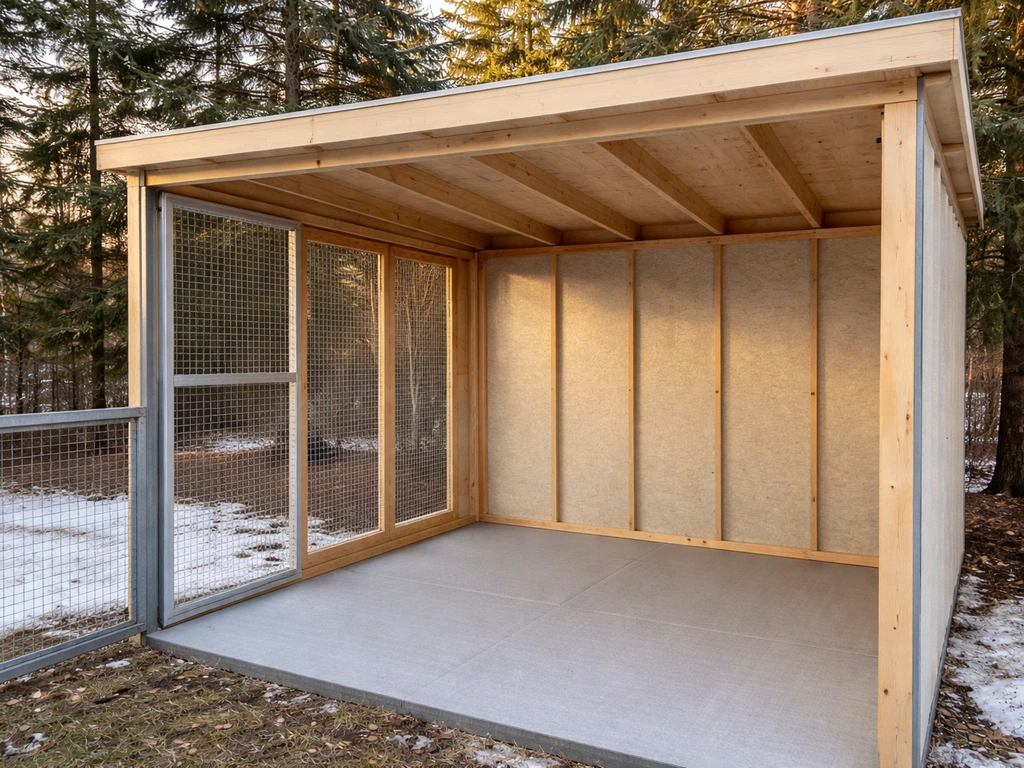
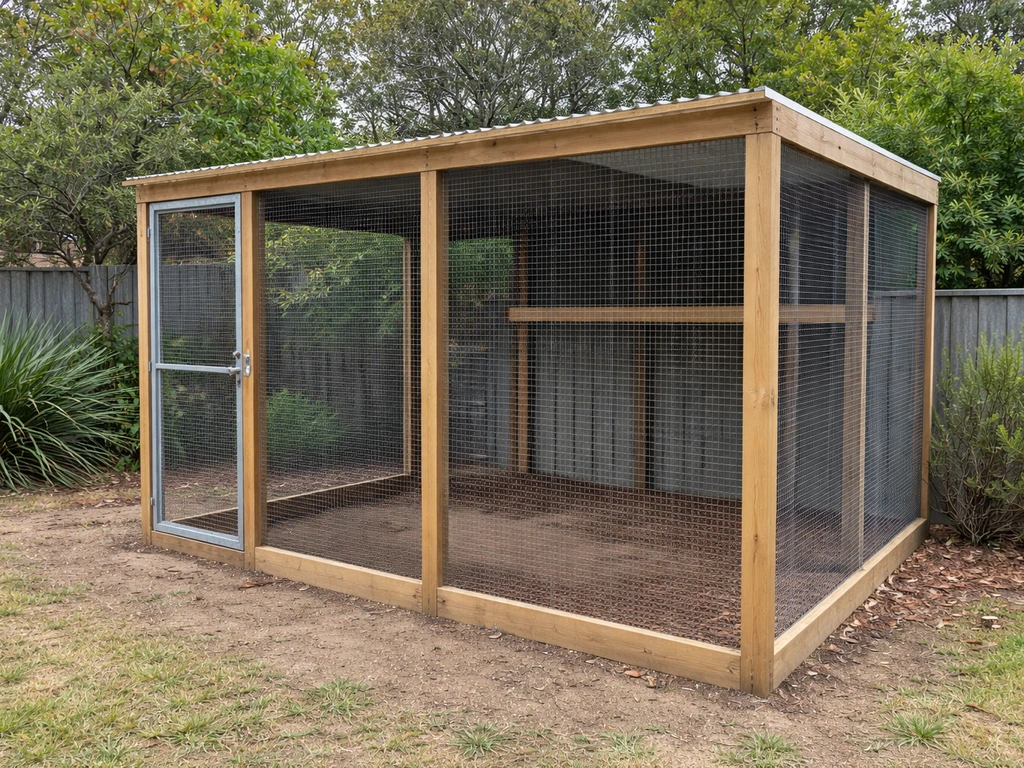
Before you buy a single roll of insulation, look at what you actually have. A fully framed, shed-style aviary with solid timber walls is a completely different project from an open wire-mesh flight cage on a frame. Each one needs a different approach.
Shed-style aviaries (plywood or timber panels, a solid roof, proper framing) can be insulated almost exactly like a small garden shed. You have cavities to fill, surfaces to line, and a structure that holds insulation in place. Wire-mesh aviaries are harder because there is no wall to insulate directly. For those, you are essentially building a windbreak layer around the outside of the existing structure, plus insulating any solid sections like the roof panel or a back wall.
Climate matters just as much as structure. If you are in a region that drops below freezing regularly, you need to prioritize both insulation and a supplemental heat source. In mild climates that just get cold and damp (think the Pacific Northwest or UK-style winters), your biggest enemy is not temperature but moisture, so ventilation design becomes the priority. If you are planning a bird aviary in Australia, the same insulation and ventilation principles apply, but you should tune them to your state’s typical climate and rainfall bird aviary australia how to build. In hot climates, the same principles apply in reverse: you want to reflect heat away from the roof and keep airflow moving.
Bird species matter too. Tropical or subtropical birds like budgerigars, cockatiels, and lovebirds struggle below about 50°F (10°C) and do best between 65 and 85°F (18 to 29°C). Cold-hardy species like some finches and native sparrows tolerate much lower temperatures as long as they are dry and draft-free. Know your birds before you set your insulation targets.
Insulation materials that work for birds: safe vs unsafe
This is where most people make avoidable mistakes. Some of the most common insulation products used in home construction are genuinely dangerous inside a bird aviary, and the risks are not obvious from the packaging.
Materials to avoid
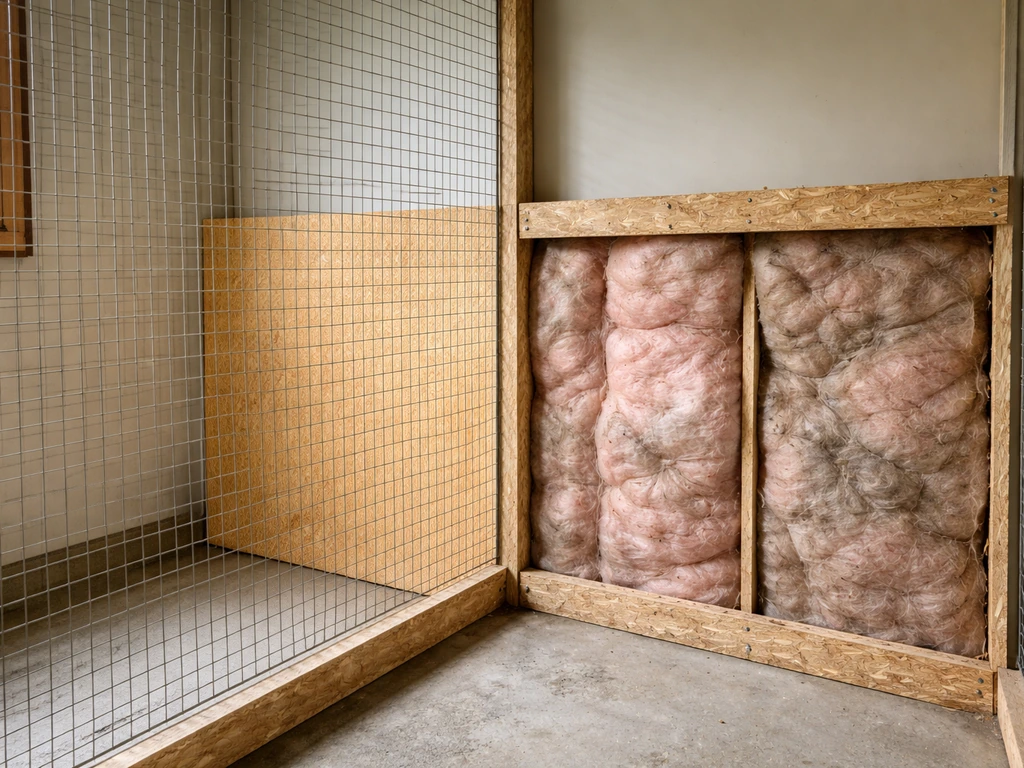
- Fiberglass batts (exposed): The loose fibers become airborne and lodge in birds' respiratory systems. If you use fiberglass at all, it must be fully enclosed behind a solid panel and have zero exposed surface inside the aviary.
- Spray foam (standard polyurethane): Off-gasses chemicals including isocyanates during and after application. Some formulations continue to release volatile compounds for weeks. Birds are far more sensitive to airborne chemicals than humans, so this is a hard no unless it is fully cured, sealed, and completely inaccessible to birds.
- Styrofoam (expanded polystyrene, unprotected): Birds will peck it apart and ingest pieces. It is not toxic in small amounts but causes crop impaction. Use only if it is sealed behind a solid, bird-proof panel.
- Mineral wool (exposed): Same problem as fiberglass. Fine particles are respiratory irritants for birds.
- Anything with formaldehyde-based adhesives or treatments: Some foam boards and reflective foils use chemical adhesives. Check the data sheet before buying.
- PTFE/Teflon-coated materials: Teflon fumes are acutely lethal to birds even in tiny concentrations. This applies to heat mats or any heating element with a non-stick coating, not just cookware.
Safe materials to use
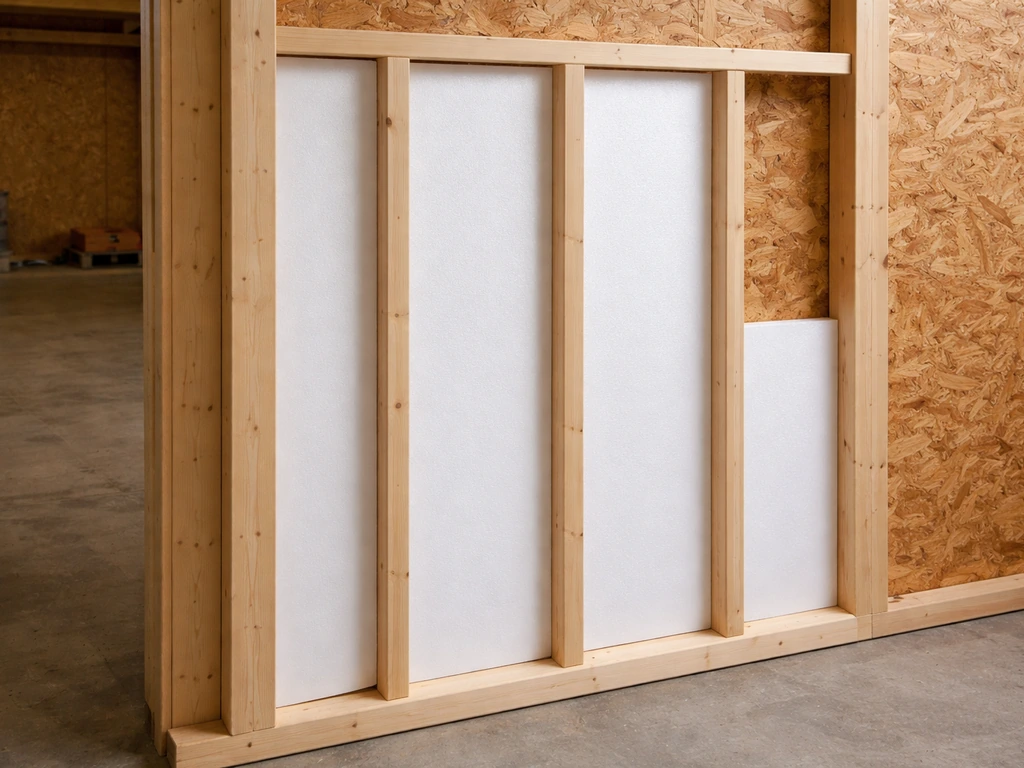
- Closed-cell foam board (rigid polyisocyanurate or XPS, fully enclosed): When sandwiched behind plywood or OSB panels, these are safe and highly effective. R-values of around R-3.8 per inch (XPS) to R-6 per inch (polyiso) make them very efficient for thin wall assemblies.
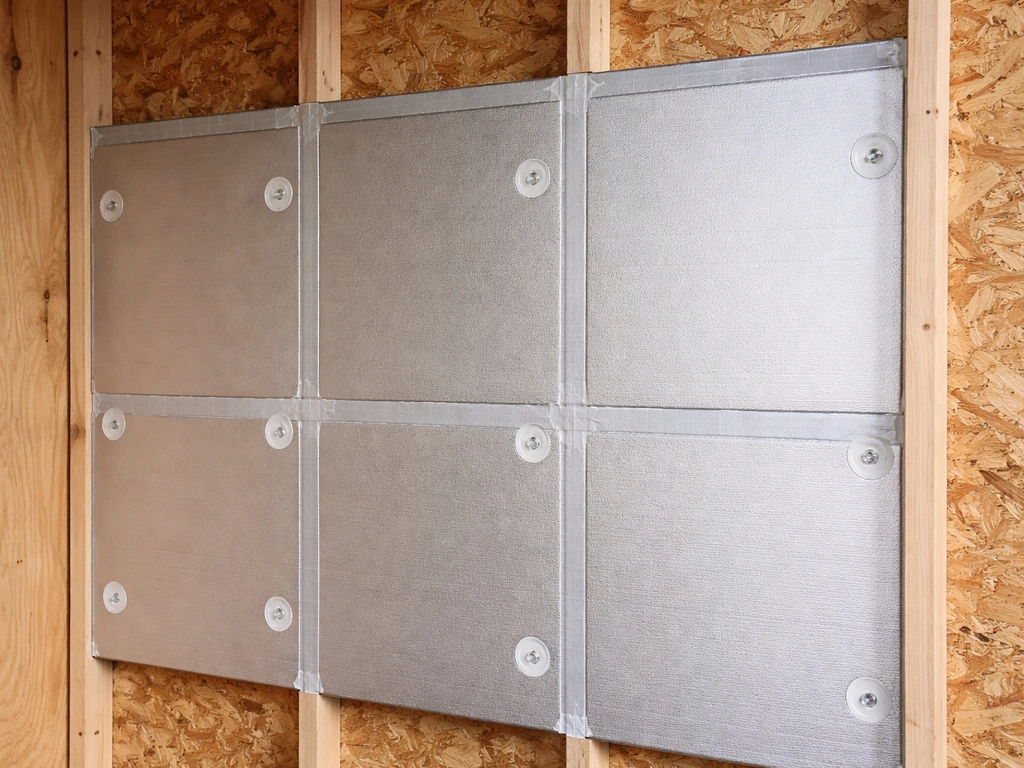
- Reflective foil insulation (radiant barrier): Useful on roof undersides and outer walls. Non-toxic, lightweight, and easy to staple. Works best as a radiant heat reflector paired with another insulation layer rather than on its own.
- Natural cork sheets or cork board: Safe, non-toxic, naturally mold-resistant, and birds can peck at it without serious harm. Lower R-value than foam board (about R-1.1 per inch) but a great option for lining interior surfaces.
- Recycled denim or cotton insulation batts: A genuinely bird-friendly alternative to fiberglass. No loose fibers or chemical irritants. Available at building suppliers; must still be enclosed behind a panel.
- Solid timber, plywood, or OSB panels: Not insulation on their own, but essential as the protective face over any insulation layer. Untreated or low-VOC-treated timber is safest.
- Weatherstrip foam tape (self-adhesive closed-cell): Safe for sealing gaps in door frames and window edges. Keep birds from chewing it by placing it on outer-facing surfaces.
Floor, wall, and ceiling insulation: step by step
Starting with the floor
The floor loses heat fast, especially if the aviary sits directly on concrete or bare ground. Cold flooring chills perching birds through their feet and drives up the overall air temperature loss. Here is how to handle it based on your floor type. To complete your setup, you can follow a full bird condo build plan that covers framing, nesting spots, and safe placement build a bird condo.
For an aviary on a concrete slab: Lay a layer of rigid foam board directly on the slab (25mm to 50mm thick is plenty), then top it with a solid sheet of plywood or OSB screwed or weighted in place. The foam insulates from below; the plywood protects from bird contact and water from cleaning. If you hose down the aviary regularly, use exterior-grade plywood and seal all edges with a non-toxic, water-based sealant.
For an aviary on a timber-framed floor (raised off the ground): Pack insulation batts or cut rigid foam board between the floor joists from below if accessible, or from above before you lay the floor deck. Seal the perimeter where the floor meets the wall framing, because that junction is a major cold-air entry point.
For an aviary on bare ground or sand: A full hard floor is always better for insulation and hygiene. If that is not possible right now, thick rubber matting or several layers of natural straw bedding over a weed-barrier membrane helps, but it is a temporary fix.
Insulating the walls
For shed-style walls with a timber frame: Cut rigid foam board to fit snugly between the studs, push it in, and face it with plywood or OSB. Use a utility knife and straightedge to score and snap foam board cleanly. No special tools needed. Aim for a tight fit so air cannot bypass the insulation at the edges. Seal any gaps between the foam and the studs with closed-cell foam sealant from a can (this is different from spray foam insulation: it is a small-bead filler product that off-gasses quickly and is safe once cured).
For a wire-mesh aviary with no solid walls: Build a secondary windbreak. The most practical method is to attach clear corrugated polycarbonate panels or exterior-grade plywood panels to the outside of the wire frame on the prevailing wind side and the coldest-facing side (usually north-facing in the Northern Hemisphere). Leave the south-facing side and top portions of the remaining sides as open wire mesh for light and airflow. You can also hang thick clear polythene sheeting as a temporary winter fix, secured with timber battens so it does not flap and stress the birds.
Roof and ceiling insulation
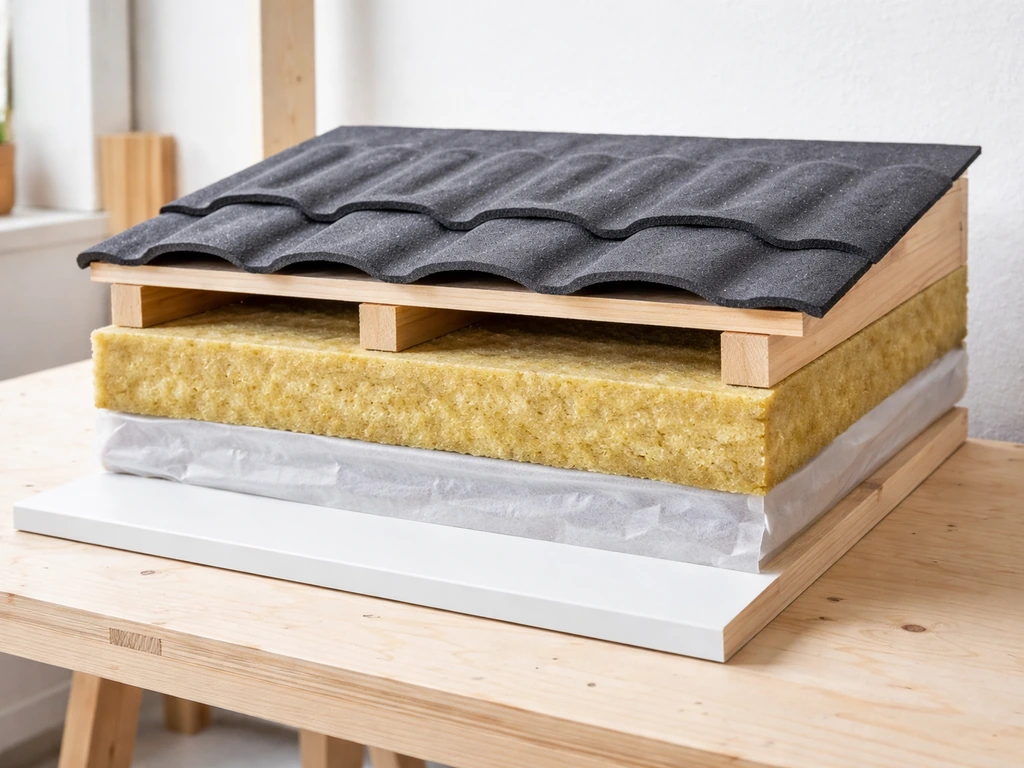
Heat rises, so an uninsulated roof is your biggest source of heat loss in winter and heat gain in summer. This is also where condensation causes the most damage if you get the assembly wrong.
The safest roof assembly for a DIY aviary goes like this, from outside in: waterproof roofing material (metal sheet, bitumen felt, polycarbonate), then a ventilated air gap of at least 25mm, then your insulation layer (rigid foam board works well here), then a vapor-check layer (foil-faced insulation or a reflective foil sheet works for this), then your interior ceiling panel (plywood or OSB).
The ventilated air gap between the roofing material and the insulation is critical: it lets any moisture that gets past the outer roof skin drain away and evaporate rather than soaking into the insulation. The U. S.
Department of Energy also notes that in ventilated roof assemblies, vapor barriers or vapor retarders should be permanently and carefully sealed at seams and penetrations to prevent wetting that can reduce thermal performance and promote mold or wood rot The ventilated air gap between the roofing material and the insulation is critical: it lets any moisture that gets past the outer roof skin drain away and evaporate rather than soaking into the insulation. .
If your roof is a simple flat or single-pitch design, you can install the insulation from inside by screwing timber battens to the underside of the roof rafters, cutting foam board panels to fit between them, and then fixing a plywood ceiling panel below. Leave a small gap at the ridge and at the eaves so air can still move through the void above the insulation. Block that gap from bird access with fine mesh, but keep it open to the outside. This is essentially the same principle that US building science uses for attic condensation control: allow intake air at the soffit/eaves and exhaust air at the ridge so any moisture moves out before it settles.
Weatherproofing and airflow: stopping drafts without creating condensation
Here is the thing that trips up a lot of DIY builders, and I have made this mistake myself: sealing every gap sounds like the right move in winter, but a perfectly sealed aviary will fill with moisture from the birds' breathing, droppings, and wet food within days. If you want to turn these principles into a complete project, the next step is learning how to build a bird garden that stays warm, dry, and draft-free. That moisture condenses on cold surfaces, soaks into timber, and grows mold that causes serious respiratory problems in birds. The goal is not zero airflow; it is controlled airflow.
Drafts are different from ventilation. A draft is an uncontrolled burst of cold air hitting birds directly, particularly at perch height. Ventilation is a slow, managed exchange of stale, damp interior air for fresh exterior air through high-level vents. You want to eliminate drafts and maintain ventilation.
The practical rule is to position ventilation openings high in the aviary, above the birds' resting height, so outgoing warm, moist air escapes at the top without creating a cold downdraft on the birds. Intake openings (if you have them at lower levels) should be baffled or directed so incoming air does not blow directly across perches. Even in winter, keep at least one high vent open at all times. A mesh-covered vent of about 150mm x 150mm is enough for a small to medium aviary. You can partially cover it with a hinged flap on the outside to reduce flow in severe cold while still letting moisture out.
Think of air movement and moisture as separate problems to manage. Air movement carries far more moisture than vapor diffusion through surfaces, so controlling air leakage (sealing random gaps with foam tape and caulk) is more important than worrying about what vapor slowly permeates through your wall panels. Seal the random gaps; leave the intentional vents open.
Problem spots: doors, windows, corners, perches, and vents
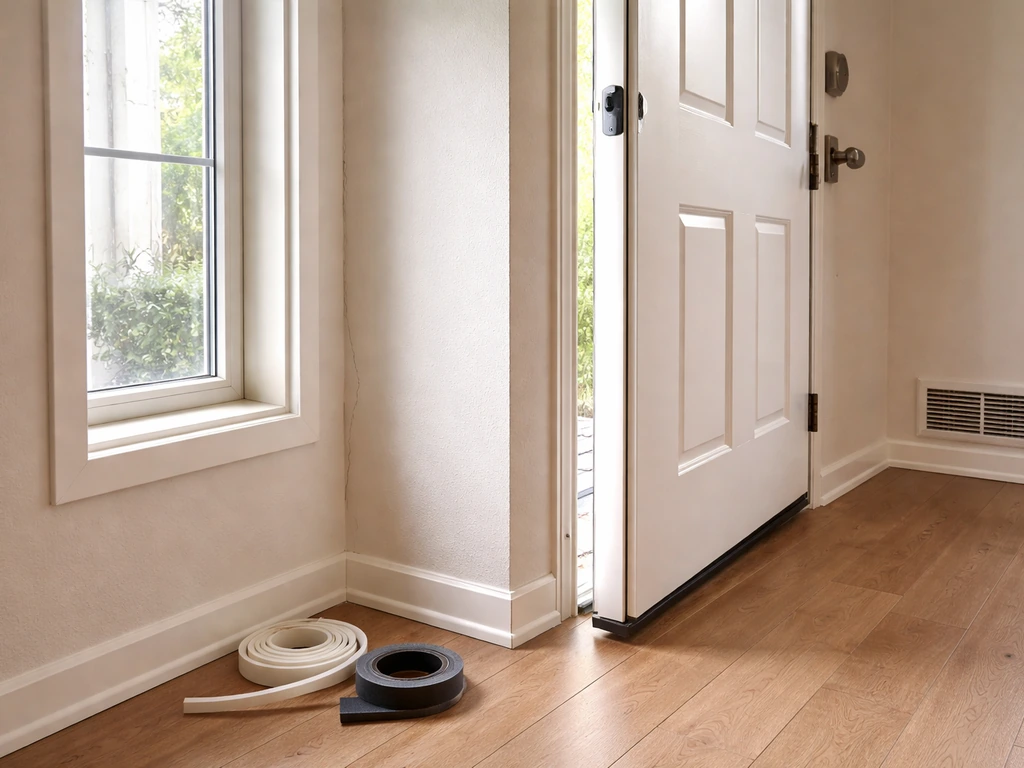
Doors and entry points
Doors are usually the single biggest source of air leakage. Check yours by holding your hand near the frame edges on a cold, windy day. You will feel the cold immediately if there are gaps. Fix it by applying closed-cell foam weatherstrip tape around the entire door frame rebate (the step the door closes against).
This compresses when the door closes and creates a seal. For sliding or overlapping doors, use brush-strip draught excluder, which maintains a seal even when the door moves. A double-entry system, basically a small transition space between two doors, is the gold standard for keeping cold air out while you enter and exit without the birds escaping. If you are building from scratch, this is worth incorporating into the design.
Windows and clear panels
Single-skin polycarbonate or glass panels are cold bridges: they conduct heat out rapidly and attract condensation on the interior surface. The best upgrade is to replace them with twin-wall or multiwall polycarbonate sheeting (the kind with internal channels running through it). It is lightweight, easy to cut with a saw, and has significantly better thermal performance than single-skin panels while still letting in plenty of light. If replacement is not in the budget, attach a second layer of clear polythene film to the interior face of existing panels using magnetic tape or press-fit timber strips, creating a DIY double-glazing effect. Seal the edges of all window openings with foam tape or flexible sealant.
Corners, perches, and vents
Corners are where walls meet and where framing gaps often hide. Run your hand along every interior corner and check for cold air entry. Fill gaps with a low-VOC acrylic caulk (water-based, not solvent-based). Perches positioned near walls or near vents should be moved to the center of the aviary so birds are not sitting in the path of any air movement. Vents themselves should be covered on the outside with hardware cloth (1/4 inch mesh) to keep pests out, then partially baffled with a small overhang or angled cover so rain cannot enter but air can still flow through.
Heating and cooling alternatives for temperature extremes
Good insulation reduces the heating load dramatically, but in a hard freeze it will not be enough on its own for tropical species. Here are the practical options, from safest to least preferred.
| Heat Source | Safety Notes | Best For | Avoid If |
|---|---|---|---|
| Ceramic heat emitter (CHE) on a thermostat | No light emission, no PTFE coating, no exposed element. Safe when mounted out of bird reach behind a guard. | Consistent overnight heat in enclosed aviaries | Birds can access the bulb directly |
| Oil-filled electric radiator | Low surface temp, no fumes, stable output. Use with a thermostat plug. | Larger shed-style aviaries with power supply | Damp conditions without proper weatherproofing |
| Low-watt heated bird perch (commercial) | Purpose-built, gentle warming of feet rather than air. Safe if PTFE-free; check product specs. | Supplemental warmth for perching birds in mild cold | Severe freezing temperatures as a sole heat source |
| Infrared panel heater | No moving parts, no fumes when PTFE-free. Mount high, out of bird reach. | Even heat distribution in insulated enclosures | Uninsulated aviaries; heat is wasted |
| Propane/gas heaters | Carbon monoxide risk is severe. Birds will die before a CO alarm triggers. Never use indoors or in enclosed spaces. | Nothing inside a bird aviary | Always — do not use these |
Always connect any electric heater to a thermostat controller set to your target temperature rather than running it continuously. A simple plug-in thermostat costs around $20 to $40 and pays for itself immediately in electricity savings. Target a minimum overnight temperature of 50°F (10°C) for cold-hardy species and 60 to 65°F (15 to 18°C) for tropical birds. Do not aim for summer temperatures in winter; a modest warmth target is easier to maintain, uses less energy, and keeps the humidity balance manageable.
For hot climates and summer overheating: reflective foil on the roof exterior, shade cloth over the south or west-facing sides, and a small battery-operated or solar clip fan to move air through the aviary are your best tools. Keep misting off bird areas unless the species specifically tolerates it.
Maintenance, monitoring, and troubleshooting condensation and mold
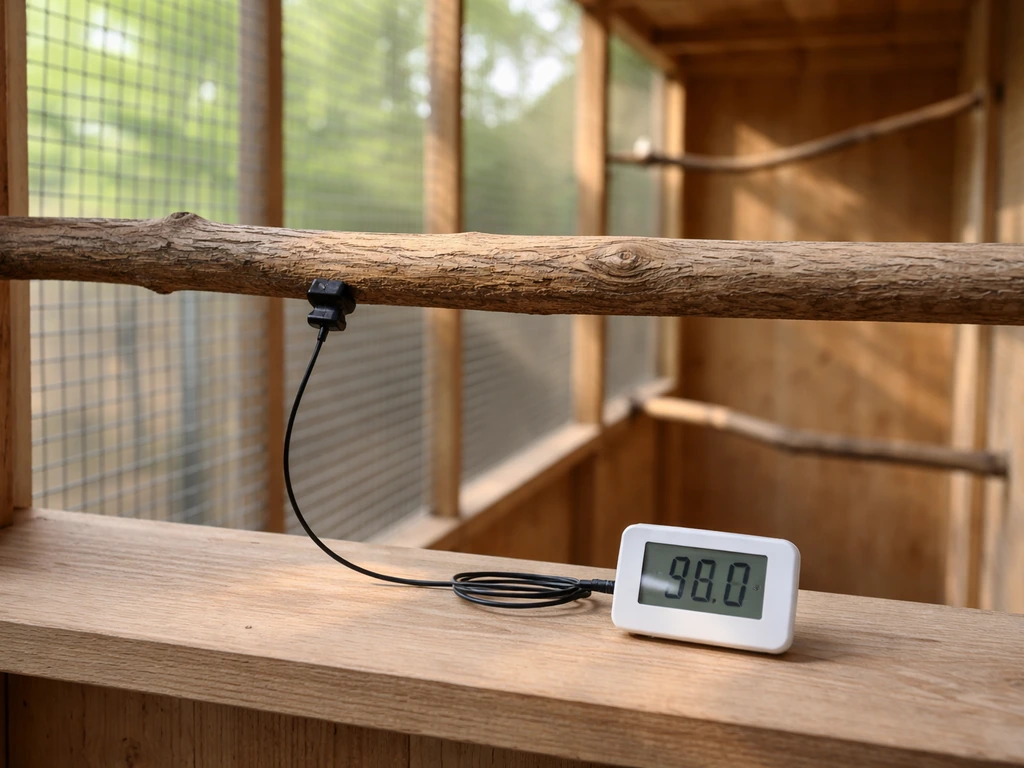
How to check if your insulation is working
The simplest monitoring tool is a cheap digital min/max thermometer with a probe. Put the probe at perch height inside the aviary and read the overnight minimum each morning. If you are hitting your target temperature, the insulation and any supplemental heat are doing their job. A second thermometer outside lets you compare and verify. Some models also track humidity, which is extremely useful: interior relative humidity above 70% in a cold aviary is a condensation and mold risk. Aim to keep it between 50 and 65%.
Watch the birds themselves. Birds sitting fluffed up and reluctant to move in the morning are telling you they are cold. Rapid or labored breathing suggests respiratory irritation, which can come from mold, chemical off-gassing from new materials, or ammonia buildup from poor ventilation. If you see that, increase ventilation immediately and check for visible mold before assuming it is a temperature problem.
Spotting and fixing condensation
Condensation appears as water droplets on cold surfaces, especially windows, metal fixings, and the interior face of the roof panel. If you see it consistently, the aviary is not venting moisture fast enough. First response: open the vent wider or add a second vent. Second check: look for any sealed gaps that should not be sealed, especially at the roof level. Third check: look for wet bedding or standing water from drinkers, because those add a huge moisture load. Fix the moisture source before adjusting the ventilation.
Persistent condensation on the underside of the roof often means the insulation assembly is letting warm interior air get past it and hit the cold outer skin. The fix is to improve the air-tightness of the ceiling panel, not to add more insulation thickness. Make sure the ceiling panel joints are sealed and that there are no gaps around light fittings, cable entries, or vent pipes passing through the ceiling. Sealing those penetrations is one of the most impactful things you can do for both thermal performance and moisture control.
If mold appears
Remove the birds immediately to a safe, temporary housing. Clean visible mold with a solution of white vinegar and water (1:1 ratio), which is non-toxic once dry and reasonably effective on surface mold. Do not use bleach in an enclosed space that birds will occupy. After cleaning, identify and fix the moisture source, increase ventilation, and let the aviary dry completely (at least 24 to 48 hours) before returning the birds. If the mold is deep in timber or insulation, that material needs to be removed and replaced because surface cleaning will not stop it from returning.
Seasonal maintenance routine
- Before winter: Check all weatherstripping and foam tape; replace any that has compressed or cracked. Verify all insulation panels are still secure and that no gaps have opened at joints. Test your thermostat and any heating elements before you need them.
- Mid-winter: Do a weekly visual check for condensation on windows and roof panels. Check the min/max thermometer readings and adjust the thermostat if temperatures are consistently missing your target.
- After winter: Remove and clean any temporary windbreak panels or polythene sheeting. Inspect the roof assembly for any moisture damage to timber by pressing firmly on roof panels; soft spots indicate water ingress. Check insulation for damp patches by touching it through any access panels.
- Before summer: Check that high vents are fully open and unobstructed. If you added any solid winter panels to the south-facing side, remove them to restore light and airflow. Consider adding shade cloth over the roof if summer sun is intense in your area.
- Year-round: Keep drinkers from overflowing, change wet bedding promptly, and keep the aviary floor clean and dry. A dry aviary is a warm aviary.
Insulating an aviary is genuinely one of the highest-impact improvements you can make to your birds' welfare, and it is very much a DIY-achievable project. If you want a complete start-to-finish plan, see our guide on how to build a bird aviary DIY-achievable project.
If you are at the point of building from scratch rather than retrofitting, it is worth reading through a full aviary build guide to bake insulation into the structure from the start rather than working around an existing design. If you want the full walkthrough, see this guide on how to build a bird room so your design and insulation come together correctly from day one build guide.
For specific guidance on how to build a bird aviary in Australia, review a dedicated plan that matches your climate and bird type a full aviary build guide. To help you with the overall process, follow a complete bird hotel build plan that covers layout, materials, and assembly from start to finish how to build a bird aviary in Australia. If you are building from scratch, use our guide on how to build a bird condo to plan the layout, materials, and assembly steps before you insulate and weatherproof.
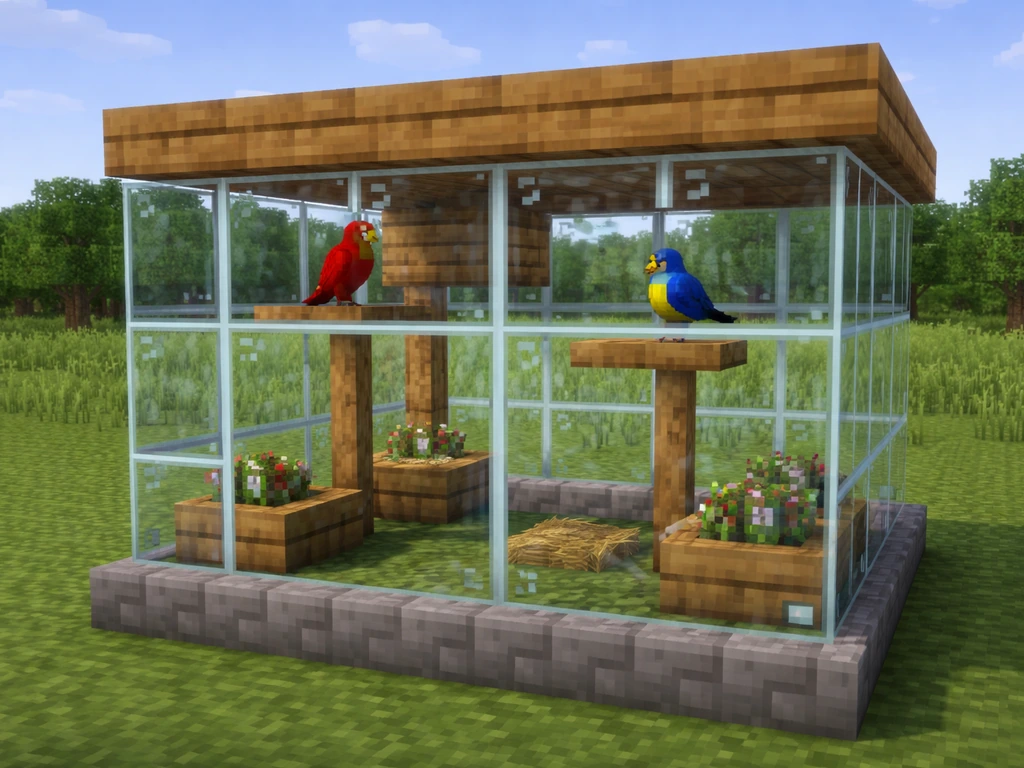
For a complete checklist of materials, layout, and step-by-step construction, see a full guide on how to build a bird garden aviary build guide. If you want Minecraft-specific ideas, you can also look up a guide on how to make a bird aviary in Minecraft Minecraft bird aviary. If you are building a bird hotel too, the same insulation, ventilation, and weatherproofing principles help keep the structure comfortable year-round how to build a bird hotel.
If you need a full walkthrough, use this guide as a foundation and then follow a complete plan for how to make a bird aviary from start to finish aviary build guide. If you are building a Minecraft-style aviary, focus on sturdy walls, good lighting, and safe space for your birds to move around make a bird aviary in Minecraft. The principles above apply whether you are fitting out a simple weekend build or upgrading a more complex walk-in bird room.
FAQ
Can I fully seal my aviary in winter to keep it warm?
Yes, but only if you do it in a way that still prevents condensation. Use your high-level vents as the “pressure relief” points, keep the vent area covered with hardware cloth, and reduce heat loss with baffles (angles or partial covers) instead of fully blocking airflow. If your humidity climbs above about 70% (measured at perch height), you have sealed too tight for winter conditions, even if the temperature feels right.
Which insulation types should I avoid because birds might chew or inhale fumes?
Aim for insulation that is safe for birds when it is fully enclosed, not exposed. Treat any insulation that smells strongly (new foam, adhesives, some types of bonded board) as a risk until it has aired out and is covered by plywood or OSB. Also avoid flexible foils or foams that can be pecked, because damaged insulation becomes a direct respiratory and ingestion hazard.
What should I check if the temperature inside is still too low after insulating?
If the aviary has bird-safe ventilation but still feels cold, the most common hidden cause is cold-bridging from single-skin panels and unsealed window/door edges. Replace single-skin polycarbonate or glass with multiwall, seal window and roof penetration edges, and move perches away from the direct line of vents so birds do not sit in a localized draft.
Where should I place an electric heater in an insulated aviary?
For winter, you usually want a gradual warm zone rather than a single hot spot. Place heat sources where they do not blow directly at perches, and use a thermostat so the heater cycles to your target overnight temperature. A heater placed too close to a wall can also create condensation on the cold surface behind it, so keep a small clearance and verify with a thermometer probe at perch height.
Can I cover the aviary with plastic sheeting for extra winter protection?
Yes, but do it as a true windbreak layer, not as a “wrap” that traps moisture. Leave bottom and top airflow paths, keep the windbreak on the outside, and avoid covering the roof entirely in cold damp weather. If you use clear plastic sheeting as a temporary fix, secure it firmly so it cannot flap, and remove or loosen it when conditions are milder to prevent humidity buildup.
My windows and roof interior sweat, what does that mean and what do I do first?
Condensation is usually a sign of a moisture removal problem, a sealing problem at penetrations, or a too-cold surface, not just “insulation not thick enough.” Try this sequence: widen the high vent(s), check that the ceiling panel joints and cable or pipe pass-throughs are sealed, then look for extra moisture sources like standing water from drinkers or wet bedding. Add more insulation only after those checks, especially on the roof.
What if condensation keeps appearing under the roof even though I added insulation?
If condensation happens mainly on the underside of the roof, focus on tightening the ceiling layer at joints and openings. A frequent mistake is sealing random gaps elsewhere while leaving light fittings, cable entries, vent pipes, or ceiling seams leaky. Improve the airtightness of the ceiling panel assembly, then confirm with humidity monitoring that the high vent is still working.
Where should I measure temperature to know my insulation is working?
Most “warm enough” setbacks fail because people measure temperature in the wrong spot. Put the sensor at perch height, take morning minimum readings, and also check how the birds behave that same morning. If you only measure at floor level, you can underestimate how cold drafts are at bird resting height.
What is the correct way to handle mold after insulating an aviary?
If you get mold, do not just clean and continue as normal. Remove birds to safe temporary housing, clean surface mold with a vinegar-water mix, then identify and fix the moisture source first. If mold returns quickly or is deep in porous timber or inside an insulation cavity, the affected materials must be removed and replaced, because surface cleaning alone will not stop regrowth.
How do I separate draft control from ventilation in practice?
Use ventilation openings positioned high so moisture exits without creating a cold downdraft at perch level. Intake air, if you use it lower down, should be baffled so it circulates before reaching birds. Cover vents outside with hardware cloth for pests, and use angled or hooded covers so rain cannot enter.
Next Articles
How to Make a Bird Aviary in Minecraft Step by Step
Step-by-step build for a Minecraft bird aviary, with safe enclosure, perches, nesting areas, viewing space, and escape-p
How to Build a Bird Aviary in Australia: DIY Guide
Step-by-step DIY guide to build a predator-proof bird aviary in Australia, with size plans, materials, setup, and mainte
How to Build a Bird Condo: Step-by-Step DIY Plan
Step-by-step DIY bird condo plans for target species, safe materials, proper placement, ventilation, predator guards, an